No-Sew Angel Applique – Free Christmas Crochet Pattern
Hi everyone! Well… today marks the first day I’m releasing a non-amigurumi pattern! I have to admit that I’m nervous on how you guys will like this pattern. I have an obsession with angels and so I just had to make this pattern!
Maybe this pattern can inspire you to look into people’s first hand accounts of meeting angels. From all of my research about angels, apparently they can appear in all shapes and forms! In fact, most of the time angels don’t come to us in the physical world with a bright light with huge wings and a halo (though that’s not to say that doesn’t happen). They actually appear like anybody else would – a normal person. It’s likely they appear as an average Joe in order to not scare us. It’s easier to accept help from a fellow human compared to a being filled with bright light and huge wings. Angels often appear at a time of need when a person really needs help. Most of the time an angel will appear right after somebody calls for needing help, such as a prayer or a plea to God.
What’s so interesting about angels is that they seemingly appear out of nowhere, help the person in need, and disappear out of thin air the second the person in need looks away. A lot of people are left confused on how it was even possible the person was able to leave because it truly is in a split second. In most of the accounts I read, the angel refuses any form of “thanks” and often leaves before the person can thank them for their help.
I have read so many people’s personal accounts of angels and it’s extremely inspiring, it makes you want to try and be an angel! I try every day to act like an angel, though I’m sure I fall short in many aspects, there’s no harm in trying. With all that being said, I hope you like this angel pattern 🙂
Purchase the PDF version here!

 Supplies:
• Yarn 4/Medium Weight in…
Main color and halo color
•4mm Crochet Hook
•Tapestry needle
•Scissors
Additional Information:
• Let’s Get Started!
The angels head, body, arms, and wings, are all made in one continuous piece. This pattern is easy in terms of stitches, but you must closely follow the directions when it comes to turning your work! The turning and stitch placement will be the only difficult part.
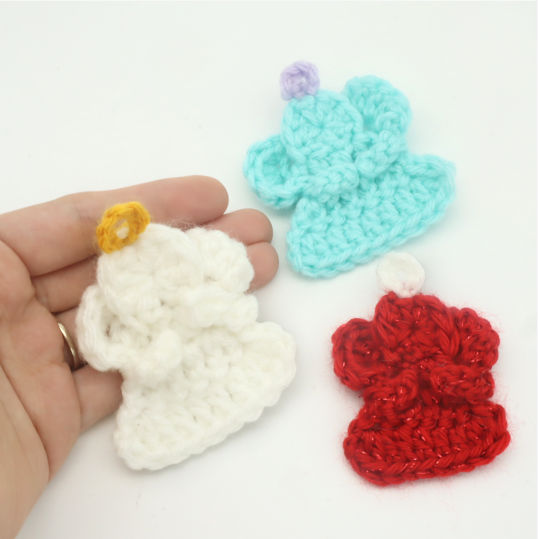
These angels make great appliques, Christmas ornaments, card inserts, and brooches! Feel free to add a face, hair, or even add gems/buttons in between the arms to make the angel hold something (like a candle).
Angel:
Start in any color
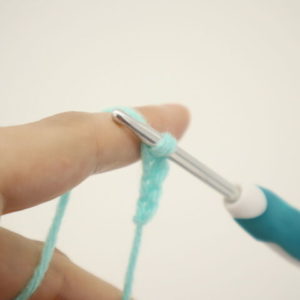
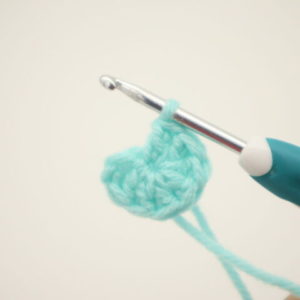
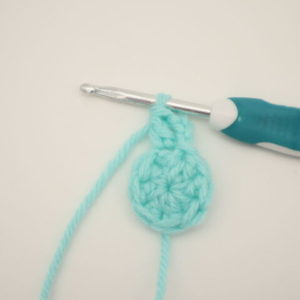
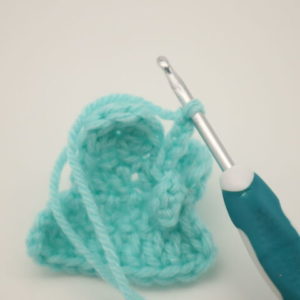
Round 1: Ch 4 (Pic 1). Skip the first 3 Ch, then make 1 Dc in the 4th Ch from the hook (Pic 2). Dc 6 times in that same st (Pic 3, Stitch count: 8)
1. 2.
2. 3.
3.
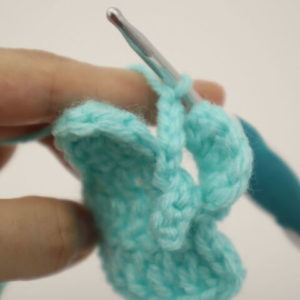
Round 2: SlSt to the top of the Ch 3 we originally made (Pic 4). Ch 3, Dc into that same st (Pic 5). Dc in the next st, Dc 2 times in the next st (Pic 6).
4. 5.
5. 6.
6.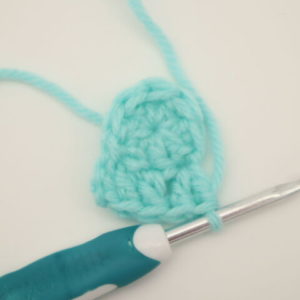
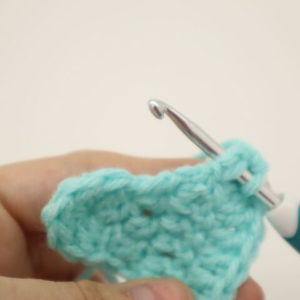
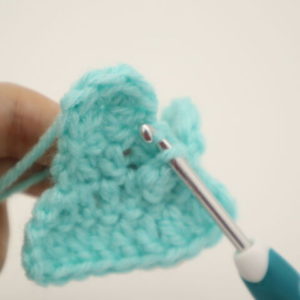
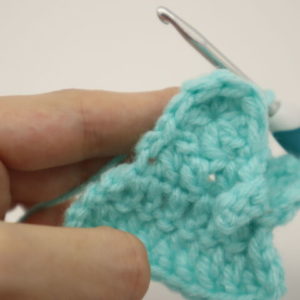
Row 3: Ch 3 and turn. Dc 2 times in the next st, Dc in the next 3 st. Dc 2 times in the next st. (Pic 7)
7.
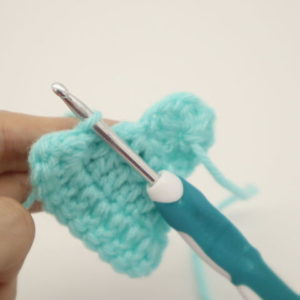
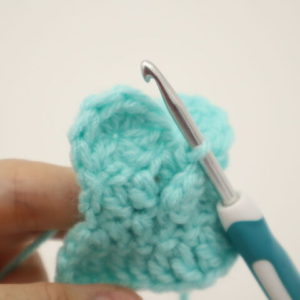
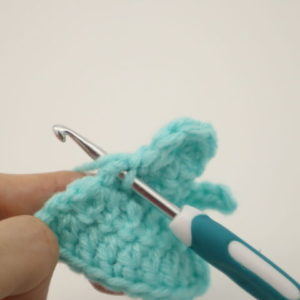
Row 4: Ch 3 and turn. Dc 3 times in the next st, Dc in the next 4 st, Dc 3 times in the next st. (Pic 8)
8.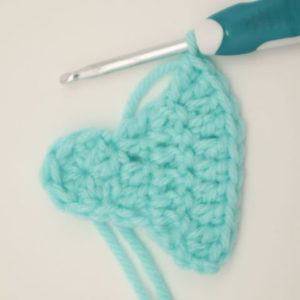
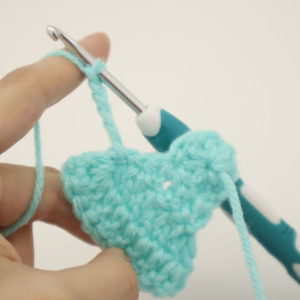
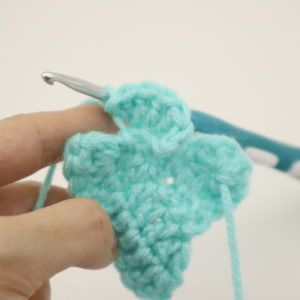
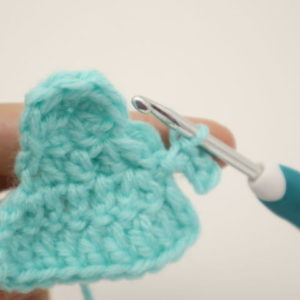
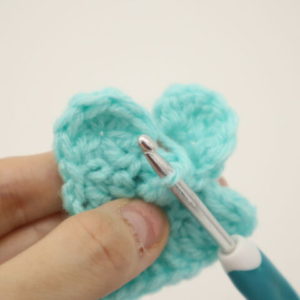
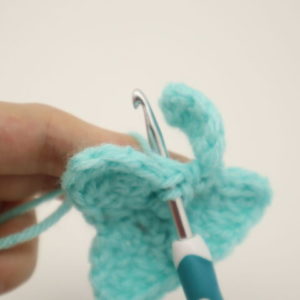
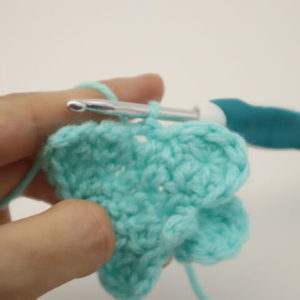
Right wing: Working along the side, SlSt in the next 3 st (Pic 1-3). Turn your work so the wrong side is facing you (Pic 4). Ch 5 (Pic 5). SlSt in the 2nd Ch from the hook, Dc 2 times in each of the next 2 Ch, Dc in the next st, SlSt in the same st (Pic 6). Working on the side, SlSt in the next st (Pic 8).
1. 2.
2. 3.
3. 4.
4. 5.
5. 6.
6. 7.
7. 8.
8.
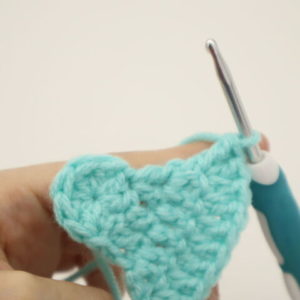
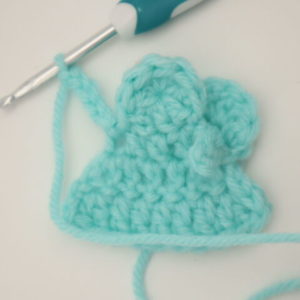
Right arm: Ch 4 (Pic 1), SlSt in the 2nd Ch from the hook. SlSt in the next 2 st (Pic 2). Fold the arm to the left as shown (Pic 3). Going through the body, SlSt in that spot (Pic 4-5).
1. 2.
2. 3.
3. 4.
4. 5.
5. 6.
6.
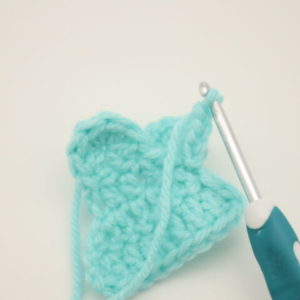
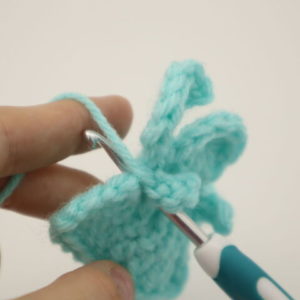
Left wing: Ch 8 (Pic 1). Bring the chain behind the head (Pic 2-3). SlSt next to the left side of the head as shown (Pic 4-5). Ch 5 (Pic 6), SlSt in the 2nd Ch from the hook, Dc 2 times in each of the next 2 Ch, Dc in the next st, SlSt in the same st (Pic 7). SlSt in the next st of the angel (Pic 8).
1. 2.
2. 3.
3. 4.
4. 5.
5. 6.
6. 7.
7.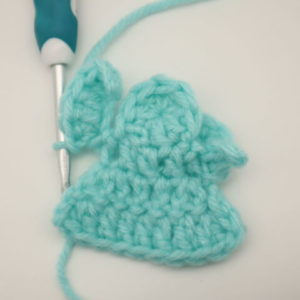 8.
8.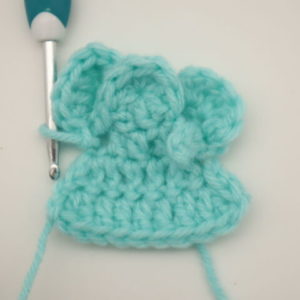
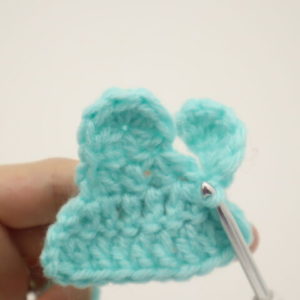
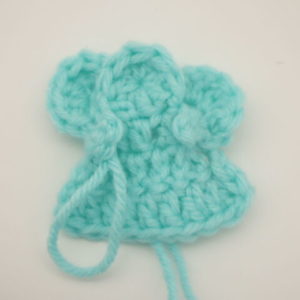
Left arm: Ch 4, SlSt in the 2nd Ch from the hook, SlSt in the next 2 ch. Hold the arm to the body, then working through the body, make a SlSt (Pic 9). Done! (Pic 10).
9. 10.
10.
Halo:
In halo color
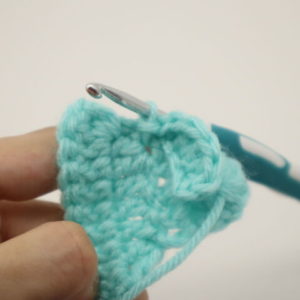
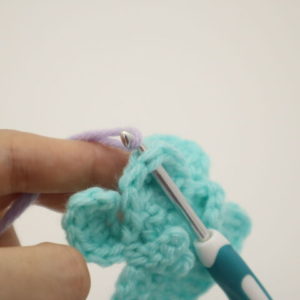
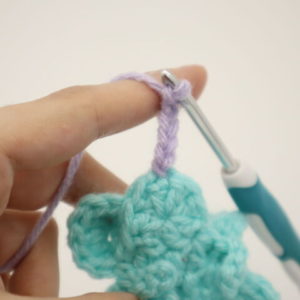
Attach the hook at the top of the head of the angel as shown (Pic 1).
Yarn over with halo color, then pull the yarn through (Pic 1-2).
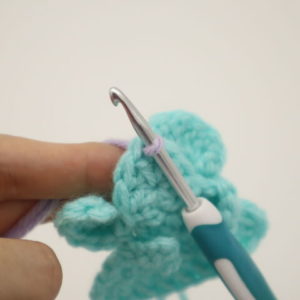
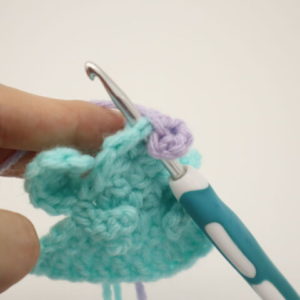
Ch 5 (Pic 3), then SlSt back into the same st (Pic 4-5).
Finish off and tie the tail ends of yarn into a firm knot. Cut excess yarn.
1. 2.
2. 3.
3. 4.
4. 5.
5.


1 Comment
Thank you for the cute patterns