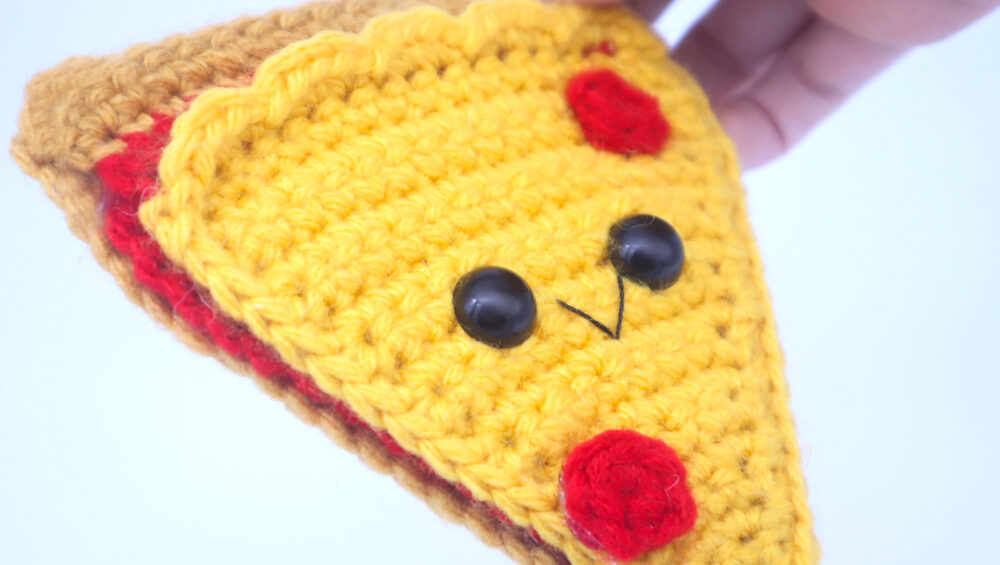
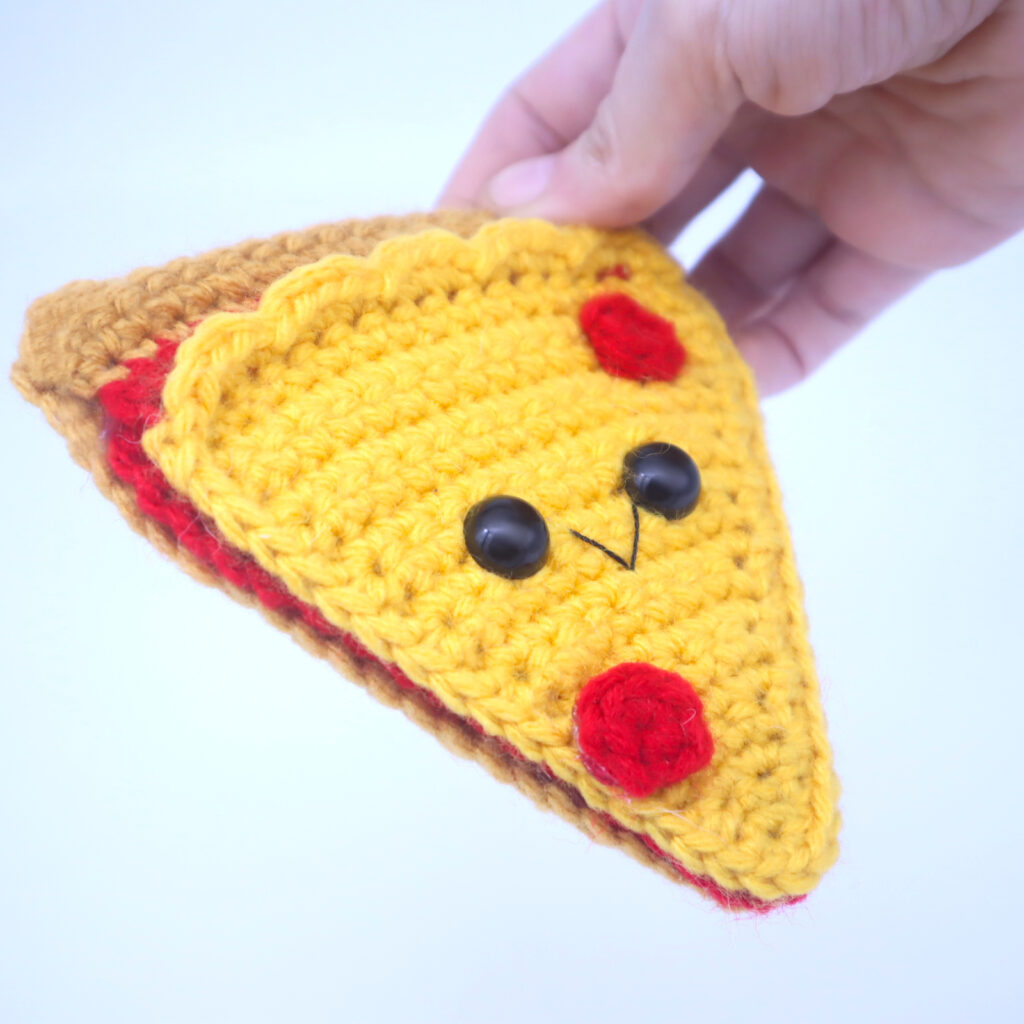
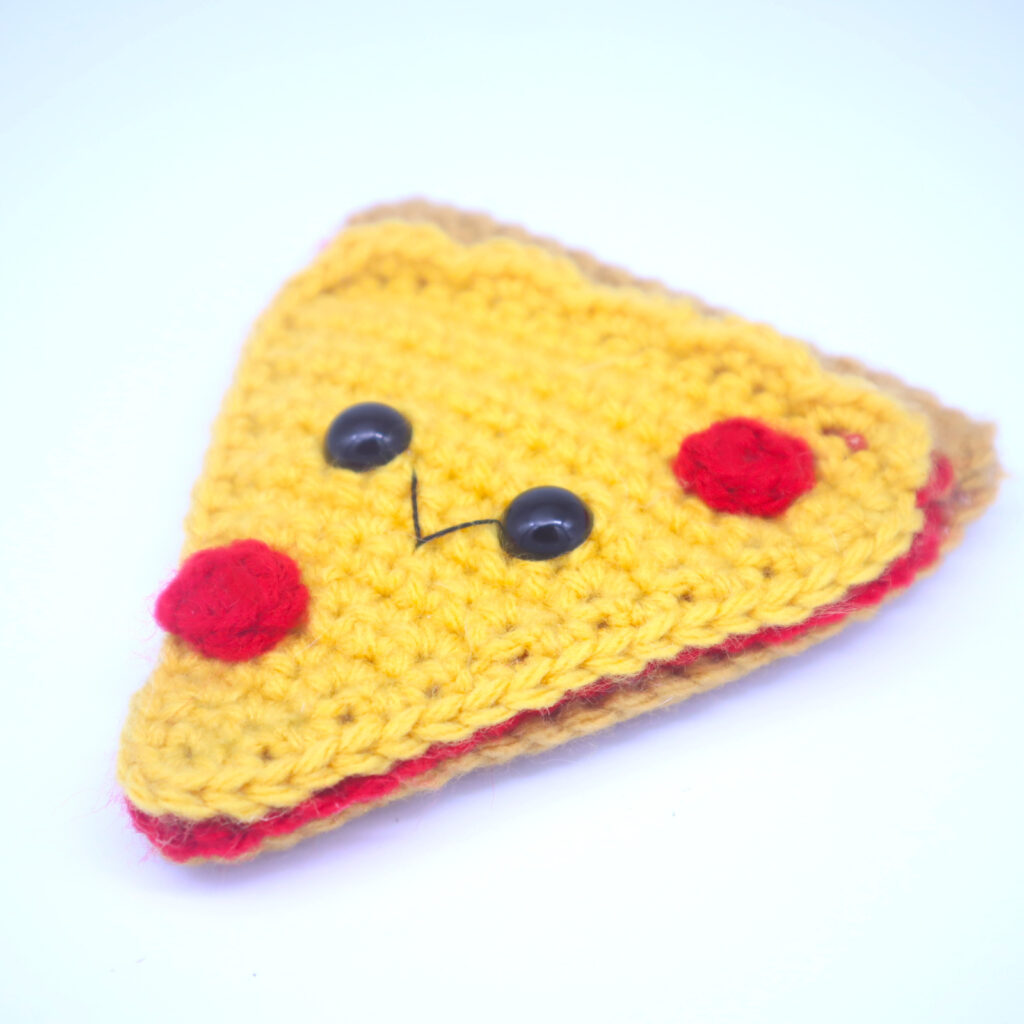
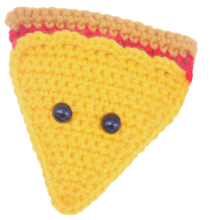
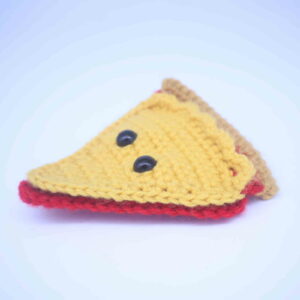
Pizza Amigurumi – Free Crochet Pattern
Print this pattern out! Purchase the PDF version here!

 Supplies:
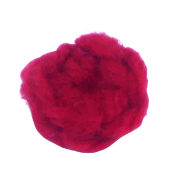
• Yarn 4/Medium Weight Yarn in…
Yellow, red, and crust color
•4mm Crochet Hook
•12mm Safety eyes
•Tapestry needle
•Black embroidery thread
•Scissors
•Hot glue (optional)
Additional Information:
•Difficulty: Easy
•Size: 4.5″ tall
Pizza is loved by nearly everybody! No matter where you’re from, you’ve probably enjoyed a piece of pizza in your life. This slice of pizza is the perfect project, it’s easy and has such cute results! There are three different pieces we make, the pizza, the sauce, and the crust. We glue (or sew) the pieces together to form one slice! You can even make a bunch of slices to form an entire circle of pizza!
Let’s get started!
Pizza:
Start in Yellow
Row 1: Ch 2. *Inc* in the 2nd Ch from the hook (2)
Row 2: Ch 1 and turn. Sc in the next 2 st (2)
Row 3: Ch 1 and turn. *Inc* in the next 2 st (4)
Row 4: Ch 1 and turn. Sc in the next 4 st (4)
Row 5: Ch 1 and turn. *Inc* in the next st, Sc in the next 2 st, *Inc* in the next st (6)
Row 6: Ch 1 and turn. Sc in the next 6 st (6)
Row 7: Ch 1 and turn. *Inc* in the next st, Sc in the next 4 st, *Inc* in the next st (8)
Row 8: Ch 1 and turn. Sc in the next 8 st (8)
Row 9: Ch 1 and turn. *Inc* 1 time, Sc in the next 6 st, *Inc* 1 time (10)
Row 10: Ch 1 and turn. Sc in the next 10 st (10)
Row 11: Ch 1 and turn. *Inc* in the next st, Sc in the next 8 st, *Inc* in the next st (12)
Now we will mark where to place the eyes. Add a stitch marker into the 4th and 9th stitch in Row 11
Row 12: Ch 1 and turn. Sc in the next 12 st (12)
Row 13: Ch 1 and turn. *Inc* in the next st, Sc in the next 10 st, *Inc* in the next st (14)
Row 14: Ch 1 and turn. Sc in the next 14 st (14)
Row 15: Ch 1 and turn. *Inc* 1 time, Sc in the next 12 st, *Inc* 1 time (16)
Row 16-18: Ch 1 and turn. Sc in the next 16 st (16)
Row 19: Ch 1 and turn. In the Front Loop Only, SlSt in the first st. Repeat the following while working in the FLO *Inc in the next 2 st, SlSt in the next st* 5 times (26)
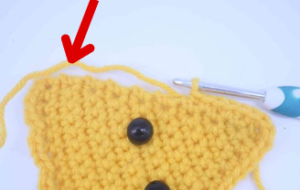
Now make single crochets around the edging of the pizza to make the sides look cleaner (Pic 1-2). When you meet the tip of the pizza, make 3 single crochets into this spot (Pic 3). Stop crocheting once you meet the top right corner of the pizza, shown by the arrow in Pic 4.
1.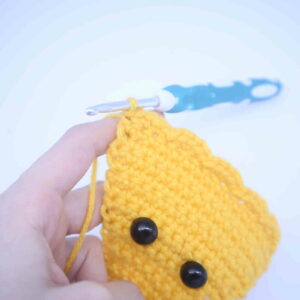 2.
2.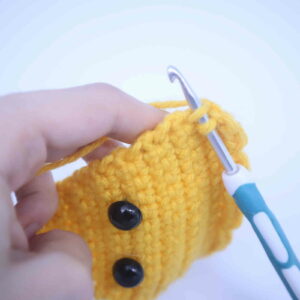 3.
3.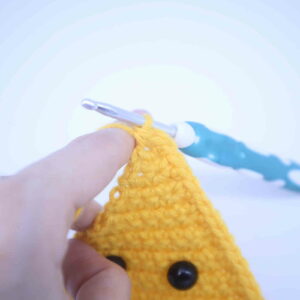 4.
4.
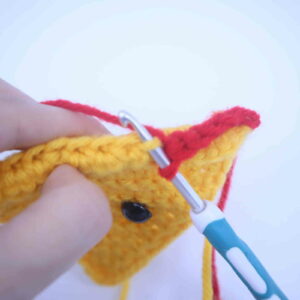
Row 20: Change to Red. Bend the scallops of crochets we made towards you. This will expose the back loops left in Row 19 (Pic 5). Working in the back loop we left in Row 19, Sc in the next 16 st (Pic 6. Stitch count: 16).
5. 6.
6.
Row 21: Ch 1 and turn. Sc in the next 16 st (16)
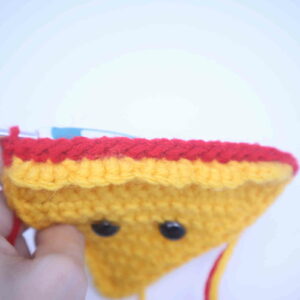
Row 22: Change to Crust color. Ch 1 and turn. Sc in the next 15 st (16)
Row 23: Ch 1 and turn. Sc 3 times in the first st. Sc in the next 14 st. Sc 3 times in the last st (20)
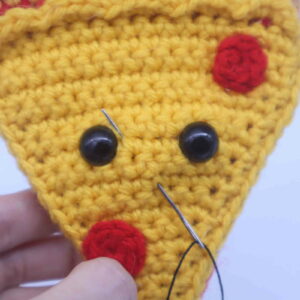
Finish off and weave in ends. Add eyes into the marked areas.
Sauce:
Start in Red
Row 1: Ch 2. *Inc* in the 2nd Ch from the hook (2)
Row 2: Ch 1 and turn. Sc in the next 2 st (2)
Row 3: Ch 1 and turn. *Inc* in the next 2 st (4)
Row 4: Ch 1 and turn. Sc in the next 4 st (4)
Row 5: Ch 1 and turn. *Inc* in the next st, Sc in the next 2 st, *Inc* in the next st (6)
Row 6: Ch 1 and turn. Sc in the next 6 st (6)
Row 7: Ch 1 and turn. *Inc* in the next st, Sc in the next 4 st, *Inc* in the next st (8)
Row 8: Ch 1 and turn. Sc in the next 8 st (8)
Row 9: Ch 1 and turn. *Inc* 1 time, Sc in the next 6 st, *Inc* 1 time (10)
Row 10: Ch 1 and turn. Sc in the next 10 st (10)
Row 11: Ch 1 and turn. *Inc* in the next st, Sc in the next 8 st, *Inc* in the next st (12)
Row 12: Ch 1 and turn. Sc in the next 12 st (12)
Row 13: Ch 1 and turn. *Inc* in the next st, Sc in the next 10 st, *Inc* in the next st (14)
Row 14: Ch 1 and turn. Sc in the next 14 st (14)
Row 15: Ch 1 and turn. *Inc* 1 time, Sc in the next 12 st, *Inc* 1 time (16)
Row 16-18: Ch 1 and turn. Sc in the next 16 st (16)
Crochet around the entire sauce now, just as we did with the first pizza slice. Finish off now and weave in ends.
Place the sauce onto the back of the pizza. The sauce piece we made will land exactly to the sauce on the pizza slice. Glue the pieces together, I used hot glue but you can use E6000 or fabric glue. You can also sew them together if you prefer.

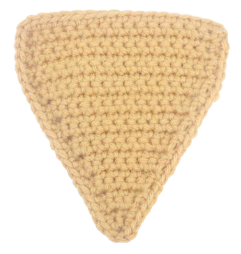
Crust:
Start in Crust Color
Row 1: Ch 2. *Inc* in the 2nd Ch from the hook (2)
Row 2: Ch 1 and turn. Sc in the next 2 st (2)
Row 3: Ch 1 and turn. *Inc* in the next 2 st (4)
Row 4: Ch 1 and turn. Sc in the next 4 st (4)
Row 5: Ch 1 and turn. *Inc* in the next st, Sc in the next 2 st, *Inc* in the next st (6)
Row 6: Ch 1 and turn. Sc in the next 6 st (6)
Row 7: Ch 1 and turn. *Inc* in the next st, Sc in the next 4 st, *Inc* in the next st (8)
Row 8: Ch 1 and turn. Sc in the next 8 st (8)
Row 9: Ch 1 and turn. *Inc* 1 time, Sc in the next 6 st, *Inc* 1 time (10)
Row 10: Ch 1 and turn. Sc in the next 10 st (10)
Row 11: Ch 1 and turn. *Inc* in the next st, Sc in the next 8 st, *Inc* in the next st (12)
Row 12: Ch 1 and turn. Sc in the next 12 st (12)
Row 13: Ch 1 and turn. *Inc* in the next st, Sc in the next 10 st, *Inc* in the next st (14)
Row 14: Ch 1 and turn. Sc in the next 14 st (14)
Row 15: Ch 1 and turn. *Inc* 1 time, Sc in the next 12 st, *Inc* 1 time (16)
Row 16-21: Ch 1 and turn. Sc in the next 16 st (16)
Row 22: Ch 1 turn. Sc 3 times first st. Sc in the next 14 st. Sc 3 times in the last st (16)
Crochet around the entire sauce now, just as we did with the first pizza slice. Finish off now and weave in ends.
Place the crust onto the back of the pizza and glue/sew on. The crust will match perfectly with the pizza slice!

Pepperonis:
Start in Red
Round 1: 6 Sc into a Magic Ring (6)
Finish off and weave in ends.Glue or sew the pepperonis to the pizza as shown.
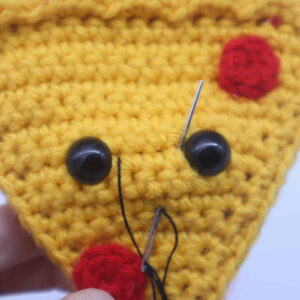
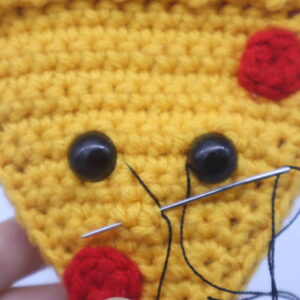
Smile:
Start in Black Embroidery Thread
Insert needle with thread into the middle mouth area of the toy, and pull the needle out next to the toy’s left eye as shown (Pic 1). Reinsert needle into the middle mouth area (Pic 2) and pull needle out next to the right eye (Pic 2). Reinsert needle into the middle mouth area and pull needle out a few stitches over. Tie the ends of thread into firm knots and bring them inside the toy to hide. This will secure the smile. Done!
1. 2.
2. 3.
3. 4.
4.
Done!


