Beaver Amigurumi – Free Crochet Pattern
Print this pattern out! Purchase the PDF version here!

 Supplies:
• Yarn 4/Medium Weight Yarn in…
Light brown, Medium Brown, Dark Brown, Light Cream Color, and White
•4mm Crochet Hook
•12mm Safety eyes
•Tapestry needle
•Scissors
Additional Information:
•Difficulty: Easy
•Size: 5.5″ tall
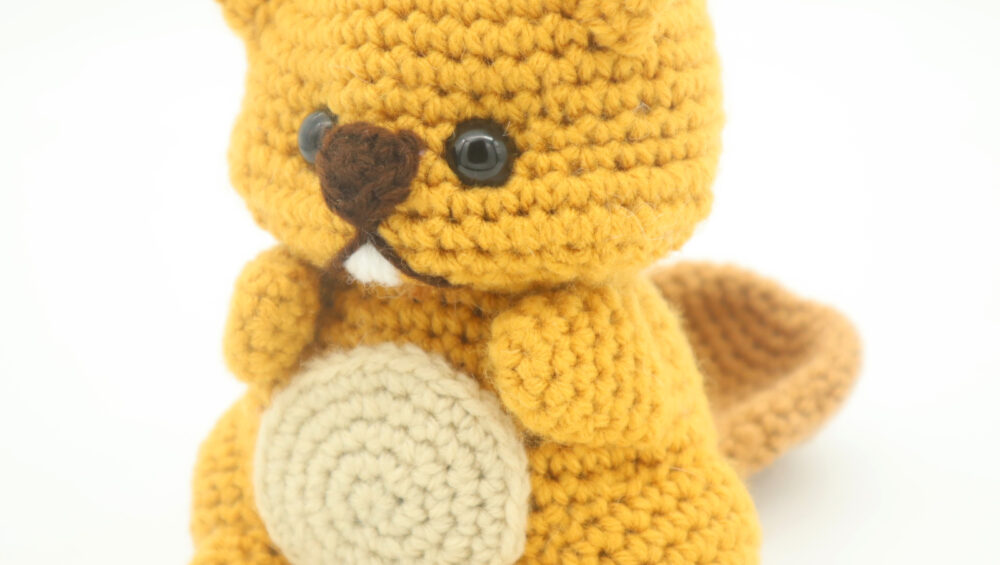
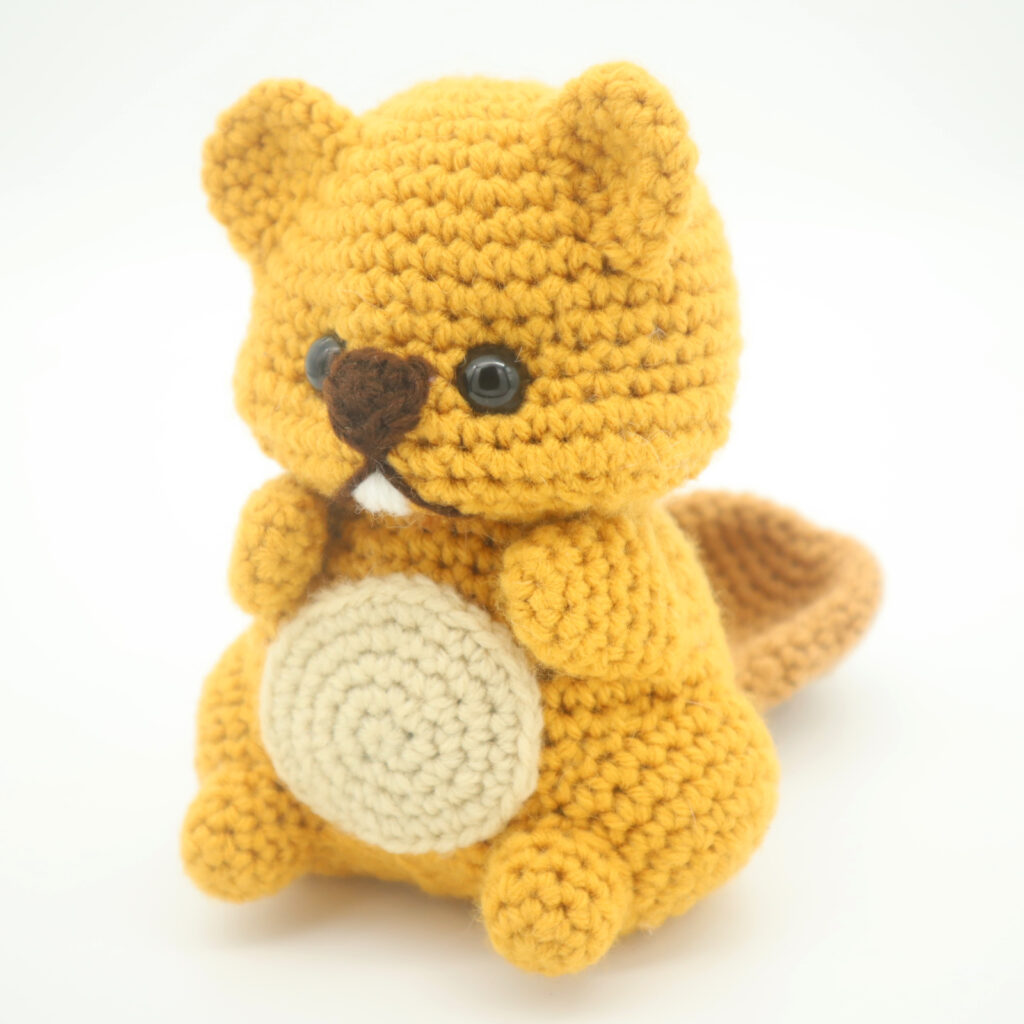
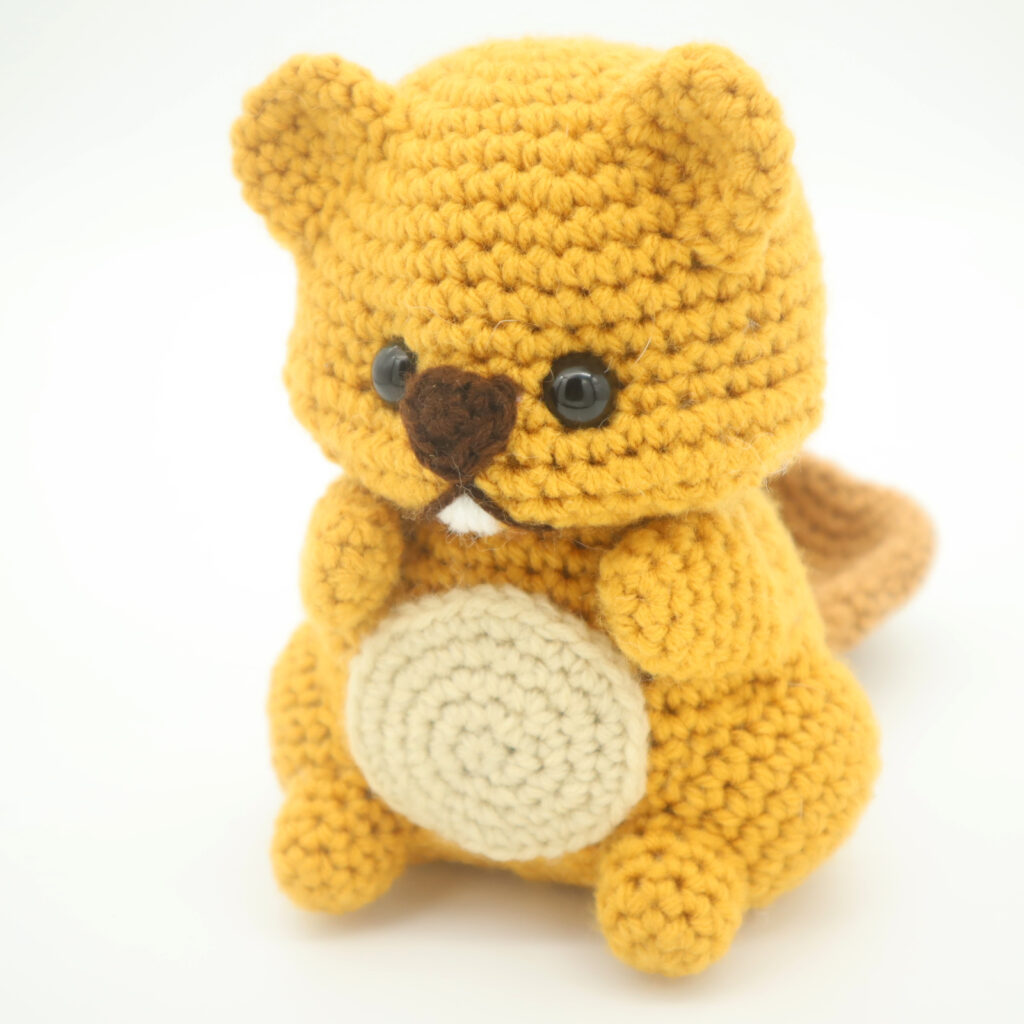
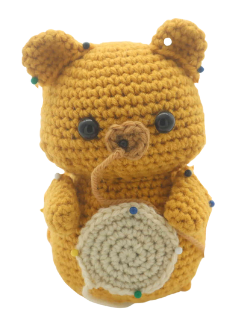
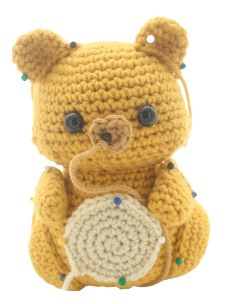
Beavers are such cuties! I made this pattern to celebrate fall, but this beaver is so perfect for any Canadian out there! If you’re Canadian, I also have a free moose pattern on my website 🙂
Anyone can appreciate how cute this beaver is, so no matter what occasion you’re making this beaver for, he’s cute no matter what!
Let’s get started!
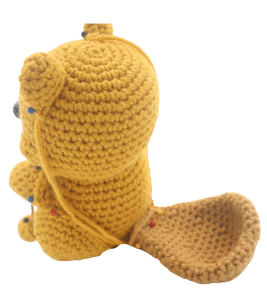
Beaver:
Start in Light Brown
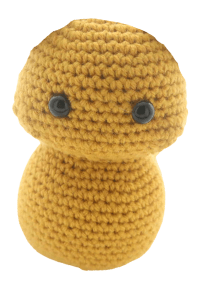
To make this beaver we will first start at the head and work our way down to the body. The head and body are worked in one continuous piece.
Round 1: 6 Sc into a Magic Ring (6)
Round 2: *Inc* all around (12)
Round 3: *Inc, Sc in the next st* all around (18)
Round 4: *Inc, Sc in the next 2 st* all around (24)
Round 5: *Inc, Sc in the next 3 st* all around (30)
Round 6: *Inc, Sc in the next 4 st* all around (36)
Round 7: *Inc, Sc in the next 5 st* all around (42)
Round 8-13: *Sc* all around (42)
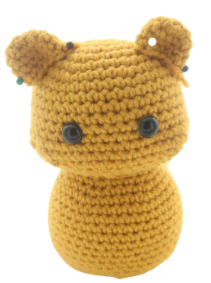
Now we will mark where to place the safety eyes. Add a differently colored stitch marker into the 19th and 25th stitch in Round 13. Later we will replace these stitch markers with the safety eyes.
Round 14: Sc in the next 12 st. *Inc* in the next 6 st, Sc in the next 9 st. *Inc* in the next 6 st, Sc in the next 9 st (54)
Round 15: *Sc* all around (54)
Round 16: Sc in the next 12 st, *Dec* 6 times, Sc in the next 9 st, *Dec* 6 times, Sc in the next 9 st (42)
Round 17: *Dec, Sc in the next 5 st* all around (36)
Add the eyes into the marked areas now.
Round 18: *Dec, Sc in the next 4 st* all around (30)
Round 19: *Dec, Sc in the next 3 st* all around (24)
Round 20: In the Front Loop Only, *Sc* all around (24)
Round 21: In BOTH loops, *Inc, Sc in the next 3 st* all around (30)
Stuff the head now.
Round 22: *Inc, Sc in the next 4 st* all around (36)
Round 24: *Inc, Sc in the next 5 st* all around (42)
Round 25-34: *Sc* all around (42)
Round 35: *Dec, Sc in the next 5 st* all around (36)
Round 36: *Dec, Sc in the next 4 st* all around (30)
Round 37: *Dec, Sc in the next 3 st* all around (24)
Stuff the body here. Continue stuffing after each round.
Round 38: *Dec, Sc in the next 2 st* all around (18)
Round 39: *Dec, Sc in the next st* all around (12)
Round 40: *Dec* all around (6)
Finish off, leaving a long tail for sewing. Sew the remaining stitches closed and weave in ends.
Ears: (Make 2)
Start in Light Brown
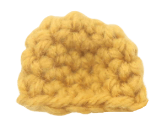
Round 1: 6 Sc into a Magic Ring (6)
Round 2: *Inc* all around (12)
Round 3-5: *Sc* all around (12)
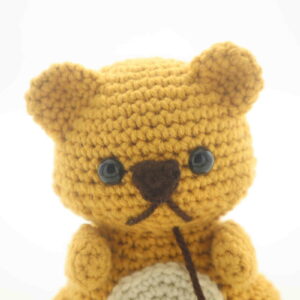
Finish off, leaving a long tail for sewing. Pin the toy’s ears onto the toy’s head as shown. Sew on. Once fully sewn on, weave in ends and cut any excess yarn.
Arms: (Make 2)
Start in Light Brown
Round 1: 6 Sc into a Magic Ring (6)
Round 2: *Inc, Sc in the next st* all around (9)
Round 3-8: *Sc* all around (9)
Finish off, leaving a long tail for sewing. Lightly stuff the arms now. Pin the toy’s arms onto the toy as shown and sew on. Once fully sewn on, weave in ends and cut excess yarn.
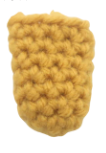
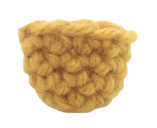
Legs: (Make 2)
Start in Light Brown
Round 1: 6 Sc into a Magic Ring (6)
Round 2: *Inc, Sc in the next st* all around (12)
Round 3: *Inc, Sc in the next 2 st* all around (18)
Round 4: *Inc, Sc in the next 3 st* all around (24)
Round 5-7: *Sc* all around (24)
Finish off, leaving a long tail for sewing. Pin the legs on as shown and sew on. Before fully sewing on, stuff the leg firmly. Continue sewing closed. Once done, weave in ends and cut excess yarn.
Feet: (Make 2)
Start in Light Brown
Round 1: 6 Sc into a Magic Ring (6)
Round 2: *Inc, Sc in the next st* all around (9)
Round 3-6: *Sc* all around (9)
Finish off, leaving a long tail for sewing. Stuff the feet firmly now. Pin the toy’s feet onto the toy’s legs as shown and sew on. Once fully sewn on, weave in ends and cut excess yarn.

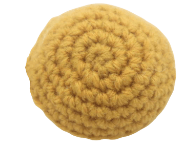
Tummy Patch:
Start in Cream Color
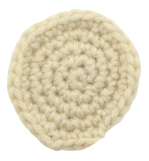
Round 1: 6 Sc into a Magic Ring (6)
Round 2: *Inc* all around (12)
Round 3: *Inc, Sc in the next st* all around (18)
Round 4: *Inc, Sc in the next 2 st* all around (24)
Round 5: *Inc, Sc in the next 3 st* all around (30)
Finish off, leaving a long tail for sewing. Pin the toy’s belly patch onto the toy as shown and sew on. Once sewn on, weave in ends and cut any excess yarn.
Tail:
Start in Medium Brown
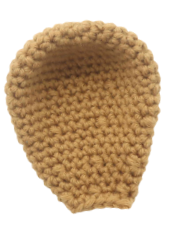
Round 1: 6 Sc into a Magic Ring (6)
Round 2: *Inc, Sc in the next st* all around (12)
Round 3: *Inc, Sc in the next 2 st* all around (18)
Round 4: *Inc, Sc in the next 3 st* all around (24)
Round 5-7: *Sc* all around (24)
Finish off, leaving a long tail for sewing. Pin the legs on as shown and sew on. Before fully sewing on, stuff the leg firmly. Continue sewing closed. Once done, weave in ends and cut excess yarn.
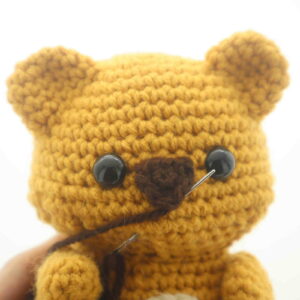
Smile:
Start in Dark Brown
Place the yarn we left under the toy’s nose onto your needle. Insert needle where shown (Pic 1), and bring needle out at the middle under the toy’s nose (Pic 2). Insert needle on the right side of the toy’s mouth where shown (Pic 3). Pull needle out a few stitches away. Tie the remaining end of yarn into a firm knot, bring the knot inside the toy to hide. This will help secure the smile. Cut any excess yarn.
1. 2.
2. 3.
3.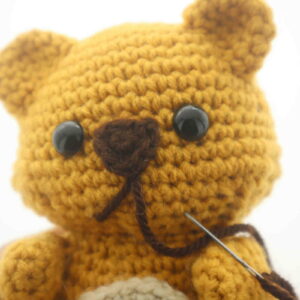 4.
4.
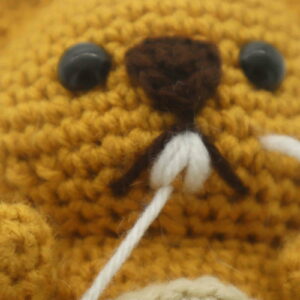
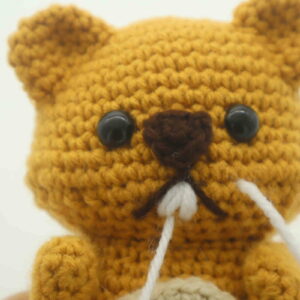
Teeth:
In White
Insert needle with thread under the toy’s mouth, then bring the needle to the left side of the toy’s mouth (Pic 1). Repeat the process of *inserting needle into the middle of the toy’s mouth, bring needle out at the same stitch on the left side of the toy’s mouth (Pic 1)*. Do this a total of 3 times (Pic 1-2). Repeat this process for the right side of the toy’s mouth, you will end up with a small separation between the two teeth!
1. 2.
2. 3.
3. 4.
4.


8 Comments
Thank You for this adorable beaver pattern. I’m going to make it for my new grandson
The tail instructions are all wrong!
Even if you buy the PDF
I have made many patterns from your website, I bought your book and have found your patterns to be well written and easy to follow – creating beautiful amigurumi. However, your Beaver pattern has some issue to it.
First in the body you jump from rnd 22 to rnd 24 – no rnd 23.
Second in the tail directions your stitch count and the end of the round does not match the directions (inc, sc) in 6 sc gives 9 sc not 12 sc, which makes the rest of the rounds off in stitch count, also the rounds for the tail stops on round 7 without giving any of the narrowing rounds to make the tail look like the picture.
Third the pattern then goes on to adding a smile and teeth – without giving the directions on how to make the Nose.
I really want to make this Beaver and thought I should let you know of the issues with the free pattern.
I don’t know if I am doing it wrong but every time a letter comes up with the instructions to increase and single crochet 1,2,3 and on it comes out as a big flat circle not a bowl shape I was wondering if you could give me some advice
please send an updated beaver tail instruction
Even though the tail and nose instructions were not complete, I finished this little fella today! Turned out cute!
Please Email directions for a tail so I can finish this Beaver. I even bought the PDF and it does not have the directions either.
Very sad the instructions are not correct once I started this for gifts and to see she hasn’t posted the edited instructions