
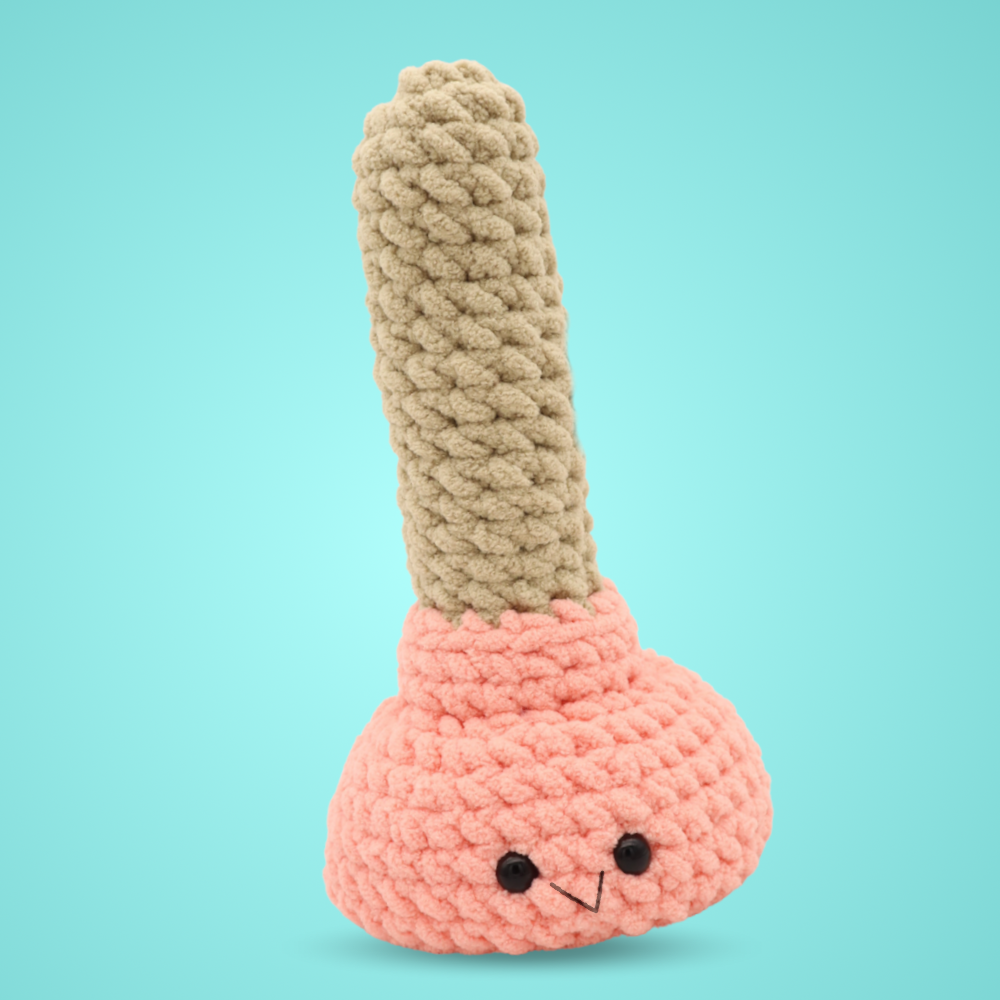
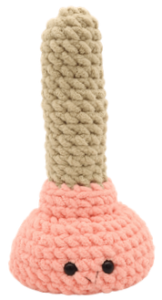
Plunger Amigurumi – Free Crochet Pattern
Print this pattern out – purchase the PDF here!

 Supplies:
• Yarn 5/Bulky Weight in…
Cream and pink
•8mm Crochet Hook
•Tapestry needle
•Scissors
•Stuffing
•12mm safety eyes
•Black Embroidery Thread
Additional Information:
Difficulty: Easy
This plunger is really quick to make and it actually kind of works! It won’t work for plunging your toilet, but it’s a great toy for little kids to play with. To make the plunger, we start at the top of the handle and work our way down. The handle and plunger are all made in one continuous piece. Let’s get started!
Plunger:
In cream color
Round 1: 6 Sc into a Magic Ring (6)
Round 2: *Inc* all around (12)
Round 3-17: *Sc* all around (12)
Round 18: Change to Pink. In the FLO (Front Loop Only), *Inc, Sc in the next st* all around (18)
Round 19: In the BLO, *Sc* all around (18)
Round 20: In BOTH Loops, *Sc* all around (18)
Round 21: In the FLO, *Inc, Sc in the next 2 st* all around (24)
Round 22: *Inc, Sc in the next 3 st* all around (30)
Round 23: *Inc, Sc in the next 4 st* all around (36)
Stuff the handle firmly here
Round 24-25: *Sc* all around (36)
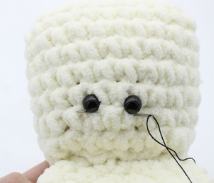
Now we will add two eye stitch markers to mark where to place the eyes later. Add an eye stitch marker to the 15th and 18th stitch in Round 25.
Round 26-27: *Sc* all around (36)
Add eyes in the marked areas now.
Now we will work on making the inside part of the plunger. The following rounds will be facing the inside of the plunger.
Round 28: In the BLO, *Sc* all around (36)
Round 29-31: In BOTH loops, *Sc* all around (36)
Round 32: *Dec, Sc in the next 4 st* all around (30)
Add stuffing to the the first two rounds of the pink part of the plunger. This arrow shows where to add the stuffing. Do NOT stuff the rest of the plunger.
Round 33: *Dec, Sc in the next 3 st (24)
Round 34: *Dec, Sc in the next 2 st (18)
Round 35: *Dec, Sc in the next st (12)
Round 36: *Dec* all around (6)
Finish off, leaving a long tail for sewing. Sew the remaining stitches closed.
Sewing:
In pink
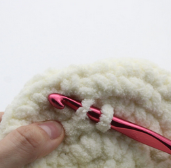
To make the plunger stay the same shape we need to sew parts of it down. Insert your hook going between Round 21 and 22 of the plunger (Pic 1). Yarn over and pull the yarn through (Pic 2-4).
1.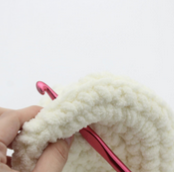 2.
2. 3.
3. 4.
4.
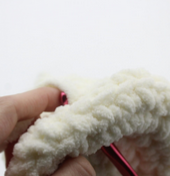
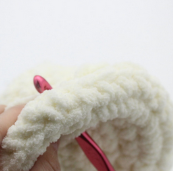
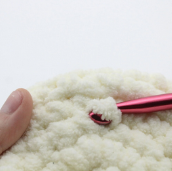
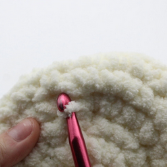
Insert your hook in the next stitch (Pic 5). Yarn over and pull the yarn through (Pic 6-7). Make a slip stitch (Pic 8-9). Continue inserting the hook through Round 21 & 22, making a slip stitch until you’ve completed going around once. This will make the plunger hold it’s shape.
5. 6.
6. 7.
7. 8.
8. 9.
9.
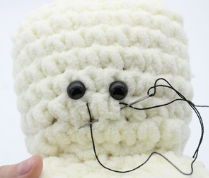
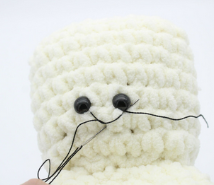
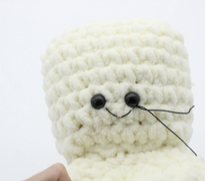
How to make a smile:
In black embroidery thread
Insert needle with thread next to the right of the toy’s eye and pull the needle out at the left of the toy’s eye as shown (Pic 1). Reinsert needle into the right of the toy’s eye (Pic 2). Pull needle out at the middle as shown, making sure the needle lands ABOVE the thread (Pic 2). Reinsert needle into the same stitch, making sure the needle lands BELOW the thread (Pic 3). Pull needle out at the right of the toy’s eye (Pic 3). Once done, tie the ends of thread into a firm knot and bring inside the toy to hide. Cut any excess yarn.
1. 2.
2. 3.
3. 4.
4.


2 Comments
Thank you for the pattern!
Here they are all together!