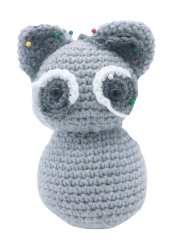
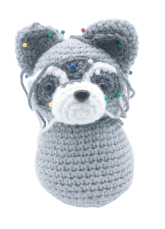
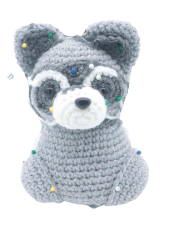
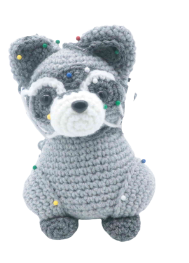
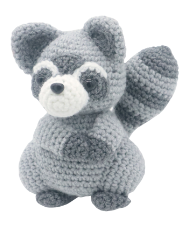
Raccoon Amigurumi – Free Crochet Pattern
Print this pattern out – purchase the PDF version here!

 Supplies:
• Yarn 4/Medium Weight Yarn in…
Light grey, dark grey, white
•4mm Crochet Hook
•Tapestry needle
•Scissors
•Stuffing
•Hot glue gun (Optional)
•12mm safety eyes
Additional Information:
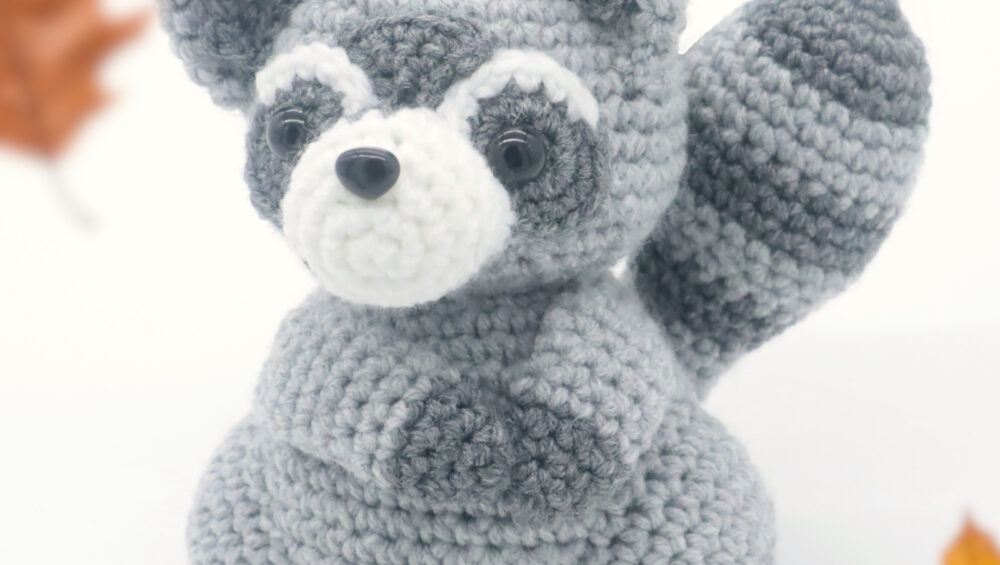
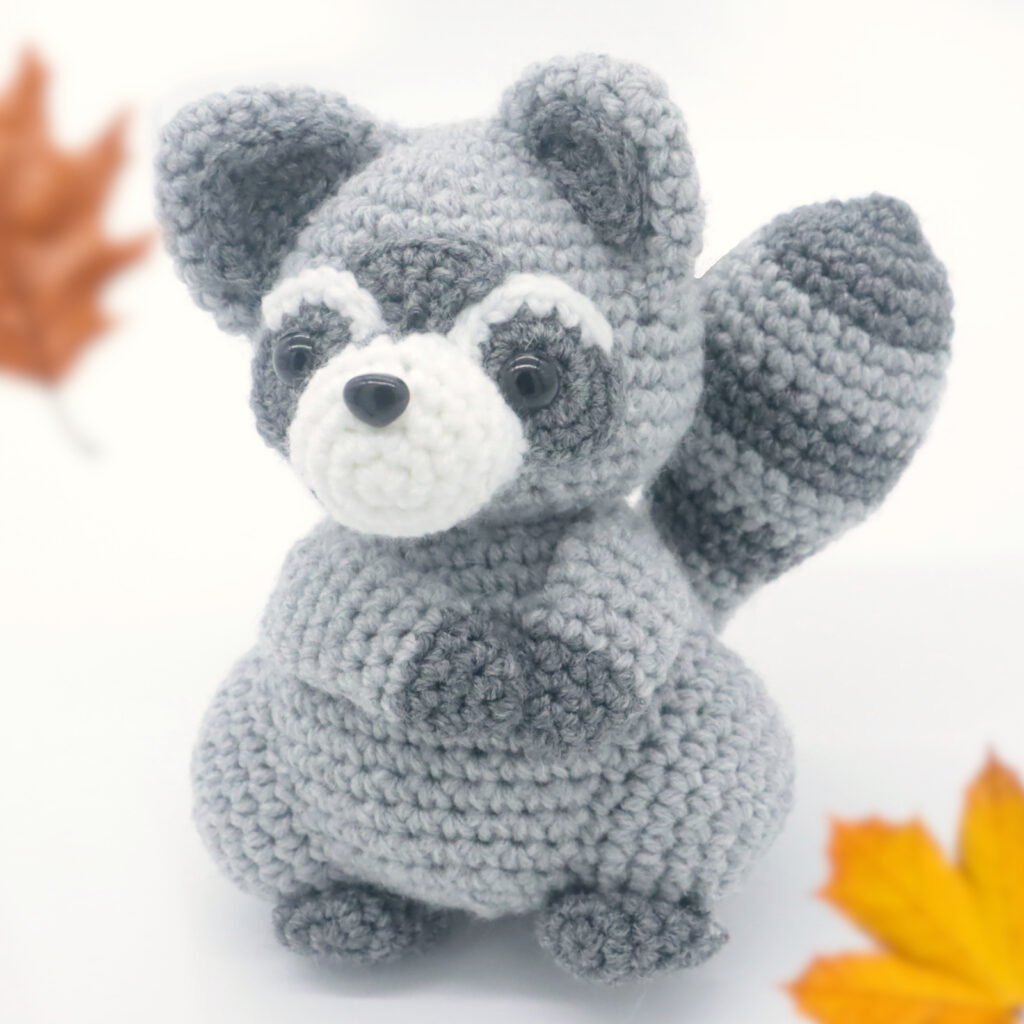
This Raccoon is so cute you’d better be careful he doesn’t steal your heart! This easy-difficulty pattern will yield an adorable, 7-inch tall raccoon with expressive features and an endearing pose. I often find myself with a lot of extra neutral-colored yarn, and this project is a great way to put your spare greys to good use.
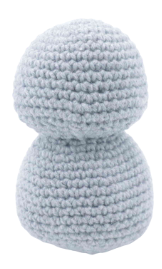
Head/Body:
In Grey
We start out by making the head which then leads into the body.
Round 1: 6 Sc into a Magic Ring (6)
Round 2: *Inc* all around (12)
Round 3: *Inc, Sc in the next st* all around (18)
Round 4: *Inc, Sc in the next 2 st* all around (24)
Round 5: *Inc, Sc in the next 3 st* all around (30)
Round 6: *Inc, Sc in the next 4 st* all around (36)
Round 7-11: *Sc* all around (36)
Round 12: *Inc, Sc in the next 5 st* all around (42)
Round 13: *Inc, Sc in the next 6 st* all around (48)
Round 14-15: *Sc* all around (48)
Round 16: *Dec, Sc in the next 2 st* all around (36)
Round 17: *Dec, Sc in the next 4 st* all around (30)
Round 18: *Dec, Sc in the next 3 st* all around (24)
Round 19: *Dec, Sc in the next 2 st* all around (18)
Round 20: Working in the Front Loop Only (FLO), *Inc, Sc in the next 2 st* all around (24)
Round 22: In BOTH loops, repeat *Inc, Sc in the next 3 st* all around (30)
Stuff the head firmly here
Round 22: *Inc, Sc in the next 4 st* all around (36)
Round 23-24: *Sc* all around (36)
Round 25: *Inc, Sc in the next 5 st* all around (42)
Round 26-32: *Sc* all around (42)
Round 33: *Dec, Sc in the next 5 st* all around (42)
Round 34: *Dec, Sc in the next 4 st* all around (36)
Round 35: *Dec, Sc in the next 3 st* all around (30)
Round 36: *Dec, Sc in the next 2 st* all around (24)
Stuff the body firmly here. Continue stuffing after each round
Round 37: *Dec, Sc in the next st* all around (18)
Round 38: *Dec* all around (12)
Finish off, leaving a long tail for sewing. Sew the remaining stitches together and weave in ends. Cut any excess yarn.
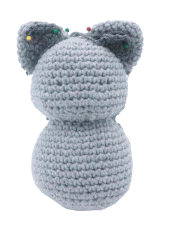
Ears: (Make 2)
In Light Grey
Round 1: 6 Sc into a Magic Ring (6)
Round 2: *Sc* all around (6)
Round 3: *Inc* all around (12)
Round 4: *Sc* all around (12)
Round 5: *Inc, Sc in the next st* all around (18)
Round 6-7: *Sc* all around (18)
Finish off, leaving a long tail for sewing. Pin the ears on as shown and sew on. Once done, weave in ends and cut any excess yarn.
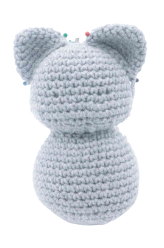
Ear Pieces: (Make 2)
In Dark Grey

Row 1: Ch 3. Sc in the 2nd Ch from the hook. Sc in the next st (2)
Row 2: Ch 1 and turn. Inc in each of the next 2 st (4)
Row 3: Ch 1 and turn. Inc in the next st, Sc in the next 2 st, Inc in the next st (6)
Row 4: Sc around the entire edge of the ear piece until you meet the first stitch in Row 4. This will make the ear piece look cleaner. Once done, finish off and leave a long tail for sewing. Pin the ear pieces on as shown and sew on. Weave in ends and cut any excess yarn.
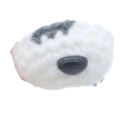
Eye Patches: (Make 2)
In Dark Grey
Round 1: 6 Sc into a Magic Ring (6)
Round 2: *Inc* all around (12)
Round 3: Repeat *Inc, Sc in the next st* 2 times. Inc in the next st. In White Sc in the next 3 st, Inc in the next st, Sc in the next 3 st. SlSt in the next st to complete.
Finish off, leaving a long tail for sewing. Add a 12mm safety eye into the middle of the magic ring. Pin the eye patches on as shown and sew or hot glue on. Once done, weave in ends and cut any excess yarn.
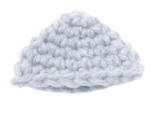
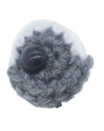
Muzzle:
In White
Round 1: 6 Sc into a Magic Ring (6)
Round 2: *Inc* all around (12)
Round 3: *Inc, Sc in the next st* all around (18)
Round 4-5: *Sc* all around (18)
Round 6: Sc in the next 9 st. Change to dark grey and Sc in the next 3 st. Change to grey and Sc in the next 6 st (18)
Finish off, leaving a long tail for sewing. Add a safety nose between round 3 and 4, making sure the nose lines up to the dark grey area we crocheted. Pin the snout on as shown and sew on. Be sure to add stuffing before fully sewing on. Once done, weave in ends and cut any excess yarn.
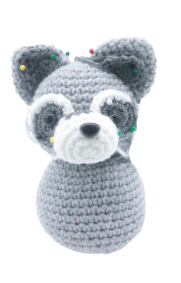
Face Patch:
In Dark Grey

Row 1: Ch 3. Sc in the 2nd Ch from the hook. Sc in the next st (2)
Row 2: Ch 1 and turn. Inc in each of the next 2 st (4)
Row 3: Ch 1 and turn. Inc in the next st, Sc in the next 2 st, Inc in the next st (6)
Finish off and leave a long tail for sewing. Pin the face patch between the toy’s eyes, the pointy part facing down. Sew or hot glue on. Weave in ends and cut any excess yarn.
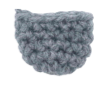
Legs: (Make 2)
In Light Grey
Round 1: 6 Sc into a Magic Ring (6)
Round 2: *Inc* all around (12)
Round 3: *Inc, Sc in the next st* all around (18)
Round 4: *Inc, Sc in the next 2 st* all around (24)
Round 5-7: *Sc* all around (24)
Finish off, leaving a long tail for sewing. Pin the legs on as shown and sew on. Add stuffing before fully sewing on. Once done, weave in ends and cut any excess yarn.
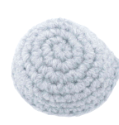
Feet: (Make 2)
In Dark Grey
Round 1: 6 Sc into a Magic Ring (6)
Round 2: *Inc* all around (12)
Round 3-6: *Sc* all around (12)
Finish off, leaving a long tail for sewing. Don’t add stuffing to the feet. Pin the feet under the legs as shown and sew on. Once done, weave in ends and cut any excess yarn.
Left Arm:
In Dark Grey
Round 1: 6 Sc into a Magic Ring (6)
Round 2: *Sc* all around (6)
Round 3: *Inc, Sc in the next st* all around (9)
Round 4: *Sc* all around (9)
Round 5-13: Change to Light Grey. *Sc* all around (9)
Finish off, leaving a long tail for sewing. Light stuff the arm. Pin the left arm on as shown and sew on. Once done, weave in ends and cut any excess yarn.
Right Arm:
In Dark Grey
Round 1: 6 Sc into a Magic Ring (6)
Round 2: *Sc* all around (6)
Round 3: *Inc, Sc in the next st* all around (9)
Round 4: *Sc* all around (9)
Round 5-10: Change to Light Grey. *Sc* all around (9)
Finish off, leaving a long tail for sewing. Light stuff the arm. Pin the right arm on as shown and sew on. Once done, weave in ends and cut any excess yarn.
Tail:
In Dark Grey

Round 1: 6 Sc into a Magic Ring (6)
Round 2: *Sc* all around (6)
Round 3: *Inc* all around (12)
Round 4: *Inc, Sc in the next st* all around (18)
Round 5-6: *Sc* all around (18)
Round 7: Change to Light Grey. Repeat *Inc, Sc in the next 2 st* all around (24)
Round 8-9: *Sc* all around (24)
Round 10-12: Change to Dark Grey. *Sc* all around (24)
Round 13: Change to Light Grey. *Sc* all around (24)
Round 14: *Dec, Sc in the next 2 st* all around (18)
Round 15: *Sc* all around (18)
Round 16-17: In Dark Grey *Sc* all around (18)
Round 18: *Dec, Sc in the next st* all around (12)
Round 19-21: In Light Grey *Sc* all around (12)
Round 22-24: In Dark Grey *Sc* all around (12)
Round 25-27: In Light Grey *Sc* all around (12)
Finish off, leaving a long tail for sewing. Stuff the tail firmly now. Pin the tail on as shown and sew on. Once sewn on, weave in ends and cut any excess yarn.
Done! If you made this raccoon, I would LOVE to see a picture! You can show me in the comments section underneath this post 🙂


15 Comments
on 19, end number is 30, but you have inc, sc 2, x 8 and I come out as 32 but if I x 7 it will be 28 count, and not 30 count, rnd 20, you have inc, sc 3, x 7 comes out at 35 and if I go 8x end with 40 I try to do screen shot but all I get is a black screen.
Same here. I’m just going to go with it. I frogged 10 rows because of this 🙁
You’ve done it again. Created a darling amigurumi!!! I’ll be starting this lil guy asap 🤩
I made a fairy racoon (faerie racoone) with your pattern. I did not have any stitchcount-problems . It really worked up quickly.
Made with scraps of yarn also recovering from a fall. So plus or minus a few stitches 🙂
The eyes aren’t big enough haha but this is my little flower raccoon. I might make it small flowers or another accessory.
End of row 32 has 42 stitches. Row 33 says Dec and 5 DC — and end up with 42 stitches ?? I just fudged it and made row 38 just DC’s cause you already have 12 stitches – hope this helps someone –
Here’s my version!
Made mine in chenille with a L hook and a few other stylizing adjustments. But for my first Amigurumi, I’m pretty proud!
i loved this pattern! easy to follow and good for my first project. made this little guy in honor of the old raccoon who bit me. he’s lovingly named ernie.
love this pattern! i recreated the old, one eyed raccoon that bit me early this year. super simple to follow pattern that caused me to learn some new tricks!
didn’t mean to comment twice haha oops.
I love this pattern! I haven’t finished it yet, but the pattern is easy to read and so far adorable! I made mine a little trash bag accessory to hold, so in case anyone wants the pattern I tried to write one.
1. 6 sc into MR (6)
2. inc all around (12)
3. inc then sc into next st (18)
4-8. rows sc all around (18)
9. inv dec, sc into next st (12)
stuff lightly here
10. inv dec all around (don’t worry about closing) (6)
12. inc all around (12)
11. 3 sc into each st all around (36)
cut live yarn leaving a LONG tail for sewing, weave yarn to row 10, sew horizontally around and pull shut to close. fasten off and weave in ends.
I hope y’all like it and I hope it works out, I have never written a crochet pattern before and partially BSed the closure.
Note: If you want a less extremely curly bag top you can do 2 sc into each st instead of 3 for row 11.
Something is very off with this pattern. I have followed your instructions and my head looks like a peanut!! Can you verify the head and body part of the pattern please?