

Purchase the PDF version here


Supplies:
4/Medium weight yarn in…
Pink
Brown
4mm crochet hook, 6mm safety eyes, tapestry needle, scissors, and stuffing.
Additional Information:
Difficulty: Easy
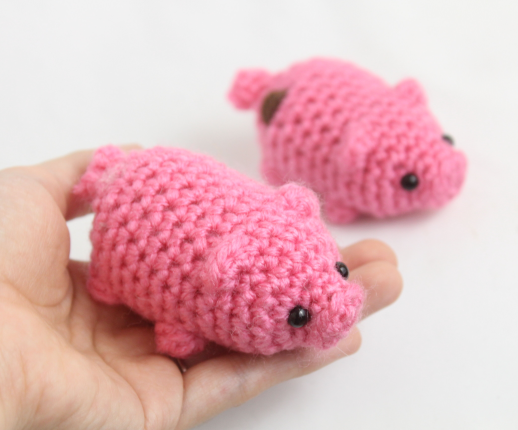
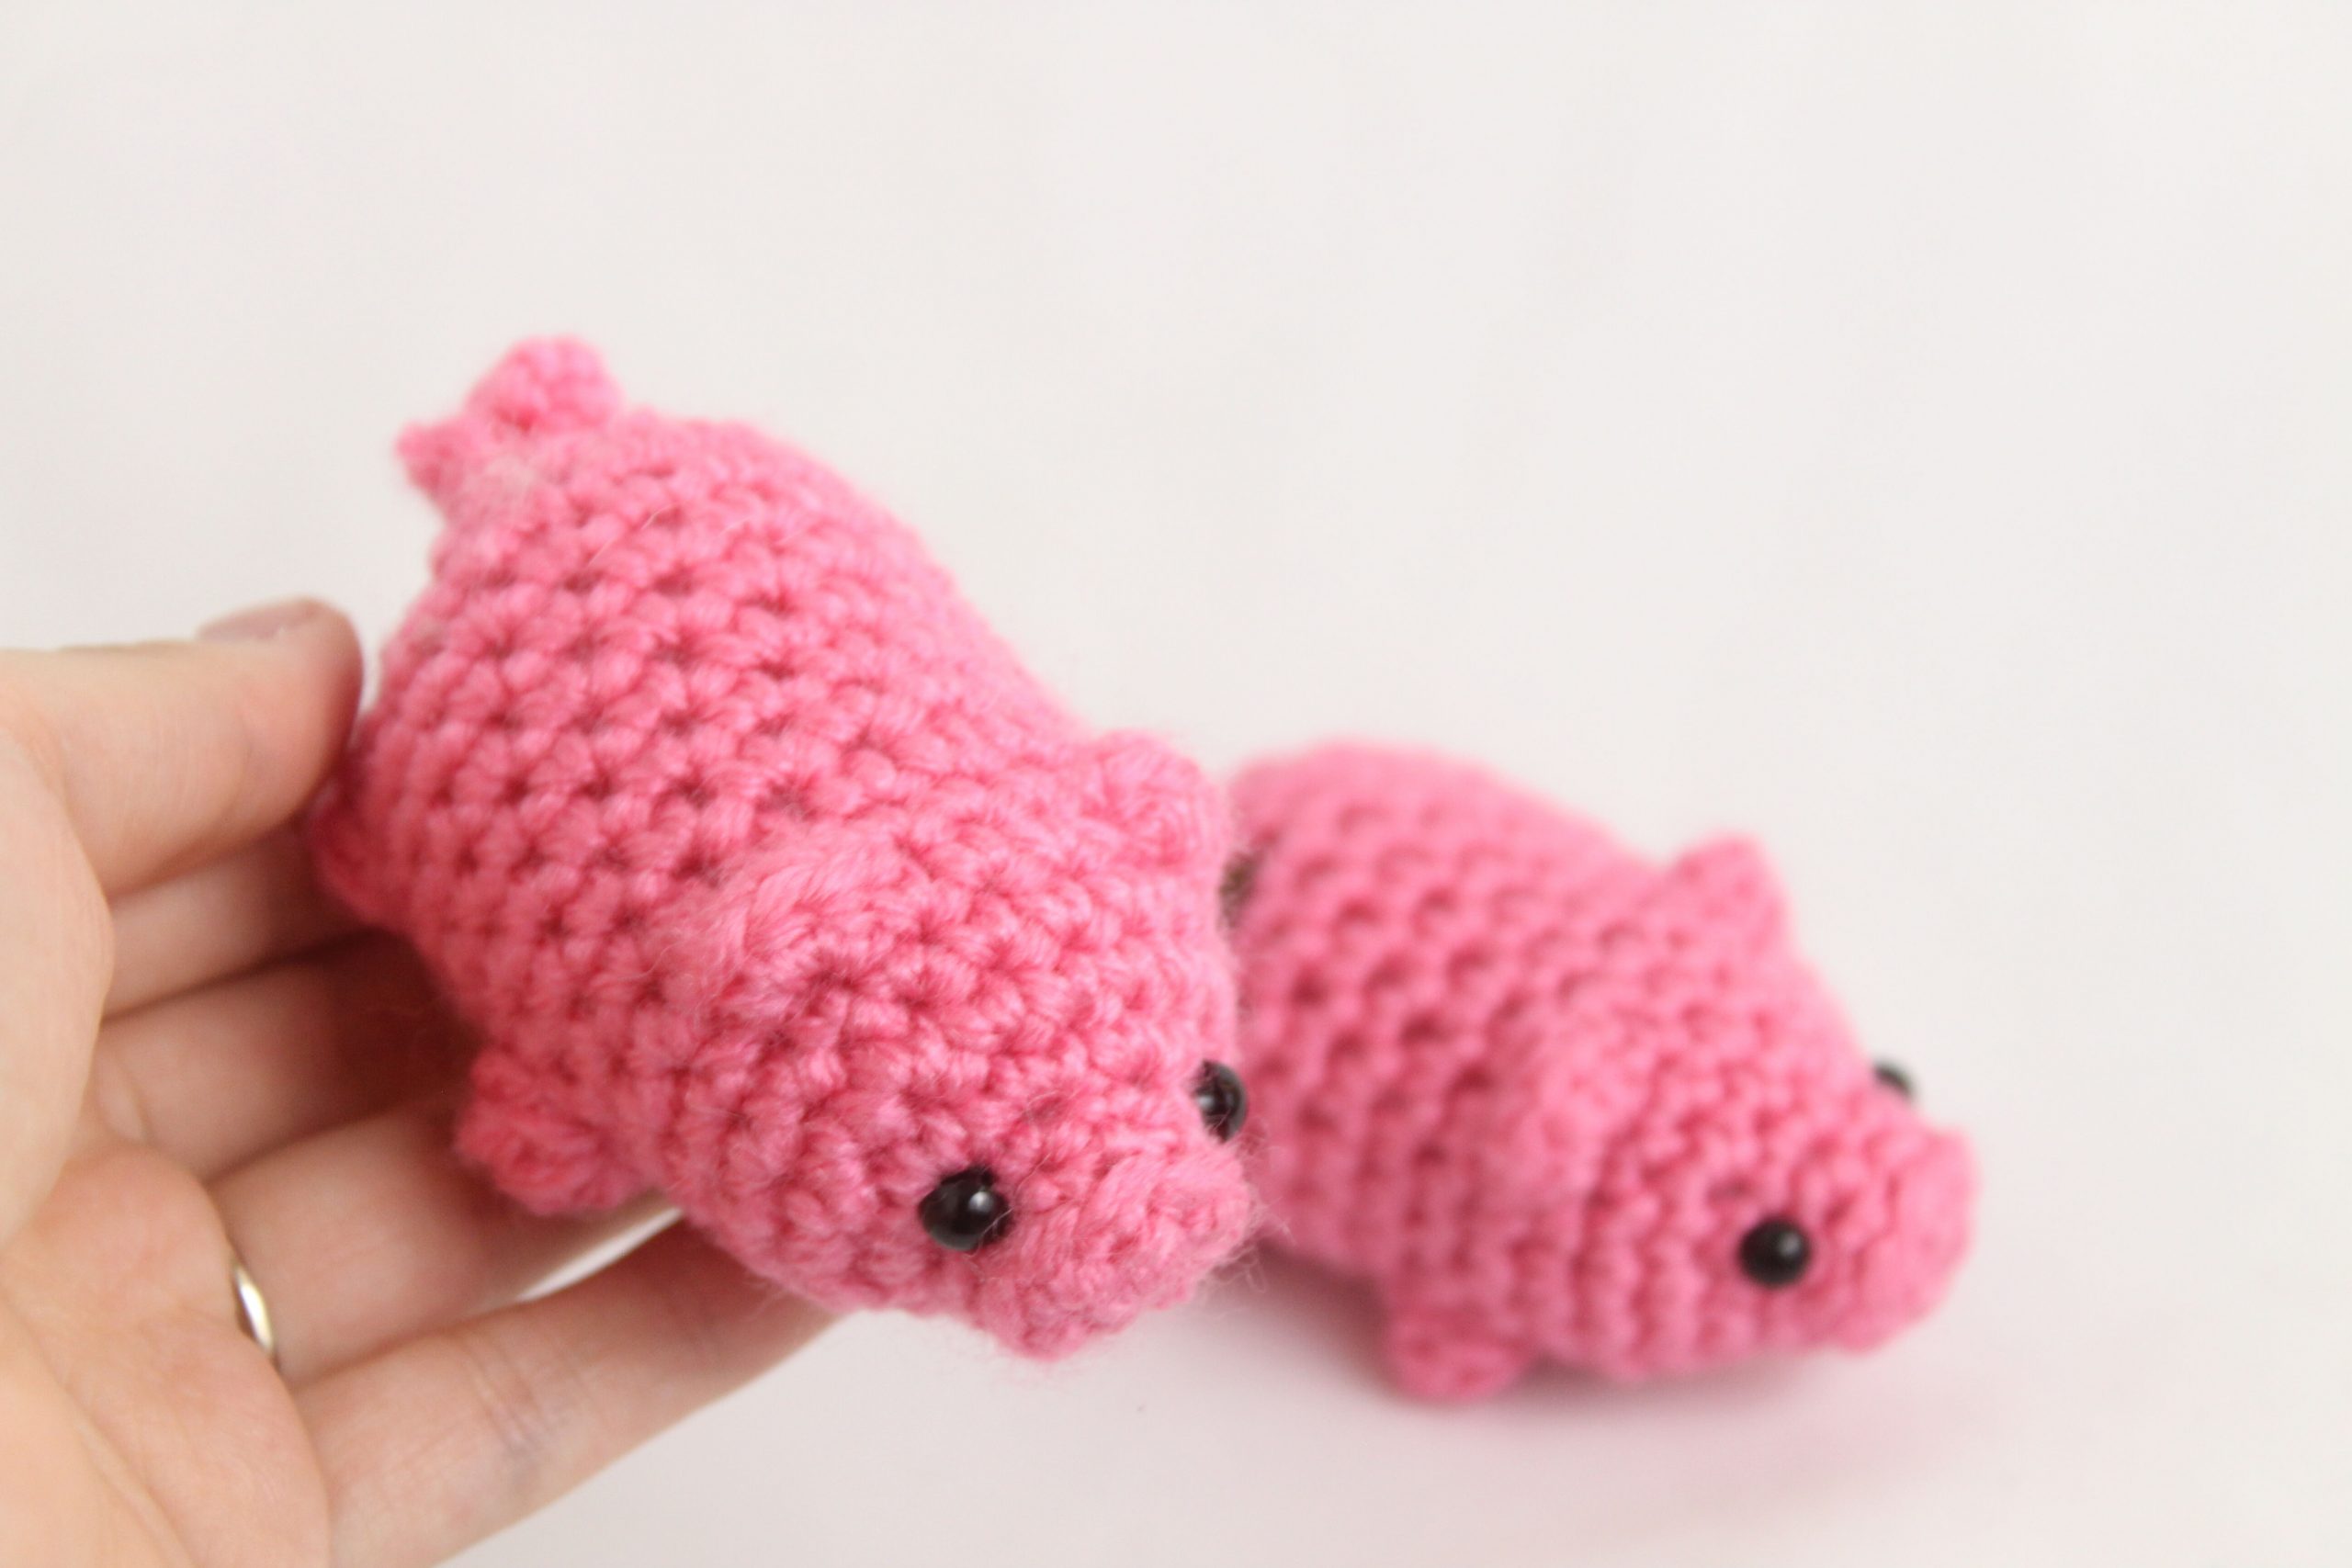
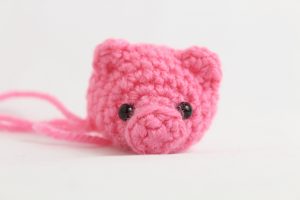
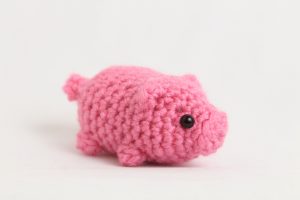
This pig is super quick, easy, and fun! You’re likely to make more than one.
This little pig is made all in one piece, so there’s no sewing involved! We start at the nose, work into the head, then the body, and finally the tail. We use special stitches to make the arms and the ears. Don’t worry, they’re explained with descriptions and photos once we get to them.
Head:
In Pink
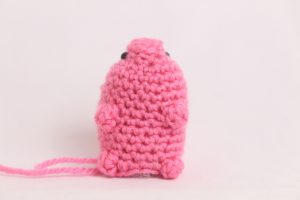
To start the pig, we make the head which works into the body. The head, ears, arms/legs, and tail are all made in one piece.
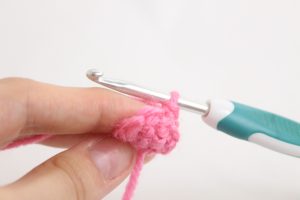
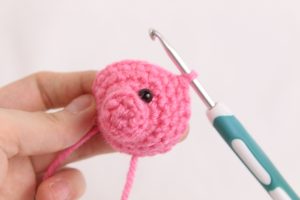
Round 1: 6 Sc in Magic Ring (6)
Round 2: *Inc in the next st, Sc in the next 2 st* all around (8)
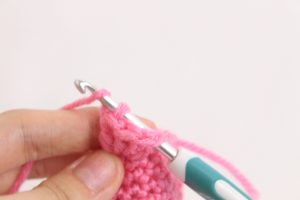
Round 3: In BLO (Back Loop Only, pictured below), *Sc* all around (8)
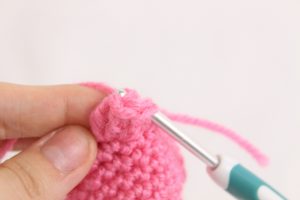
Round 4: In this round we will add eye stitch markers to mark where to place the eyes later. In BOTH Loops, Sc in the next 2 st. Sc in the next st and add a different colored st marker to Sc just made. This marks where to place the eye later. Sc in the next 2 st. Sc in the next st and add a different colored st marker to the Sc just made. Sc in the next 2 st (8)
Round 4 Pictured Below
Round 5: *Inc* all around (16)
Round 5 Pictured Below
Round 6: *Inc, Sc in the next 4 st* 3 times, Sc in the last st (19)
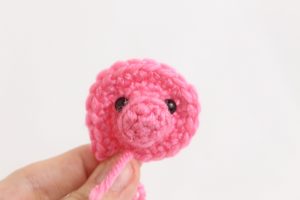
Add safety eyes in the marked areas from Round 4 now
Round 7: *Sc* all around (19)
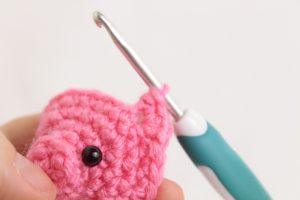
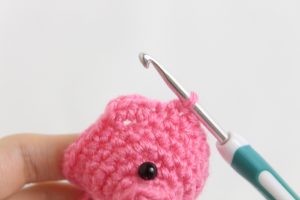
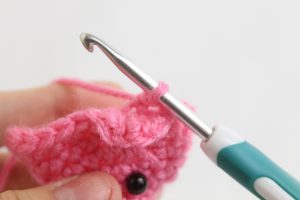
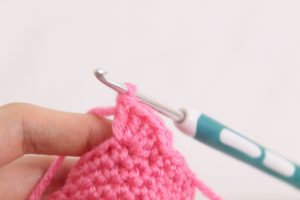
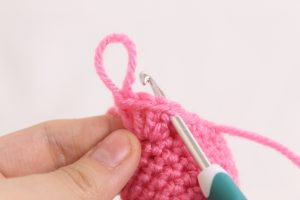
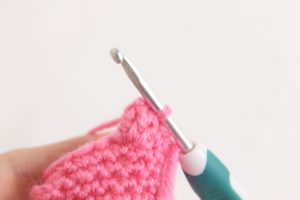
Round 8: Sc in the next 8 st (Pic 1). In the FLO (Front Loop Only, Pic 2) of the next st, *Hdc 2, Sc 1, Hdc 1* (Pic 3). In BOTH Loops, Sc in the next 4 st. In the FLO (Front Loop Only) of the next st, *Hdc 2, Sc 1, Hdc 1*. In BOTH Loops on the next st, Sc in the next 5 st (Pic 4) (25)
1. 2.
2.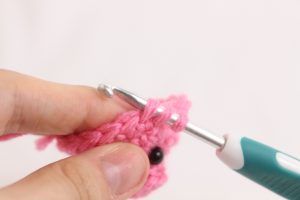
3. 4.
4.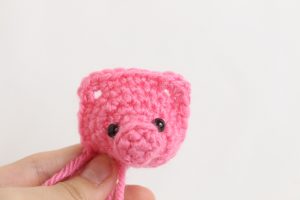
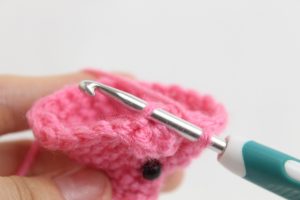
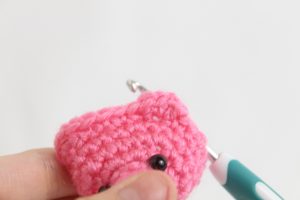
Round 9: Sc in the next 8 st. Now we meet the ear (Pic 1). Fold the ear towards you. Now behind the ear will be the back loop we left since we crocheted only in the front loop earlier (Pic 2). Single crochet one time in that back loop (Pic 3-4).
1. 2.
2.
3. 4.
4.
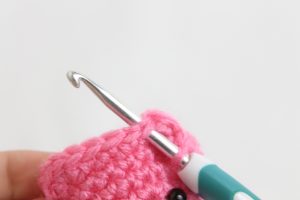
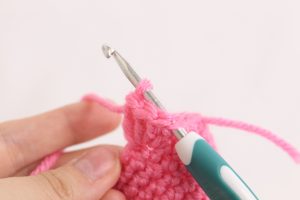
Now continuing on in both loops (don’t crochet on the ear, crochet on the head), Sc in the next 4 st (Pic 5-7). Fold the second ear towards you and Sc one time in the back loop. Continuing in BOTH loops, Sc in the next 5 st (Pic 8) (19)
5. 6.
6.
7. 8.
8.
Round 10: *Sc* all around (19)
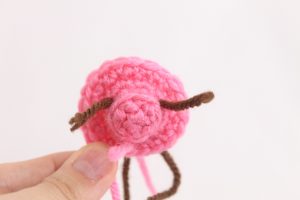
Round 11: Sc in the next 4 st. Now we will make the arms. Dc 4 times in the next st (Pic 1). Remove your hook from the current working loop and insert it into the first Dc made (Pic 2). Now also reinsert your hook into the current working loop (Pic 3). You will have two loops on your hook. Yarn over (Pic 4) and pull through both loops (Pic 5). You have just made one popcorn stitch (Pic 6). Sc in the next 13 st, Popcorn stitch in the next st (19)
1. 2.
2.
3. 4.
4.
5. 6.
6.
7.
Round 12-16: *Sc* all around (19)
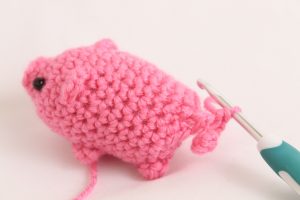
Round 17: Sc in the next st, Popcorn stitch in the next st, Sc in the next 4 st, Popcorn st in the next st, Sc in the next 12 st (19)
Stuff here. Continue stuffing after each round.
Round 18: *Dec, Sc in the next st* 6 times, Sc in the last st (13)
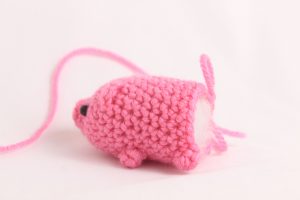
In the next round we’re going to make a chain and single crochet on top of that chain to make a tail.
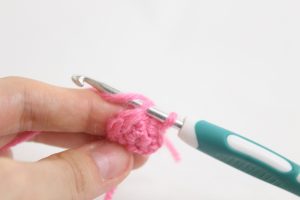
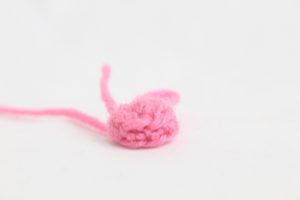
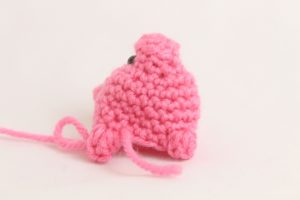
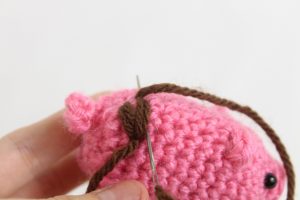
Round 19: *Dec* 5 times. Ch 4 (Pic 1), Sc in the 2nd Ch from the hook 3 times. Sc 3 times in each of the next 2 ch (Pic 2). *Dec* 1 time, Sc in the last st (7 st + 9 st from the chain)

Finish off. Sew closed (Pic 3-5).
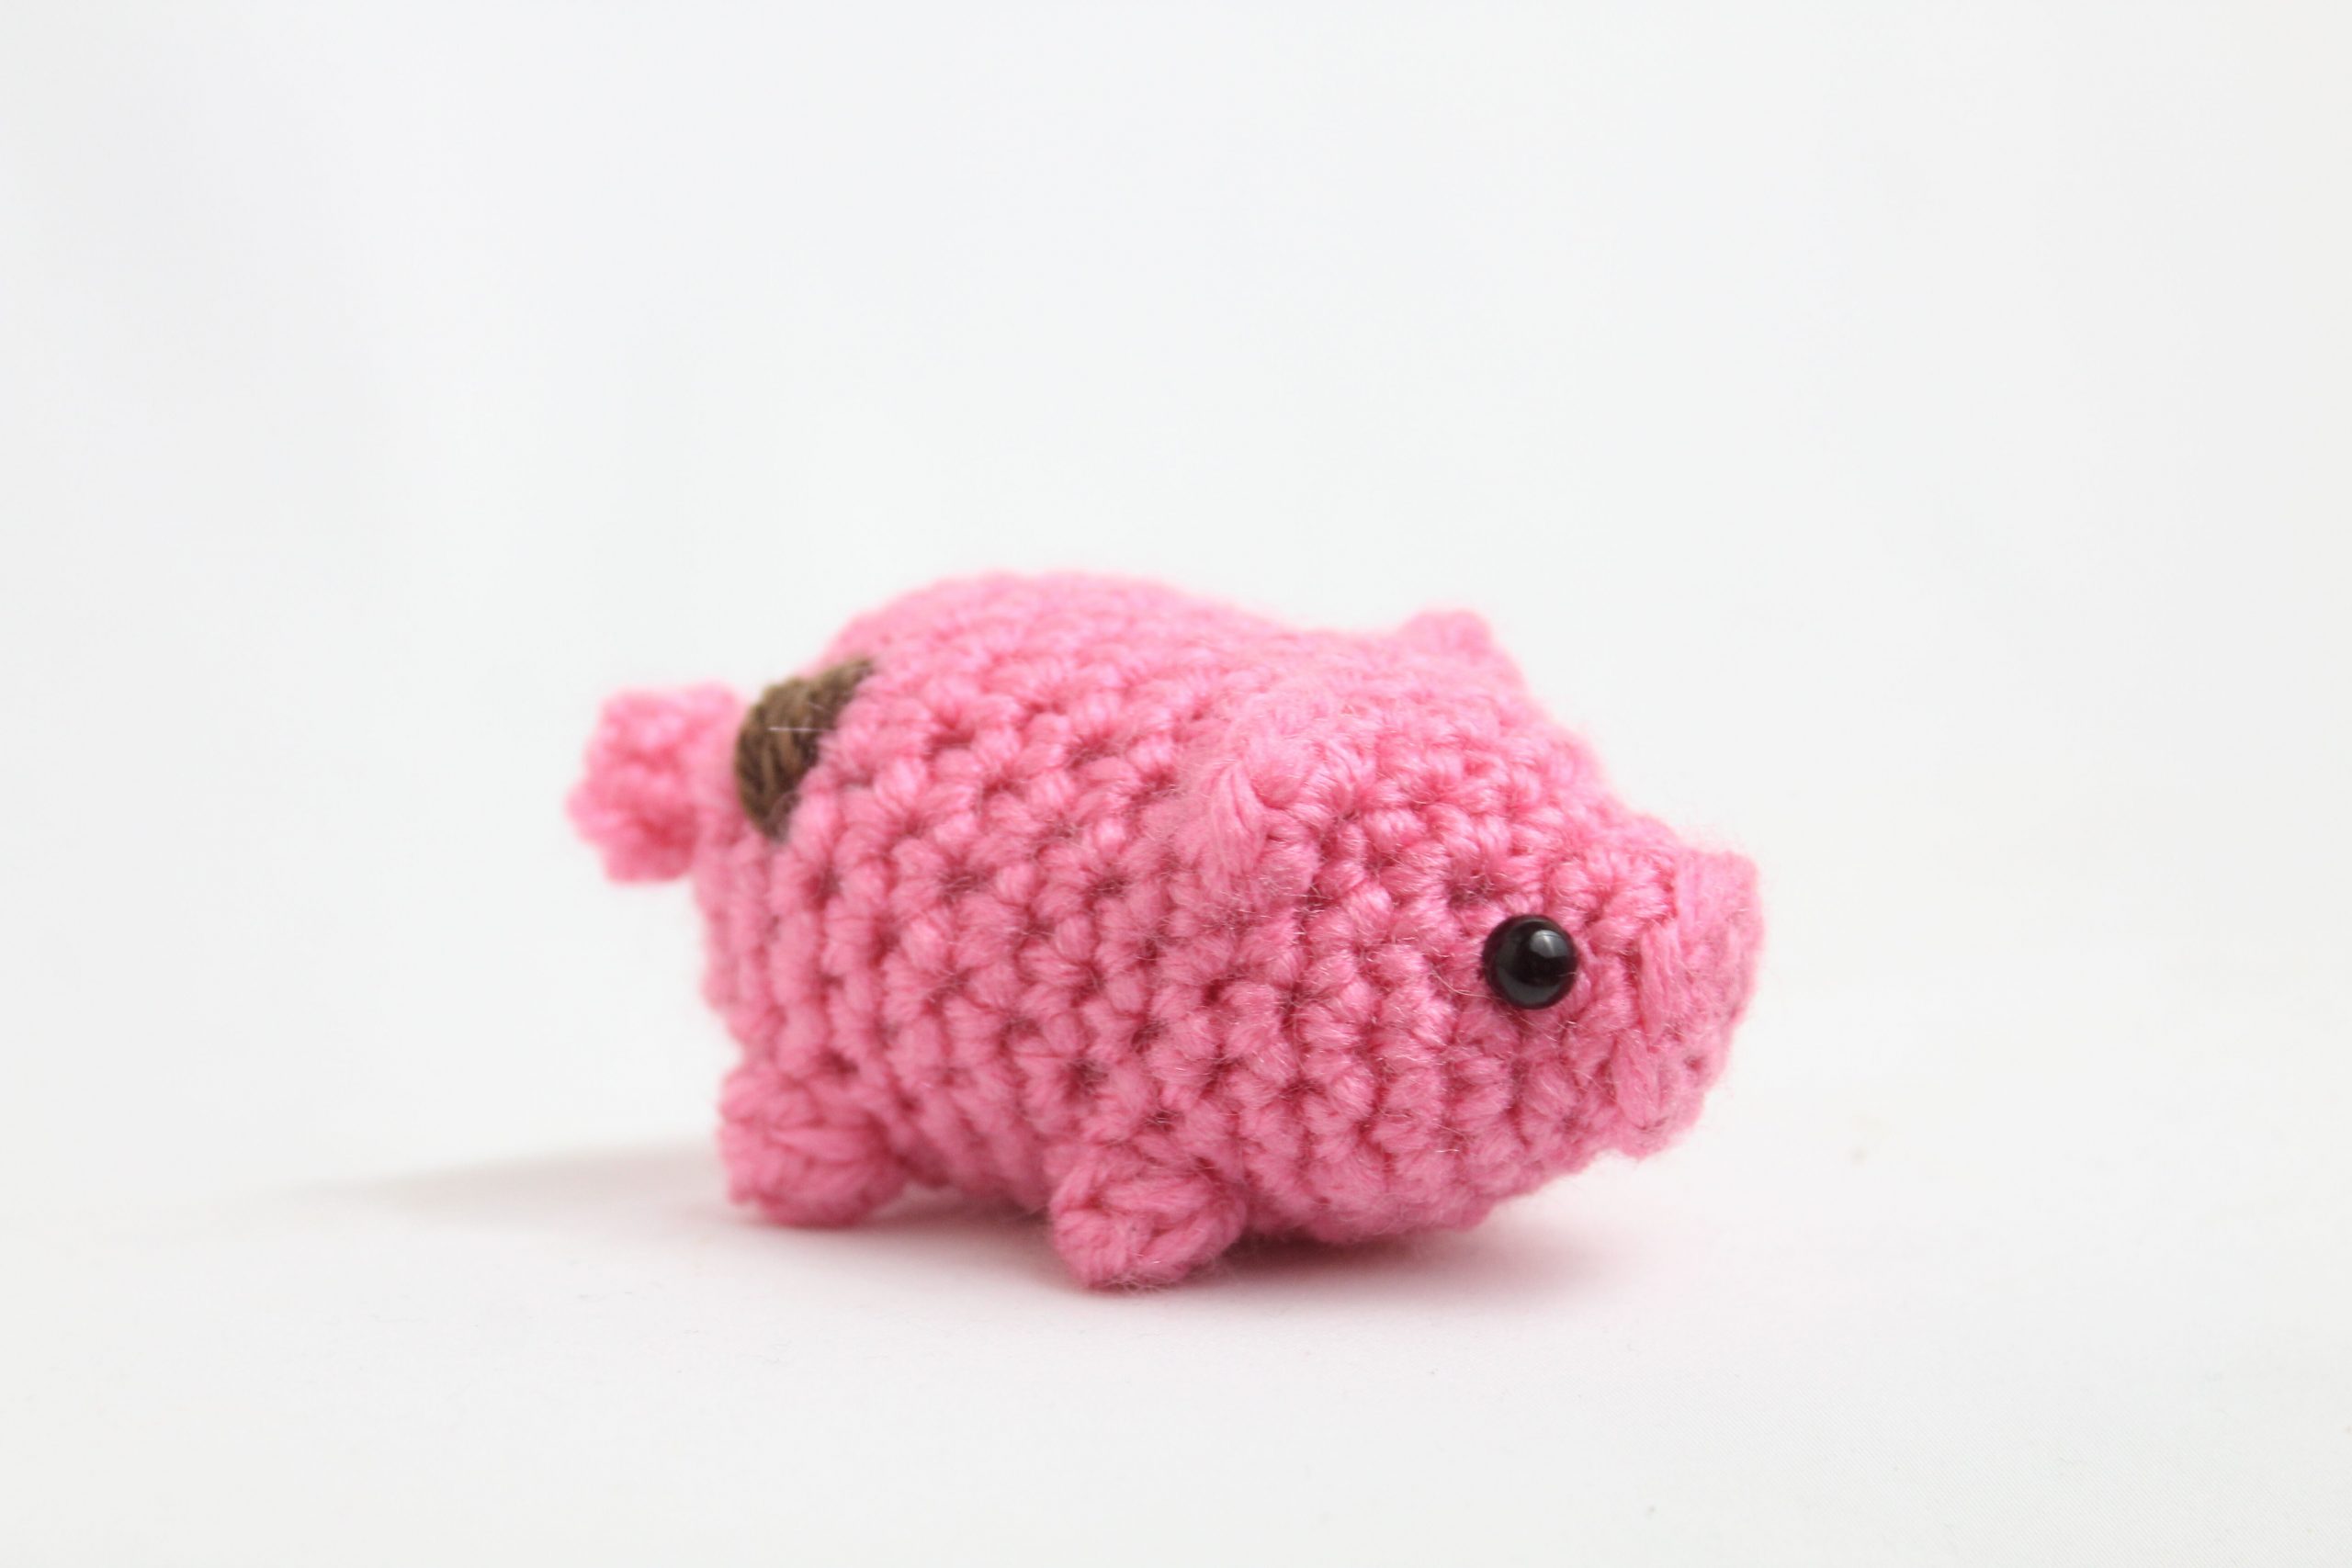
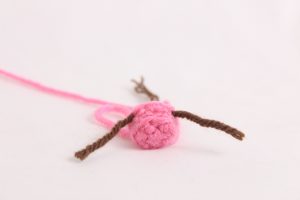
Mud
In Brown
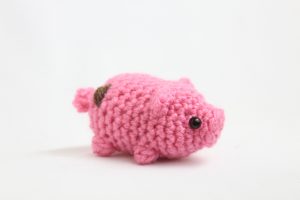
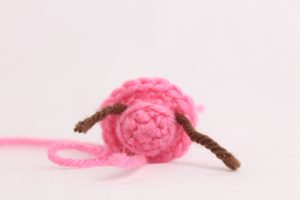
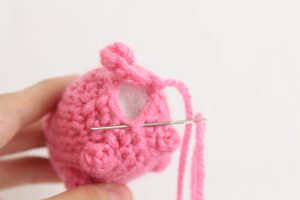
You can sew on little mud spots to your pig. You can do this in any way you’d like, or you can follow my instructions on how I did it. Mud is messy though, so of course it doesn’t have to be perfect!
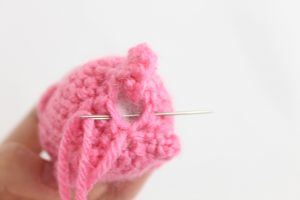
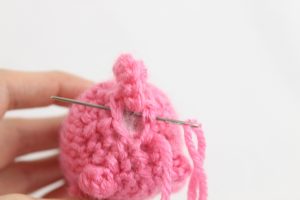
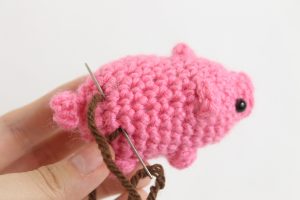
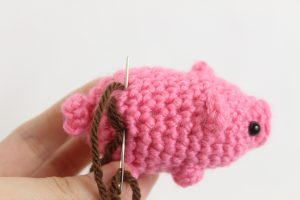
Insert needle with thread into the back of the pig and pull needle out 2 stitches above (Pic 1). Reinsert needle into the same areas (Pic 2). Insert needle into the original insertion spot and pull needle out a little to the right (Pic 3). Reinsert needle into the same areas 2 times (Pic 4-5). Sew anywhere else you think may need it (Pic 6). Tie a knot with both ends of yarn and weave them into the pig to hide.
1.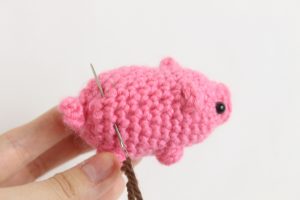 2.
2.
3.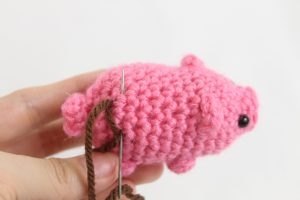 4.
4.
5. 6.
6.
7.
Done! If you made a little pig I would LOVE to see 🙂 You can show me by “trying” it on Pinterest.


19 Comments
I sorry but I’m having trouble with round 8 with trying to make the ears.
Never mind I realized that it was all one stitch
Hi there Natalie! The ears do look a bit weird as you’re making them, but yes like you said, they are all one stitch! The ears take better form the round AFTER making them too! The stitches kinda push the ears up in that following round 🙂 Please let me know if you have any other questions! 😊
Is there any way to size up these cuties? They’re adorable as is. I’m just curious if they can be sized up.
Hi Azzy! Yes, you can totally size them up! It depends how big you want them, though 🙂 For a pretty large pig you can use blanket yarn (I recommend Bernat) and use a 6mm hook with that yarn. A lot of people have done this with my patterns to make a really big amigurumi, so that would be the best way! If you want to see what I mean, somebody posted a picture of using blanket yarn with my ice cream pattern: https://stringydingding.com/wp-content/uploads/2020/05/IMG_1725-scaled.jpg
If you want it only a little bit bigger, you can use regular 4/Medium weight yarn and a larger hook. Try using a 6mm hook for it to be a bit bigger but not huge! I hope this was able to help, let me know if I can answer any other questions 😍
hey thanks for giving this awesome pattern just can we add bigger eyes and make the pig a little bit bigger?:)
Hi there Lizz! You have a great question, if you want to make the pig bigger you can do a few things. If you only want it slightly bigger, use a bigger hook like a 5mm crochet hook 🙂 This won’t make the pig huge, but definitely a little bigger! The next thing you can do is use a bigger yarn. Using something like Bernat Blanket yarn will turn the pig lots bigger, and very soft! I know you can also use velvet yarn if you want it much bigger ❤️
Depending on the size the pig comes out, I would use maybe 12mm safety eyes if you made the pig with large yarn. However, if you just changed the hook size I would only size up the eyes to 8mm 🙂 I hope this was able to help!
This was a wonderful pattern! Quick and easy to make — I made about a dozen as party favors for a graduation. Sewing on arms and other parts is usually tedious for me when doing amigurumi, and I couldn’t find many small and quick patterns that looked cute and high-quality until these! I’m a bit of a beginner when it comes to amigurumi, but your directions were clear enough where I was able to follow all of your instructions without trouble! Thanks for the pattern!
Oh my gosh this is so exciting to hear, that’s really amazing you made THIRTY for a graduation! I bet everyone was going crazy over the pigs you made 😁 After you make a pattern a few times, you memorize it and don’t even need the pattern anymore! So I bet you’re an expert piggy maker LOL! And I’m amazed to hear that you’re more of a beginner and still could make these pigs, you have some talent! I tried to make this pattern easy to follow, so I’m glad some of the directions could help 🙂
Sewing on small pieces to an already tiny amigurumi is very tedious, I get it. It adds so much more time to things, especially if you’re planning on making a lot. I actually have even more “scraptacular” patterns, most of them involve little to no sewing and are made for scrap yarns! You can see if there’s more you’d like to make here: https://stringydingding.com/category/scrap-yarn/ Thanks so much for the super kind comment, I’m in awe you made thirty of these! You’re a crochet machine 😁 Take care!
This pattern is so cute!!
Thank you so much, Sarah! 🥰 I love to hear that! I hope you have some fun making your own scarp piggy. Let me know if you have any questions 😍
OMG!! This turned out so cute and amazing!!THANK YOU SO MUCH!!
Hi Alex! Awww that’s so amazing to hear 😍 I love when a project works out! Thank you so much for your kind comment,I truly appreciate it 🙂
Olive
How many yards is needed to make that cute piggy?
I don’t know the yardage but it took way less than half a regular size skien.
Lots of fun. Thank you!
I made one for my cousin and I just know he’s gonna love it! thank you so much for this pattern it was super quick and easy to follow!!!! 💕
THIS IS THE CUTEST LITTLE PIG I HAVE EVER SEEN IN MY LIFE (i’m 11) thank-you SO SO SO SO MUCH
making this for my galentine! adding a mud spot in the shape of a heart. i think she’ll like it 🙂