
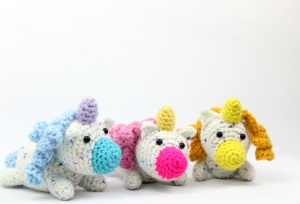
Scraptacular Unicorn Amigurumi – Free Crochet Pattern
Purchase the PDF version here
This pattern is written in US terms. For the UK terms version, click here.
Supplies:
4mm crochet hook, 4/Medium weight yarn in any desired colors for your unicorn. 6mm safety eyes, tapestry needle, scissors, and stuffing. (I used I Love This Yarn! Prints in color Fruit Salad for the unicorn’s body)
Stitches Used:
Magic Ring, St/Stitch, Ch/Chain, Sc/Single Crochet, Dc/Double Crochet, Trc/Triple Crochet
Additional Information:
Difficulty: Easy
This pattern is perfect for scrap yarns! But you may use any kind of yarn you desire, in any yarn weight, with any hook size. To get the same size as my Unicorns, please use 4/Medium weight yarn with a 4mm hook.
Use “Muzzle Color” as the color you want the Unicorn’s nose to be. Use “Body Color” as the color you want the Unicorn’s body to be. Use “Hair Color” as the color you want the Unicorn’s hair to be.
We start by making the nose, which leads into making the head. They are one piece. Then we make the ears, horn, and mane. After assembling the face, we make the body. We then create the arms/legs and assemble them on. Lastly, we create the tail and sew it on.
Head:
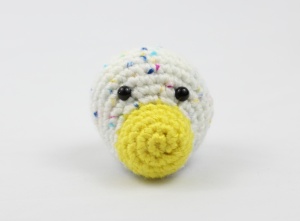
In Muzzle Color
Round 1: 6 Sc in Magic Ring (6)
Round 2: *Inc* all around (12)
Round 3: *Inc, Sc in next 3 St* 3 times (15)
Round 4-5: *Sc* all around (15)
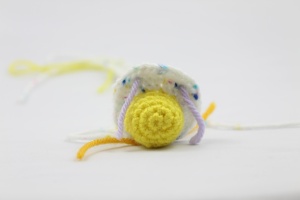
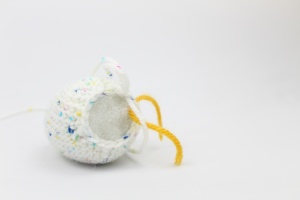
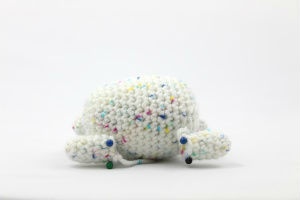
Round 6: Switch to Body Color. Sc in next 5 St, *Inc* in next 5 St, Sc in last 5 St (20)
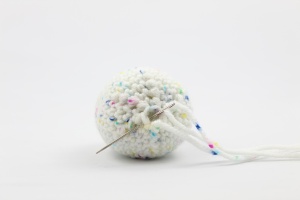
Round 7: Sc in next 5 St, *Inc, Sc* 1 time, Inc in next st. Add different colored St marker to St just made. This marks where we will place the eye. Sc in next st. *Inc, Sc* 1 time. Inc in next st. Add different colored St marker to St just made. Sc in next st. *Inc, Sc* 1 time, Sc in last 5 st (25)
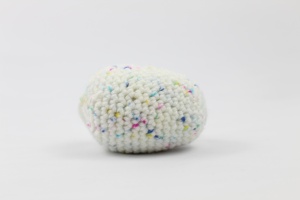
Round 8: Sc in next 5 St, *Inc, Sc 2* 5 times, Sc in last 5 St (30)
Round 8 pictured below
Round 9-13: *Sc* all around (30)
Round 14: *Dec, Sc 3* all around (24)
Round 15: *Dec, Sc 2* all around (18)
Round 16: *Dec, Sc* all around (12)
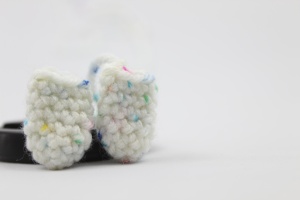
Stuff at this point, add in Safety Eyes
Round 17: *Dec* all around (6)
Finish off and add any additional stuffing. Sew closed.
Horn
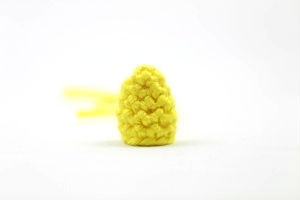
In Any Color
Round 1: 6 Sc in Magic Ring (6)
Round 2: *Sc* all around (6)
Round 3: *Inc, Sc* all around (9)
Round 4-6: *Sc* all around (9)
Finish off, stuff, and pin to the head.
Ears: (Make 2)
In Body Color
Round 1: Ch 4. Sc in 2nd Ch from hook, Dc in next St, Trc in last St.
Finish off and pin next to the horn.
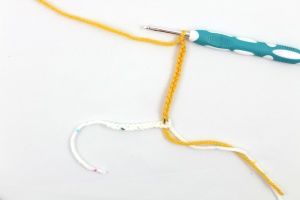
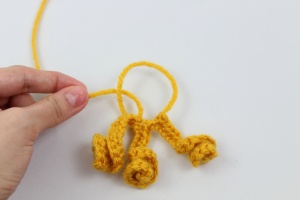
Mane:
In Any Color
Round 1: Ch 15. Sc in 2nd Ch from hook. Switch to desired hair color. Sc in next St. With new color, *Ch 17. Dc in 2nd Ch from hook. 2 Sc in same st. 3 Dc in each of the next 3 st. Sc in next 12 St. Now we meet original Ch. Sc in next 2 st.* 6 times.
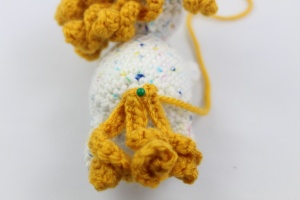
Finish off and pin to the back of the head.

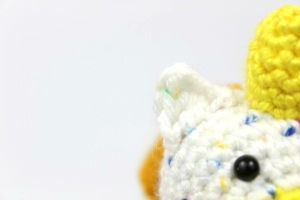
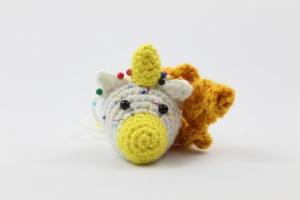
Head should look like this.
Sew on now.

Body:
In Body Color:
Round 1: 6 Sc in Magic Ring (6)
Round 2: *Inc* all around (12)
Round 3: *Inc, Sc* all around (18)
Round 4: *Inc, 2 Sc* all around (24)
Round 5-7: *Sc* all around (24)
Round 8: *Inc, 3 Sc* all around (30)
Round 9-17: *Sc* all around (30)
Round 18: *Dec, Sc 3* all around (24)
Round 19: *Dec, Sc 2* all around (18)
Stuff here
Round 20: *Dec, Sc* all around (12)
Round 21: *Dec* all around (6)
Finish off and add any additional stuffing. Sew closed
Arms/Legs: (Make 4)
In Body Color:
Round 1: 4 Sc in Magic Ring (4)
Round 2: *Inc* all around (8)
Round 3-7: *Sc* all around (8)
Finish off, stuff, and refer to arms/legs assembly.
Arms/Legs Assembly:
Pin each limb on the body, making sure the limbs lay flat and stable the body. Sew on.
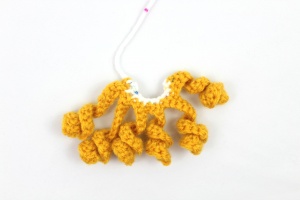
Tail:
In Hair Color
Round 1: Make a Magic Ring. Don’t close the ring yet. *Ch 17. Dc in 2nd Ch from hook. Dc 2 in same st. 3 Dc in each of the next 3 St. Sc in next 12 St. Now we meet the Magic Ring. Sc in Magic Ring* 3 times. Close magic ring and sew to the back of the Unicorn.

![]()
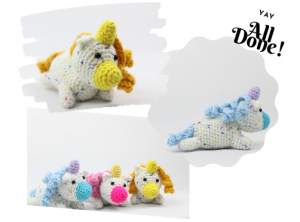
If you finished this pattern, I would be SO HAPPY if you could upload a picture to the Ravelry project page, or tag me on Instagram @StringyDingDing, or “try” it on Pinterest.


6 Comments
Not sure how to sew mane on head?? Fold in half or sew behind ears?? Along a row?
Hi Sheri! I recommend pinning the mane to the head, right behind the horn. Pin the mane on so it’s straight and going down in a line 🙂 To sew it on, use yarn matching the unicorn’s head. Place the yarn onto a sewing needle. Then repeat the process of inserting the needle into the unicorn’s head, then into the next closest stitch of the mane. (Be sure you’re inserting your needle through the original Chain 15 piece of the mane – since this matches the color you’re using to sew the mane to the head).
Continue to sew from the next stitch of the head, to the next stitch of the mane, and back into the head. Repeat this until the mane is fully sewed on. Once it’s secured, tie the tail end of yarn into a firm knot. Bring the knot into the unicorn head to hide the excess yarn/knot. Cut any excess yarn. Then you’re done! If I can help clarify anything, please let me know 🙂 ❤️
What do you mean when you say to pin something on?
you use ball pins to attach the mane to the head to make sure it’s in the correct place then sew it on
How do you get the mane to be curly?
How do you get the mane to curl?