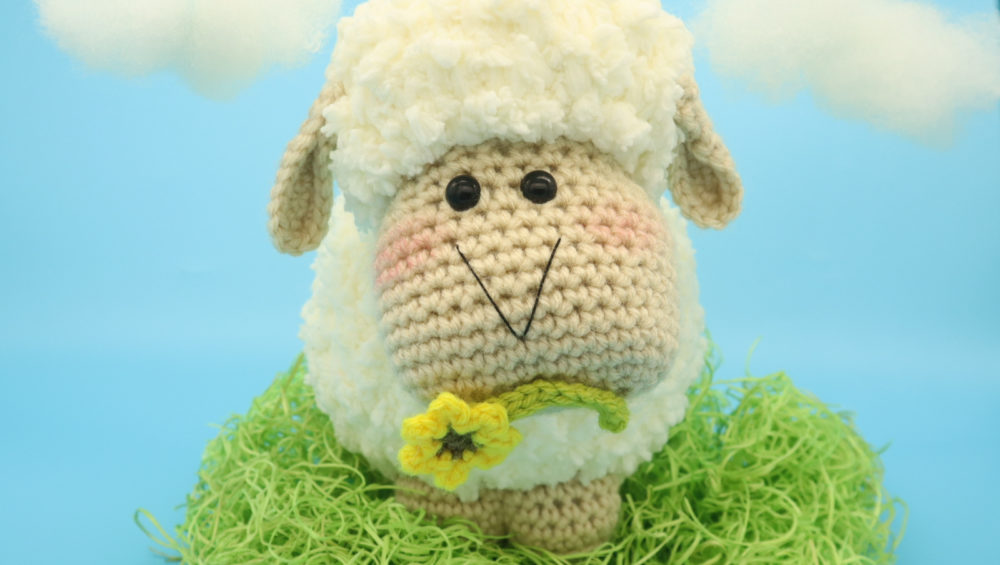
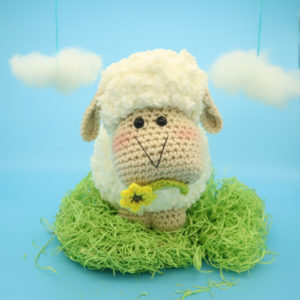
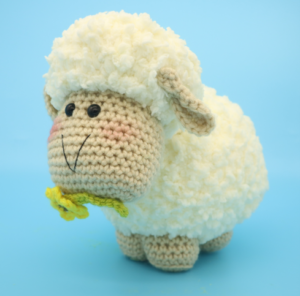
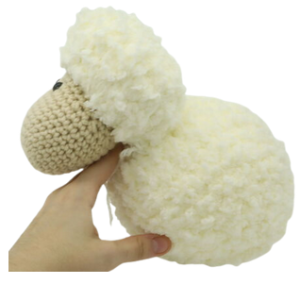
Sheep with Flower Amigurumi – Free Crochet Pattern

Print this pattern out – purchase the PDF version here!

 Supplies:
• Yarn 4/Medium Weight in…
Cream color, Yellow, Brown, Green, and a Fuzzy Yarn. I used Bernat’s Sheepy yarn in the color Cotton Tail.
•4mm Crochet Hook
•Tapestry needle
•Scissors
•Stuffing
•10mm safety eyes
•Black Embroidery Thread
Additional Information:
Difficulty: Intermediate
• Before we get started…
Working with fuzzy yarn is a challenge IF you don’t know how to use it. It’s nearly impossible to see your stitches, but I have found a way to use fuzzy yarn with ease. Instead of trying to see your stitches, just crochet where you THINK the next stitch might be and make a mental note of the amount of stitches you’ve made as you’re making them.
This means you’ll be crocheting blind, but since you’re keeping track of how many stitches you’ve made, the outcome will be about the same as if you could actually see your stitches.
If you’re almost to your stitch marker end up with too little stitches, make up the amount by adding a few increases at the last few stitches. If you have too many stitches, simply skip a few until you meet your stitch marker. Small mistakes like having too little or too many stitches will go unnoticed in the end, because the fuzzy yarn easily covers any mistakes. Don’t be a perfectionist with fuzzy yarn!
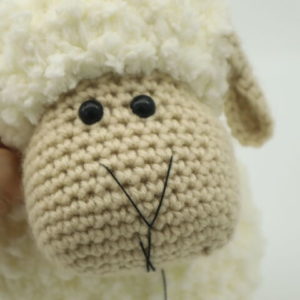
Head:
In cream color
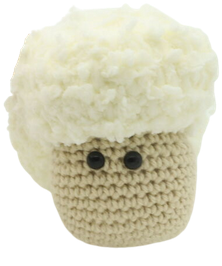
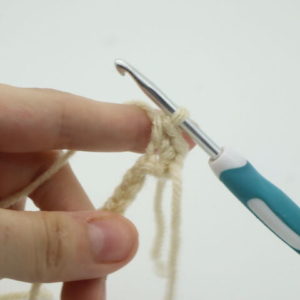
Round 1: Ch 10 (Pic 1). Sc 3 times in the 2nd Ch from hook. Add a stitch marker in the first Sc you made – this will mark our rounds (Pic 2). Sc in the next 7 st. Sc 3 times in the last Ch (Pic 3). Turn to the OTHER side of the chain, where we haven’t worked any stitches yet (Pic 4). Working on that other side of the chain, Sc in the next 7 st (Pic 5-6, Stitch Count: 20)
1. 2.
2. 3.
3.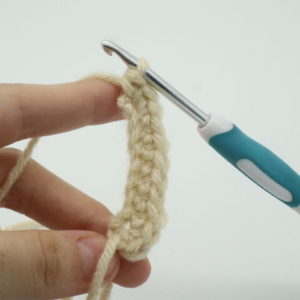 4.
4.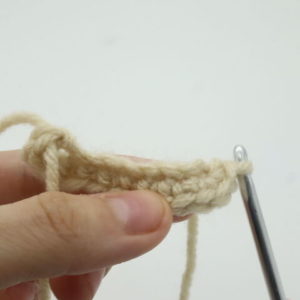 5.
5. 6.
6.
Round 2: *Inc* in the next 3 st, Sc in the next 7 st, *Inc* in the next 3 st, Sc in the next 7 st (26)
Round 3: *Inc in the next st, Sc in the next st* 3 times, Sc in the next 7 st, *Inc in the next st, Sc in the next st* 3 times. Sc in the next 7 st (32)
Round 4-10: *Sc* all around (32)
Round 11: Sc in the next 15 st. Sc in the next st and add an eye stitch marker in the stitch you just made. This will mark where to place the eyes later. Sc in the next 2 st. Sc in the next st and add an eye stitch marker in the stitch you just made. Sc in the next 13 st (32)
Round 12: Sc in the next 3 st, Repeat *Dec, Sc in the next st* 3 times. Sc in the next 7 st. Repeat *Dec, Sc in the next st* 3 times, Sc in the next 4 st (26)
Round 13: *Sc* all around (26)
Round 14: Sc in the next 3 st, *Dec* 3 times, Sc in the next 9 st, *Dec* 3 times, Sc in the next 2 st (20)
Add eyes into the marked areas now.
Round 15: Change to Fuzzy White Yarn. *Inc* all around (40)
Round 16-18: *Sc* all around (40)
Round 19: *Dec* all around (20)
Stuff the head/nose firmly now. Continue stuffing after each round.
Round 20: *Dec, Sc in the next st* 6 times, Sc in the next 2 st (14)
Round 21: *Dec* all around (7)
Finish off now, leaving a long tail for sewing. Sew the remaining stitches closed. Once done, weave in ends.
Body:
In Fuzzy yarn
Round 1: 6 Sc into a Magic Ring (6)
Round 2: *Inc* all around (12)
Round 3: *Inc, Sc in the next st* all around (18)
Round 4: *Inc, Sc in the next 2 st* all around (24)
Round 5: *Inc, Sc in the next 3 st* all around (30)
Round 6: *Inc, Sc in the next 4 st* all around (36)
Round 7: *Inc, Sc in the next 5 st* all around (42)
Round 8-12: *Sc* all around (42)
Round 13: *Dec, Sc in the next 5 st* all around (36)
Round 14: *Dec, Sc in the next 4 st* all around (30)
Round 15: *Dec, Sc in the next 3 st* all around (24)
Stuff the body now. Continue stuffing after each round.
Round 16: *Dec, Sc in the next 2 st* all around (18)
Round 17: *Dec, Sc in the next st* all around (12)
Round 18: *Dec* all around (6)
Finish off now, leaving a long tail for sewing. Sew the remaining stitches closed. Weave in ends.
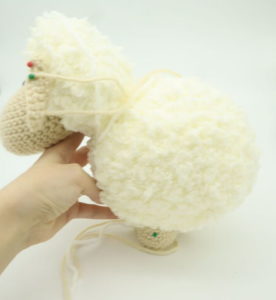
Pin the head onto the body as shown. Sew on using a regular 4/medium weight yarn in a white color. Once sewn on firmly, weave the yarn in and cut any excess yarn.
Feet: (Make 2)
In cream color
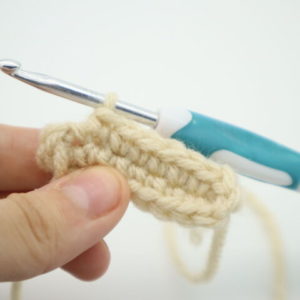
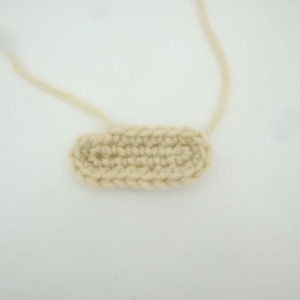
Round 1: Ch 9 (Pic 1). Sc 3 times in the 2nd Ch from hook. Add a stitch marker in the first Sc you made – this will mark our rounds (Pic 2). Sc in the next 6 st. Sc 3 times in the last Ch (Pic 3). Turn to the OTHER side of the chain, where we haven’t worked any stitches yet (Pic 4). Working on that other side of the chain, Sc in the next 6 st (Pic 5-6, Stitch Count: 18)
1. 2. 3. 4. 5. 6.
Round 2: *Inc* in the next 3 st. Sc in the next 6 st. *Inc* in the next 3 st. Turn to the OTHER side of the chain, where we haven’t worked any stitches yet. On that other side, Sc in the next 6 st (24)
Round 3: Repeat *Inc, Sc in the next st* 3 times. Sc next 6 st. Repeat *Inc, Sc in the next st* 3 times, Sc in the next 6 st (30)
Round 4: In the BLO, *Sc* all around (30)
Round 5-7: In BOTH loops, *Sc* all around (30)
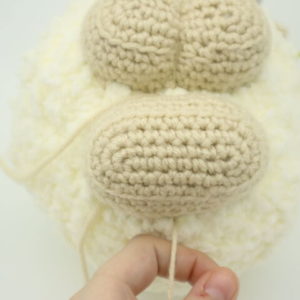
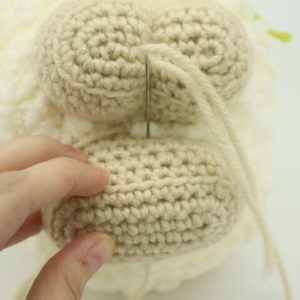
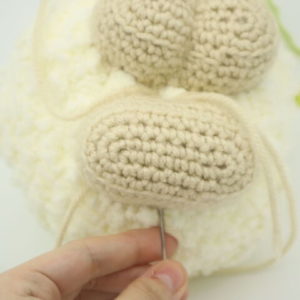
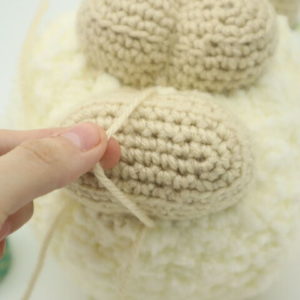
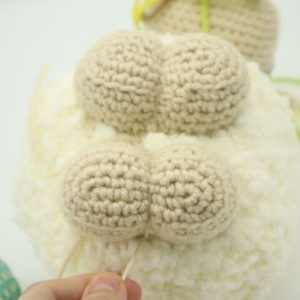
Finish off, leaving a long tail for sewing. Pin the first foot on as shown (Pic 1). Place the second foot behind the first one. Sew on, making sure to stuff before fully sewing closed. Once fully sewn on, bring the remaining yarn to the middle of the foot as shown (Pic 2). Insert the needle on the opposite side (Pic 3), and pull the needle out at the opposite side (Pic 4). This will make the yarn go over the foot as shown (Pic 5). Pull the yarn on your needle firmly. This will divide the foot into two sections! (Pic 6). Now, tie a firm knot with the remaining yarn close to the base of the amigurumi. Bring this knot into the amigurumi’s body and cut any excess yarn.
1. 2.
2. 3.
3. 4.
4. 5.
5. 6.
6.
Ears: (Make 2)
In cream color
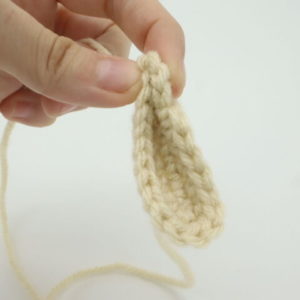
Round 1: Ch 8. Sc 3 times in the 2nd Ch from hook. Add a stitch marker in the 1st stitch you made. Sc in the next 5 st. Sc 3 times in the last Ch. Turn to OTHER side of Ch where we haven’t made any stitches yet. Working on that other side, Sc in the next 5 st (16)
Round 2: *Inc* in the next 3 st, Sc in the next 5 st, *Inc* 3 times, Sc in the next 5 st (22)
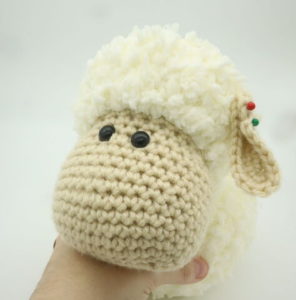
Finish off, leaving a long tail for sewing. Fold the ear in half (Pic 2). Pin onto the toy’s head as shown and sew on (Pic 3). Once done, weave in ends and cut excess yarn.
1. 2.
2. 3.
3.
Nose:
In black embroidery thread
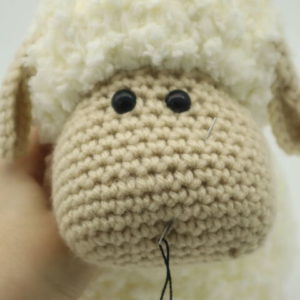
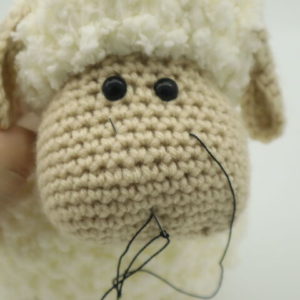
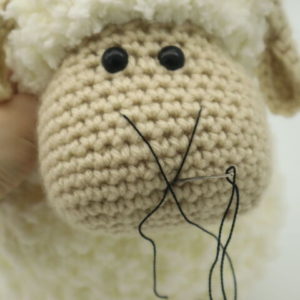
Insert needle with thread into the middle bottom area as shown (Pic 1) and pull needle out at the top right, under the toy’s eye as shown (Pic 1). Reinsert the needle into the original insertion spot (Pic 2) and pull needle out at the top left, under the toy’s eye as shown (Pic 2). Reinsert needle into the original insertion spot (Pic 3). Tie the ends of thread into a firm knot, then bring into the toy’s head to hide, cutting any excess yarn. Done! (Pic 4).
1. 2.
2. 3.
3. 4.
4.
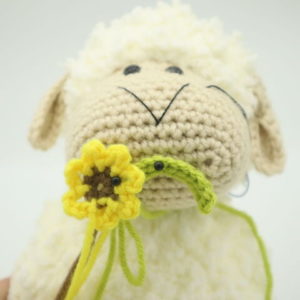
Flower:
In brown yarn
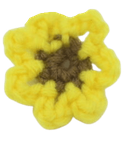
Round 1: 6 Sc into a Magic Ring (6)
Round 2: Change to yellow. Repeat *SlSt in the next st, Ch 5, SlSt in the next st* 6 times.
Finish off. Weave the tail ends of yarn and cut any excess yarn.
Stem:
In green yarn
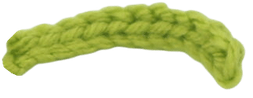
Row 1: Ch 8. SlSt in the 2nd Ch from hook, SlSt in the next 6 st
Finish off, leaving a long tail for sewing. Sew the stem to the flower. After this, pin the flower onto the head as shown and sew on. Once done, weave in ends and cut any excess yarn.
Done! If you made this sheep, I would LOVE to see it! You can show me by posting a picture in the comments section underneath this post.


1 Comment
I’m still new to crochet, & haven’t used big’r yarn yet, so I improvised from my small selection & this is my take on your sheep 🐑 I call her ‘Olive the Ewe’ (I♡U) Thanks for your patterns… can’t wait to try the Frenchie next since I am a bulldog mommy 🥰