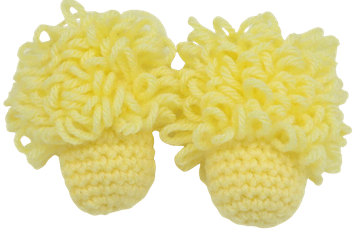
Spring Alpacas Amigurumi – Free Crochet Pattern
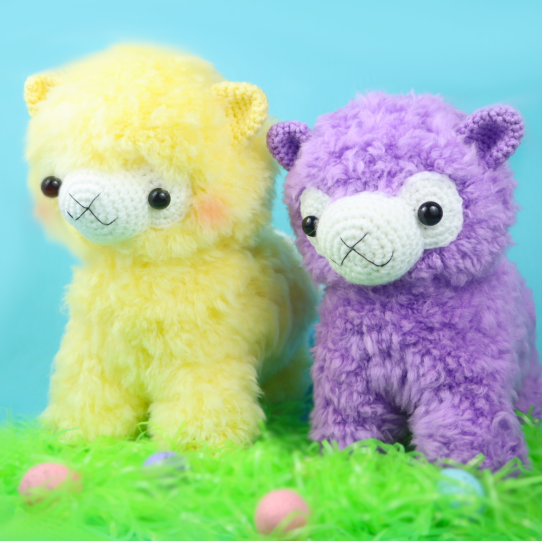
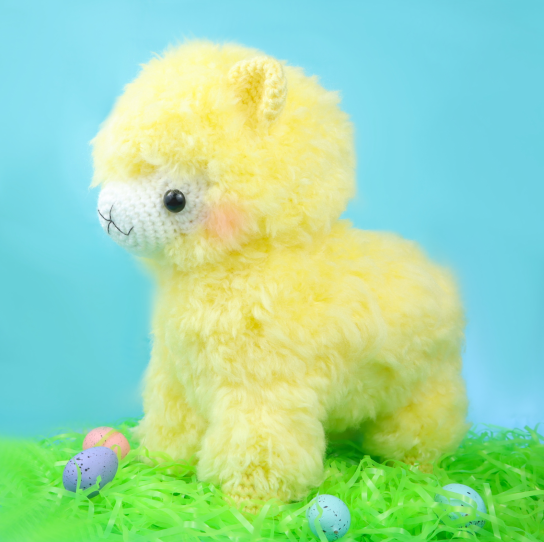
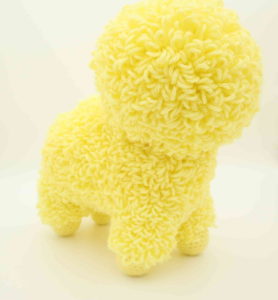
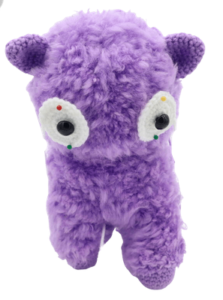
Hello, everyone! This week we have a suuuuuper fun and adorable pattern – a free spring alpaca amigurumi crochet pattern! The best thing about this pattern is that it involves using loop stitches, so you don’t need to use furry yarn in order to make this cute alpaca! Also, the body is crocheted all together, so there’s nearly no sewing needed. Although this pattern is called the Spring Alpaca Amigurumi, you can definitely make an alpaca for any time of the year.
Please note that because this pattern uses loop stitches, it takes a long time to make an alpaca. I would say this project will take a few days to a week depending on how much you work on it.
Print this pattern out – purchase the PDF version here!

 Supplies:
• Yarn 4/Medium Weight in…
Main color and white
•4mm Crochet Hook
•Tapestry needle
•Scissors
•16mm Safety Eyes
•Black embroidery thread
•Stuffing
•Wire pet brush (I bought mine at Dollar Tree)
Additional Information:
Difficulty: Advanced
Let’s get started!
This alpaca is SUPER cute! This pattern uses loop stitches, which means you won’t have to work with fuzzy yarn in order to make a fuzzy alpaca! We simply cut and brush out the loops to make the fur. I recommend making a longer loop for longer fur, and shorter loops for shorter fur. The alpaca’s body is all crocheted together into 1 piece, meaning you will not have to sew the body together. However, since this pattern makes a big toy and uses loop stitches, it takes a while to finish this project. It’s definitely well worth all the effort!
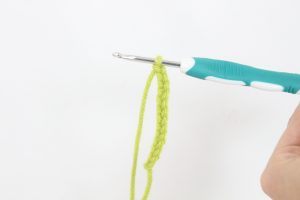
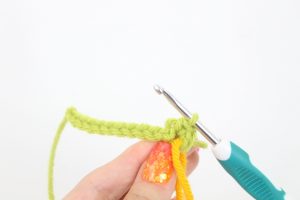
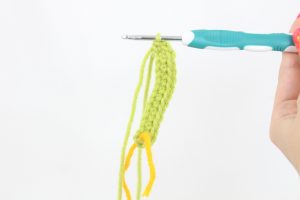
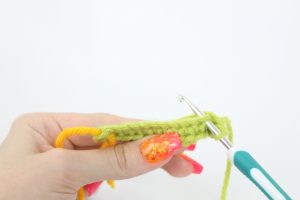
How to do a loop stitch:
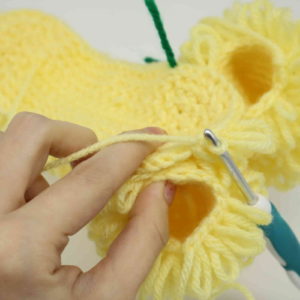
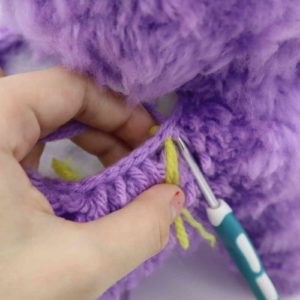
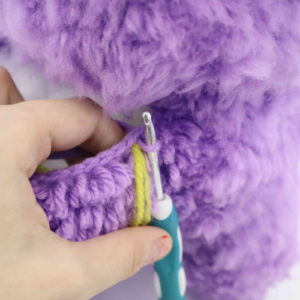
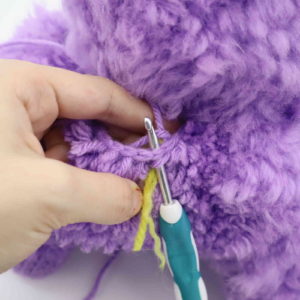
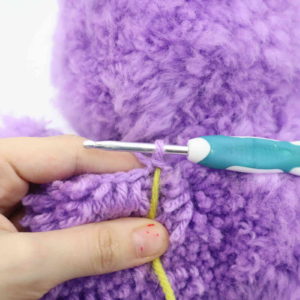
Insert your hook into the next stitch (Pic 1). Hold the yarn as shown (Pic 2). Pull the yarn on the left with your hook through the stitch (Pic 3-5). You will have 2 loops on your hook (Pic 5). Yarn over and pull through both loops (Pic 6-8). You’ve made 1 loop stitch, it will be a loop at the back. Pull that loop from the back to the front (Pic 9-10), and keep crocheting!
Legs: (Make 4)
Start in Main Color. We will start by making the legs. After creating all of the legs, we will create the belly, then crochet the legs to the belly.
Round 1: 6 Sc into a Magic Ring (6)
Round 2: *Inc* all around (12)
Round 3: *Inc, Sc in the next st* all around (18)
Round 4-7: *Sc* all around (18)
Round 8-16: Create 1 loop stitch all around (18)
Finish off and weave in ends.
Bottom body patch to connect to legs:
Start in Main Color. When the rest of this pattern calls for increases or decreases, you can create it as you usually do with no loop stitch involved.
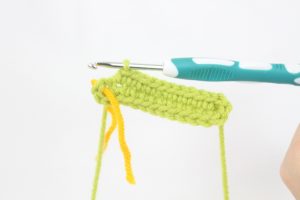
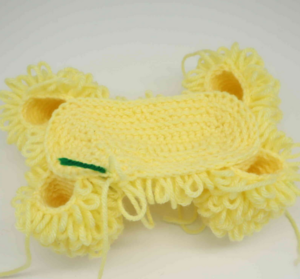
To start the body, we will create a chain and work completely around the chain to form a round.
Round 1: Ch 18 (Pic 1). Sc 3 times in the 2nd Ch from the hook (Pic 2). Sc in the next 15 st. Make 3 Sc in the last Ch (Pic 3). Now that we’re at the end of our chain, we will continue working on the OTHER side of the chain, where we haven’t made any stitches yet (Pic 4). Turn to the other side of the Chain and Sc in the next 15 st (Pic 5, Stitch count: 36)
1. 2.
2. 3.
3. 4.
4. 5.
5.
Round 2: *Inc* in the next 3 st, Ls in the next 15 st, *Inc* in the next 3 st, Ls in the next 15 st (42)
Round 3: *Inc, Ls in the next st* 3 times, Ls in the next 15 st, *Inc, Ls in the next st* 3 times, Ls in the next 15 st (48)
Round 4: *Inc, Ls in the next 2 st* 3 times, Ls in the next 15 st, *Inc, Ls in the next 2 st* 2 times, Ls in the next 15 st (54)
Round 5: Ls in the next 2 st, *Inc, Ls in the next 3 st* 3 times, Ls in the next 16 st, *Inc, Ls in the next 3 st* 3 times, Ls in the next 12 st (60)
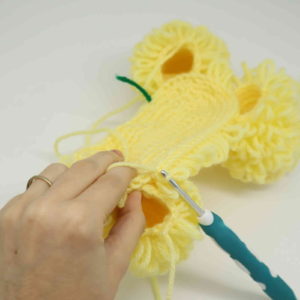
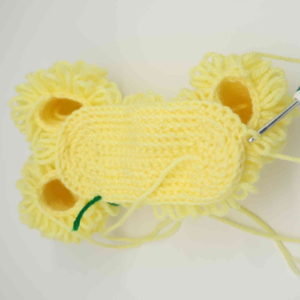
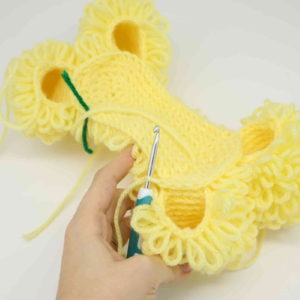
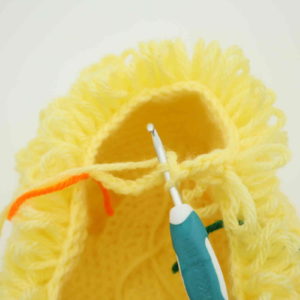
Round 6: Ls in the next 3 st (Pic 1). Line up a leg to the body patch, making sure the stitches align (Pic 2). Sc going through BOTH the leg and the patch, Sc in the next 5 st (Pic 3-4).
1. 2.
2. 3.
3.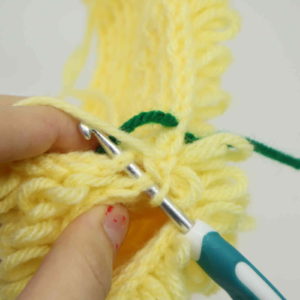 4.
4.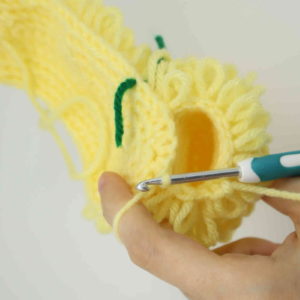
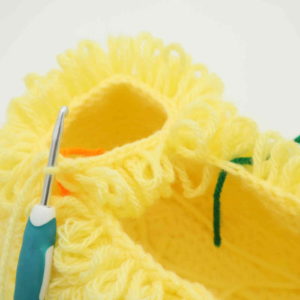
Going through just the body patch, Ls in the next 4 st (Pic 5-6). Line up the second leg to the body (Pic 7). Going BOTH through the leg and the body, Sc in the next 5 st (Pic 8).
5. 6.
6. 7.
7. 8.
8.
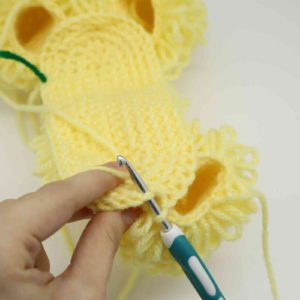
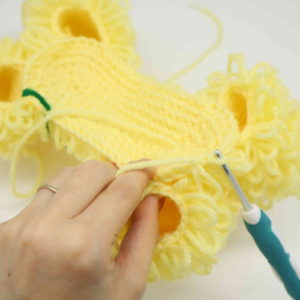
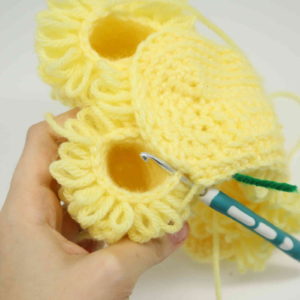
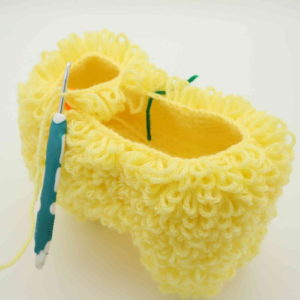
Going through just the body patch, Ls in the next 17 st (Pic 9-10). Line up a leg to the body patch (Pic 11). Going through BOTH stitches Sc in the next 5 st (Pic 11-12).
9. 10.
10. 11.
11. 12.
12.
Going on just the body patch Ls in the next 4 st (Pic 13). Line up the last leg to the body. Working through BOTH the legs and the patch, Sc in the next 5 st (Pic 14-15). Working on just the body patch, Ls in the next 12 st. (Stitch Count: Count the stitches on the body patch and the stitches on the leg – NOT the stitches connecting each leg. Stitch count is 92. Each leg will have 13 stitches.)
13. 14.
14. 15.
15. 16.
16.
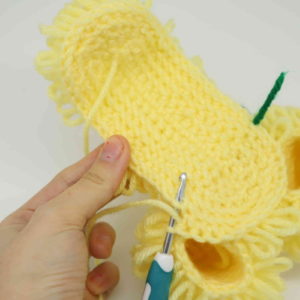
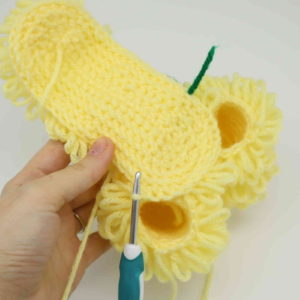
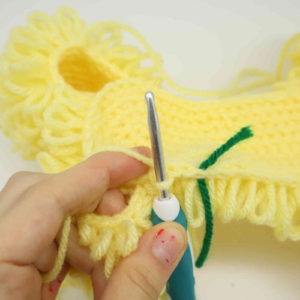
Round 7: Ls in the next 3 st. Working on the leg, Ls in the next 13 st (Pic 2-3). Working back onto the body, Ls in the next 4 st (Pic 4). Working on the leg, Ls in the next 13 st. Working back on the body, Ls in the next 17 st. Working on the leg, Ls in the next 13 st. Working on the body, Ls in the next 4 st. Working on the leg, Ls in the next 13 st. Working on the body, Ls in the next 12 st (92)
1. 2.
2. 3.
3. 4.
4.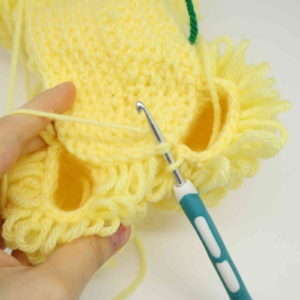
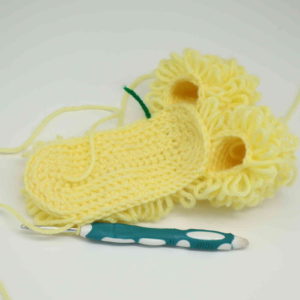
Round 8-19: *1 Ls in each st* all around (92)
Round 20: *Dec, Ls in the next 5 st* 13 times, Ls in the last st (79)
Round 21: *Dec, Ls in the next 4 st* 13 times, Ls in the last st (66)
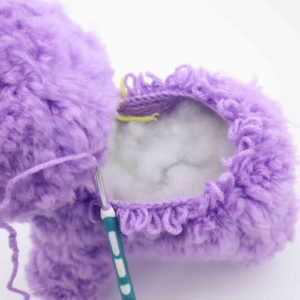
Do not move your stitch marker used in Round 21. Keep it in place by marking the first Dec in Round 21! In the next round we will be forming the neck, which will work into the head.
Round 22: Ch 12 (Pic 1). Count the next 43 stitches. Sc in that 43rd st (Pic 2). This will separate the head from the back. Now we are forming the head. Sc in the next st and add a different colored st marker to the Sc just made. This is the first round of the head. Ls in the next 23 st (Pic 3). Now we meet the Ch. Ls in the next 12 ch (Pic 5-7). (36)
1.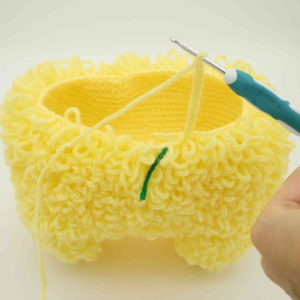 2.
2. 3.
3. 4.
4. 5.
5. 6.
6.
Round 23: Repeat *Inc, Ls 5* all around (42)
Round 24: Repeat *Inc, Ls 6* all around (48)
Round 25: Repeat *Inc, Ls 7* all around (54)
Round 26: Repeat *Inc, Ls 8* all around (60)
Round 27: Repeat *Inc, Ls 9* all around (66)
Round 28-38: Ls all around (66)
Round 39: Repeat *Dec, Ls 9* all around (60)
Round 40: Repeat *Dec, Ls 8* all around (54)
Round 41: Repeat *Dec, Ls 7* all around (48)
Round 42: Repeat *Dec, Ls 6* all around (42)
Round 43: Repeat *Dec, Ls 5* all around (36)
Round 44: Repeat *Dec, Ls 4* all around (30)
Round 45: Repeat *Dec, Ls 3* all around (24)
Stuff the head here. Continue stuffing after each round.
Round 46: Repeat *Dec, Ls 2* all around (18)
Round 47: Repeat *Dec, Ls 1* all around (12)
Round 48: Repeat *Dec* all around (6)
Finish off, leaving a long tail for sewing. Sew the remaining
stitches closed. Weave in ends.
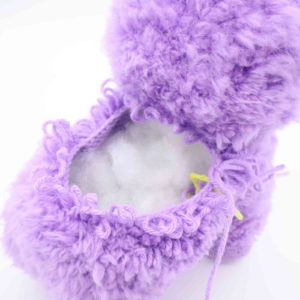
Closing Back of Alpaca:
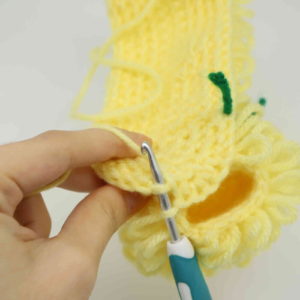
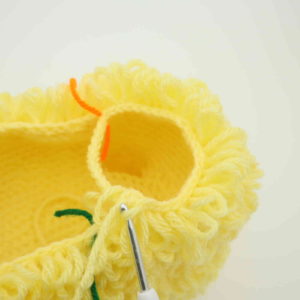
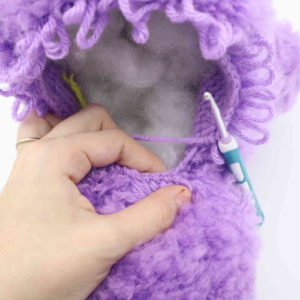
Now we will work on closing the back. Attach your hook into where we left the original stitch marker in the alpaca’s back (Pic 1). Yarn over and pull through your main color yarn (Pic 2-4). Now Ls in the next st (Pic 5). Move the old stitch marker into the stitch you just made – this will mark your rounds from now on (Pic 6).
1.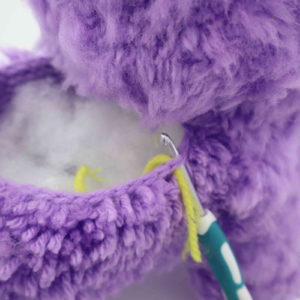 2.
2. 3.
3. 4.
4. 5.
5. 6.
6.
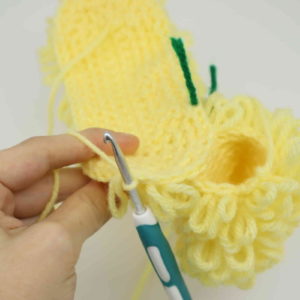
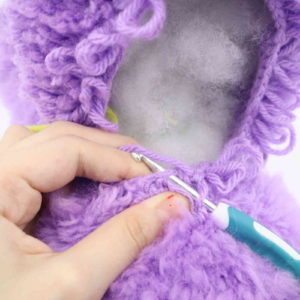
Round 1: Ls in the next 7 st. Repeat *Dec, Ls in the next 7 st* all around. (48) Note that once you meet the neck area (Pic 2), this is where we made our 12 chains earlier to form the neck. Simply crochet across those 12 chains (Pic 3-4). If you’re having a hard time seeing the stitches in the neck area, or are coming out with a slightly different number, that’s completely fine. You can skip stitches if necessary, or add a few increases if necessary. Since the neck area is a bit hard to see, it’s hard to get it totally perfect, which is why it’s fine to skip or add stitches to come out with the right stitch count if you’re having a hard time seeing the stitches.
1. 2.
2. 3.
3. 4.
4. 5.
5.
Round 2: *Dec, Ls in the next 6 st* all around (42)
Round 3: *Dec, Ls in the next 5 st* all around (36)
Round 4: *Dec, Ls in the next 4 st* all around (30)
Stuff the legs and body now. Continue stuffing the body after each round.
Round 5: *Dec, Ls in the next 3 st* all around (24)
Round 6: *Dec, Ls in the next 2 st* all around (18)
Round 7: *Dec, Ls in the next 1 st* all around (12)
Round 8: *Dec* all around (6)
Finish off, leaving a long tail for sewing. Sew the remaining stitches closed and weave in ends.
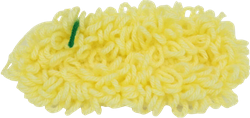
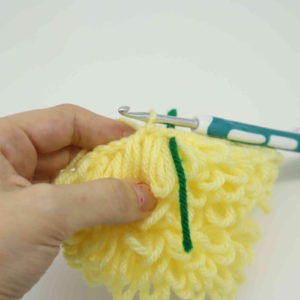
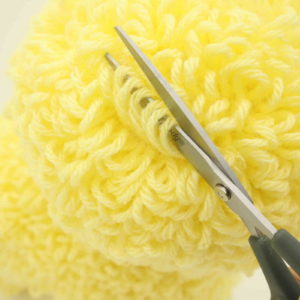
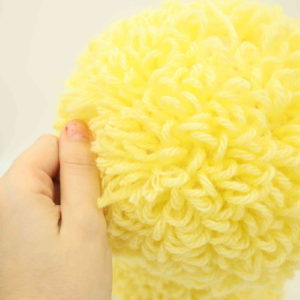
Making it furry!
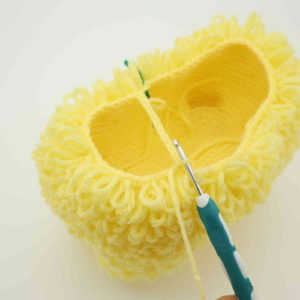
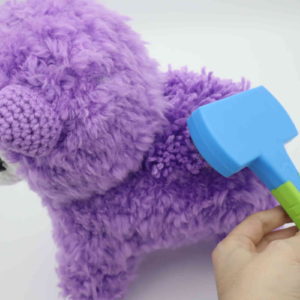
Your alpaca will have loop stitches all over (Pic 1). Cut each loop stitch (Pic 2). I worked in small sections to make sure each loop stitch is cut (Pic 3). Once every loop stitch is cut, use a wire pet brush and brush in the same sections to make it furry (Pic 4).
1. 2.
2. 3.
3. 4.
4.
Eyes: (Make 2)
In White

Round 1: 6 Sc into a Magic Ring (6)
Round 2: *Inc* all around (12)
Round 3: *Inc, Sc in the next st* all around (18)
Round 4: *Inc, Sc in the next 2 st* all around (24)
Finish off, leaving a long tail for sewing. Place a 16mm safety eye in the middle of the circle. Pin the eyes onto the toy as shown and sew on. Weave in ends.
Nose:
In white
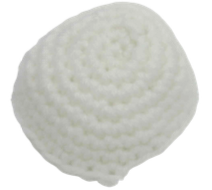
Round 1: 6 Sc into a Magic Ring (6)
Round 2: *Inc* all around (12)
Round 3: *Inc, Sc in the next st* all around (18)
Round 4: *Inc, Sc in the next 2 st* all around (24)
Round 5: *Inc, Sc in the next 3 st* all around (30)
Round 6-8: *Sc* all around (30)
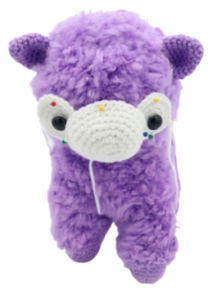
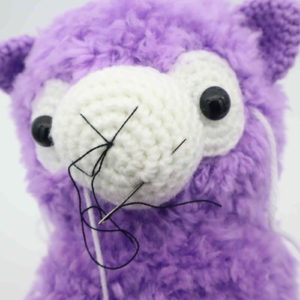
Finish off, leaving a long tail for sewing. Pin the nose on between the eyes, slightly below both eyes. Sew on, stuffing the nose before it’s fully sewn on. Once done, weave in ends.
Ears: (Make 2)
In main color
Round 1: 6 Sc into a Magic Ring (6)
Round 2: *Inc* all around (12)
Round 3: *Sc* all around (12)
Round 4: *Inc, Sc in the next st* all around (18)
Round 5-7: *Sc* all around (18)
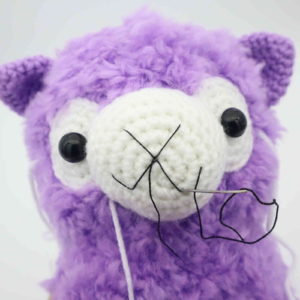
Finish off, leaving a long tail for sewing. Place a 16mm safety eye in the middle of the circle. Pin the eyes onto the toy as shown and sew on. Weave in ends.
TAIL: Make an additional ear, except use loop stitches when a Sc is called for. Once done, cut and brush the loop stitches. Pin the tail at the butt of the toy and sew on!
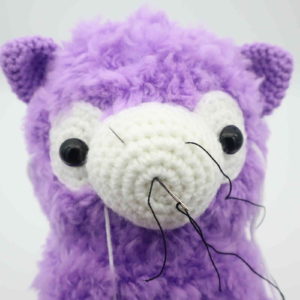
Mouth:
In black embroidery thread
Insert needle with embroidery thread into the middle of the toy’s nose, then pull the needle out at the right as shown (Pic 1). Reinsert needle into the middle of the nose, and pull the needle out at the left as shown (Pic 2).
1.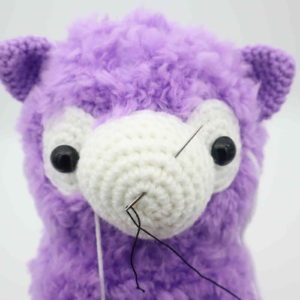 2.
2.
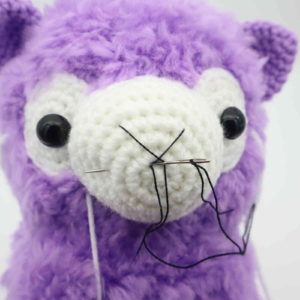
Reinsert needle into the middle, then pull the needle out to the left as shown (Pic 3). Reinsert needle a few stitches below and pull the needle out at the middle as shown (Pic 4).
3. 4.
4.
Reinsert needle into the left area again (Pic 5). Pull needle back out at the middle (Pic 6).
5. 6.
6.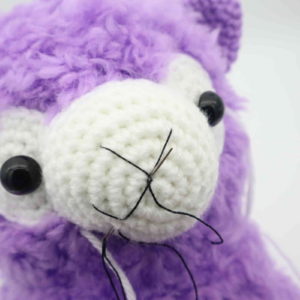
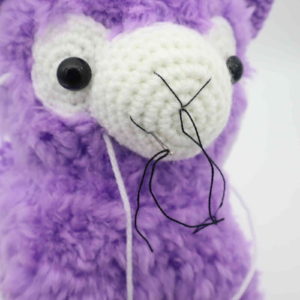
Reinsert needle to the bottom right, and pull needle out a few stitches up (Pic 7). Reinsert needle into the left area as shown (Pic 8). Tie the ends of thread into firm knots, bring the knots inside the toy’s muzzle to hide. Cut any excess yarn.
7. 8.
8.
Done! If you made an alpaca, I would LOVE to see! You can show me by posting a picture in the comments underneath this post.


9 Comments
Hi,
I just finished making this! https://www.instagram.com/p/CbTYsw9vL-8/?utm_source=ig_web_copy_link
Very cool pattern! I started it on Monday and it was a fun project to complete this week! He is also a lot bigger than I expected but it works out. Also cutting those loop stitches was nerve raking because I was sure it would somehow come apart.
Thank you for the pattern!
I cannot find the pictures for the explanation of the loop stitch. 🤷♀️ Been searching on Youtube for a guide but there are so many. Please help, I really wanna do this pattern but am scared I will ruine it with wrong loops. Thank you. 👋🦙
I’m having the same issue unfortunately. This pattern is so cute though, I hope it was just a slip-up and she’s able to add the pictures
Need help on the loop stitch. Did not see it in the pattern.
The Loop Stitch is in the pattern. Maybe she added it but it is there now~
This is soooo cuuuute!!! But I’m a little intimidated by it because I’ve never done a project with a loop stitch before. Do you have a smaller one to get me started? Thanks so much!!!
This pattern is adorable! I’d love to make it. Do you remember roughly how much yarn you used for it? Thanks so much!
If it still helps you or anyone else: I used 2 skeins of basic acrylic yarn for the main colour, dk weight (recommended 4 mm hook), 50 gr and 155m for each skein (so 100 gr and 310m). Since I tend to crochet with a looser tension, I used a 3mm hook, though.
Corrigendum: In the pattern for the body, round 4, in the second process of increases and ls it should be 3 times instead of 2 times, no? Because in round 3 we have 48 stitches and in round 4 we should end up with 54 stitches (2x 3x increases = 6 stitches instead of 1x 3x increases + 1x 2x increases = 5). I’m in the process of making this, thank you for the pattern 🙂