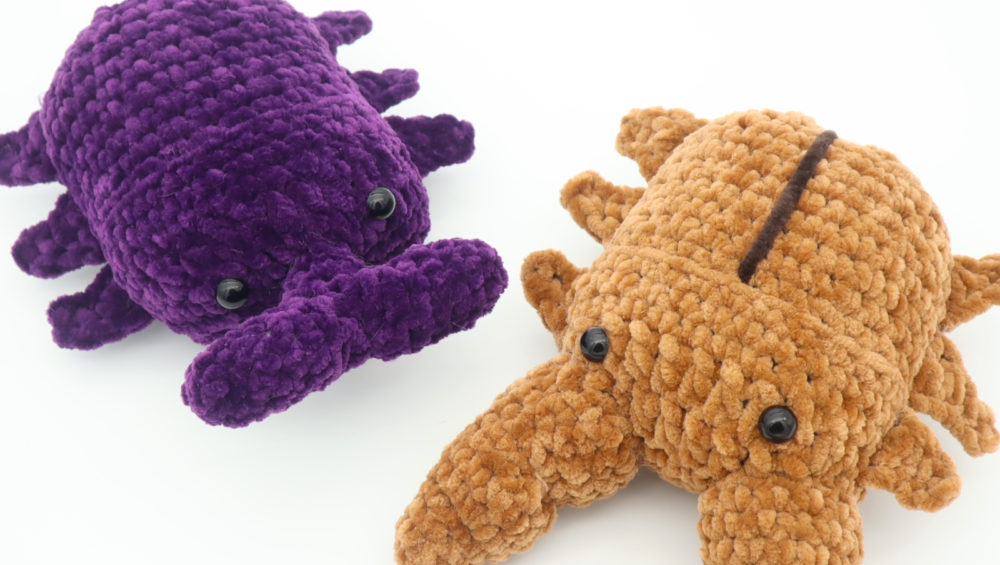
Stag & Dynastid Beetle Amigurumi – Free Crochet Pattern
Print this pattern out – purchase the PDF version here!


 Supplies:
• Yarn 6/Super Bulky Weight in:
Brown, black, or purple
•7mm Crochet Hook
•Tapestry needle
•Scissors
•Stuffing
•12mm safety eyes for face
Additional Information:
Difficulty: Easy
Let’s get started!
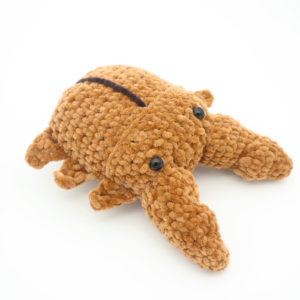
The Stag and Horned Dynastid beetle are some of the most famous beetles around… well, with exception of John, George, Paul, and Ringo.
These bugs are fun to make, and especially cute and large when you use plush yarn. Any chenille yarn will work out perfectly for this project, but you can also use blanket yarn, or regular 4 weight yarn if you use the yarn’s recommended hook size.
To make this bug, we will start at the head and work down the body. next, we will make the arms and nose. Let’s get started!
Head/Body:
In brown, black, or purple

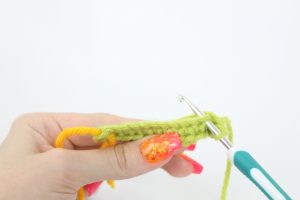
We will create the body by creating a chain and working completely around the chain to form a round.
Round 1: Ch 10 (Pic 1). Sc 3 times in the 2nd chain from the hook (Pic 2). Sc in the next 7 st. Sc 3 times in the last Ch (Pic 3). Working on the OTHER the side of the chain, where we haven’t made any stitches yet (Pic 4), Sc in the next 7 st (Pic 5, Stitch Count: 20)
1.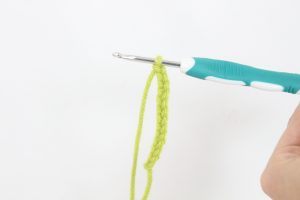 2.
2.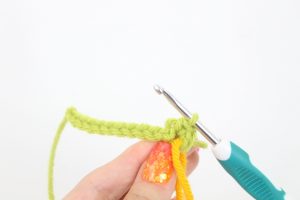 3.
3.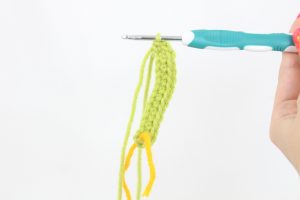 4.
4. 5.
5.
Round 2: *Inc* in the next 3 st, Sc in the next 7 st, *Inc* in the next 3 st, Now we’re on the other side, Sc in the next 7 st (26)
Round 3: Sc in the next 6 st, Dc in the next 8 st, Sc in the next 12 st (26)
Round 4: Sc in the next 6 st, Dc in the next 9 st, Sc in the next 11 st (26)
Now we will add in the safety eyes. Add an eye into the 9th and 15th stitch in Round 4.
Round 5-7: *Sc* all around (26)
Round 8: Sc in the next 4 st. In the BLO (Back Loop Only), Sc in the next 15 st, Working in BOTH stitches, Sc in the next 7 st (26)
Round 9-15: *Sc* all around (26)
Round 16: Repeat *Dec, Sc in the next 3 st* 5 times. Sc in the next st (21)
Round 17: Repeat *Dec, Sc in the next 2 st* 5 times. Sc in the next st (16)
Stuff the toy’s body firmly here. Continue stuffing after each round.
Round 18: Repeat *Dec, Sc in the next st* 5 times. Sc in the next st (11)
Round 19: Repeat *Dec* 5 times. Sc in the next st (6)
Finish off, leaving a long tail for sewing. Sew the remaining stitches closed and weave in ends.
Arms: (Make 6)
In brown, black, or purple

Row 1: Ch 5. Sc in the 2nd Ch from the hook, Hdc in the next st, Dc in the next st, Trc in the last st.
Finish off, leaving a long tail for sewing. Pin 3 legs on each side as shown and sew on. Once done, weave in ends and cut the excess yarn.

Stag Nose: (Make 2)
In brown, black, or purple

Round 1: 6 Sc into a Magic Ring (6)
Round 2-3: *Sc* all around (6)
Round 4: *Inc, Sc in the next st* all around (9)
Round 5: Sc in the next 3 st, Inc in the next 3 st, Sc in the next 3 st (12)
Round 6: *Sc* all around (12)
Round 7: Sc in the next 3 st, *Dec* 3 times, Sc in the next 3 st (9)
Round 8: *Sc* all around (9)
Round 9: Sc in the next 3 st, *Inc* in the next 4 st, Sc in the next 2 st (13)
Round 10-12: *Sc* all around (13)
Finish off, leaving a long tail for sewing. Stuff each piece firmly. Pin each piece onto the bug as shown. Sew on. Once done, weave in ends.

Note: If you’re making the stag, we need to form it’s wings. Take a dark brown piece of yarn and place it on a needle. Insert it where shown (Pic 1), and reinsert the needle where the ridge of loops is as shown (Pic 2). Once done, weave in ends.
1. 2.
2. 3.
3.
Dynastid Nose:
In brown, purple, or black

Round 1: 6 Sc into a Magic Ring (6)
Round 2-6: *Sc* all around (6)
Round 7: Sc in the next 4 st (Pic 1). Turn your work (Pic 2). Skip the next st, Sc in the next st, Skip the next st, Sc in the next st (Pic 3).
1. 2.
2. 3.
3.
Finish off the first piece now. When making the second piece, don’t finish off here. Instead, continue onto the next round.
Round 8: Line up the stitches where curves are (Pic 1). Going through BOTH pieces, Sc next 2 st together (Pic 2-3). This will connect the horns together.
1. 2.
2. 3.
3.
Now Sc 1 time going between both horns (Pic 4-5). Place your stitch marker into the stitch you just made, this will mark the rounds.
4. 5.
5.
Working on the left horn, Sc in the next 3 st (Pic 6-7).
6. 7.
7.
Sc 1 time between both horns (Pic 8-9).
8. 9.
9.
Working on the other side of the horn, Sc in the next 3 st (Pic 10-11). (Stitch Count: 8. Do NOT count the first 2 stitches we made, which connect the horns together. We will not crochet into those stitches, as they simply connect the horns together.)
10. 11.
11. 12.
12. Round 9-11: *Sc* all around (8)
Finish off, leaving a long tail for sewing. Stuff the horn firmly now. Pin the horn on as shown and sew on. Weave in ends.
Done! If you made one of these beetles I would LOVE to see! You can show me by posting a picture in the comments underneath this post 🙂


3 Comments
Oooohhh! Interesting! I have to try this! 🙂
My god this is one of the best and silliest patterns I’ve ever seen thank you so much
They’re in love your honor