Goose & Mother Goose Amigurumi – Free Crochet Pattern
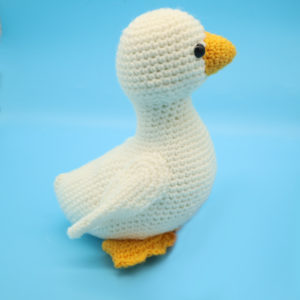
Hello everyone! This week I’m releasing a suuuuper cute pattern – a free goose amigurumi crochet pattern! I included how to make a bonnet so that you can even make a mother goose. I hope you enjoy this pattern!
Print this pattern out! Purchase the PDF version here!

 Supplies:
• Yarn 4/Medium Weight in:
White and yellow. Pink and blue are optional if making the mother goose
•4mm Crochet Hook
•Tapestry needle
•Scissors
•Stuffing
•12mm safety eyes
Additional Information:
Difficulty: Intermediate
Let’s get started!
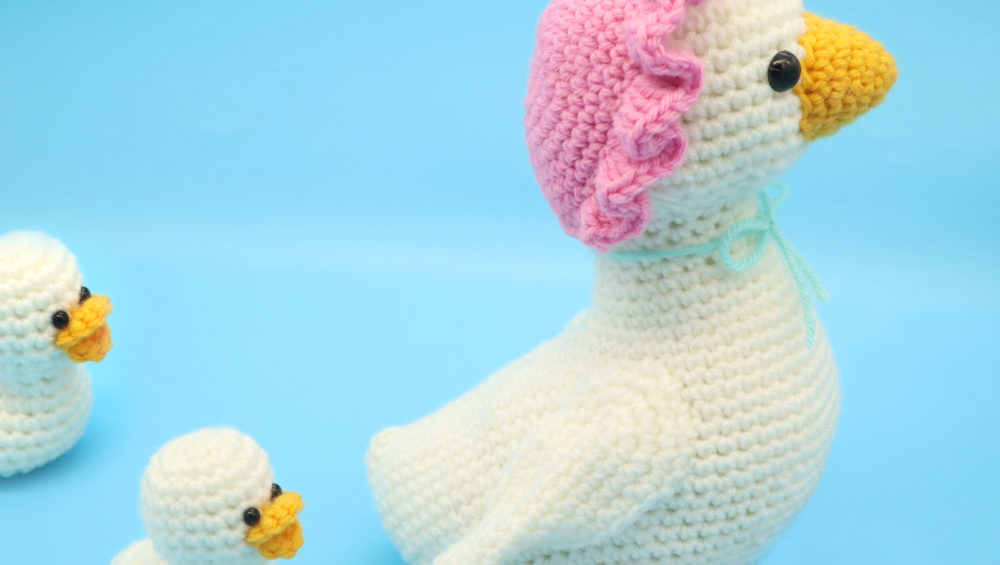
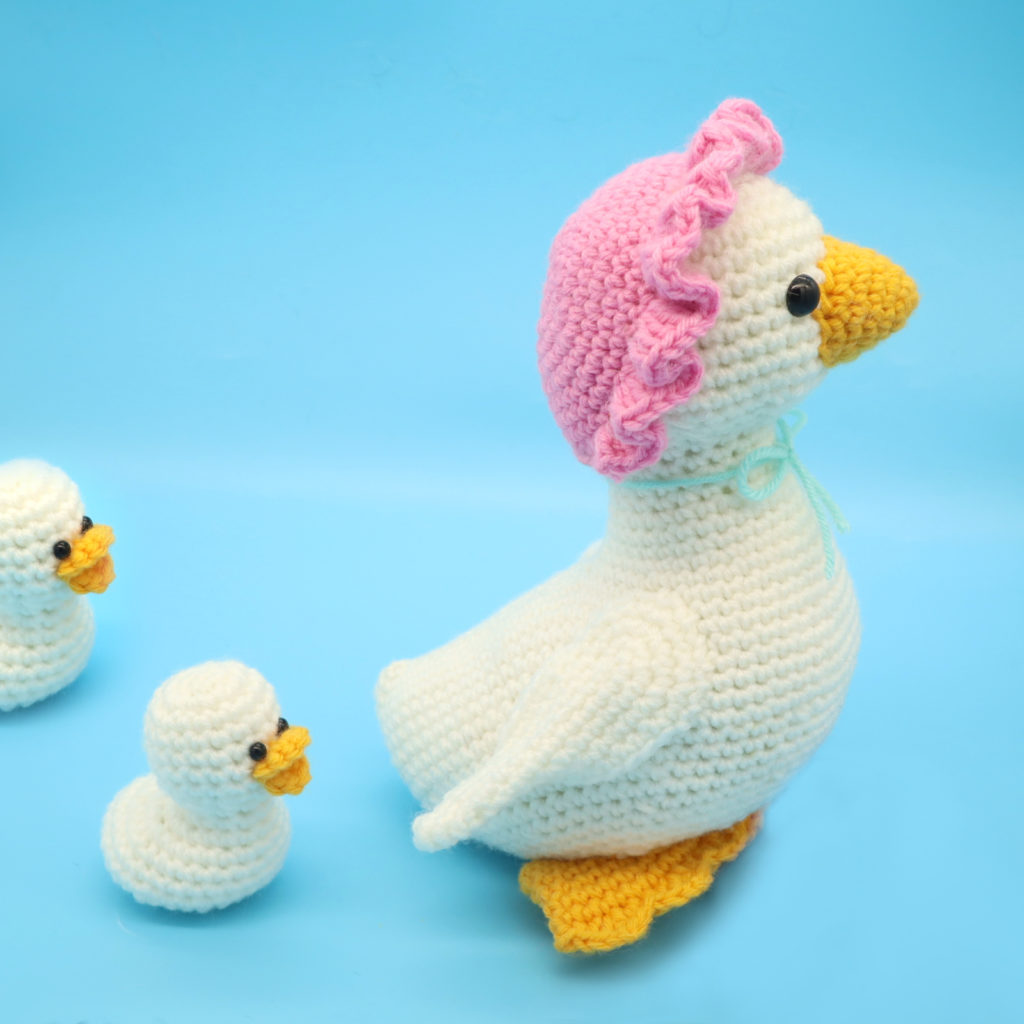
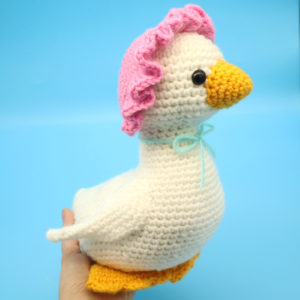
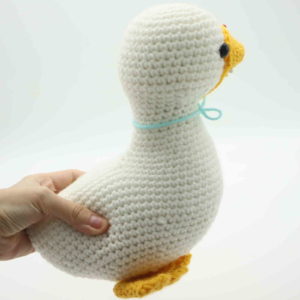
This goose is tons of fun to make! With this pattern you can make a regular goose, or add a bonnet and bow to make a mother goose! The tiny ducks you see pictured on the first page are not included in this pattern. Those are ducks made from my “20 minute duck” pattern, which you can find free on my website here.
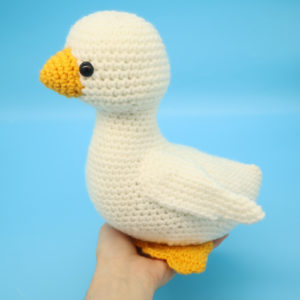
For the goose, we will start by making the head and working our way down to the body. The head, neck, and body are all made in one continuous piece. After this, we will make the nose, feet, wings, and bonnet/bow. Let’s start making this cute goose!
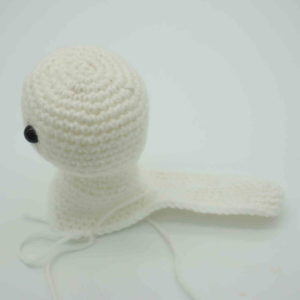
Head/body:
In white

Round 1: 6 Sc into a Magic Ring (6)
Round 2: *Inc* all around (12)
Round 3: *Inc, Sc in the next st* all around (18)
Round 4: *Inc, Sc in the next 2 st* all around (24)
Round 5: *Inc, Sc in the next 3 st* all around (30)
Round 6: *Inc, Sc in the next 4 st* all around (36)
Round 7-10: *Sc* all around (36)
Now we’re going to mark where to place the safety eyes later. Add a different colored stitch marker into the 13th and 21st stitch of Round 10.
Round 11-14: *Sc* all around (36)
Round 15: Sc in the next 7 st. Repeat *Dec, Sc in the next 3 st* 5 times. Sc in the next 4 st (31)
Round 16: Sc in the next 7 st. Repeat *Dec, Sc in the next 2 st* 5 times. Sc in the next 4 st (26)
Round 17: Sc in the next 7 st. Repeat *Dec, Sc in the next st* 5 times. Sc in the next 4 st (21)
Round 18-21: *Sc* all around (21)
Round 22: *Inc, Sc in the next 2 st* all around (28)
Round 23-24: *Sc* all around (28)
Round 25: Repeat *Inc, Sc in the next 3 st* all around (35)
Add the eyes into the marked areas now. Stuff the head firmly now. In the next round we will start forming the back of the goose.
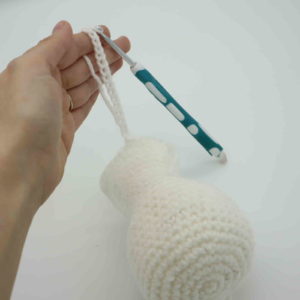
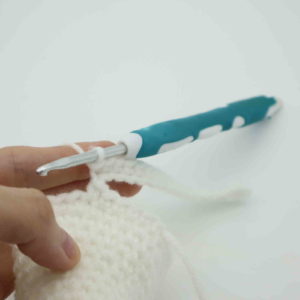
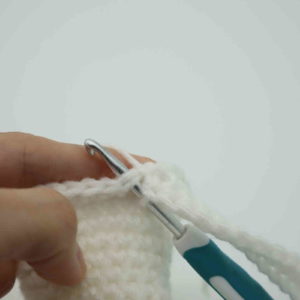
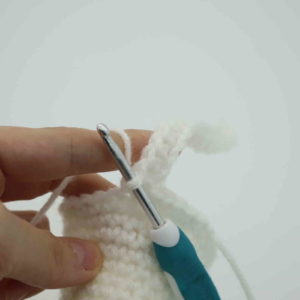
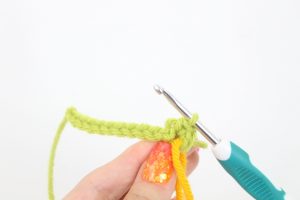
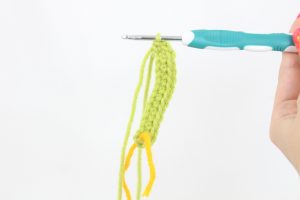
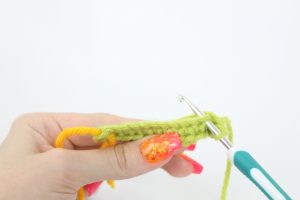
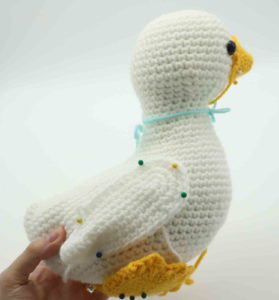
Round 26: Sc in the next 6 st (Pic 1). Ch 17 (Pic 2). Sc 3 times in 2nd ch from hook. Sc in the next 15 ch (Pic 3). Now working back on body (Pic 4-5), Sc in the next 29 st. (Stitch count: 68, make sure to count stitches on BOTH sides of the chain to get 68 st.)
1.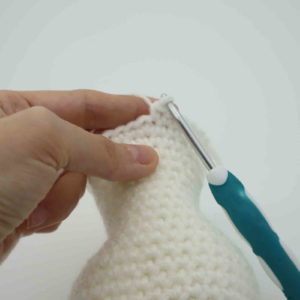 2.
2. 3.
3. 4.
4. 5.
5. 6.
6.
Round 27: Sc in the next 6 st. Working on the Ch, Sc in the next 15 st. Make 1 *Inc* in each of the next 3 st. Working on the other side of the Ch, Sc in the next 15 st. Working back onto the body, Sc in the next 29 st (71)
Round 28-34: *Sc* all around (71)
Round 35: Repeat *Dec, Sc in the next 6 st* 8 times. Dec 1 time, Sc in the next 5 st (62)
Round 36-38: *Sc* all around (62)
Round 39: Repeat *Dec, Sc in the next 5 st* 8 times. Dec 1 time, Sc in the next 4 st (53)
Round 40: Repeat *Dec, Sc in the next 4 st* 8 times. Dec 1 time, Sc in the next 3 st (44)
Round 41: Repeat *Dec, Sc in the next 3 st* 8 times. Dec 1 time, Sc in the next 2 st (35)
Round 42: Repeat *Dec, Sc in the next 2 st* 8 times. Dec 1 time, Sc in the next st (26)
Round 43: Repeat *Dec, Sc in the next 2 st* 6 times. Sc in the next 2 st (20)
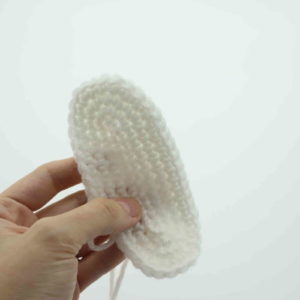
Stuff the neck and body firmly now. Continue stuffing after each round.
Round 44: Repeat *Dec, Sc in the next st* 6 times. Sc in the next 2 st (14)
Round 45: *Dec* all around (7)
Finish off and leave a tail for sewing. Sew the remaining stitches together. Weave in ends.
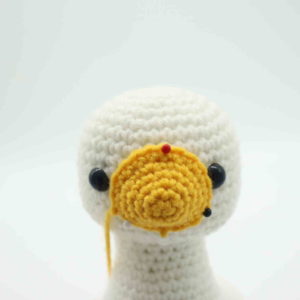
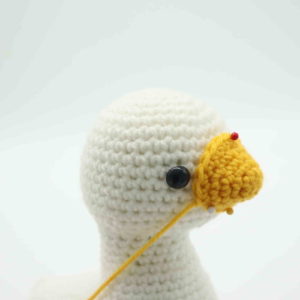
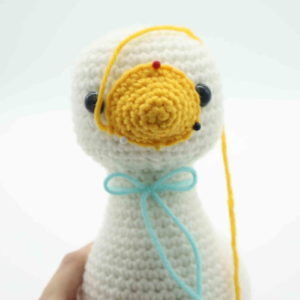
Nose:
In yellow
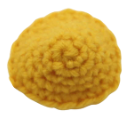
Round 1: 6 Sc into a Magic Ring (6)
Round 2: *Sc* all around (6)
Round 3: *Inc* all around (12)
Round 4: *Sc* all around (12)
Round 5: *Inc, Sc in the next st* all around (18)
Round 6: *Sc* all around (18)
Finish off, leaving a long tail for sewing. Pin the nose on as shown and sew on. Make sure to stuff the nose firmly before fully sewing closed. Once done, weave in ends.
Feet: (Make 2)
In yellow
Round 1: 6 Sc into a Magic Ring (6)
Round 2: *Inc* all around (12)
Round 3: *Inc, Sc in the next st* all around (18)
Round 4-7: *Sc* all around (18)
Round 8: *Inc, Sc in the next 2 st* all around (24)
Round 9-10: *Sc* all around (24)
Round 11: Fold the foot in half so the stitches line up as shown (Pic 1).
1.
Going through BOTH stitches at the same time (Pic 2), repeat *SlSt in the next st, Hdc in the next st, Dc in the next st, Ch 2, Dc into the same st, Hdc in the next st.* 3 times.
2.
Now you have made the toes (Pic 3).
3.
Finish off, leaving a long tail for sewing. Pin the feet on as shown (Pic 4-5) and sew on. Once sewn on, weave in ends.
4. 5.
5.
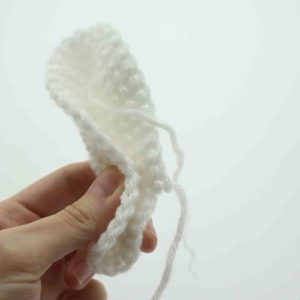
Wings: (Make 2)
In white
Round 1: Ch 12 (Pic 1). Sc 3 times into the 2nd Ch from the hook (Pic 2). Sc in the next 9 st. Sc 3 times into the last Ch. Now we meet the end of the chains (Pic 3). Turn your work to the OTHER side of the chain, where we haven’t many ANY stitches yet (Pic 4). Working on that side of the Ch, Sc in the next 9 st (24) Now we’ve made a round! (Pic 5)
1. 2.
2. 3.
3. 4.
4. 5.
5.
Round 2: *Inc* in the next 3 st, Sc in the next 9 st, *Inc* in the next 3 st, Sc in the next 9 st (30)
Round 3: Repeat *Inc, Sc in the next st* 3 times. Sc in the next 9 st. Repeat *Inc, Sc in the next st* 3 times. Sc in the next 9 st (36)
Round 4: Repeat *Inc, Sc in the next 2 st* 3 times. Sc in the next 9 st. Repeat *Inc, Sc in the next 2 st* 3 times. Sc in the next 9 st (42)
Round 5: Repeat *Inc, Sc in the next 3 st* 3 times. Sc in the next 9 st. Repeat *Inc, Sc in the next 3 st* 3 times. Sc in the next 9 st (48)
Finish off, leaving a long tail for sewing. Fold the lower half of the wing in half as shown (Pic 2). The stitches should line up. Place the tail of yarn onto your needle and sew the next 6 stitches together (Pic 3-5). Once done, weave the yarn up to the other end of the wing and place the wing on as shown (Pic 6). Sew on and weave in ends.
1. 2.
2. 3.
3.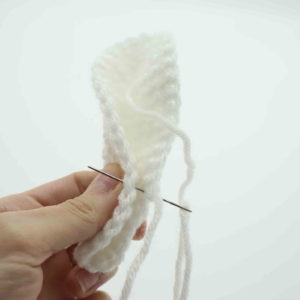 4.
4.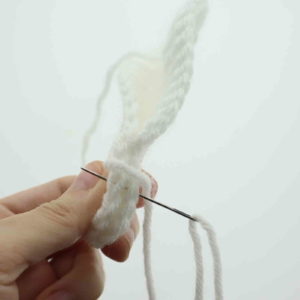 5.
5.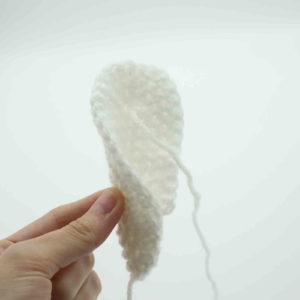 6.
6.
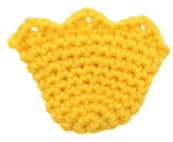
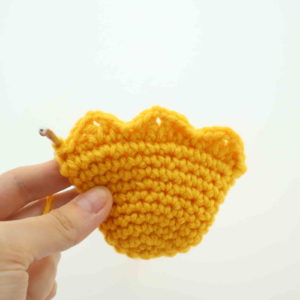
Bonnet: (Optional)
In pink
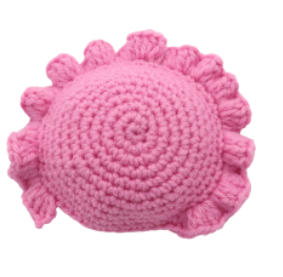
Round 1: 6 Sc into a Magic Ring (6)
Round 2: *Inc* all around (12)
Round 3: *Inc, Sc in the next st* all around (18)
Round 4: *Inc, Sc in the next 2 st* all around (24)
Round 5: *Inc, Sc in the next 3 st* all around (30)
Round 6: *Inc, Sc in the next 4 st* all around (36)
Round 7: *Inc, Sc in the next 5 st* all around (42)
Round 8-11: *Sc* all around (42)
Round 12: *4 Dc* into each of the next 31 st.
Finish off and leave a long tail for sewing. Pin the bonnet on as shown and sew on. Once done, weave in ends.
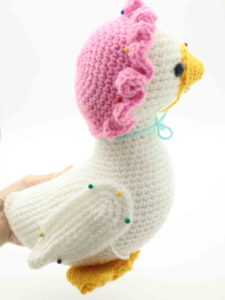
Bow: (Optional)
In light blue
Take a long piece of light blue yarn. Tie a bow around the toy’s neck, just like you would tie your shoes. Cut the excess yarn ends to your liking. Done!


29 Comments
Thank you so much, it’s work is beautiful, thank you, you teach very good… Hello from Guatemala
Precioso,gracias por compartir
Another great pattern! Thank you.
Thank you for another great pattern. I really like this goose. Your patterns are so easy to follow with all the pictures.
Thanks a lot for this very nice goose – may be – it’s a duck when crochet a short neck 😉
hi hi is there a way to get this pattern ?
Thank you
Grazie, sei molto brava e le spiegazioni sono fatte molto bene, un grazie e un caro saluto dall’Italia.
Could you explain what it means to SC in next 7 st,repeat *dec,SC in next three xfive.single in next four.
Hermoso el pato quisiera la traducción de : sc, st etc.,gracias
my interpretation is that you do 7 single crochets, then you do a {decrease stitch (skip one stitch and then single crochet) then regular single crochet in the next three stitches}x5, after this you finish the round with 4 sc. hope this helps
What does Inc mean in the pattern directions. Thank you.
Inc means increase which is two single crochet in the SAME stitch.
i love this pattern. you are a genius when making these patterns. thank you so much for sharing. happy crocheting
Would you be able to turn this into a mother duck? Maybe redesign the beak?
Hello i was wondering if you could help me understand round 26 onthe head and body. If possible. Thanks
I wanted to know why the little geese are shown and it says goose and mother goose? I paused for the pdf thinking the baby would be there and it is not.
i think they are 20 min duck’s you will find them in farm animals…i think
I think it’s one of her other patterns for ducks as the goslings
This is so lovely!❣️but can you tell me what to do to make it stand up in a good position and not fall
Love this pattern, but the feet don’t turn out the way pictured. Still look cute, but don’t look webbed.
I figured it out! thanks
I made this cute goose, but it wants to fall forward. Did you weight the bottom somehow?
Hi Martha! If your amigurumi falls forward, you can place plastic pellets inside a sachet, then place the sachet inside the amigurumi’s lower half. I use Poly-Pellets, which I buy from JoAnn Fabrics and they work well. You can also use something like a rock to weigh it down. If you already finished off your amigurumi, you’ll have to undo the last ~4 rounds to place the sachet in.
I hope this helps!
Thank you so much for this lovely pattern of this super cute mother goose.
i love how you’ve done it’s back you’re so smart
How do you make the baby ducks
Great pattern
This was the first stuffed animal I’ve ever made and I am only nine years old
This pattern is absolutely fantastic! I made one with a normal yarn size, and now I want to make a massive one with big yarn! It’s so easy to understand!! I love all your patterns!