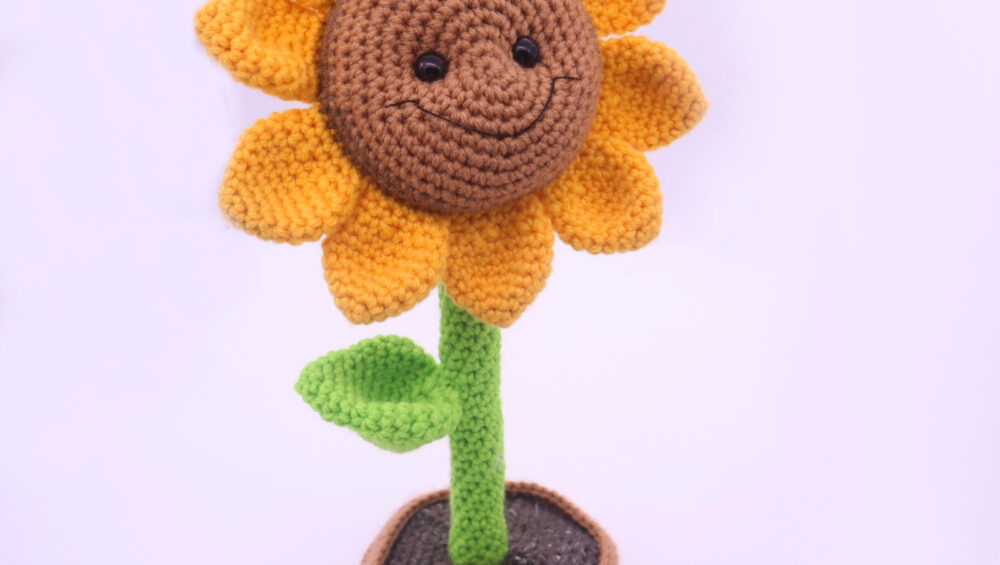
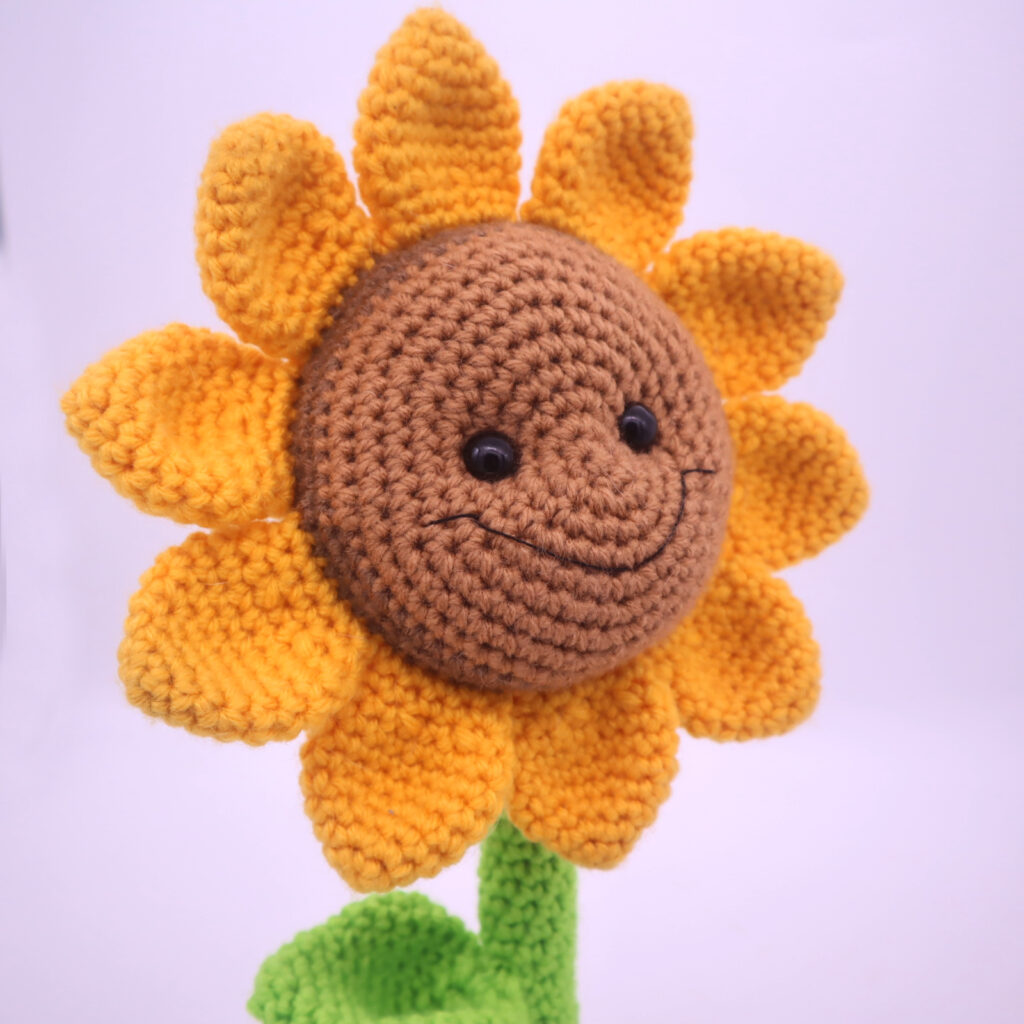
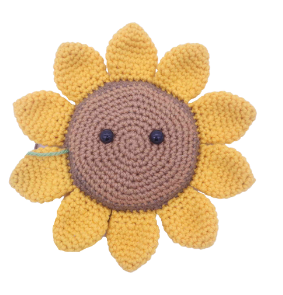
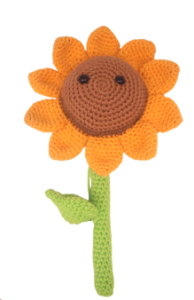
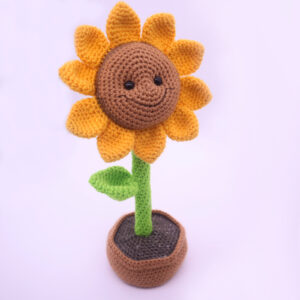
Sunflower Amigurumi – Free Crochet Pattern

Print this pattern out! Purchase the PDF version here

 Supplies:
• Yarn 4/Medium Weight Yarn in…
Yellow, Light Brown, Dark Brown, Soil Colored Yarn, and Green
•4mm Crochet Hook
•12mm safety eyes
•Tapestry needle
•Scissors
•Stuffing
•Black Embroidery Thread
•2 Chop sticks or dowel for stem support
•Rock, plastic pellets, or any weight to weigh down and stabilize the pot
Additional Information:
•Difficulty: Intermediate
•Size: 15″ tall when measuring from the bottom of the top to the tip of the petal.
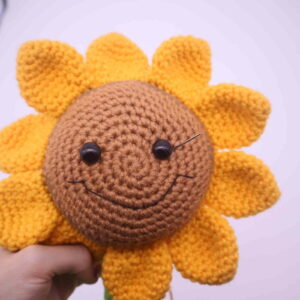
This sunflower is super cute! It’s the perfect pattern for fall time, summer, or spring! I think this would be a fantastic and heart warming “Get Well Soon!” gift 🙂 It would also warm the hearts of mothers for Mother’s Day! This pattern is fantastic for a lot of special occasions.
The sunflower itself is easy to make. The petals are crocheted into the sunflower, so there is no sewing involved when attaching the petals to the flower! However, there is sewing and assembly involved with the stem and the pot. We want the stem to sit up straight, so we place chop sticks into the stem and pot, and a little bit into the flower. We also add cardboard discs into the pot so it sits flat. We will also add in a weight into the pot so it sits firmly down.
Let’s get started!
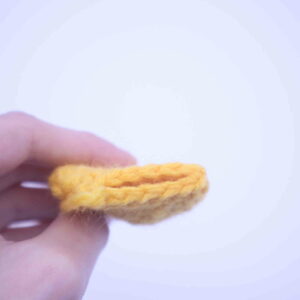
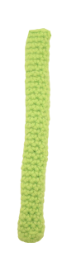
Petals: (Make 6)
In Yellow
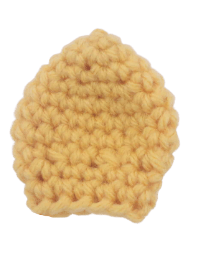
We will create the petals first. The petals will be crocheted onto the sunflower, which is very easy to do!
Round 1: 6 Sc into a Magic Ring (6)
Round 2: *Sc* all around (6)
Round 3: *Inc* all around (12)
Round 4: *Sc* all around (12)
Round 5: *Inc, Sc in the next st* all around (18)
Round 6-8: *Sc* all around (18)
Round 9: *Dec, Sc in the next st* all around (12)
Round 10-11: *Sc* all around (12)
Finish off now.
Sunflower Face:
In Light Brown
Round 1: 6 Sc into a Magic Ring (6)
Round 2: *Inc* all around (12)
Round 3: *Inc, Sc in the next st* all around (18)
Round 4: *Inc, Sc in the next 2 st* all around (24)
Now we will mark where to place the safety eyes. Add a differently colored eye stitch marker into the 8th and 18th stitch in Round 4.
Round 5: *Inc, Sc in the next 3 st* all around (30)
Round 6: *Inc, Sc in the next 4 st* all around (36)
Round 7: *Inc, Sc in the next 5 st* all around (42)
Place the safety eyes into the marked areas from Round 4 now.
Round 8: *Inc, Sc in the next 6 st* all around (48)
Round 9: *Inc, Sc in the next 7 st* all around (54)
Round 10: *Inc, Sc in the next 8 st* all around (60)
Round 11-12: Change to a darker brown now. *Sc* all around (60)
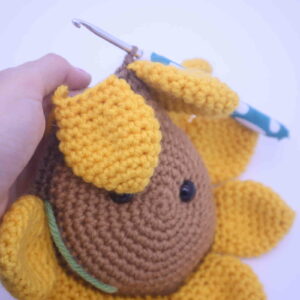
In the next round we will crochet the petals to the sunflower!
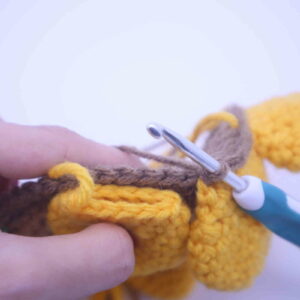
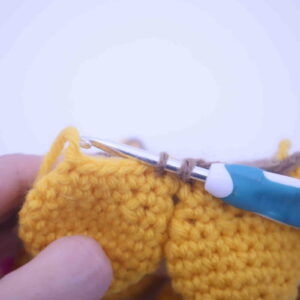
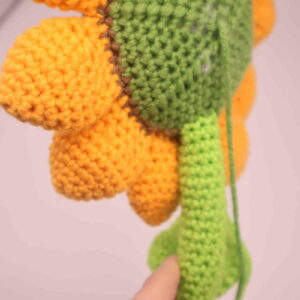
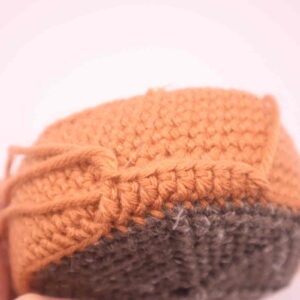
Round 13: Take a petal and squish in so each stitch aligns with each other as shown (Pic 1). Point the tip of the sunflower towards you as shown (Pic 2). Now align the petal to the stitches of the sunflower (Pic 3).
1. 2.
2. 3.
3.
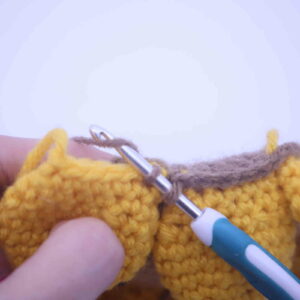
Insert your hook going through 2 aligned stitches of the petals (Pic 4). Now insert your hook into the next stitch of the sunflower (Pic 5).
4.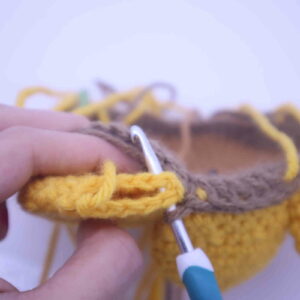 5.
5.
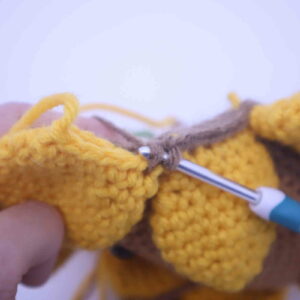
Yarn over (Pic 6) and pull the yarn through the 3 stitches on your hook (Pic 7-8).
6.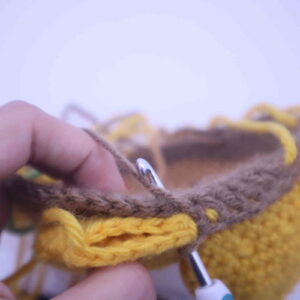 7.
7. 8.
8.
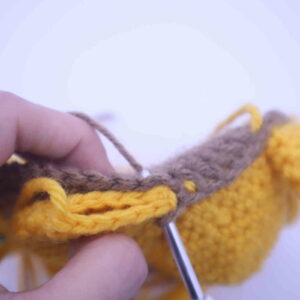
Yarn over and pull through both loops on your hook (Pic 9-11). You have just crocheted the petal to the sunflower! Repeat this process for a total of 6 times, which will create 6 stitches total connecting the petal to the sunflower (Pic 12). Repeat this process all around until each petal is crocheted to the sunflower (10 petals, 6 stitches each=Stitch Count of 60)
9. 10.
10. 11.
11.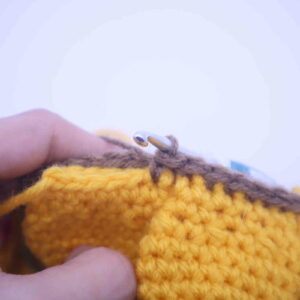 12.
12.
Round 14: Now we are working on the back of the sunflower. Change to Green. Repeat *Dec, Sc in the next 8 st* all around (54)
Round 15: *Dec, Sc in the next 7 st* all around (48)
Round 16: *Dec, Sc in the next 6 st* all around (42)
Round 17: *Dec, Sc in the next 5 st* all around (36)
Round 18: *Dec, Sc in the next 4 st* all around (30)
Stuff the sunflower firmly now. Continue stuffing after each round.
Round 19: *Dec, Sc in the next 3 st* all around (24)
Round 20: *Dec, Sc in the next 2 st* all around (18)
Round 21: *Dec, Sc in the next st* all around (12)
Round 22: *Dec* all around (12)
Finish off, leaving a long tail for sewing. Weave in ends.
Stem:
In green
Round 1: 6 Sc into a Magic Ring (6)
Round 2: *Inc, Sc in the next st* all around (9)
Round 3: In the BLO (Back Loop Only), *Sc* all around (9)
Add stuffing after every few rounds.
Round 4-37: In BOTH Loops, *Sc* all around (9)
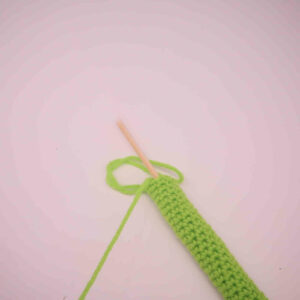
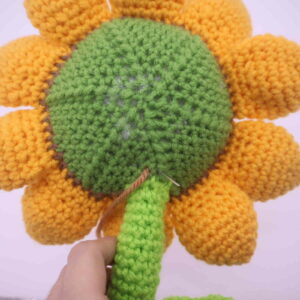
To stabilize the flower and stem, we will add a chop stick into the stem. Make sure the stick is long enough to fit in the stem. I made sure to have about an inch and a half sticking out at the top of the stem (Pic 2-3).
1. 2.
2.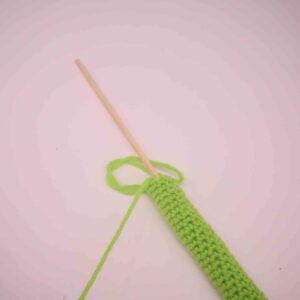 3.
3.
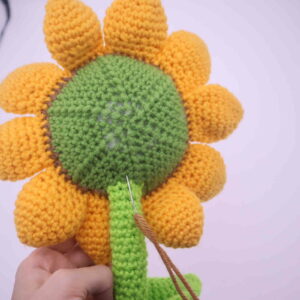
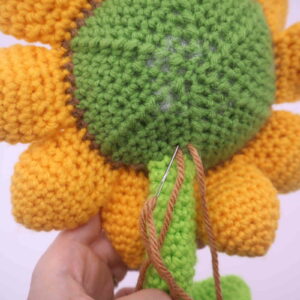
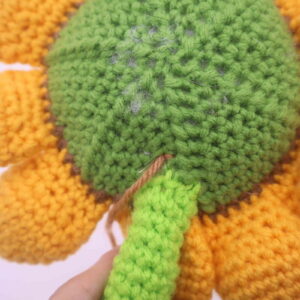
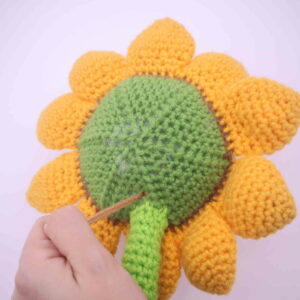
Poke that end of the chopstick up into the flower (Pic 4). This will help stabilize the flower so it won’t flop around. Once you’ve done this, sew the stem to the flower. After this, weave in ends and cut any excess yarn.
4.
Leaf:
In Green
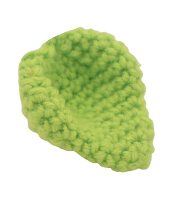
Round 1: 6 Sc into a Magic Ring (6)
Round 2: *Sc* all around (6)
Round 3: *Inc* all around (12)
Round 4-5: *Sc* all around (12)
Round 6: *Inc, Sc in the next st* all around (18)
Round 7: *Inc, Sc in the next 2 st* all around (24)
Round 8: *Inc, Sc in the next 3 st* all around (30)
Round 9-10: *Sc* all around (30)
Round 11: *Dec, Sc in the next 3 st* all around (24)
Round 12: *Dec, Sc in the next 2 st* all around (18)
Round 13: *Dec, Sc in the next st* all around (12)
Round 14: *Dec* all around (6)
Finish off, leaving a long tail for sewing. Place the leaf on the left side of the stem, about in the middle. Sew on. Once sewn on, weave in ends and cut any excess yarn.
Flower Pot:
Start in Light Brown
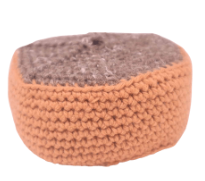
Round 1: 6 Sc into a Magic Ring (6)
Round 2: *Inc* all around (12)
Round 3: *Inc, Sc in the next st* all around (18)
Round 4: *Inc, Sc in the next 2 st* all around (24)
Round 5: *Inc, Sc in the next 3 st* all around (30)
Round 6: *Inc, Sc in the next 4 st* all around (36)
Round 7: *Inc, Sc in the next 5 st* all around (42)
Round 8: *Inc, Sc in the next 6 st* all around (48)
Round 9: *Inc, Sc in the next 7 st* all around (54)
Round 10: *Inc, Sc in the next 8 st* all around (60)
Round 11: In the BLO (Back Loop Only), *Sc* all around (60)
Round 12-19: In BOTH loops, *Sc* all around (60)
Round 20: Change to a dark brown for the dirt color. In the BLO, repeat *Dec, Sc in the next 8 st* all around (54)
Round 21: In BOTH loops, repeat *Dec, Sc in the next 7 st* all around (48)
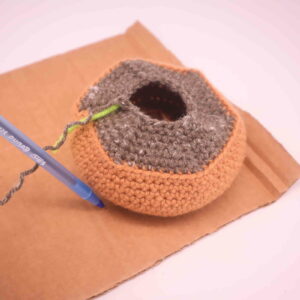
Now we will add in cardboard to make the pot sit flat.
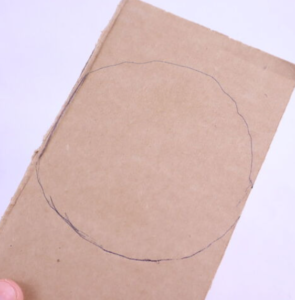
Step 1. Place the pot on cardboard and trace around the entire bottom of the pot (Pic 1)
1.
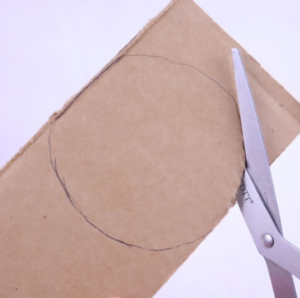
Step 2. You will have a circle (Pic 2). Cut around the circle with scissors (Pic 3-4)
2. 3.
3. 4.
4.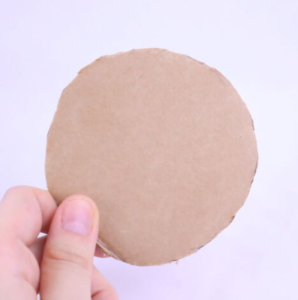
Step 3. Repeat steps 1-2 again. You will now have a total of 2 cardboard pieces. Using a chopstick, poke through the center of each cardboard piece. We will later put the chopstick through these holes to stabilize the flower.
Step 4. Place one piece into the bottom of the pot (Pic 5), stuff the pot firmly, add a weight to the pot (such as a hefty rock, plastic pellets wrapped in a cloth sack, etc.) then place the second piece of cardboard into the top of the pot (Pic 6).
5. 6.
6.
Round 22: *Dec, Sc in the next 6 st* all around (42)
Round 23: *Dec, Sc in the next 5 st* all around (36)
Round 24: *Dec, Sc in the next 4 st* all around (30)
Round 25: *Dec, Sc in the next 3 st* all around (24)
Round 26: *Dec, Sc in the next 2 st* all around (18)
Round 27: *Dec, Sc in the next st* all around (12)
Round 28: *Dec* all around (6)
Finish off, leaving a long tail for sewing.
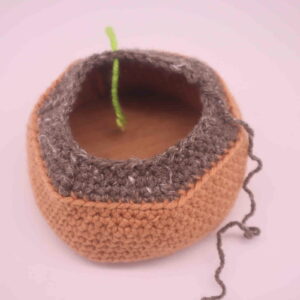
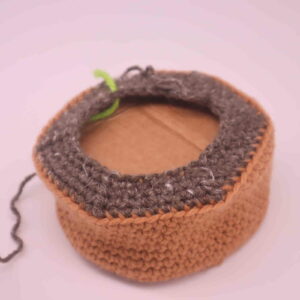
Flower Pot Rim:
Start in Brown
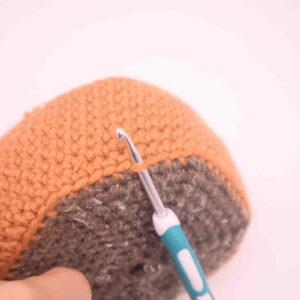
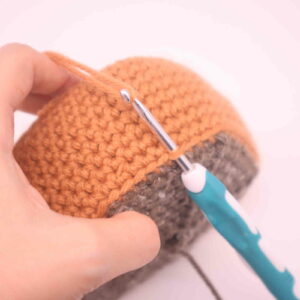
Round 1: Attach your hook the the front loops we left in Round 20 (Pic 1). Yarn over with brown yarn and pull the yarn through the loop (Pic 2). Make 1 Dc into each stitch until you meet your first Dc (Pic 3). SlSt to the first Dc to complete the round. Finish off and weave in ends, cut any excess yarn (Pic 4).
1. 2.
2.
 3.
3. 4.
4.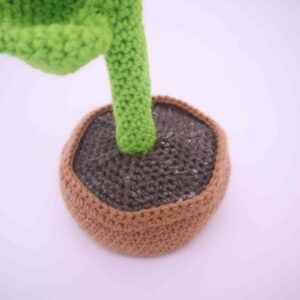
Assembling Flower to Pot:
Poke a chopstick into the bottom center of the pot, insert the chopstick into the center hole we made into the first cardboard piece, then into the hole of the second cardboard piece. The majority of your chopstick should be outside of the pot. Insert the rest of the chopstick into the stem of the flower. This process will help stabilize it and make it stand straight. After this, using the tail of yarn from the brown soil, sew the stem to the soil. Once done, tie the tail end of yarn into a firm knot. Bring this knot into the toy to hide, cutting any excess yarn.
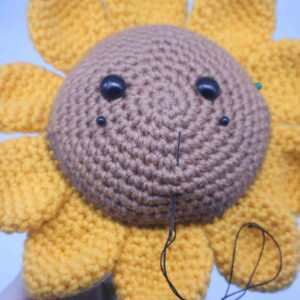
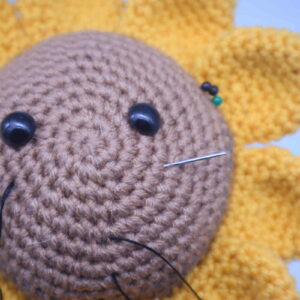
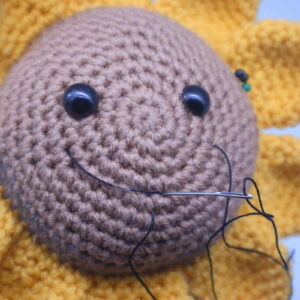
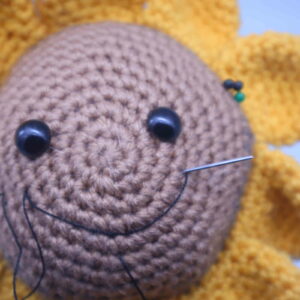
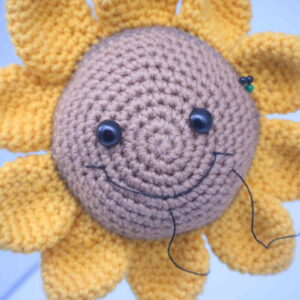
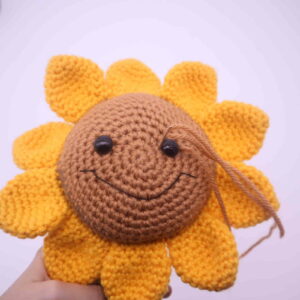
Smile:
In Black Embroidery Thread
Insert needle with thread into the middle area of the sunflower and pull needle out at about Round 6 (Pic 1). Insert needle into the left area as shown (Pic 2). Pull needle out at the right area as shown (Pic 3). Insert needle into the middle mouth area as shown (Pic 4). Pull needle out at the left area as shown (Pic 5). Reinsert needle a few stitches to the left (Pic 6). Pull needle out at the right side of the mouth (Pic 7). Insert needle a few stitches to the right (Pic 8). Done! Tie both ends of thread into a firm knot. Bring the knot inside the toy to hide, cutting any excess yarn.
1. 2.
2. 3.
3. 4.
4. 5.
5. 6.
6. 7.
7. 8.
8. 9.
9.
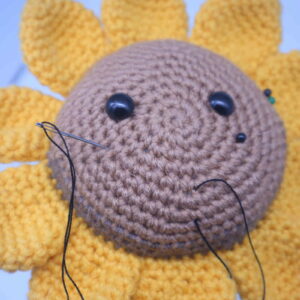
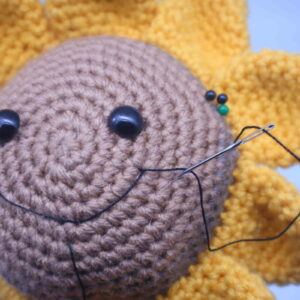
Face Shaping:
In Brown Yarn
Insert needle with thread into the back of the sunflower as shown (Pic 1). Pull needle out next to the toy’s right as shown (Pic 2). Reinsert needle to the left of the toy’s eye as shown (Pic 3).
1. 2.
2. 3.
3.
Pull needle out at the back of the sunflower, 1 stitch over from where we originally inserted it (Pic 4). Reinsert needle 1 stitch to the left (Pic 5). Pull needle out at the right side of the toy’s left eye as shown (Pic 6).
4. 5.
5. 6.
6.
Reinsert needle to the left of the toy’s left eye (Pic 7). Pull needle out at the original insertion spot of the sunflower (Pic 7). Pull both ends of thread at the same time (Pic 9).
7. 8.
8. 9.
9.
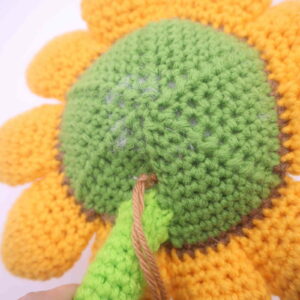
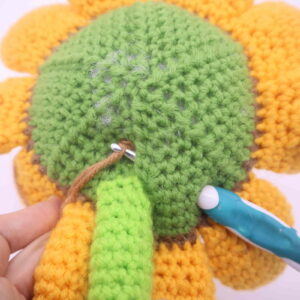
This will tighten the face (Pic 10). Tie both ends of yarn into a firm knot (Pic 11). Insert hook into the toy, yarn over (Pic 12).
10. 11.
11.
 12.
12.
Pull the yarn (Pic 13). Cut any excess yarn (Pic 14). Done!
13.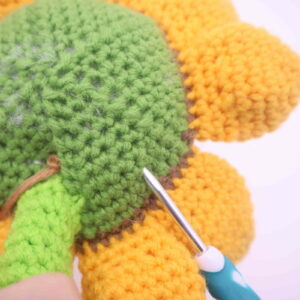 14.
14.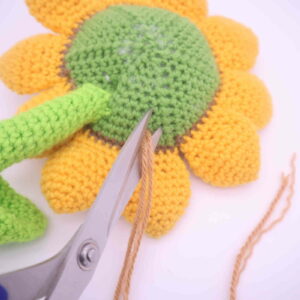 15.
15.


5 Comments
I love crafts
I love this pattern, there was one error I seen for how many petals to make for the sunflower itself you have make 6 petals not 10 petals just thought I would let you know
I love your patterns. Thank you!!
I love your patterns. Thank you!!
Please check out Fortville Hookery on Facebook and Instagram. http://www.candyandcrochet.com
Thank you for the pattern it was a fun creation:)