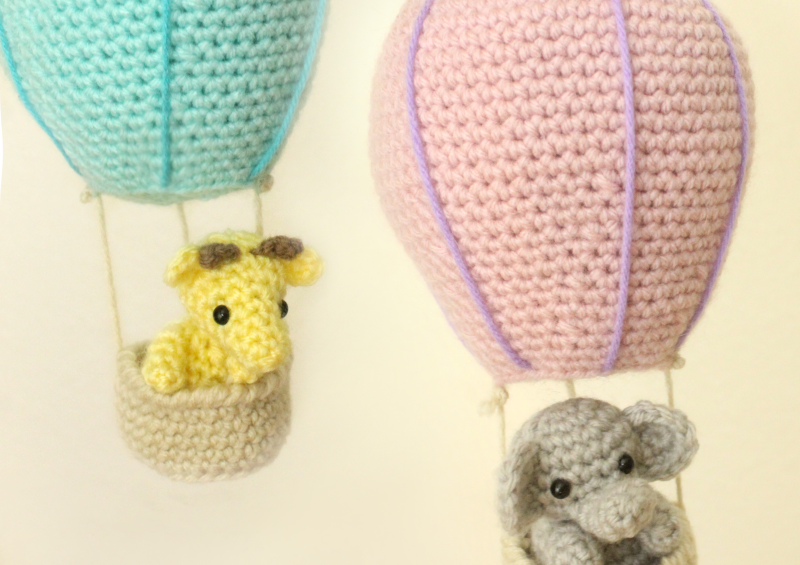
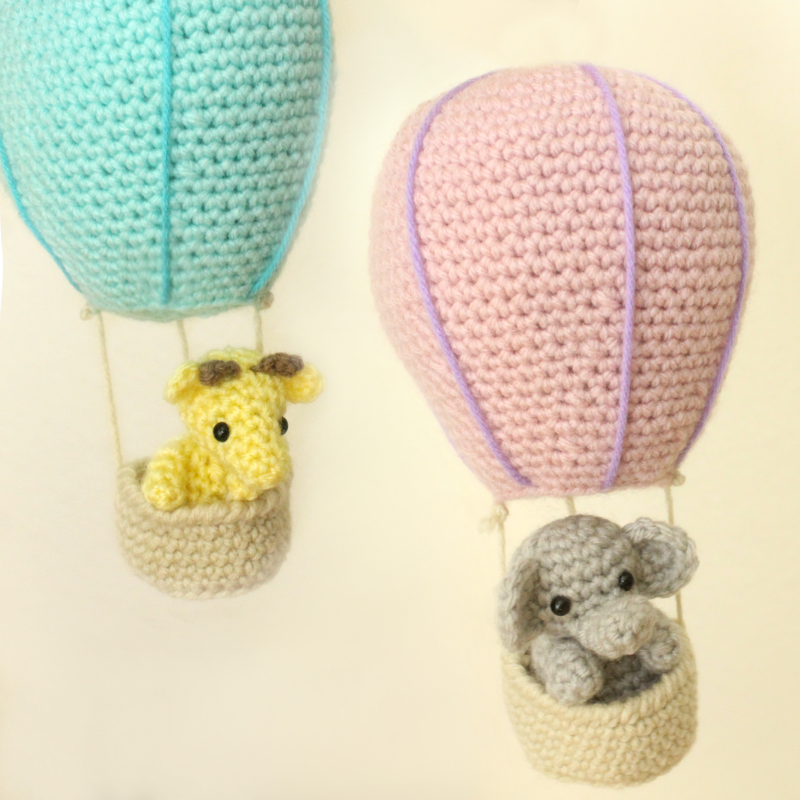
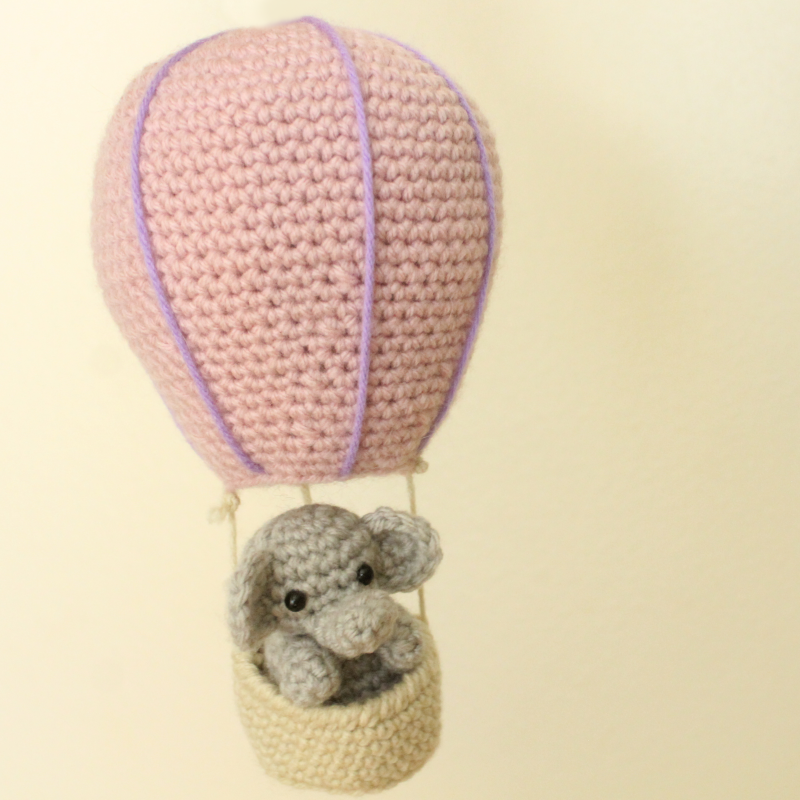
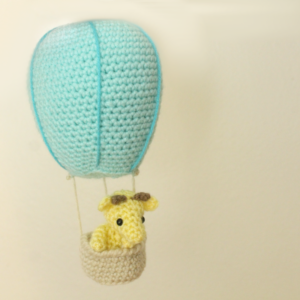
Animals in an Air Balloon Amigurumi – Free Crochet Pattern

Print this pattern out – purchase the PDF version here!

 Supplies:
• Yarn 4/Medium Weight Yarn in…
Main Color, Darker Main Color, Light Yellow, Brown, and Grey
•4mm Crochet Hook
•6mm safety eyes
•Tapestry needle
•Scissors
•Stuffing
•Small rock or weight to weigh down basket (optional)
Additional Information:
•Difficulty: Easy, but the animals involve a lot of small pieces which must be sewn or hot glued on
•Size: From top to bottom 3″
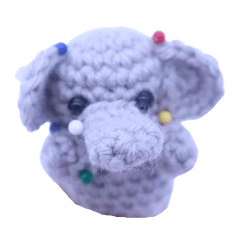
These animals in a hot air balloon are so adorable. It’s an idea I’ve had for the longest time and I am to glad the idea has finally came to life! I think these would be a fantastic decoration for a baby’s nursery. You could even change up the sizes of the air balloons! Just use a different weight yarn and hook. I think making a big air balloon with blanket yarn would be awesome.
Let’s get started!
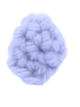
Air Balloon:
In Main Color
Round 1: 6 Sc into the Magic Ring (6)
Round 2: *Inc* all around (12)
Round 3: *Inc, Sc in the next st* all around (18)
Round 4: *Inc, Sc in the next 2 st* all around (24)
Round 5: *Inc, Sc in the next 3 st* all around (30)
Round 6: *Inc, Sc in the next 4 st* all around (36)
Round 7: *Inc, Sc in the next 5 st* all around (42)
Round 8: *Inc, Sc in the next 6 st* all around (48)
Round 9: *Inc, Sc in the next 7 st* all around (54)
Round 10-19: *Sc* all around (54)
Round 20: *Dec, Sc in the next 7 st* all around (48)
Round 21-22: *Sc* all around (48)
Round 23: *Dec, Sc in the next 6 st* all around (42)
Round 24-25: *Sc* all around (42)
Round 26: *Dec, Sc in the next 5 st* all around (36)
Round 27-28: *Sc* all around (36)
Round 29: *Dec, Sc in the next 4 st* all around (30)
Round 30-32: *Sc* all around (30)
Stuff the balloon firmly now. Stop here and scroll down to follow the steps for the “Balloon Detail”. After that, continue with this pattern. Continue stuffing after each round.
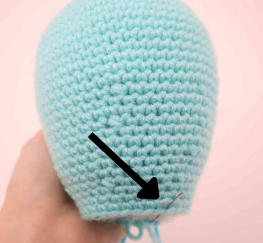
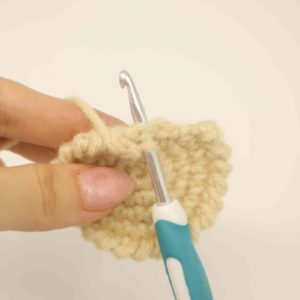
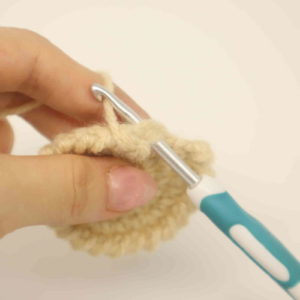
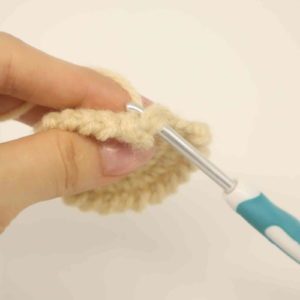
Round 33: In the BLO (Back Loop Only), repeat *Dec, Sc in the next 3 st* all around (24)
Working in the BLO will look like the photo below:
Round 34: In BOTH loops, repeat *Dec, Sc in the next 2 st* all around (18)
Round 35: *Dec, Sc in the next st* all around (12)
Round 36: *Dec* all around (6)
Finish off, leaving a long tail for sewing. Sew the remaining stitches closed and weave in ends.
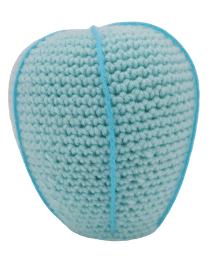
Balloon Detail:
In Darker Main Color
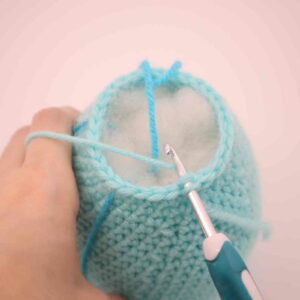
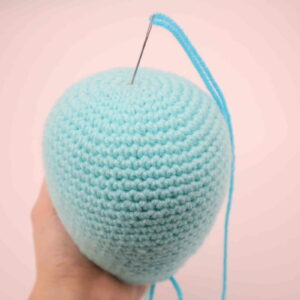
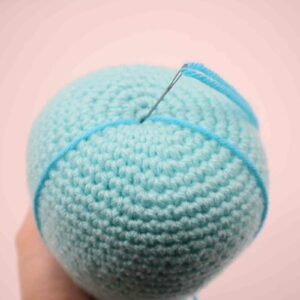
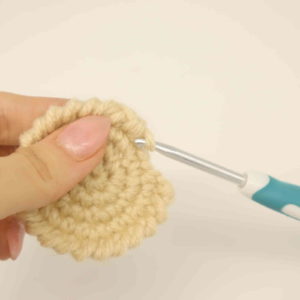
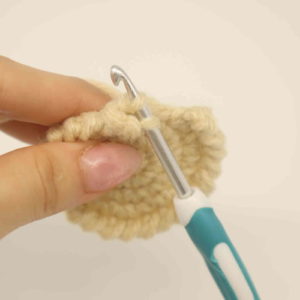
Now we will create the detail on the balloon! Place the darker main color yarn onto a needle. Place the needle into the balloon and pull the needle out at the last round (Pic 1). Reinsert needle into the very top of the balloon (Pic 2). This will create 1 line on the balloon.
1. 2.
2.
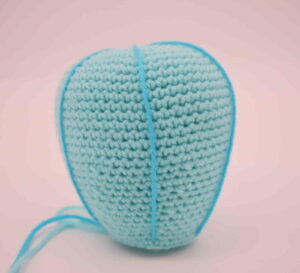
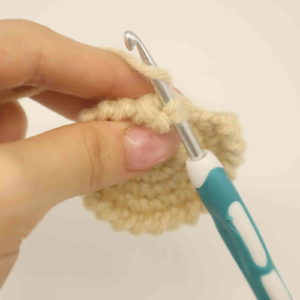
Pull needle out at the last round, spaced out from the first line (Pic 3). Reinsert needle into the top of the balloon (Pic 4). This will create another line.
3.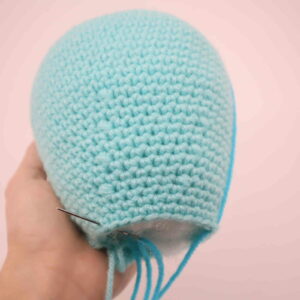 4.
4.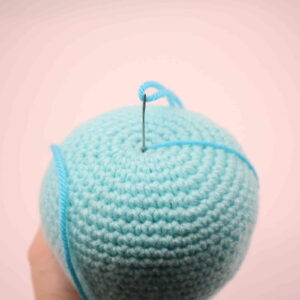
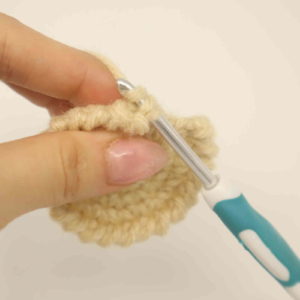
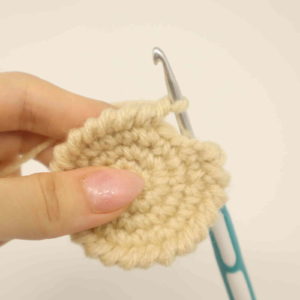
Insert needle into the last round (Pic 5). Reinsert needle into the top of the balloon (Pic 6). Repeat this around the entire balloon, making sure to space the lines out evenly. You can make as many lines as you’d like, but I recommend making 6 lines total.
5.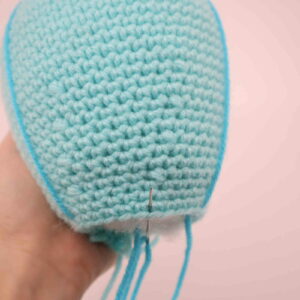 6.
6. 7.
7.
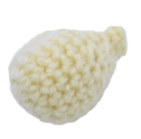
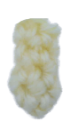
Basket:
In Cream Color
Round 1: 6 Sc into the Magic Ring (6)
Round 2: *Inc* all around (12)
Round 3: *Inc, Sc in the next st* all around (18)
Round 4: *Inc, Sc in the next 2 st* all around (24)
Round 5: *Inc, Sc in the next 3 st* all around (30)
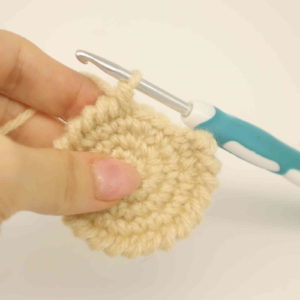
Round 6: In the BLO (Back Loop Only), *Sc* all around (30)
Round 7-10: In BOTH loops, *Sc* all around (30)
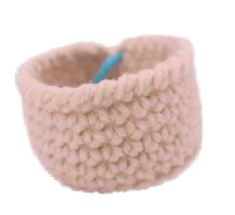
In the next round we will make the edging of the basket. We do this by making a crab stitch.
Round 11: Make 1 crab stitch in each stitch all around (30) Finish off, leaving a tail for weaving in ends. Weave in ends and cut any excess yarn.
How To Make a Crab Stitch:
Insert your hook into the next stitch to your right (Pic 1-3).
1. 2.
2. 3.
3.
Yarn over, and pull the yarn through (Pic 4-6). You will have two loops on your hook (Pic 6).
4. 5.
5. 6.
6.
Yarn over and pull through both loops (Pic 7-9). You have completed 1 crab stitch! See, it’s simply making 1 single crochet into the next stitch to your right! After you’ve completed a round, finish off, leaving a long tail. Sew the last and first stitch together to join. Weave in ends.
7. 8.
8. 9.
9. 10.
10.
Basket Assembly:
In Cream Color
Take a long piece of cream thread and put it on a needle. Insert the needle inside the last round of the basket, and pull the needle out (Pic 1). Leave a few inches of yarn on the inside of the basket as shown (Pic 2). Now pull the needle through the last edge of the balloon as shown (Pic 2). Check how long you want the string that connects the basket to the balloon. Make sure it’s long enough to fit the animal! After you like the length of the string, tie a firm knot on the inside of the basket (Pic 4). This will secure the string. Now tie a firm knot with the thread on the balloon (Pic 4). Cut the excess yarn a small amount away from the knot. Now repeat this whole process 2 more times, which will make a total of 3 strands connecting the basket and balloon.
1.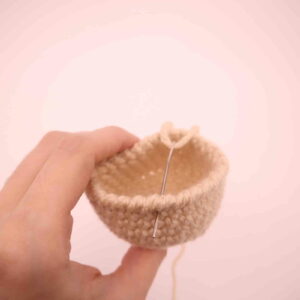 2.
2.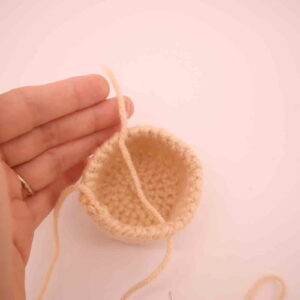 3.
3.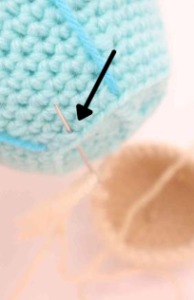 4.
4.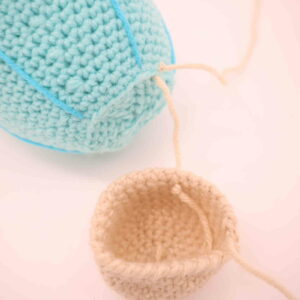
5.
Elephant Body:
In Grey
Round 1: 6 Sc into the Magic Ring (6)
Round 2: *Inc* all around (12)
Round 3: *Inc, Sc in the next st* all around (18)
Round 4-5: *Sc* all around (18)
Now we will mark where to place the safety eyes. Add a different colored stitch marker into the 6th and 9th stitch in Round 5.
Round 6-7: *Sc* all around (18)
Round 8: *Dec* all around (9)
Round 9: In the FLO (Front Loop Only), *Sc* all around (9)
Add the eyes into the marked areas now.
Round 10: In BOTH loops, *Inc* all around (18)
Round 11-15: *Sc* all around (18)
Stuff the head and body firmly now. Continue stuffing after each round.
Round 16: *Dec* all around (9)
Round 17: *Dec* 3 times. Finish off now, leaving a long tail for sewing. Sew the remaining stitches closed. Once done, weave in ends and cut any excess yarn.
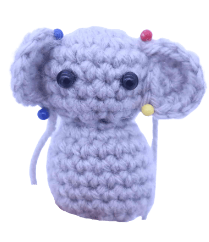
Elephant Ears: (Make 2)
In grey
Round 1: 6 Sc into the Magic Ring (6)
Round 2: *Inc* all around (12)
Finish off now, leaving a long tail for sewing. Pin the ears onto the head as shown. Sew on. Once sewn on, weave in ends and cut any excess yarn.
Elephant Trunk:
In grey

Round 1: 6 Sc into the Magic Ring (6)
Round 2-6: *Sc* all around (6)
Finish off now, leaving a long tail for sewing. Pin the trunk onto the head as shown. I pinned the trunk 1 round below the toy’s eyes. Now sew on. Once sewn on, weave in ends and cut any excess yarn.

Elephant Arms: (Make 2)
In grey
Round 1: 6 Sc into the Magic Ring (6)
Round 2-4: *Sc* all around (6)
Finish off now, leaving a long tail for sewing. You can stuff the arms if you’d like, but since the arms are fairly small it isn’t needed. Pin the arms onto the toy’s body as shown. Now sew on. Once sewn on, weave in ends and cut any excess yarn.
You don’t have to crochet legs for the elephant since the legs aren’t visible. If you’d like to, then you can use the arm pattern for the legs of the elephant!
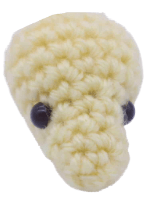
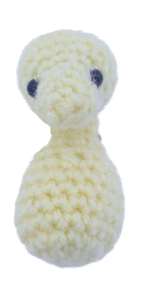
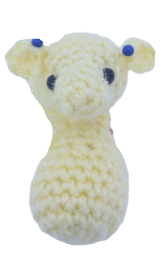
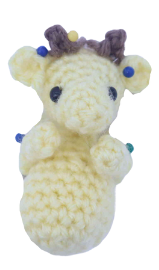
Giraffe Head:
In Light Yellow
Round 1: 6 Sc into the Magic Ring (6)
Round 2: *Sc* all around (6)
Round 3: Repeat *Inc, Sc in the next 2 st* all around (8)
Round 4: *Sc* all around (8)
Round 5: Repeat *Inc, Sc in the next 3 st* all around (10)
Now we will mark where to place the safety eyes. Add a differently colored eye stitch marker into the 3rd and 7th stitch in Round 5.
Round 6: Repeat *Inc, Sc in the next 2 st* 3 times. Sc in the next st (13)
Round 7: Repeat *Inc, Sc in the next 3 st* 3 times. Sc in the next st (16)
Round 8-9: *Sc* all around (16)
Add the eyes into the marked areas now.
Round 10: *Dec, Sc in the next 2 st* all around (12)
Stuff the head now. Continue stuffing after each round.
Round 11: *Dec, Sc in the next st* all around (8)
Round 12: *Dec* all around (4)
Finish off, leaving a long tail for sewing. Sew the remaining stitches closed and weave in ends. Cut any excess yarn.
Giraffe Body:
In Light Yellow
Round 1: 6 Sc into the Magic Ring (6)
Round 2: *Inc* all around (12)
Round 3: *Inc, Sc in the next st* all around (18)
Round 4-7: *Sc* all around (18)
Round 8: *Dec, Sc in the next st* all around (12)
Stuff the body firmly here. Continue stuffing after each round.
Round 9: *Sc* all around (12)
Round 10: *Dec* all around (6)
Round 11-12: *Sc* all around (6)
Finish off now, leaving a long tail for sewing. Pin the neck to the toy’s head as shown. Sew on. Once sewn on, weave in ends. Cut any excess yarn.
Giraffe Ears: (Make 2)
In Light Yellow

Round 1: 6 Sc into the Magic Ring (6)
Finish off, leaving a long tail for sewing. Pin the ears onto the toy’s head as shown and sew on. Once done, weave in ends and cut any excess yarn.
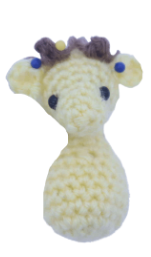
Giraffe Horns: (Make 2)
In Brown

Row 1: Ch 3. SlSt into the 2nd Ch from the hook. SlSt into the next st.
Finish off, leaving a long tail for sewing. Pin the horns onto the toy’s head as shown and sew on. Once sewn on, weave in ends. Cut any excess yarn.
Giraffe Arms: (Make 2)
In Light Yellow
Round 1: 4 Sc into the Magic Ring (4)
Round 2-5: *Sc*all around (4)
Finish off, leaving a long tail for sewing. Pin the arms onto the toy’s body as shown and sew on. There is no need to stuff the arms since they are very small. Once sewn on, weave in ends. Cut any excess yarn.
You don’t have to crochet legs for the giraffe since the legs aren’t visible. If you’d like to, then you can use the arm pattern for the legs of the giraffe!
One Last Step!
Now simply place the animal to the basket and sew it to the basket. The animal may tilt the basket. If this is the case, you can weight down the basket with a small rock. I do not recommend adding the rock if you are making this for a baby or small child. You can also simply tuck the animal’s ear behind one string and it should hold it in place.


1 Comment
My only wish is that you have less sewing I have used several methods in my patterns that have the ears crocheted as you work the head and it turned out very well.