
Purchase the PDF version here


Supplies:
4mm crochet hook, 4/Medium weight yarn in brown, yellow, orange, and red. 9mm safety eyes, tapestry needle, scissors, and stuffing.
Additional Information:
Difficulty: Easy
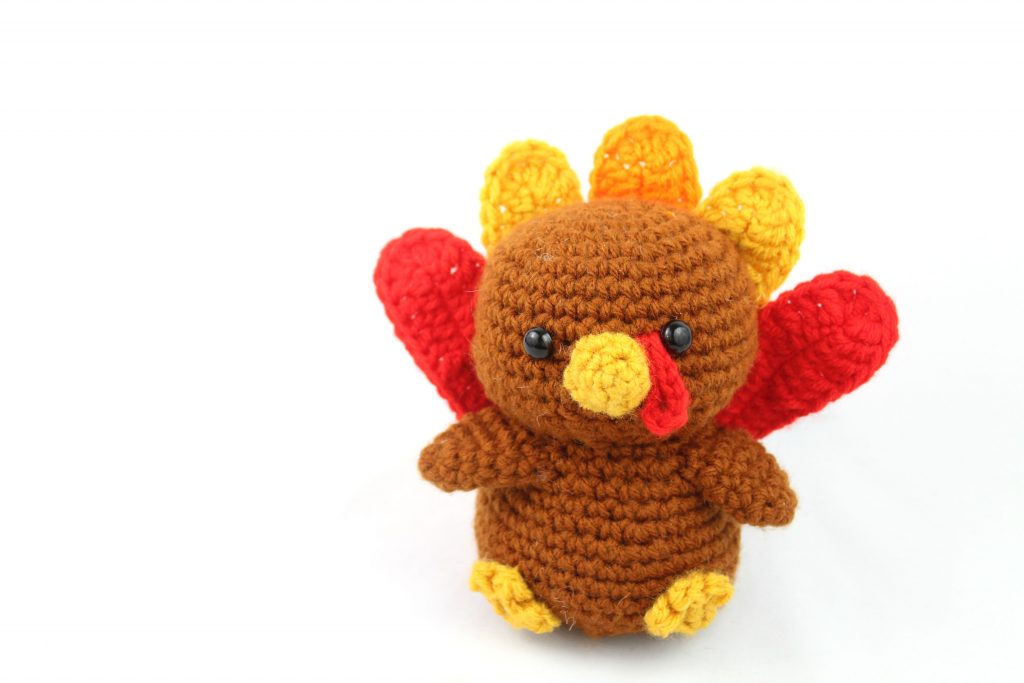
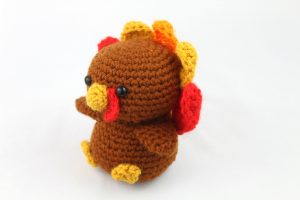
We start by making the turkey’s head, which leads into the body as one piece. Next we create the beak, wattle, and arms. Last, we make the feathers, tail, and feet!
Body:
In Brown
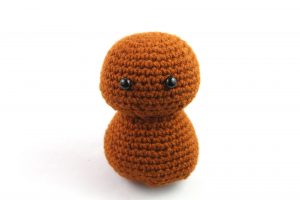
Round 1: 6 Sc in Magic Ring (6)
Round 2: *Inc* all around (12)
Round 3: *Inc, Sc* all around (18)
Round 4: *Inc, Sc 2* all around (24)
Round 5: *Inc, Sc 3* all around (30)
Round 6: *Inc, Sc 4* all around (36)
Round 7-8: *Sc* all around (36)
Round 9: Sc in the next 15, Sc in the next st and add a different colored stitch marker to the Sc just made. This marks the eye. Sc in the next 4 st. Sc in the next st and add different colored st marker to Sc just made. Sc in next 15 st (36)
Round 10-11: *Sc* all around (36)
Round 12: *Inc, Sc 5* all around (42)
Round 13: *Sc* all around (42)
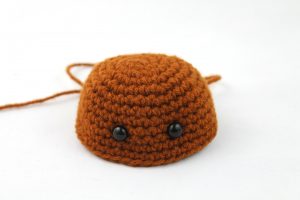
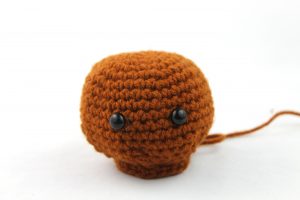
Add eyes here
Round 14: *Dec, Sc 5* all around (36)
Round 15: *Dec, Sc 4* all around (30)
Round 16: *Dec, Sc 3* all around (24)
Round 17: *Dec, Sc 2* all around (18)
Round 18: In FLO (Front Loop Only), *Inc, Sc 2* all around (24)
Round 19: In BOTH Loops, *Inc, Sc 3* all around (30)
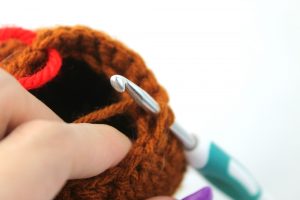
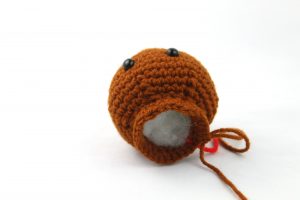
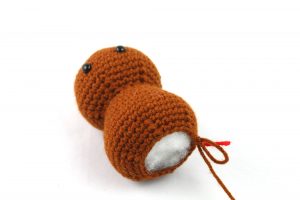
Stuff here
Round 20-21: *Sc* all around (30)
Round 22: *Inc, Sc 4* all around (36)
Round 23: *Inc, Sc 5* all around (42)
Round 24-27: *Sc* all around (42)
Round 28: *Dec, Sc 5* all around (36)
Round 29: *Dec, Sc 4* all around (30)
Round 30: *Dec, Sc 3* all around (24)
Stuff here
Round 31: *Dec, Sc 2* all around (18)
Round 32: *Dec, Sc* all around (12)
Round 33: *Dec* all around (6)
Finish off and add any additional stuffing. Sew closed.
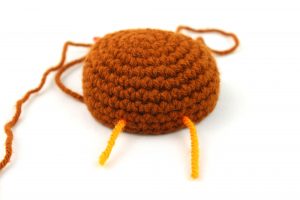
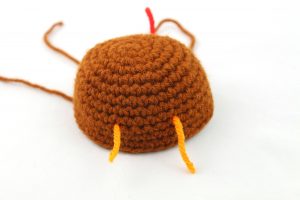
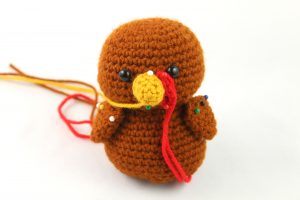
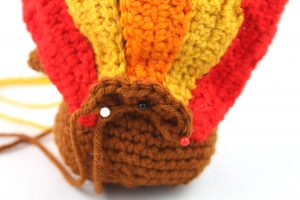
Beak:
In Yellow
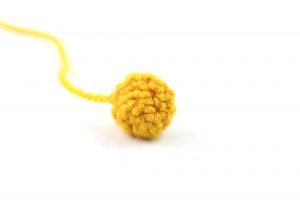
Round 1: 6 Sc in Magic Ring (6)
Round 2: *Sc* all around (6)
Round 3: *Inc, Sc* all around (9)
Round 4: *Sc* all around (9)
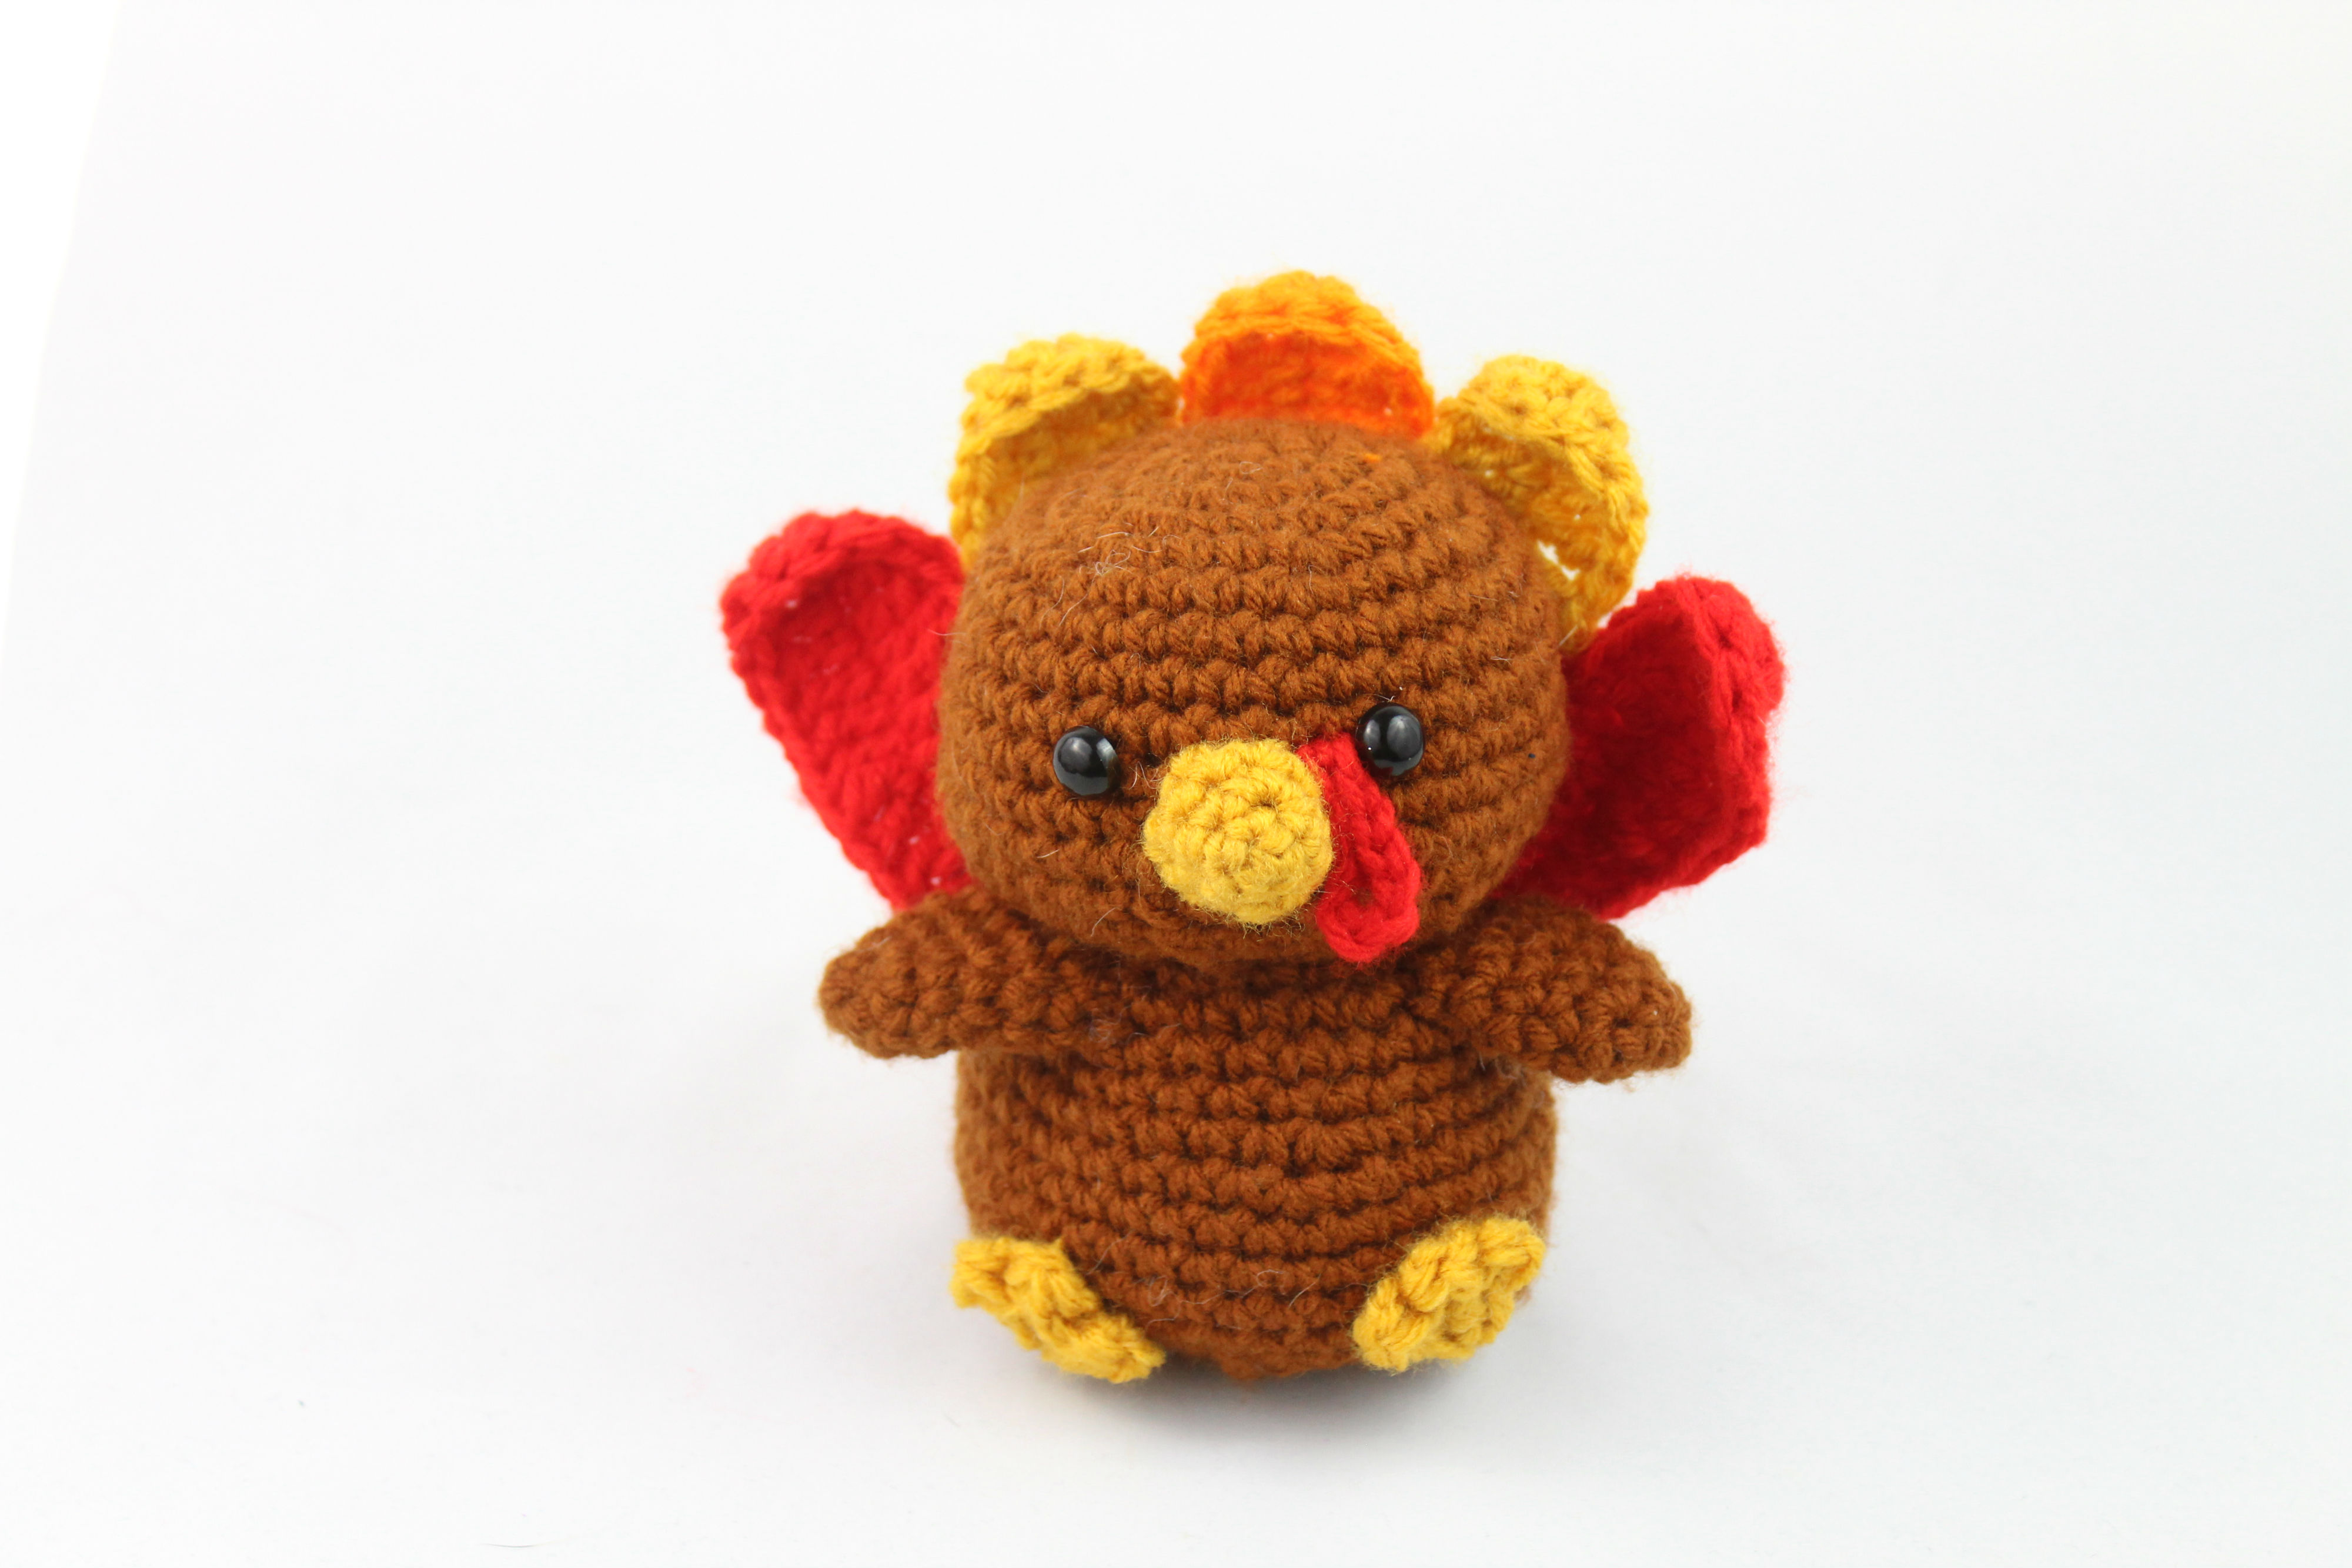
Finish off and pin to the head as shown.
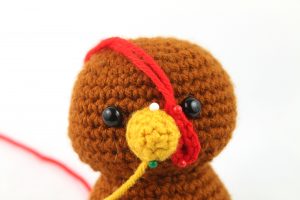
Wattle:
In Red
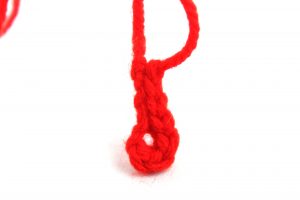
Round 1: Ch 6. Sc 3 times in the 2nd Ch from hook. Sc in the next 2 st, SlSt in last 2 st (7)
Finish off and pin to the head as shown.
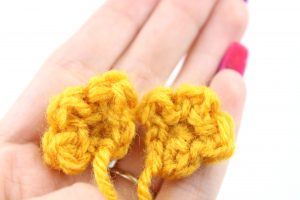
Arms: (Make 2)
In Brown
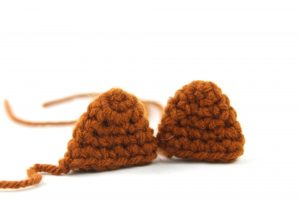
Round 1: 6 Sc in Magic Ring (6)
Round 2: *Sc* all around (6)
Round 3: *Inc, Sc* all around (9)
Round 4: *Sc* all around (9)
Round 5: *Inc, Sc 2* all around (12)
Round 6: *Sc* all around (12)
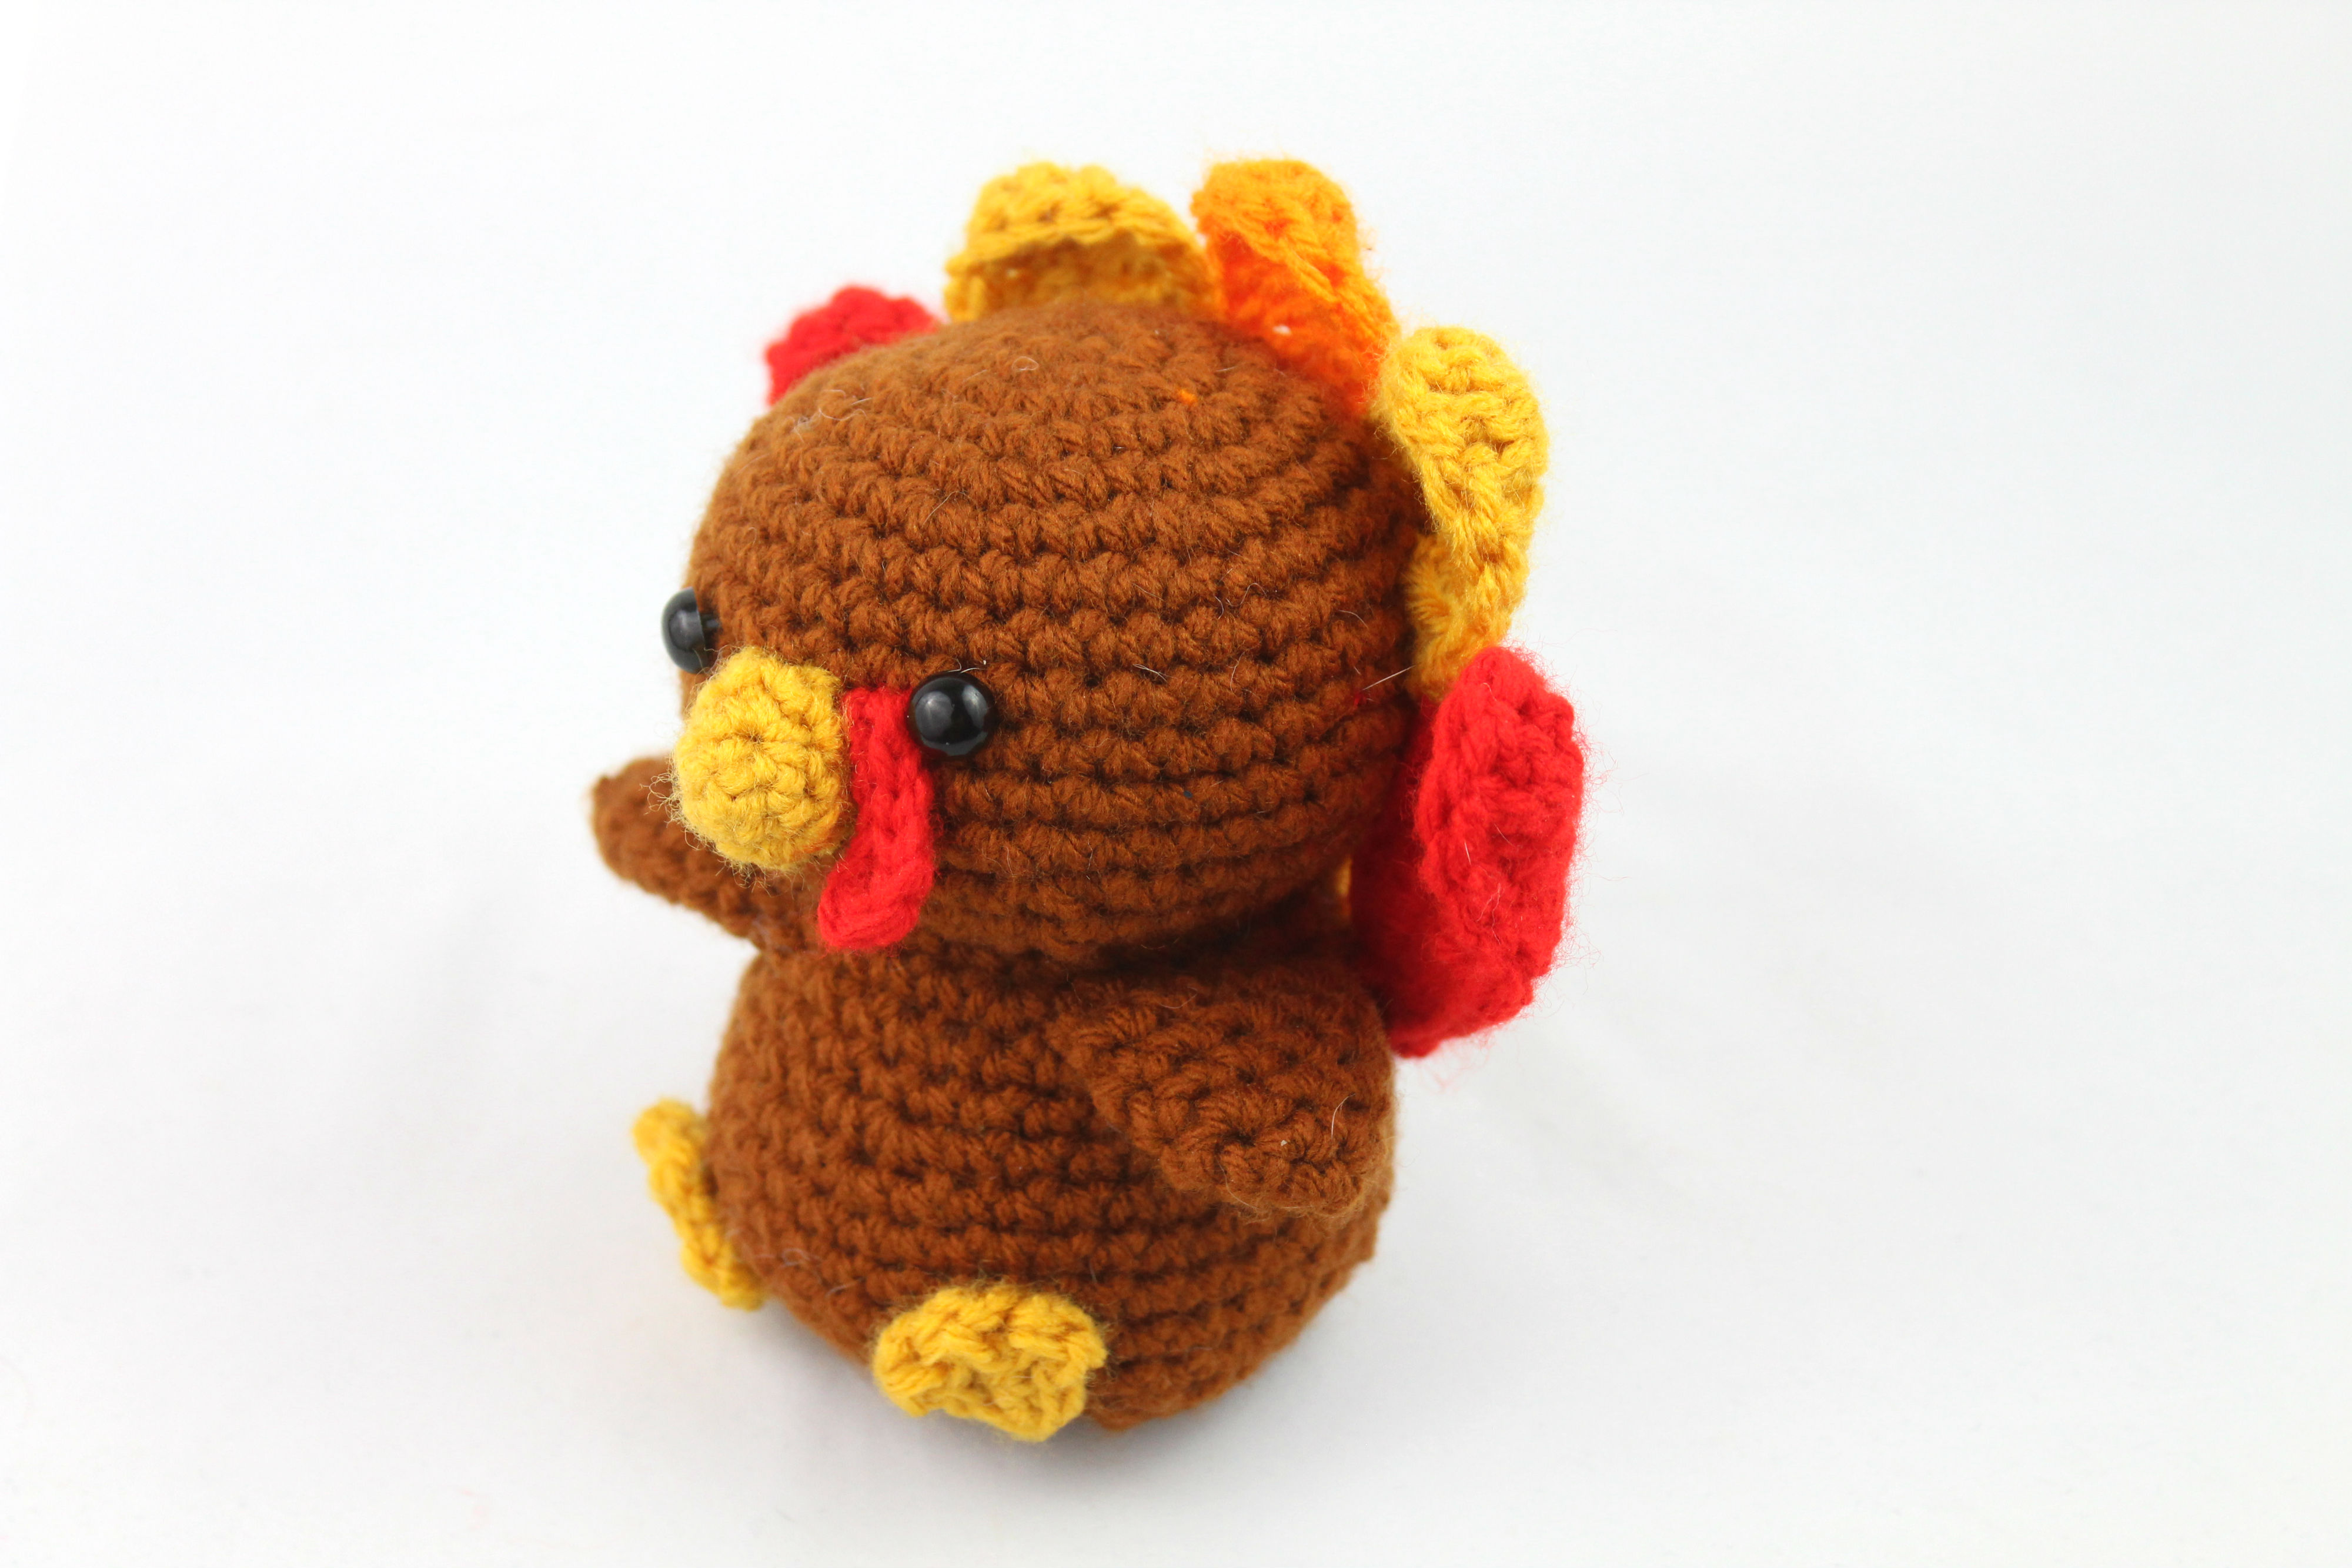
Finish off and pin to the body as shown.
Sew on all pieces now.
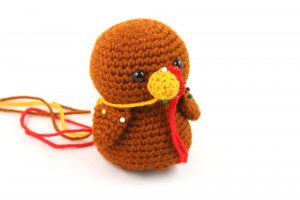
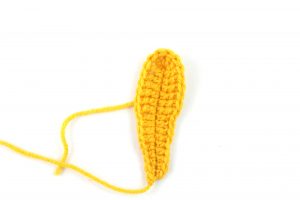
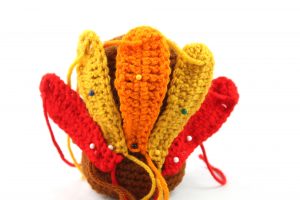
Feathers: (Make 5)
2 in red, 2 in yellow, 1 in orange
(Note: If you find that you want your feathers thicker and sturdier, crochet another set of feathers in the same colors stated. Then, crochet each matching feather together to form one thicker feather).
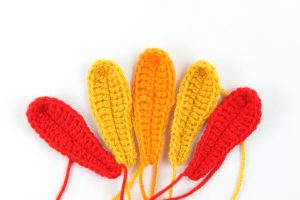
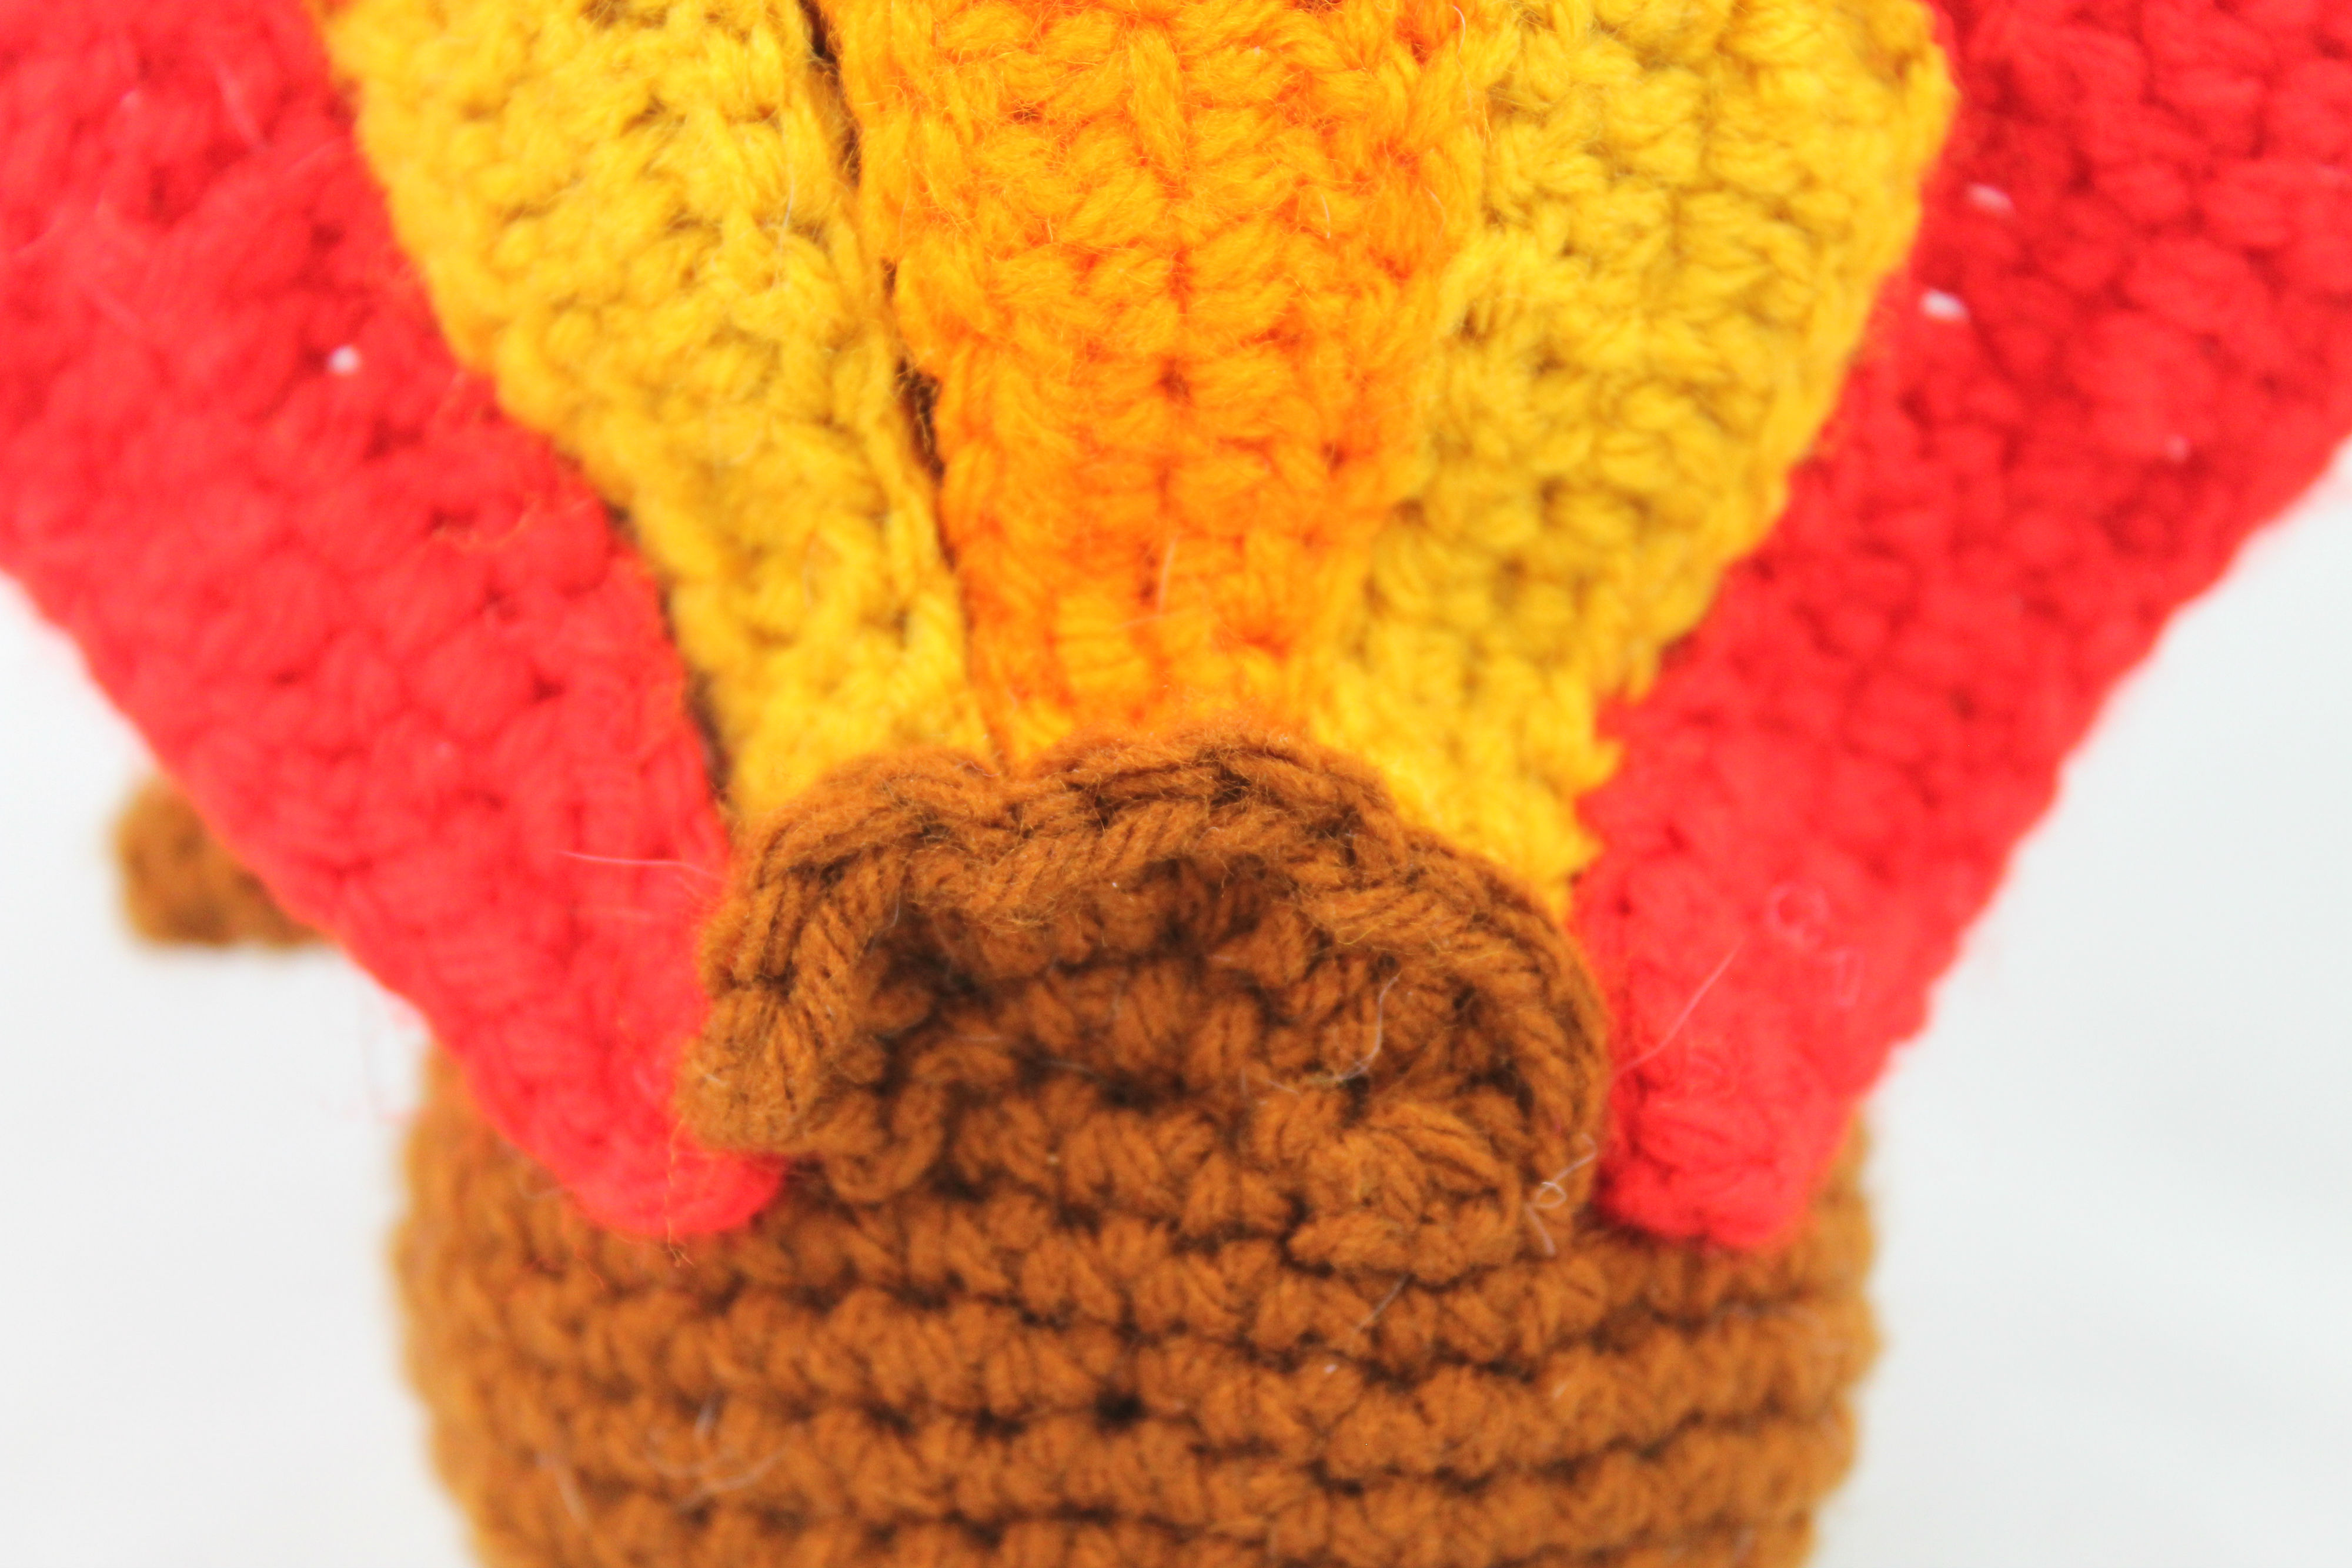
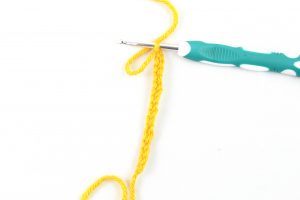
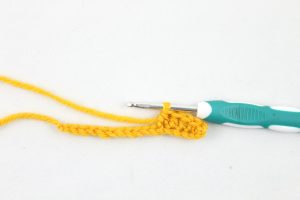
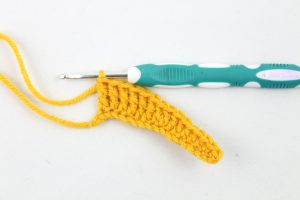
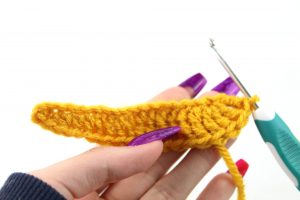
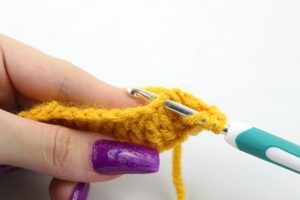
Round 1: Ch 17 (Pic 1). Sc in 2nd Ch from hook. Sc in next st, Hdc in next 3 st (Pic 2), Dc in next 4 st, Trc in next 6 st (Pic 3), Trc 4 times in next st (Pic 4). Now we are on the other side of the Ch (Pic 5). Trc in next 6 st, Dc in next 4 st, Hdc in next 3 st, Sc in next 2 st. Finish off.
Assembly:
Pin on the feathers as shown. Sew the feathers at the bottom, then sew the feathers to the head around there the pins show.
Tail:
In Brown

Round 1: Ch 7. Dc 3 times in 2nd Ch from hook, SlSt in next st, *Dc 3 times in next st, SlSt in next st* 2 times
Finish off and pin as shown. Sew on.
Feet:
In Yellow
Round 1: 6 Sc in Magic Ring (6)
Round 2: SlSt in the next 2 st, *SlSt in next st, Dc 2 times in same st, SlSt in same st* 3 times, SlSt in last st
Finish off and pin on as shown. Sew on.

 Done! If you finished this pattern, I would be SO HAPPY if you


19 Comments
Super cute Turkey! Very easy to follow pattern. One question, how do you get your feathers to stiffen? Mine are limp. Especially the red ones.
Hi there! To make them stand a bit more stiff I sewed the feathers on not only the back, but also on the back of the head. If you want the feathers more stiff on their own, you can also crochet another set of feathers in the same colors and sew/crochet the feathers together. This will make each feather thicker. Let me know what you think! I’d be happy to help you further or offer more suggestions if needed 🙂
Was I supposed to change 1 at the beginning of each round? I’m just getting a bigger and bigger circle, no curving is taking place to form ball of the head, I’m at 30 at around now.
Hi there! No, you don’t need to chain 1 at the beginning of each round. However, if you’re at round 30 you should have the head formed completely by then. This is because at Round 14-17 we decrease, which forms the head. Then at Round 18 we work in the front loops, then start forming the body. Perhaps did you make sure to decrease when stated at rounds 14-17? This might be why there’s no head formed yet. Let me know and I’m happy to help you further! Thanks
I found an easy way to make the feathers. Follow the arm pattern to the 12 row increase. Change to hdc and continue crocheting in spirials to desired length. Slip stitch in next stitch fasten off. Sew on back just as pattern shows. Easier.
That feather looks really great! Thank you so much for sharing, I will have to try it out too 😍 It looks so good!
I made him keychain size. 😍
How did you make a smaller version??? I want to make a keychain too!🦃
Caitlyn, ❤️ the key chain idea is there a pattern for that or could you share how you did that my granddaughter would love it 😊
Thank you so much for this pattern! It’s absolutely adorable and very easy to follow. Another method I’ve found for the feathers to stand straight, follow the pattern for the wings until youve made the first side. Make another wing the same way and connect the two together with slip stitches.
How do I make a smaller version making for a special baby would I not tsp the rows with the sc?
I would love the key chain pattern . It’s really cute. TIA.
I would like the pattern or instruction to make the key chain . TIA
I love this pattern! It was very easy to follow and turned out really cute. I did do 2 sets of feathers and slip stitched each matching set together and that made for nice, sturdy feathers, so that was a good suggestion. I’m going to make several of these for gifts, so trying to make each one a little different. On this one, I added white stitch for eyes, eyebrows and fuzzy, baby turkey hair. Thank you so much for sharing this wonderful pattern!!!
Super cute!! How big/tall is the finished turkey? Looking to make something about 6inches tall.
Sorry for the late response. Ended up being about 7 inches tss as l to the tip of back feather.
Do you sew the pieces on with their long tails or thread?
With doubling each feather, do you still see it to the back of the head?
Thanks!
I did not stitch to the back of head when doubling the feathers. They were pretty sturdy when doubled..
Thanks so much I love the design was supper easy to follow!