![]()


Get the PDF version here

Or Get the entire Halloween PDF Bundle
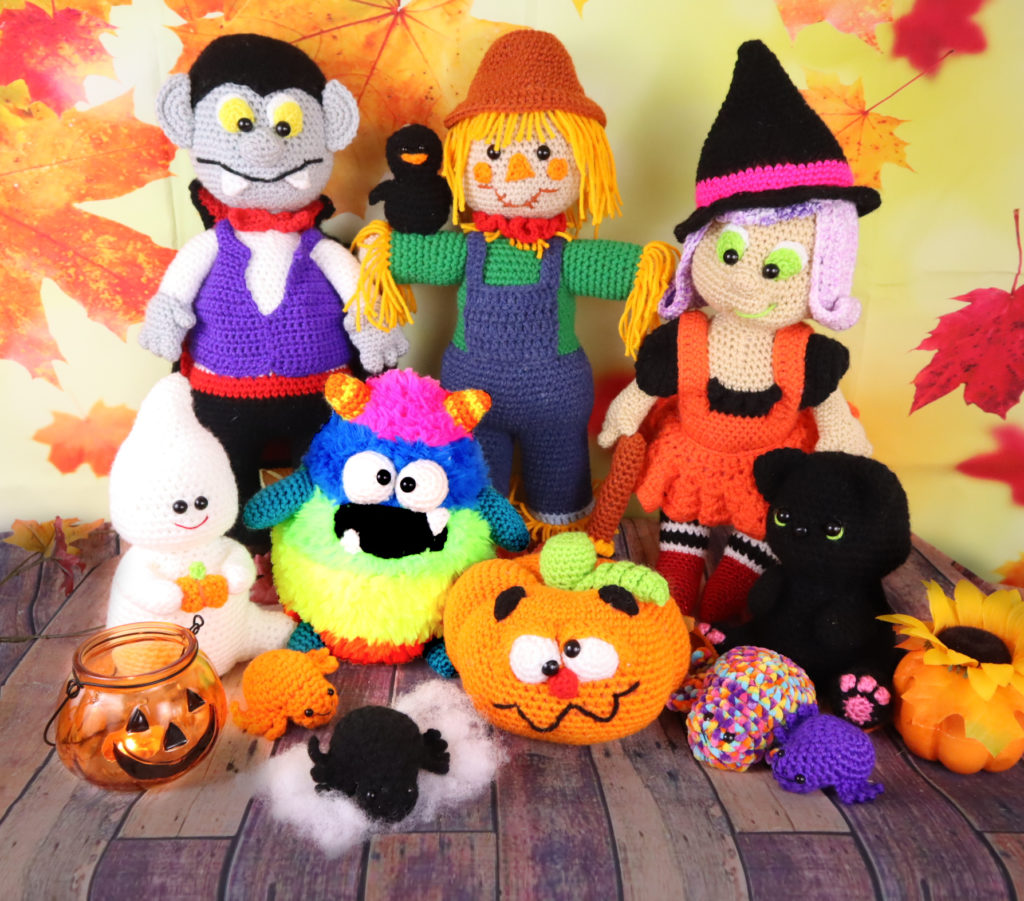
Show me the rest of the Halloween bundle, no PDFs.
Supplies:
• Yarn 4/Medium Weight Yarn in…
Grey, Black, White, Red, Purple, Yellow, and Brown
• 3mm Crochet Hook
We will use the 3mm crochet hook only for the fingers and arm
• 4mm Crochet Hook
We will use the 4mm crochet hook for the rest of the pattern
•12mm safety eyes
•Tapestry needle
•Scissors
•Stuffing
•Foam roller or dowel (optional) This is recommended for the neck to strand firm
Additional Information:
Difficulty: Experienced
• Size
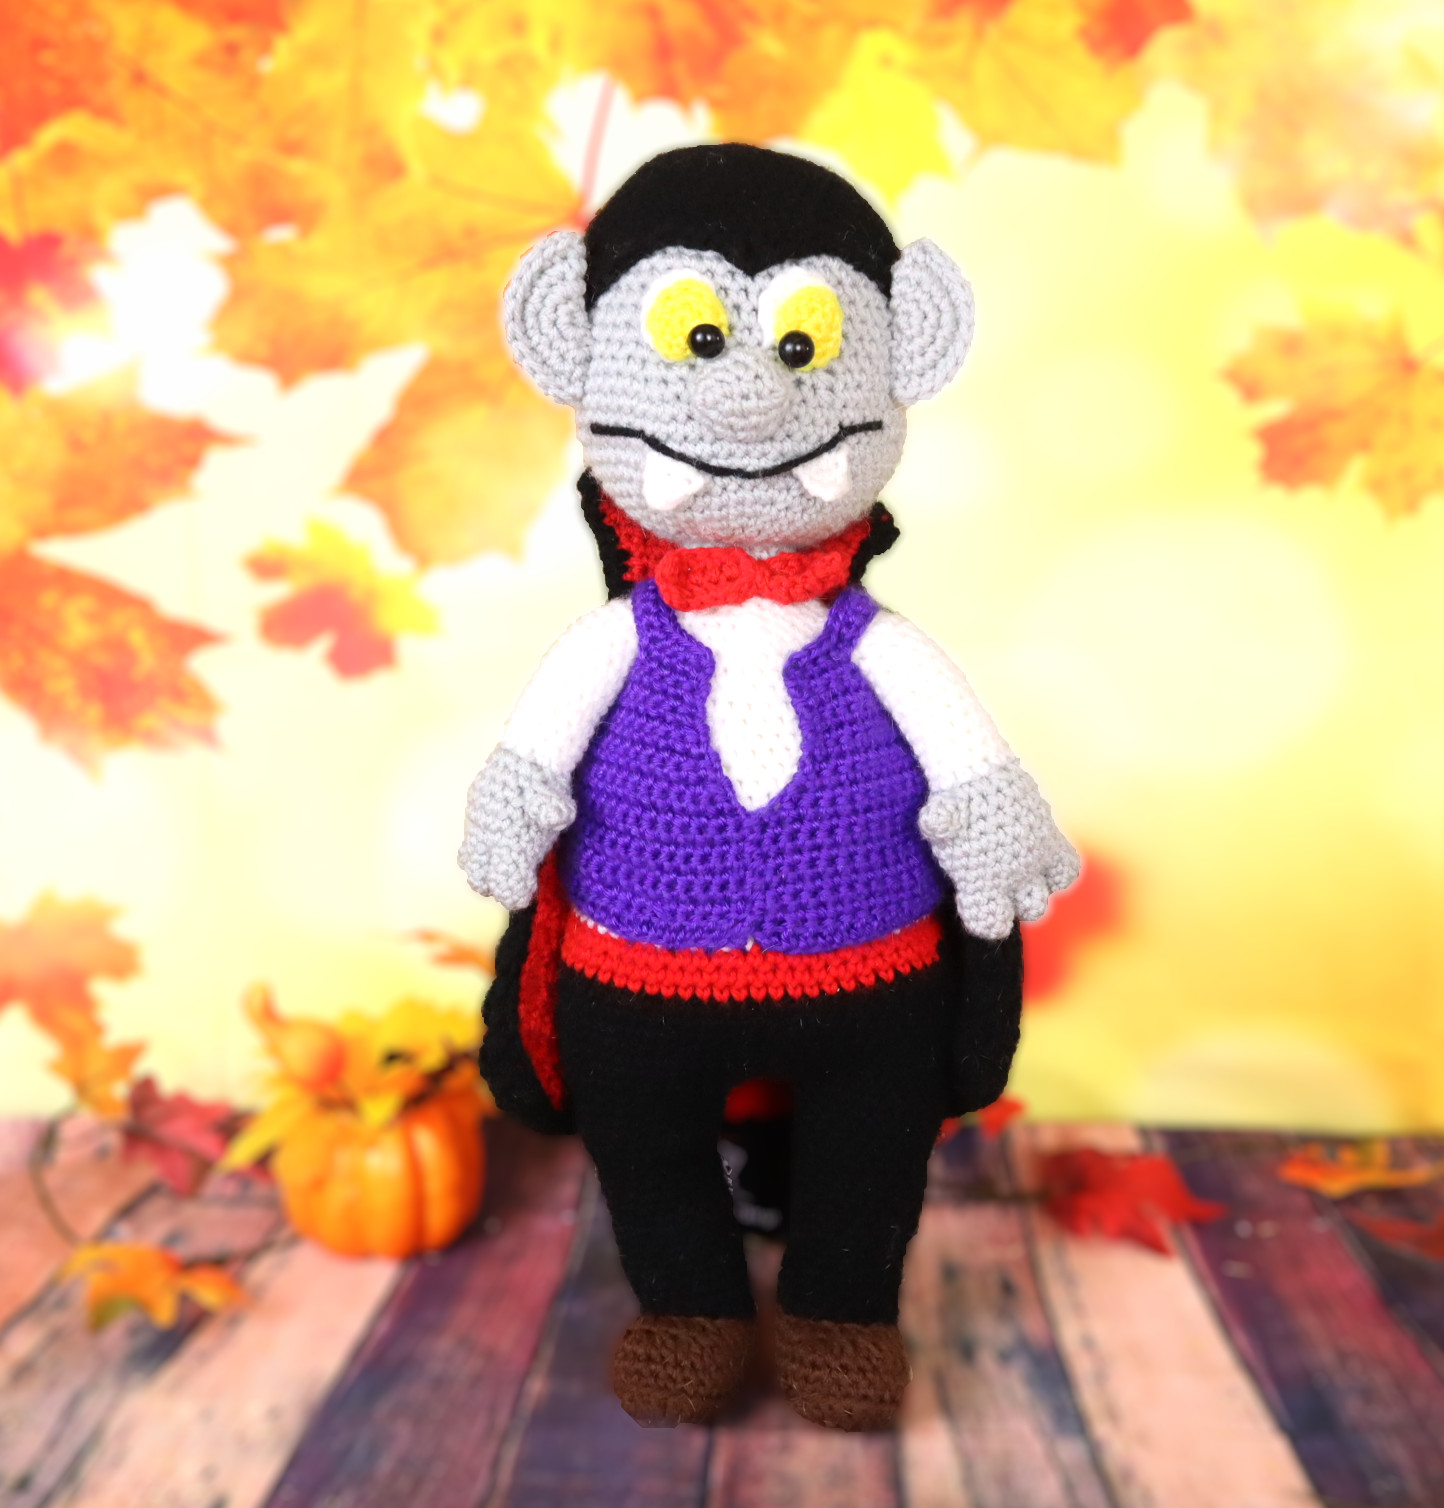
This vampire measures 17.5″ from the shoes to the tip of the head. This pattern is pretty big and takes time, but it’s well worth it!
• Getting started
We start with the legs and crochet then together, which then forms the body and head. All are one piece. We then make the face, hair, arms, and clothes!
Feet: (Make 2)
In Brown
To start the vampire we first create his feet. The foot then leads into the leg. We make one more foot that leads into the leg and crochet both legs together. This forms the bottom of the hips, then leads into the body, and the head. The legs to the head are all one continuous piece.
We work the shoe in a round. We first start by making a chain and work entirely around the chain in a round, rather than turning it like a row.
Make one leg first, then create the second
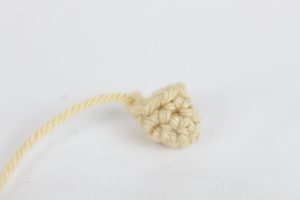
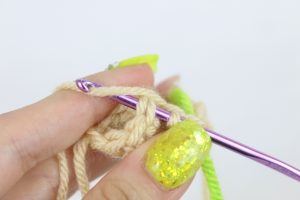
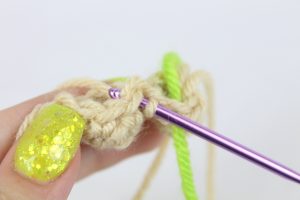
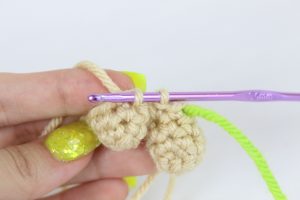
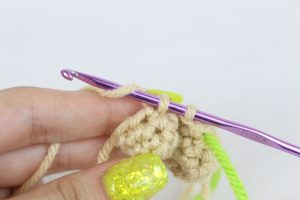
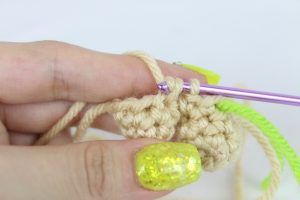
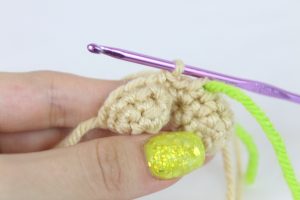
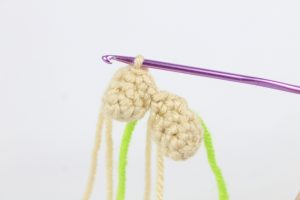
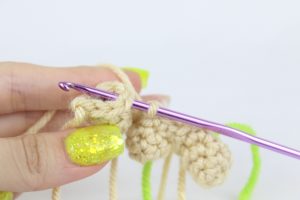
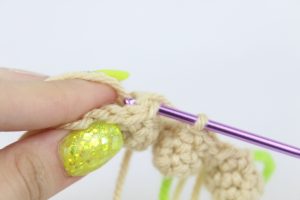
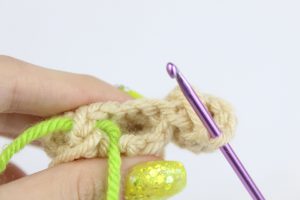
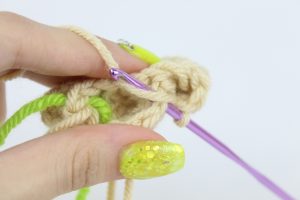
Round 1: Ch 11 (Pic 1). Sc in the 2nd Ch from the hook. Sc in the next 5 st. Dc in the next 3 st. Dc 5 times in the last ch of the st (Pic 2). Now we’re at the end of the chain. Turn to the other side of the ch (Pic 3). We’re going to crochet on that other side now (Pic 4-5). Dc in the next 3 ch, Sc in the last 6 ch (Pic 6) (23)
1. 2.
2.
3. 4.
4.
5. 6.
6.
Round 2: Sc in the next 2 st, Dc in the next 7 st. Dc 2 times in each of the next 5 st, Dc in the next 7 st, Sc in the last 2 st (28)
Round 2 Will Look Like This

Round 3: In the BLO, *Sc* all around (28)
Round 3 Pictured Below


Round 4: In BOTH Loops, *Sc* all around (28)
Round 5: Sc 10, *Dc Dec 1* 5 times, Sc in the next 8 st (24)
Round 6: Sc 8, *Dc Dec* 5 times, Sc 5 (18)
Shoe will look like this

Round 7: Change to black. In the BLO, *Sc* all around (18)
Stuff the shoe now. Stuff the leg when needed.

Round 8-20: In BOTH Loops, *Sc* all around (18)
Round 21: Repeat *Inc, Sc in the next 5 st* all around (21)
Round 22-24:*Sc* all around (21)
Finish off only the first leg now. Don’t finish off the second leg here. Instead, continue on with Round 25.
Connecting the legs
Now we’re going to connect the legs together. Once the legs are connected, we will start working on the body!
Round 25: Sc in the next 5 st, Ch 4 (Pic 1). Now take the 2nd leg and count 8 stitches before the stitch marker. Sc in that 8th stitch (Pic 2-8).
1. 2.
2.
3. 4.
4.
5. 6.
6.
7. 8.
8.
You can now take out the old stitch marker from that leg. Sc in the next 20 st. Now we meet the chain (Pic 9). Sc in the next 4 st along the chain (Pic 10-12). Now we meet the other leg (Pic 13). Sc in the next 16 st (Pic 14-15).
9. 10.
10.
11. 12.
12.
13. 14.
14.
15.
Round 26: Sc in the next 5 st. Now we meet the ch (Pic 1). Sc in the next 4 st along the ch (Pic 2-3). Now we meet the other leg. Sc in the next 21 st of that leg (Pic 4).
1. 2.
2.
3. 4.
4.
Now Sc in the next 4 st across the middle of the legs (Pic 5-7). Now we meet the other leg. Sc in the next 16 st of that leg (Pic 8-10)
5. 6.
6.
7. 8.
8.
9. 10.
10.
Hips:
Now that we have the feet connected we’re now working on the hips. This will soon lead to the waist and torso.

Round 27: *Sc* all around (50)
Round 28: *Inc, Sc 6* 7 times, Sc in the last st (57)
Round 29-34: *Sc* all around (57)
Round 35-37: Change to Red. *Sc* all around (57)
Round 38-41: Change to White. *Sc* all around (57)
Round 42: *Dec, Sc 17* 3 times (54)
Round 43-49: *Sc* all around (54)
Round 50: *Dec, Sc 7* all around (48)
Round 51: *Sc* all around (48)
Round 52: *Dec, Sc 6* all around (42)
Round 53-57: *Sc* all around (42)
Stuff here

Round 58: *Dec, Sc 5* all around (36)
Round 59: *Dec, Sc 4* all around (30)
Round 60: *Dec, Sc 3* all around (24)
Round 61: *Dec, Sc 2* all around (18)
Round 62: Change to Grey. In the FLO, *Sc* all around (18)
Round 62 FLO Pictured Below

Round 63-64: In BOTH Loops, *Sc* all around (18)
Round 65: In the FLO repeat *Inc, Sc 2* all around (24)
Round 66: In BOTH Loops repeat *Inc, Sc 3* all around (30)
Round 67: *Inc, Sc 4* all around (36)
Round 68: *Inc, Sc 5* all around (42)
Round 69: *Inc, Sc 6* all around (48)
Round 70: *Inc, Sc 7* all around (54)
Round 71: *Inc, Sc 8* all around (60)
Now we’re working on the head
Round 72-75: *Sc* all around (60)
Round 76: *Dec, Sc 8* all around (54)
Round 77: *Dec, Sc 7* all around (48)
Round 78-84: *Sc* all around (48)
Round 85: *Dec, Sc 6* all around (42)
Stuff here. Continue stuffing after each round.

Round 86-88: *Sc* all around (42)
Round 89: *Dec, Sc 5* all around (36)
Stuff here. Continue stuffing after each round.
Round 90: *Dec, Sc 4* all around (30)
Round 91: *Dec, Sc 3* all around (24)
Round 92: *Dec, Sc 2* all around (18)
Round 93: *Dec, Sc* all around (12)
Round 94: *Dec* all around (6)
Finish off and sew the head closed. Set body aside for now.
Eye Iris: (Make 2)
In Yellow

Round 1: 6 Sc in Magic Ring (6)
Round 2: Sc in the first st, *Inc* in the next 3 st, Sc in the last st (9)
Finish off, leaving a tail for sewing. Add a 12mm safety eye in the 2nd stitch of Round 2.
Eye Whites: (Make 2)
In White

Round 1: 6 Sc in Magic Ring (6)
Round 2: Sc in the first st, *Inc* in the next 3 st, Sc in the last 2 st (9)
Finish off. Weave in ends.
Eye Assembly:
In Yellow
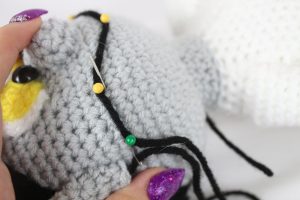
Now we will sew the iris to the eye white. Place the iris slightly below the white of the eye (Pic 1-3). Sew the iris to the eye with the tail of yarn, be sure to sew the eye in the last round (Pic 4). Now pin the eyes where shown and sew on (Pic 6).
1. 2.
3. 4.
4.
5. 6.
6.
Nose:
In Grey

Round 1: Ch 5. Sc in the 2nd ch from hook. Sc in the next 3 st, Sc 2 times next st. Now we’re on the other side of the chain. Sc in the next 4 st (10)
Round 2-3: *Sc* all around (10)
Finish off, leaving a long tail for sewing. Pin the nose as shown and sew on. Be sure to lightly stuff the nose before fully sewing closed.

Smile:
In Black
Take a very long piece of black yarn. Pin the smile on as shown, we will have 5 pins total (Pic 1). With the tail end of yarn from the left side of the smile, insert needle with thread where the first pin is (Pic 2). Pull the needle out under the smile by the next pin (Pic 3). Reinsert needle right above the yarn in the same stitch (Pic 4).
1. 2.
2.
3. 4.
4.
Pull needle out to the middle pin (Pic 5). Reinsert needle above the yarn in the same stitch (Pic 6). Pull the needle out by the next pin (Pic 7). Reinsert needle above the yarn in the same stitch (Pic 8).
5. 6.
6.
7. 8.
8.
Pull the needle out to the next stitch (Pic 9). Reinsert needle above the yarn in the same stitch (Pic 10). Tie the ends of yarn into firm knots and weave into the head. Done!
9. 10.
10.
11. 12.
12.
Teeth: (Make 2)
In White

Row 1: Ch 4. Hdc in the 2nd Ch from the hook. Dc in the next st, Trc in the last st (3)
Finish off, leaving a tail for sewing. Pin each tooth below the smile as shown and sew on.

Ears: (Make 2)
In Grey

Round 1: 6 Sc in Magic Ring (6)
Round 2: *Inc* all around (12)
Round 3: *Inc, Sc* all around (18)
Round 4: *Inc, Sc 2* all around (24)
Take the ear and fold it in half, making sure the stitches line up (Pic 2). Insert the hook under BOTH stitches (Pic 3)
1. 2.
2.
3.
and Sc the ear together for the next 12 st (Pic 4-9).
4. 5.
5.
6. 7.
7.
8. 9.
9.
Finish off, leaving a long tail for sewing. Pin each ear to the head as shown, the round side will be facing out (Pic 10). Sew on.
10.
Hair:
In Black

Round 1: 6 Sc in Magic Ring (6)
Round 2: *Inc* all around (12)
Round 3: *Inc, Sc* all around (18)
Round 4: *Inc, Sc 2* all around (24)
Round 5: *Inc, Sc 3* all around (30)
Round 6: *Inc, Sc 4* all around (36)
Round 7: *Inc, Sc 5* all around (42)
Round 8: *Inc, Sc 6* all around (48)
Round 9-11: *Sc* all around (48)
Round 12: *Inc, Sc 7* all around (54)
Round 13-17: *Sc* all around (54)
Round 18: Sc in the next 24 st. Dc in the next 2 st. Dc in the next st, Trc in that same st, Ch 1, Trc in that same st, Dc in that same st, Dc in the next 2 st, Sc in the next 25 st (54)
Finish off, leaving a long tail for sewing. Slide the hair onto the head (Pic 1) and pin where the peak is between the eyes (Pic 2). Sew on.
1. 2.
2.
Hands/Arms:
We start the hands by creating each individual finger. We then crochet the fingers together, this will form the hand. The hand then leads into the arm as one continuous piece.
NOTE: Demo pictures in this pattern show a skin color. This is because it shows up on the camera easier than a grey/white.
NOTE: Make all fingers and the entire arm using a 3mm hook. Change back to a 4mm hook for all other parts of the pattern.
Thumb: (Make 1 per arm, Make this first)
In Grey
Round 1: 6 Sc in Magic Ring (6)
Round 2-3: *Sc* all around (6)
Finish off and set aside for now.
Fingers: (Make 3 Per Hand)
In Grey
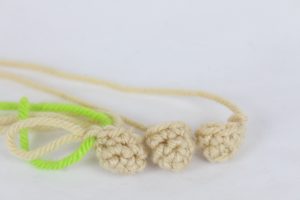
Round 1: 6 Sc in Magic Ring (6)
Round 2-4: *Sc* all around (6)
Finish off the first 2 fingers. Don’t finish off the third finger, instead continue on to Round 5.
Hand

Now we will connect 3 fingers and this will start forming the hand. A few rounds later we will connect the thumb. Remember, demo photos show a different color but please continue to use grey.
Round 5: Sc in the next 3 st (Pic 1). Now take a finger and Sc into any stitch on that finger (Pic 2-8). Sc in the next 2 st of that finger (Pic 9).
1.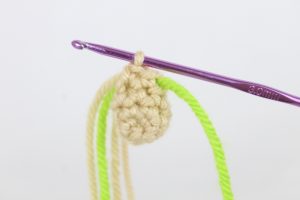 2.
2.
3. 4.
4.
5. 6.
6.
7. 8.
8.
9.
Now take the third finger and Sc into the next 6 st of that 3rd finger (Pic 10-12). Now we’re at the other side of the fingers (Pic 12). Sc in the next 3 st of the middle finger (Pic 13-14),
10. 11.
11.
12. 13.
13.
14. 
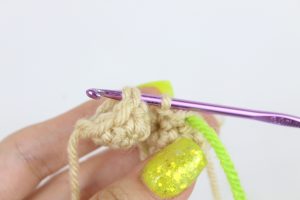
Sc in the next 3 st of the first finger (Pic 15-16). Round 5 will look like Pic 16-17. (18)
15. 16.
16.
17.
Now we’re going to connect the thumb like we did the other fingers. After this, we will start to form more of the arm
Round 6-8: *Sc* all around (18)
In the next round we will add the thumb
Round 9: Sc in the next 9 st (Pic 1). Now take the thumb and align the stitches to the hand (Pic 2). Going under BOTH the thumb and hand stitches, Sc in the next 3 st (Pic 3-8). Now continuing on just the hand, Sc in the next 6 st (Pic 9) (18)
1. 2.
2.
3. 4.
4.
5. 6.
6.
7. 8.
8.
9.
Round 10: Sc in the next 9 st . Now we meet the thumb (Pic 1). Sc in the next 3 st on the thumb (Pic 2). Continuing on the hand, Sc in the next 6 st (Pic 3-4) (18)
1. 2.
2.
3. 4.
4.
Round 11: Repeat *Dec, Sc* all around (12)
Stuff gradually in the next rounds
Round 12-25: Change to white. *Sc* all around (12)
Finish off, leaving a long tail for sewing. Pin the arms to the doll as shown and sew on.
Pin each arm to the sides of the doll as shown. Be sure the thumbs are pointing outwards. Leave equal room on each side of the arm for the sleeve and strap later.


Vest:
In Purple
Row 1: Ch 64. Sc in the 2nd Ch from the hook. Sc in the next 62 st (62)
Row 2-9: Turn, Sc in the next 62 st (62)
Row 10: Turn, Dec, Sc 8* 6 times, *Dec* 1 time (55)
Row 11: Turn, Sc next 55 st (55)
Row 12: Turn, *Dec, Sc 7* 6 times, Sc in the last st (49)
Row 13: Turn, Sc next 49 (49)
Row 14: Turn, *Dec, Sc 6* 6 times, Sc in the last st (43)
Row 15-17: Turn, Sc next 43 st (43)
In the next round we will make the arm holes by making a chain, skipping some stitches, then crocheting in the next stitches. The markers show where they will go, don’t worry you don’t need to add these markers.
Row 18: Sc in the next 5 st, Ch 10 (Pic 2). Skip the next 5 st, Sc in the next st (Pic 3). This makes an armhole (Pic 4). Sc in the next 22 st. Ch 10. Skip the next 5 st, Sc in the next st. Sc in the next 4 st. (53)
1. 2.
2.
3. 4.
4.
5.
Row 19: Turn, Sc in the next 5 st, Now we meet the ch. Sc in the next 10 ch. Sc in the next 23 st, Now Sc in the next 10 st, Sc in the next 5 st (53)
Row 20: Turn, Sc in the next 53 st (53)
Finish off and leave a long tail for sewing. Put the vest on the doll (note you may need to squish his hands to fit through the armhole, Pic 2). Now you can leave the vest as is (Pic 3) or you can pin the bottom piece as shown and sew together (Pic 4).
1. 2.
2.
3. 4.
4.
Note: If your vest is too short, simply single crochet at the bottom of the vest to add more rows!
Cape:
Make 2 pieces, one in red first then one in black

To make the cape we create two flat pieces and crochet them together to form the entire cape. First, we make one in red, then we make the black one.
Row 1: Ch 46. Dc in the 2nd Ch from the hook. Dc in the next 44 st (45)
Row 2-8: Turn, Dc in the next 45 st (45)
Row 9: Turn, Repeat *Dec, Sc 5* 6 times, *Dec* 1 more time, Dc in the last st (38)
Row 10-12: Turn, Dc in the next 38 st (38)
Row 13: Turn, Repeat *Dec, Sc 4* 6 times, Sc in the last 2 st (32)
Row 14-15: Turn, Sc next 32 (32)
Row 16: Turn, Repeat *Dec, Sc 3* 6 times, Sc in the last 2 st (26)
Row 17-18: Turn, Sc in the next 26 st (26)
Row 19: Turn, Repeat *Dec, Sc 2* 6 times, Sc in the last 2 st (20)
Row 20: Turn, Dc in the next 20 st (20)
Row 21: Turn, Repeat *Dec, Sc* 6 times, Dc in the next 2 st (14)
Row 22: Turn, Dc in the next 14 st (14)
Row 23: Turn, In the FLO, *Inc* in the first st. Sc in the next 12 st, *Inc* in the last st (16)
Row 24: Turn, *Sc* in the next 16 st (16)
Row 25: Turn, *Inc* in the first st. Sc in the next 14 st, *Inc* in the last st (18)
Row 26: Turn, *Sc* in the next 18 st (18)
Row 27: Turn, *Inc* in the first st. Sc in the next 16 st, *Inc* in the last st (20)
Row 28: Turn, *Sc* in the next 20 st (20)
Row 29: Turn, *Inc* in the first st. Sc in the next 18 st, *Inc* in the last st (22)
Finish off the red cape. Don’t finish off the black cape, instead continue on to cape assembly.
Cape Assembly:
In Black
Place both capes together, making sure the stitches line up (Pic 3). Insert hook under BOTH stitches from the red and black cape (Pic 4). Sc around the entirety of the cape (Pic 11). Finish off, leaving a long tail for sewing the cape to the neck. Pin the cape to the vampire as shown (Pic 12) and sew on. Weave in any ends.
1. 2.
2.
3. 4.
4.
5. 6.
6.
7. 8.
8.
9. 10.
10.
11. 12.
12.
Bow
In Red

To make the bow we create a flat piece. We then weave the tail end of yarn to the middle and wrap it around the center. Finally we pin the bow to the vampire and sew on!
Row 1: Ch 13. Dc in the 2nd Ch from the hook. Dc in the next 11 st (12)
Row 2: *Sc* in the next 12 st (12)
Finish off, leaving a very long tail.
Weave the tail of yarn to the middle of the bow (Pic 2-3). Now tie this yarn around the bow firmly a few times (Pic 4). Sew the tail of yarn through the middle of the bow to secure (Pic 5) and pin the bow on as shown (Pic 6). Sew on and weave in any ends.
1. 2.
2.
3. 4.
4.
5. 6.
6.
All done! If you made this vampire, I would LOVE to see 🙂 Please post a picture in the comments below this post, or you can “try” it on Pinterest.


