Waffle Amigurumi – Free Crochet Pattern
Print this pattern out – purchase the PDF version here!

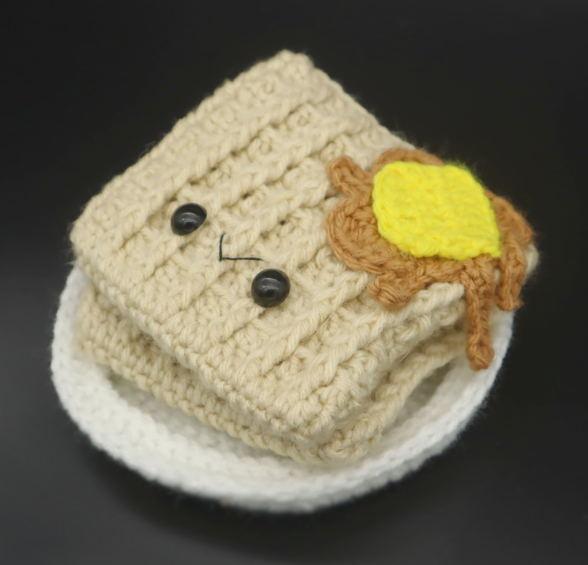
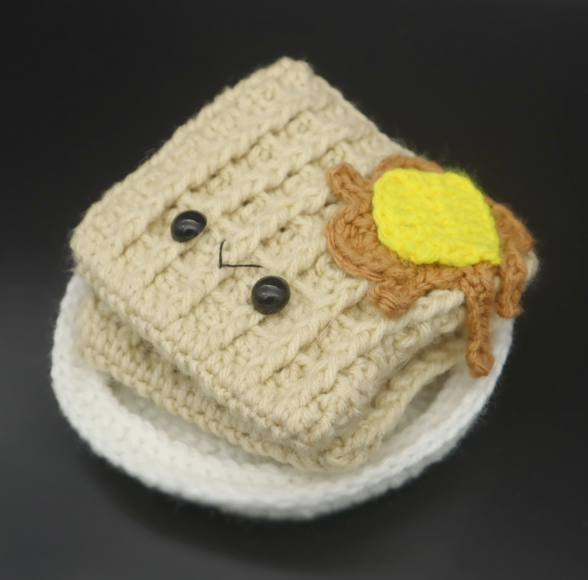
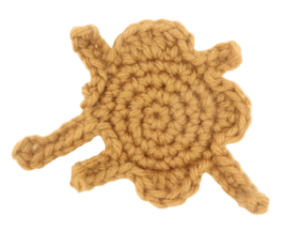
 It’s about time you crochet one of the best things ever – waffles! Use this free amigurumi crochet pattern! Don’t let the unique stitching intimidate you. This pattern is pretty easy, as long as you’re experienced with double crochets. I show you step by step how to do a front posts double crochet, as well as how to work behind a stitch. This pattern is great for a cute decoration, play food for kids, and would make a super cute pillow if you use blanket yarn! Let’s get started.
Supplies:
• Yarn 4/Medium Weight in:
Cream for waffle, brown for syrup, yellow for butter, and white for plate (optional)
•4mm Crochet Hook
•Tapestry needle
•Scissors
•Stuffing (optional)
•12mm safety eyes
•Black embroidery thread
Additional Information:
Difficulty: Intermediate
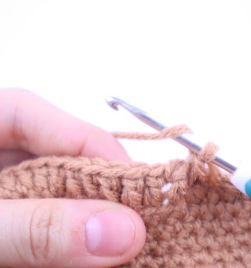
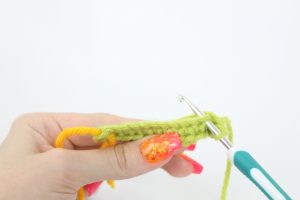
How to do a front post double crochet:
Yarn over (Pic 1). Insert hook through the next double crochet by inserting your hook from the right side of the double crochet, over to the left (Pic 1-2).
1. 2.
2.
Yarn over (Pic 4). Pull yarn through (Pic 5-6). You will have 3 loops on your hook (Pic 6)
3.4.
 5.
5.
 6.
6.
 7.
7.
Yarn over and pull through two loops. You will now have 2 loops left on your hook (Pic 7). Yarn over and pull through those remaining two loops (Pic 7).
8.
Waffle:
In cream color
To make the waffle, we will make a chain and work completely around the chain to form a round.
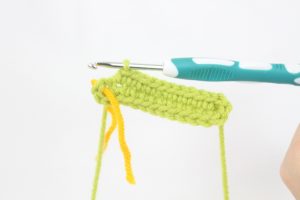
Row 1: Ch 22 (Pic 1). Dc in the 3rd Ch from the hook (Pic 2). The 3 chains we just skipped WILL count as a double crochet!
1.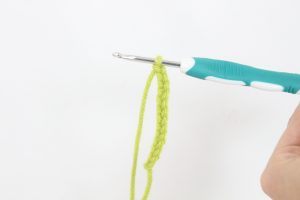 2.
2.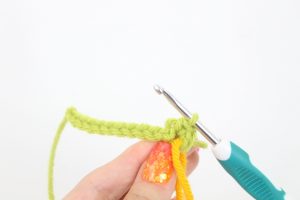
Dc in the next 19. Now we meet the end of the chain (Pic 3). Turn your work to the other side, where we haven’t made any stitches yet (Pic 4). Working on that other side, Dc next 18 (Pic 5) (39)
3.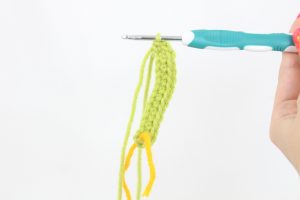 4.
4. 5.
5.
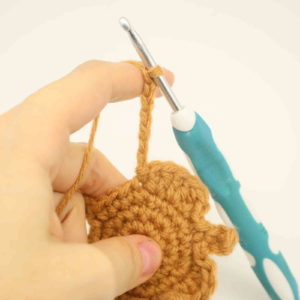
Round 2: Repeat *Dc in the next 2 st, FpDf in the next st* all around (39)
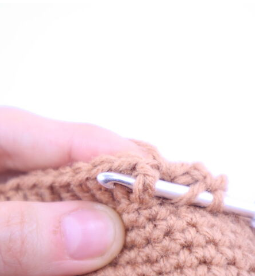
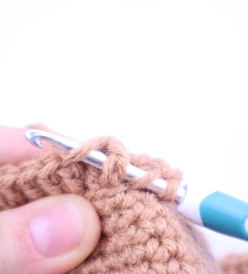
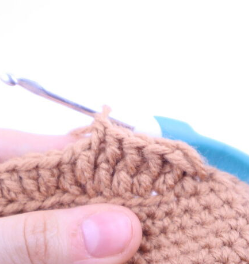
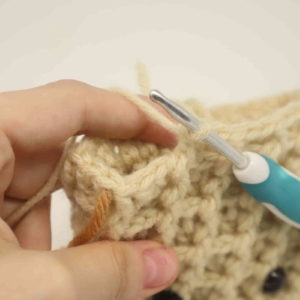
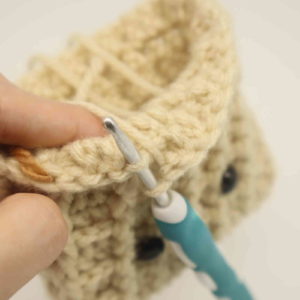
Now we will make the horizontal line you see on the waffle. To do this, we will work in the back of the regular double crochets we made. Bend the stitches towards you so you will see the back of the double crochets (Pic 2).
1. 2.
2.
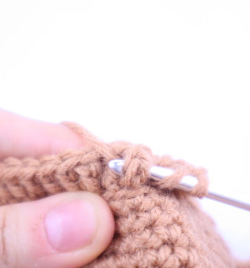
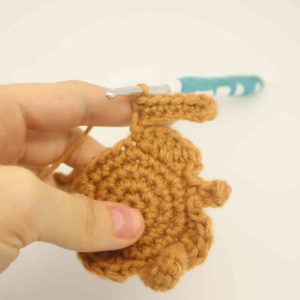
You will see large loops, then a smaller loop between each large loop. I highlighted the smaller loops in yellow (Pic 3). Yarn over, and insert your hook into the smaller loop highlighted in yellow (Pic 3-4).
3. 4.
4.
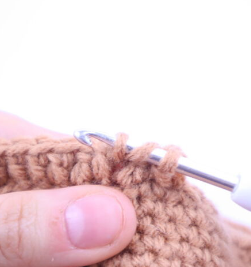
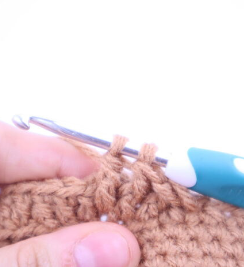
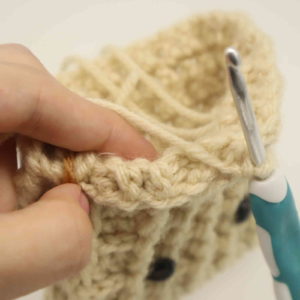
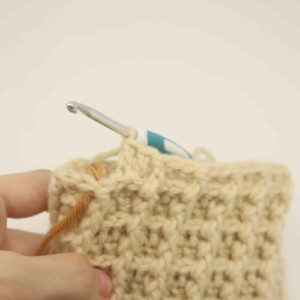
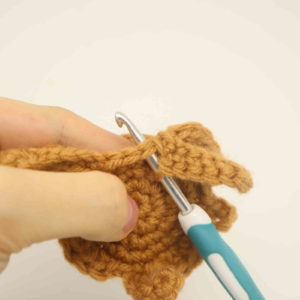
Finish making a double crochet (Pic 5-6). You have successfully created what I will refer to this as a “behind double crochet”.
5.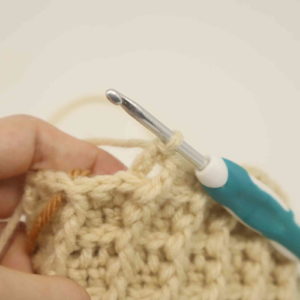 6.
6.
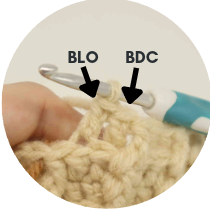 If this method is difficult for you, you can simply make your double crochets in the back loop only. However, your horizontal line won’t be as visible compared to the “behind double crochet” method shown above. Finding the intended loop is a bit hard at first, but it should be easy to insert your hook into. If you find it’s very difficult to insert your hook into the intended stitch, you may be inserting your hook into the wrong loop. Remember that this loop is smaller, and tucked between larger loops (Pic 3).
Round 3: Repeat *Behind double crochet in the next 2 st, FpDc in the next st* all around (39)
Round 4: Repeat *Dc in the next 2 st, FpDf in the next st* all around (39)
Round 5: Repeat *Behind double crochet in the next 2 st, FpDc in the next st* all around (39)
Round 6: Repeat *Dc in the next 2 st, FpDf in the next st* all around (39)
Round 7: Repeat *Behind double crochet in the next 2 st, FpDc in the next st* all around (39)
Round 8: Repeat *Dc in the next 2 st, FpDf in the next st* all around (39)
Round 9: Repeat *Behind double crochet in the next 2 st, FpDc in the next st* all around (39)
Round 10: Repeat *Dc in the next 2 st, FpDf in the next st* all around (39)
Round 11: Repeat *Behind double crochet in the next 2 st, FpDc in the next st* all around (39)
Round 12: Repeat *Dc in the next 2 st, FpDf in the next st* all around (39)
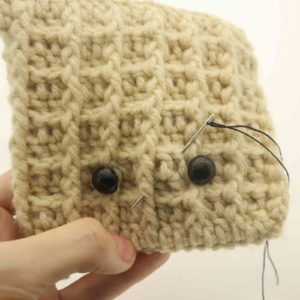
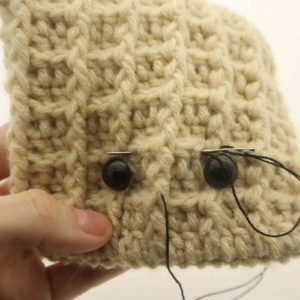
Round 13: Insert safety eyes between Round 3 and 4. I placed a safety eye on the 3rd and 5th FpDc (Pic 1). Align the stitches of the waffle so each stitch matches together as shown (Pic 2). Inserting your hook through BOTH stitches (Pic 3), *SlSt* until each stitch is crocheted together (Pic 3-8), adding stuffing if desired before fully crocheting closed (Pic 9). Once done, cut the yarn and leave a long tail for sewing. Weave in ends.
Smile:
In black embroidery thread
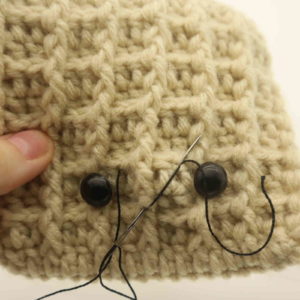
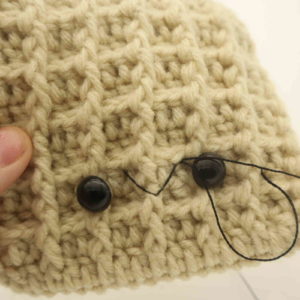
Insert needle with thread one stitch over from the right eye, and pull needle out at the middle as shown (Pic 1). Reinsert needle into the original insertion spot, and pull needle out next to the left of the toy’s eye as shown (Pic 2). Reinsert needle into the middle again, and pull needle out at the original insertion spot (Pic 3). Tie the tail ends of yarn firmly into knots and bring into the toy to hide. Done!
1. 2.
2. 3.
3. 4.
4.
Syrup:
In brown yarn
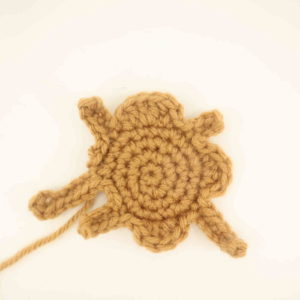
Round 1: 6 Sc into a Magic Ring (6)
Round 2: *Inc* all around (12)
Round 3: *Inc, Sc in the next st* all around (18)
Round 4: *Inc, Sc in the next 2 st* all around (24)
Round 5: Sc in the next st. Ch 7 (Pic 1), Sc 3 times in the 2nd Ch from the hook. Sc in the next 5 ch (Pic 3). Working back on the circle, SlSt in the next 2 st (Pic 4-5).
1. 2.
2. 3.
3. 4.
4. 5.
5.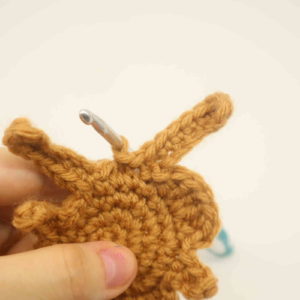
Ch 4. Sc 2 times in the 2nd Ch from the hook, Sc in the next 2 ch. Working on the circle, SlSt in the next 2 st. Dc 2 times in each of the next 2 st, SlSt in the next 2 st. Ch 6. Sc 2 times in the 2nd Ch from the hook, Sc in the next 4 st. Working on the circle, SlSt in the next 2 st. Dc 2 times in each of the next 2 st, SlSt in the next 2 st. Ch 3, Sc 2 times in the 2nd Ch from the hook, Sc in the next ch. Working on the circle, SlSt in the next 2 st. Dc 2 times in each of the next 3 st. SlSt in the next st. Ch 4, Sc 2 times in the 2nd Ch from the hook, Sc in the next 2 Ch. Working on the circle, SlSt in the next 3 st (Pic 6).
6.
Finish off, leaving a long tail for sewing. Place the syrup onto the corner of the waffle, letting the long chains drip down as shown (Pic 7-8).
7. 8.
8.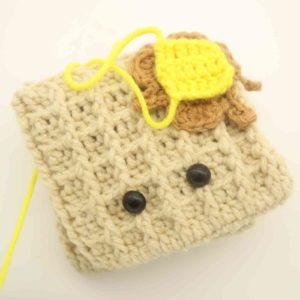 Sew on. You can also use E600 or hot glue to attach the syrup to the waffle – this method isn’t recommended if you’re giving the toy for children, as they syrup may come off. Once done, weave in ends.
Butter:
In yellow yarn
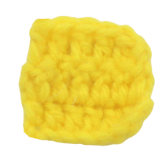
Row 1: Ch 8. Dc in the 3rd Ch from the hook. The 2 chains we skipped WILL count as a double crochet. Dc in the next 5 st (7)
Row 2-3: Turn. Dc in the next 7 st (7)
Finish off, leaving a long tail for sewing. Place the butter onto the syrup as shown. Sew on and weave in ends, or glue on with hot glue or E600.
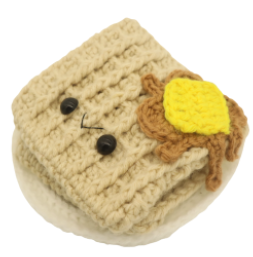
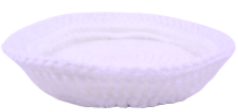
Plate: (Optional)
In white yarn
Round 1: 6 Sc into a Magic Ring (6)
Round 2: *Inc* all around (12)
Round 3: *Inc, Sc* all around (18)
Round 4: *Inc, Sc 2* all around (24)
Round 5: *Inc, Sc 3* all around (30)
Round 6: *Inc, Sc 4* all around (36)
Round 7: *Inc, Sc 5* all around (42)
Round 8: *Inc, Sc 6* all around (48)
Round 9: *Inc, Sc 7* all around (54)
Round 10: *Inc, Sc 8* all around (60)
Round 11: *Inc, Sc 9* all around (66)
Round 12: Work in the FLO and *Dc* all around (66)
Round 13: *FpDc* all around (66)
Finish off now, weave in ends.
Done! I hope you had a fun time making these waffles! If you made this, I would LOVE to see a picture. You can show me by posting a picture in the comments under this post 🙂


3 Comments
Another item to add to my granddaughters birthday gift. Thank you.
Your abbreviations could have been explained better but altogether the pattern is really good. It’s also just so cute!!!
Hello trying to do this pattern but I’m confused about abbreviation FPdf??