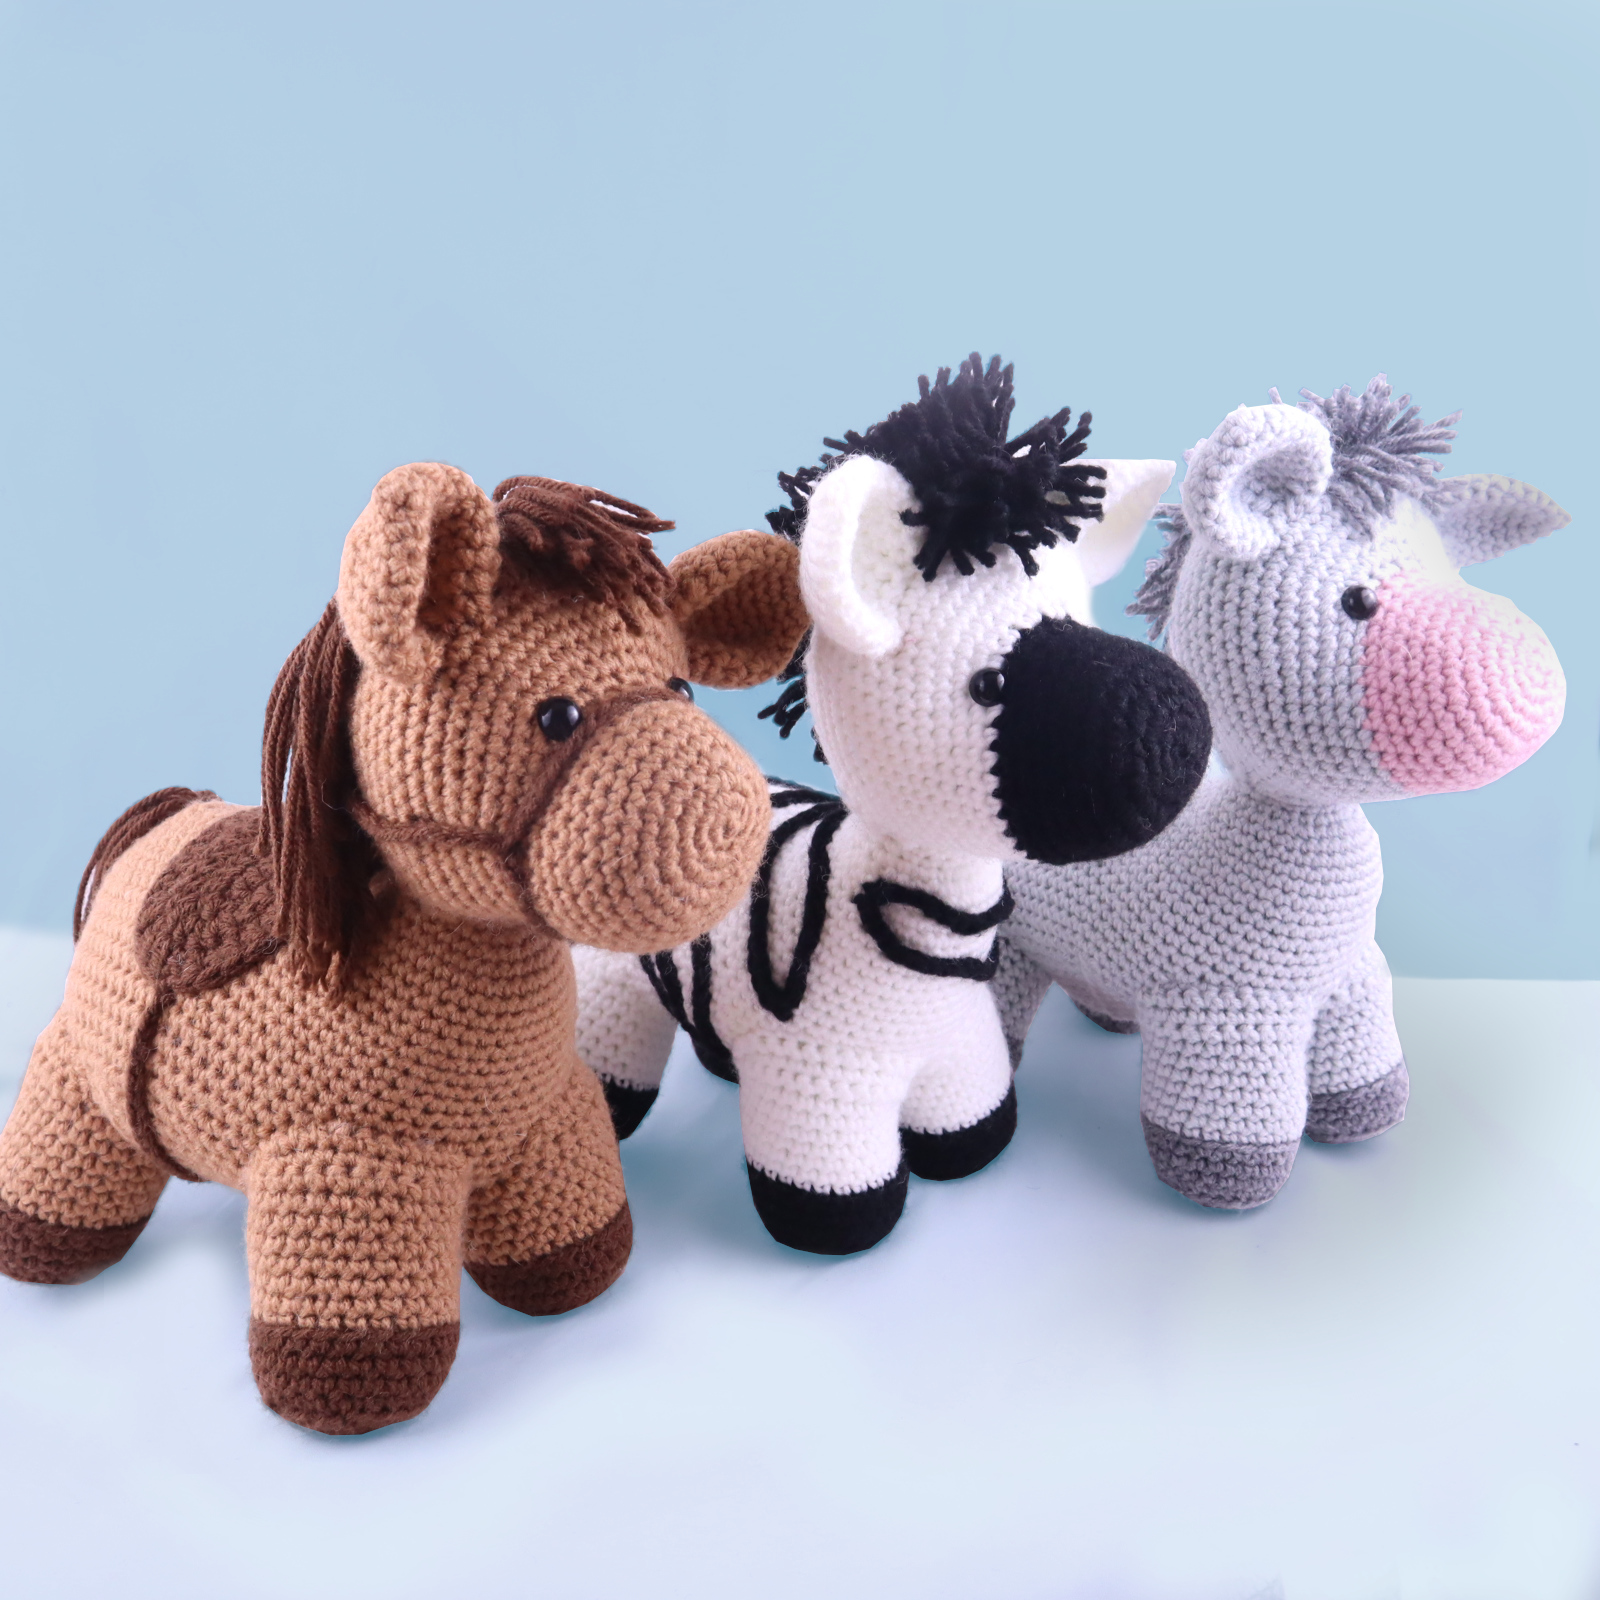
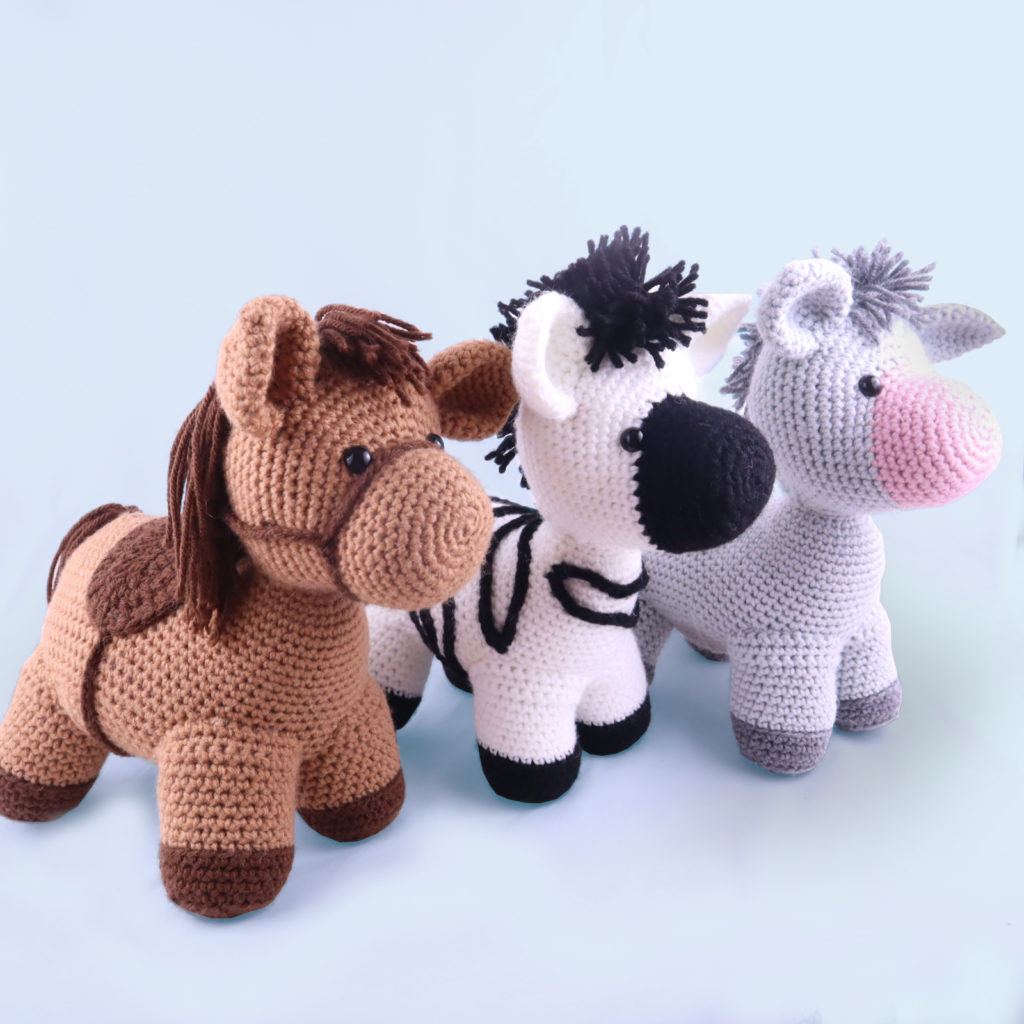
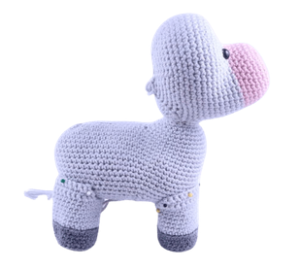
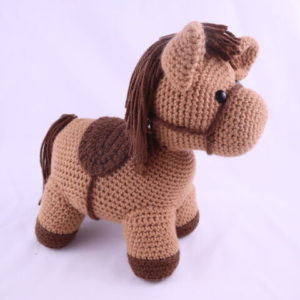
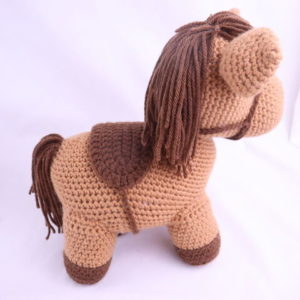
Oh my goodness I am really happy to finally share with you this free horse bundle pattern! This week I’m releasing 3 patterns in 1 🙂 Included in this pattern is how to crochet a horse, zebra, and donkey. Each uses the same pattern, but then uses different techniques to make certain parts, and of course different colors.
Please note that this is a very involved pattern. It takes a lot of time to make, and uses some more advanced techniques. While I always try to make my patterns use as little sewing as possble, it would be overcomplicating things to do that with this pattern. So I ended up making the legs and ears sew on. However, the nose, head, neck, and body are all made in one piece! So there’s actually not a ton of sewing to do 🙂
If you really want to make a horse, zebra, or donkey but aren’t confident doing this more advanced pattern, you can use my chihuahua pattern here! The chihuahua pattern is obviously for a dog, but you can make some slight color adjustments to make it into a horse. Just use the “standing dog” body in that pattern, then make the nose in dark brown, the first 3 rounds of the legs in dark brown, and the rest of the body in light brown! Also, add hair to the “chihuahua” following this horse pattern’s instructions. Trust me, you’ll get a very cute horse as a beginner using that pattern! (PS I would recommend squishing the bottom of the ears in that pattern like I do with the ears in this pattern. It will look more horse like!).
Okay, anyways that’s a lot of rambling. I really hope you like this pattern 🙂 I worked really hard on it, it took a LOT of time to do each horse, photograph them, write up and edit the pattern, make the pdf, add the pattern to my website, etc. It’s never required, but if you already like this pattern a lot and want to support my efforts, consider joining my crochet membership! You’ll unlock this PDF download and StringyDingDing’s most recent PDF pattern downloads 🙂 Okay now to the pattern!
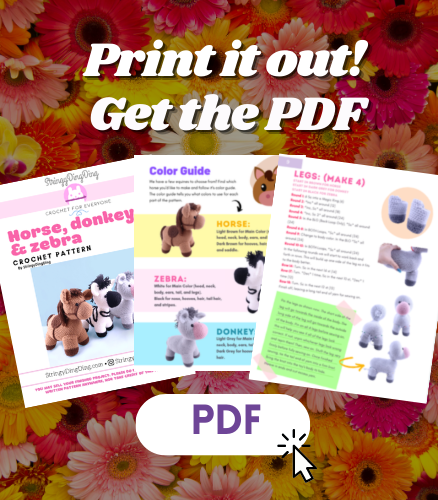
Print this out! Purchase the PDF here!
Supplies:
• Yarn colors in size 4/Medium Yarn…
See below this pattern information for colors needed for your specific horse!
•4mm Crochet Hook
•12mm safety eyes
•Tapestry needle
•Scissors
•Stuffing
Additional Information:
• Getting started…
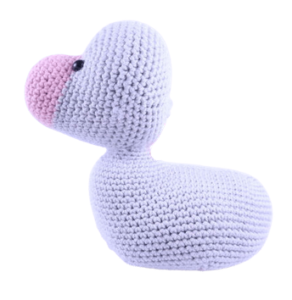
Each horse uses the same pattern, but some techniques will be slightly different depending on which one you choose to make. We first start making the nose, which leads into the head. While doing this we leave an opening so we can form the neck from that opening. After forming the neck, it will lead into the body. Essentially the nose, head, neck, and body are one connected piece! After this we will make all of the other parts 🙂
• Recommended Yarns:
JoAnn Fabric’s “Big Twist” Yarn
Red Heart Super Saver Yarn
Hobby Lobby’s “I Love This Yarn!”
Color Guide:
We have a few equines to choose from! Find which horse you’d like to make and follow it’s color guide. The color guide tells you what colors to use for each part of the pattern.
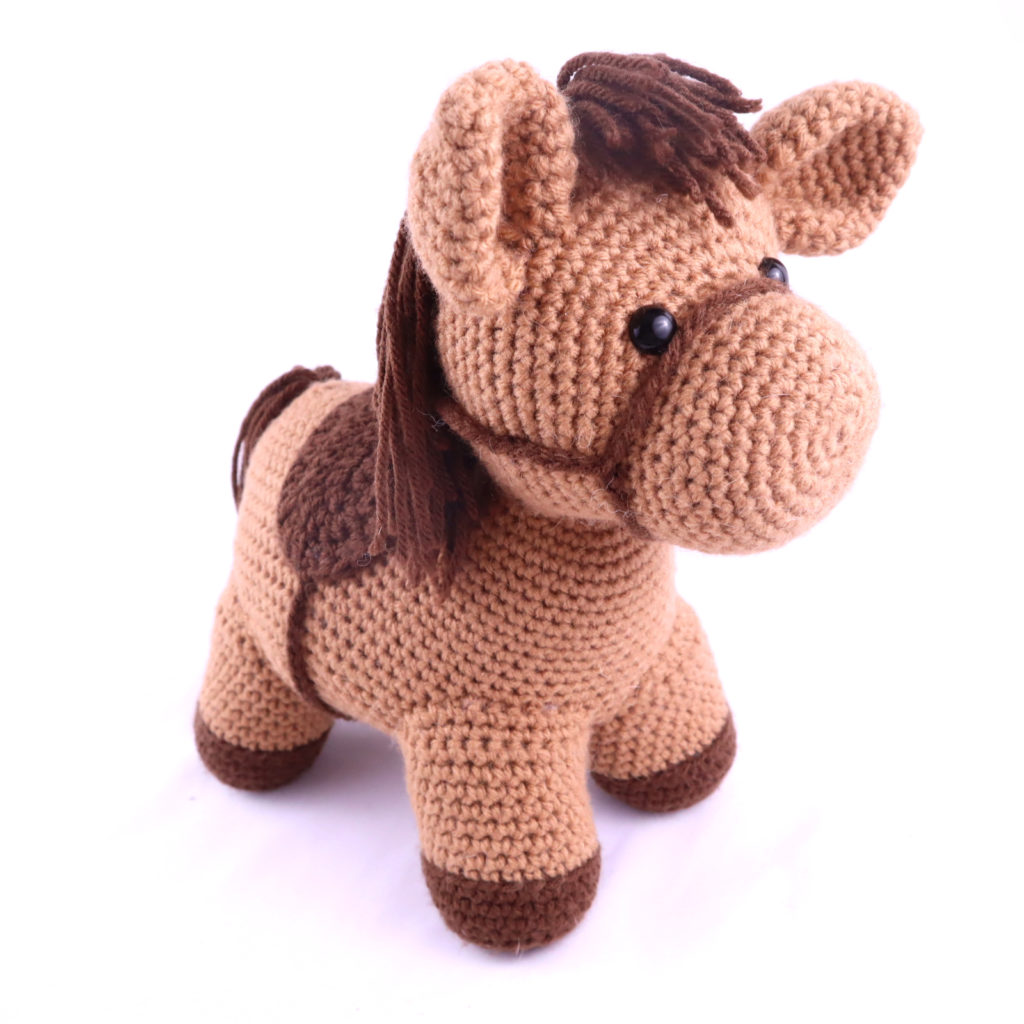
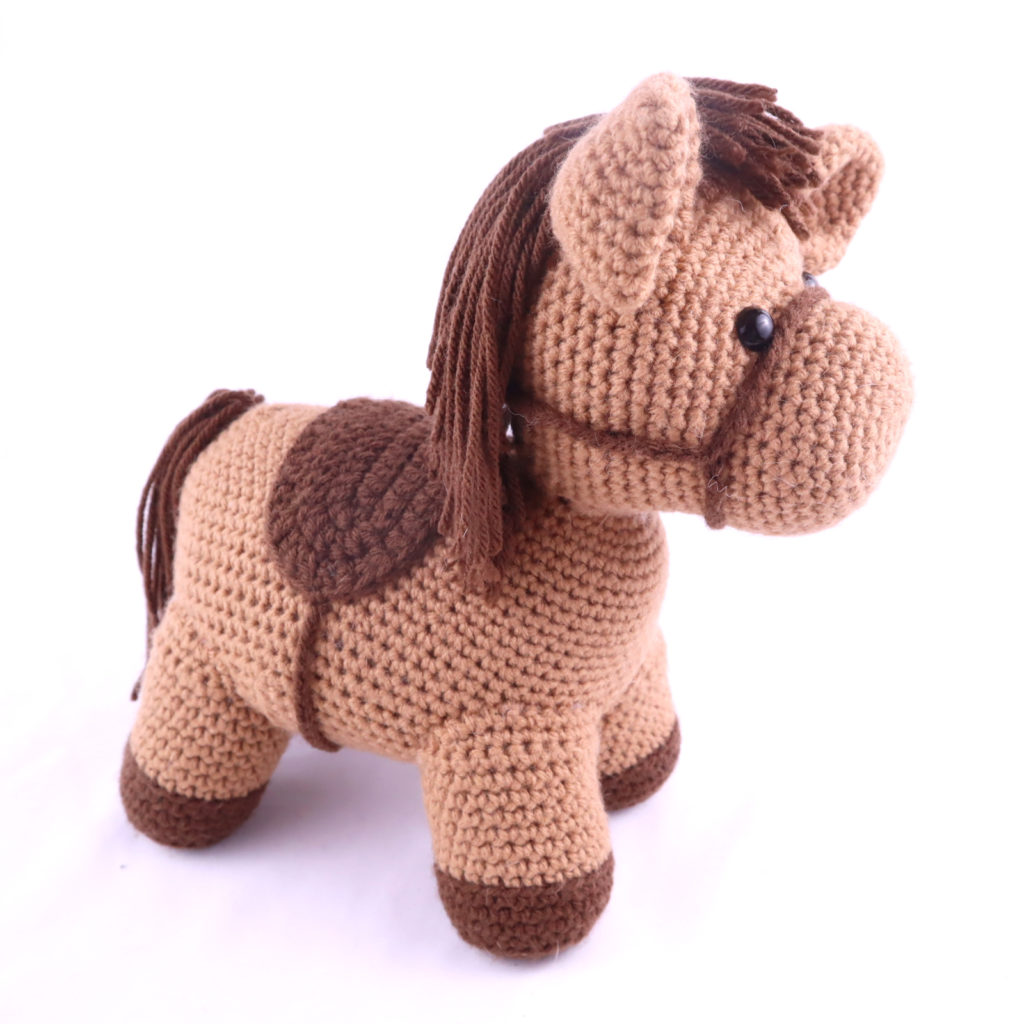
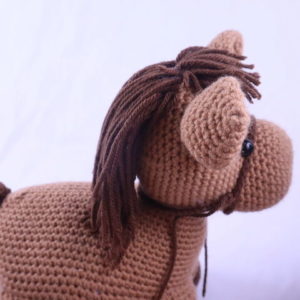
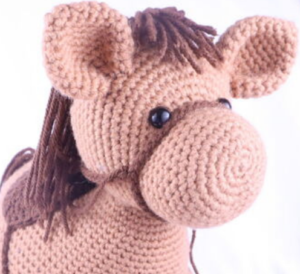
Horse
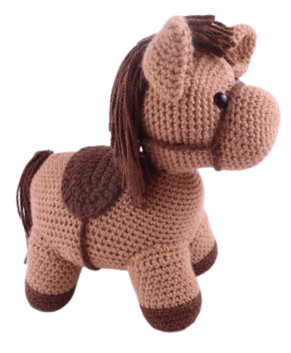
Light Brown for Main Color (nose, head, neck, body, ears, and legs).
Dark Brown for hooves, hair, bridle, and saddle.
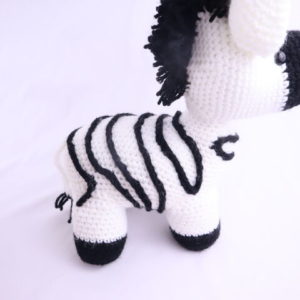
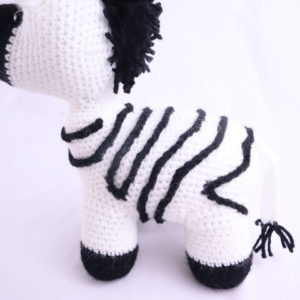
Zebra
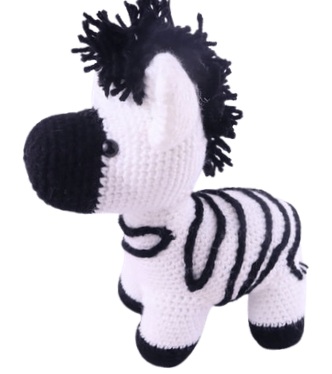
White for Main Color (head, neck, body, ears, tail, and legs).
Black for nose, hooves, hair, tail hair, and stripes.
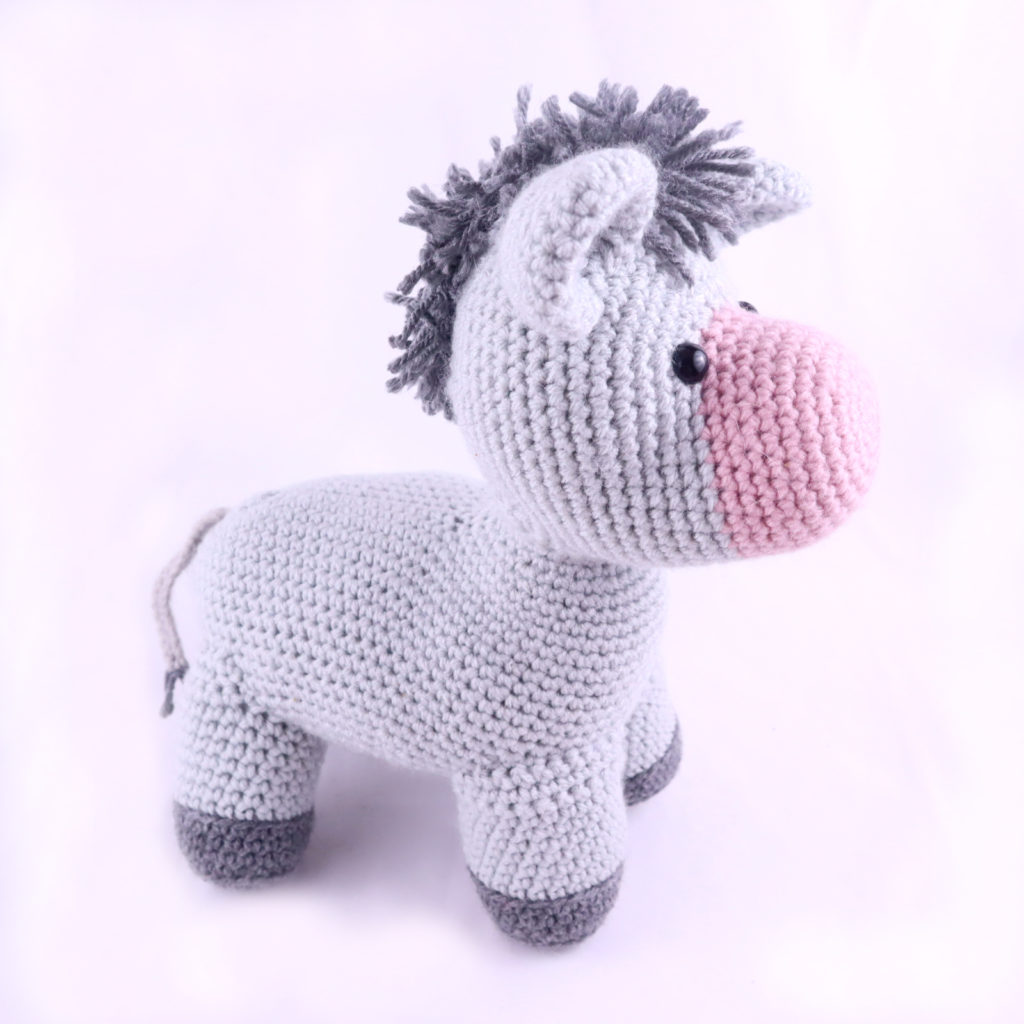
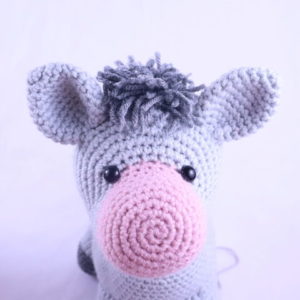
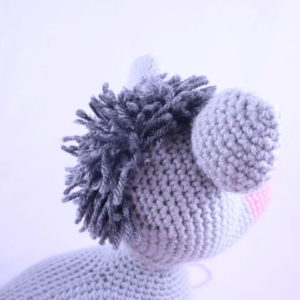
Donkey:
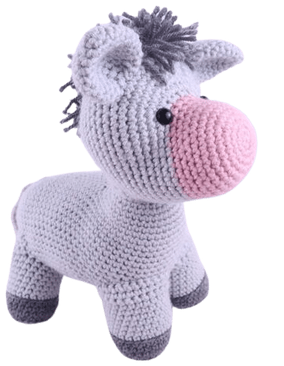
Light Grey for Main Color (head, neck, body, ears, tail, and legs).
Dark Grey for hooves, hair, and tail hair.
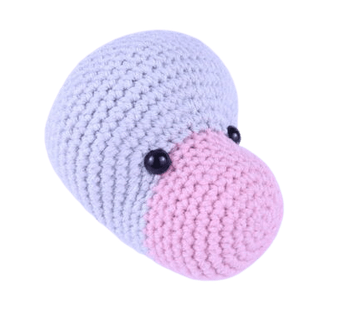
Nose/Head:
Start in brown for horse. Start in light pink for donkey. Start in black for zebra
Round 1: 6 Sc into a Magic Ring (6)
Round 2: *Inc* all around (12)
Round 3: *Inc, Sc* all around (18)
Round 4: *Inc, Sc 2* all around (24)
Round 5: *Inc, Sc 3* all around (30)
Round 6-11: *Sc* all around (30)
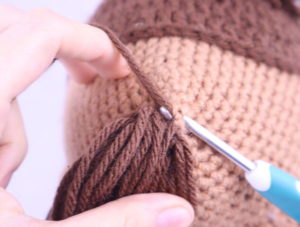
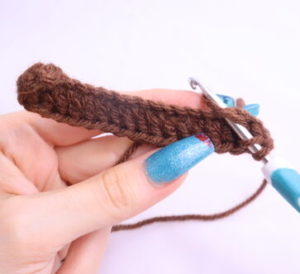
Round 12: Sc in the next 12 st. In the FLO (Front Loop Only), *Inc* in the next 6 st. In BOTH loops, Sc in the next 12 st (36)
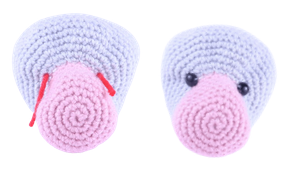
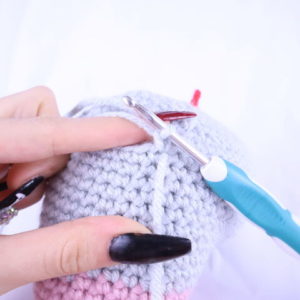
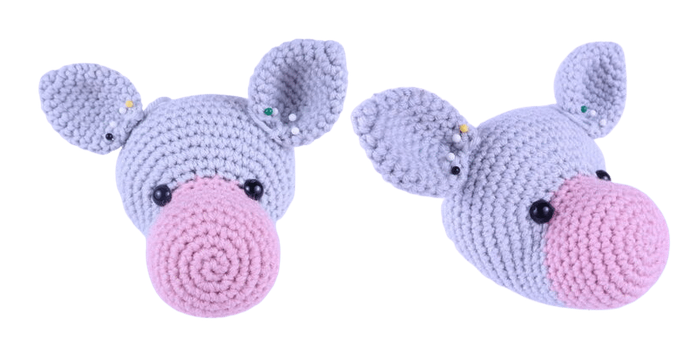
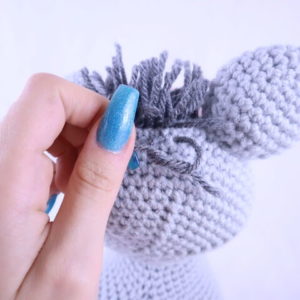
We will now add 2 different colored eye stitch markers into Round 12. Add one eye stitch marker into 13th stitch and one in the 25th stitch.
Round 12 eye markers will look like photo above
Round 13: Change to grey for donkey. Change to white for zebra. Continue in brown for horse. Sc in the next 12 st. Repeat *Inc in the next st, Sc in the next st* 6 times. Sc in the next 12 st (42)
Round 14: Sc in the next 12 st. Repeat *Inc, Sc 2* 6 times. Sc in the next 12 st (48)
Round 15: Sc in the next 12 st. Repeat *Inc, Sc 3* 6 times. Sc in the next 12 st (54)
Round 16-21: *Sc* all around (54)
Add eyes into the marked areas from Round 12 now.
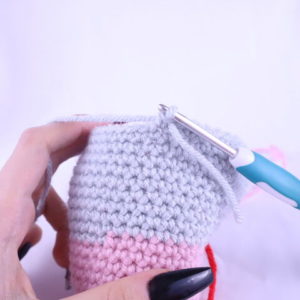
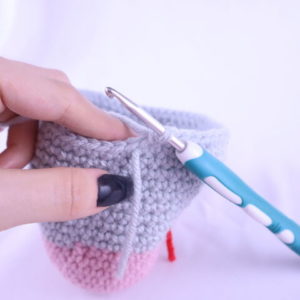
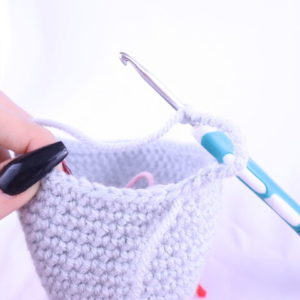
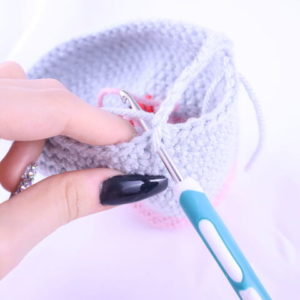
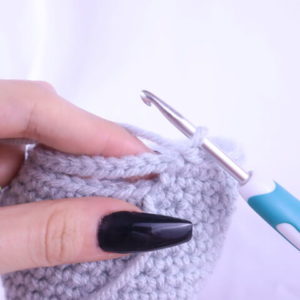
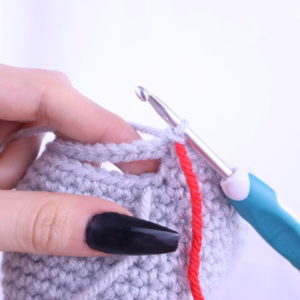
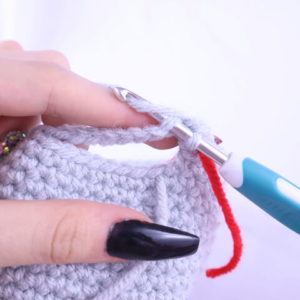
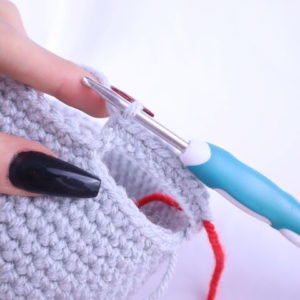
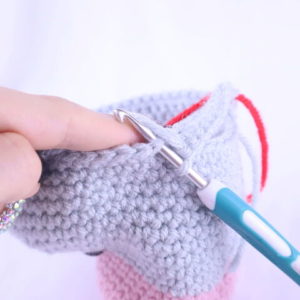
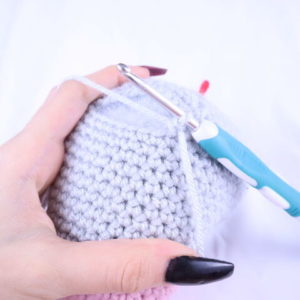
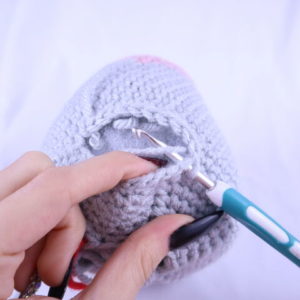
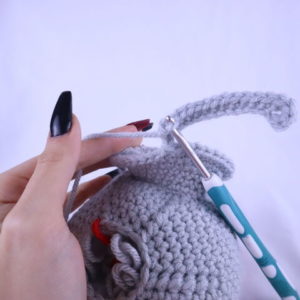
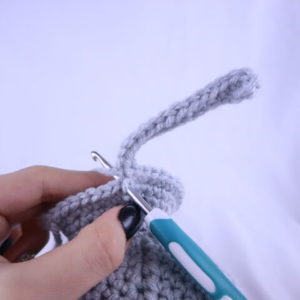
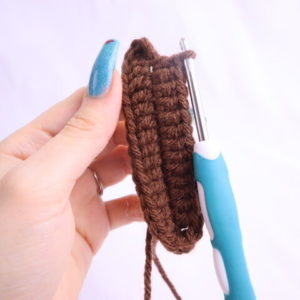
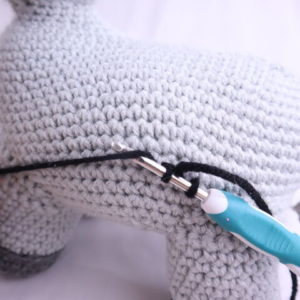
Round 22: Sc in the next st. Leave the stitch marker in first st made and don’t move it! (Pic 1). This will mark where we insert our hook to make the neck later. Sc next 53 st. Now we meet the old stitch marker (Pic 2). Ch 12 (Pic 3). Skip the next 9 st (Pic 4)
1. 2.
2.
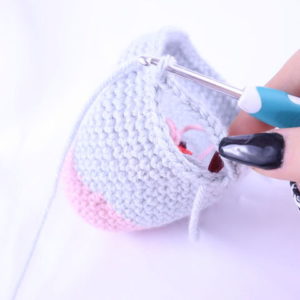
3. 4.
4.
Sc in the next st (Pic 5-6). Continuing on the head, Sc next 44 st (Pic 7) (57)
5. 6.
6.
7.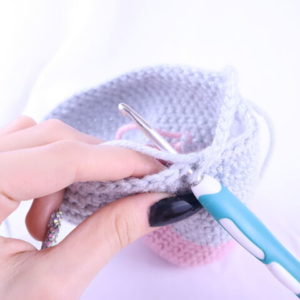
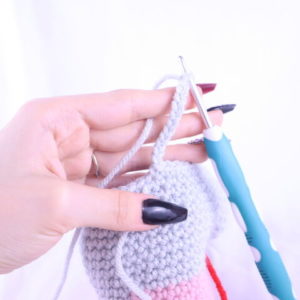
Round 23: Now we meet the chains we made (Pic 1). Sc in the next Ch. Add st marker into the Sc just made (Pic 2). This will mark our rounds to continue making the head. Sc in the next 11 Ch (Pic 3-4). Continuing on the head, *Dec* in the next st (Pic 5). Sc in the next 39 st. *Dec* 2 times (54)
1. 2.
2.
3. 4.
4.
5.
Round 24: *Dec, Sc 7* all around (48)
Round 25: *Dec, Sc 6* all around (42)
Round 26: *Dec, Sc 5* all around (36)
Round 27: *Dec, Sc 4* all around (30)
Stuff the head firmly here. Continue stuffing after each round.
Round 28: *Dec, Sc 3* all around (24)
Round 29: *Dec, Sc 2* all around (18)
Round 30: *Dec, Sc* all around (12)
Round 31: *Dec* all around (6)
Finish off, leaving a tail end of yarn for sewing. Sew the remaining stitches closed and weave in ends.
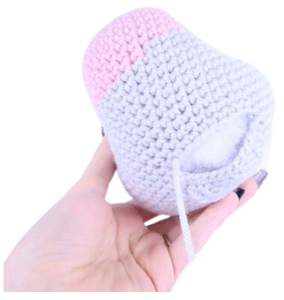
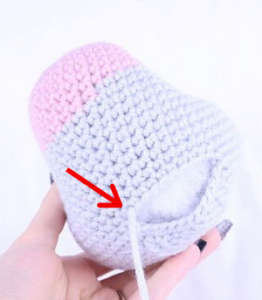
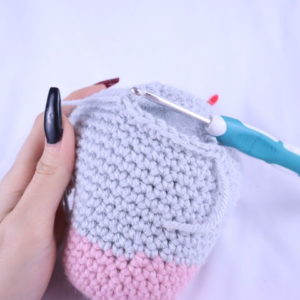
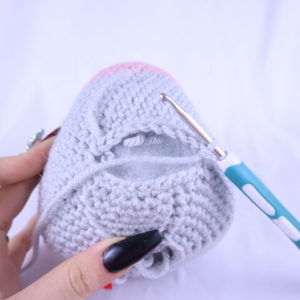
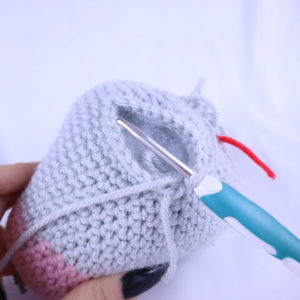
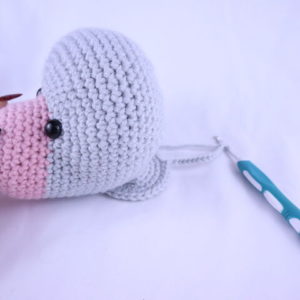
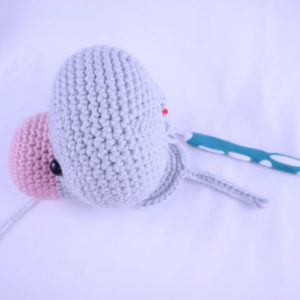
Now that the head is done, we will start forming the neck and body! Notice the hole that’s in the bottom of the head? That’s where we’ll attach our crochet hook and new yarn to start forming the neck.
Neck/Body:
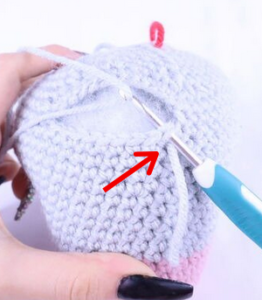
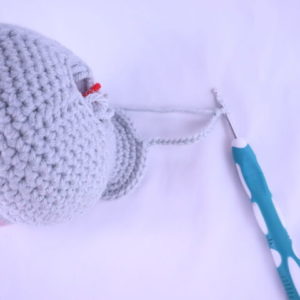
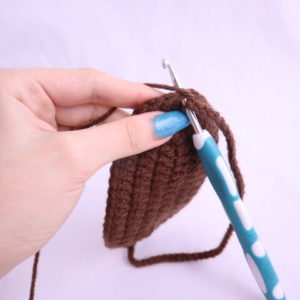
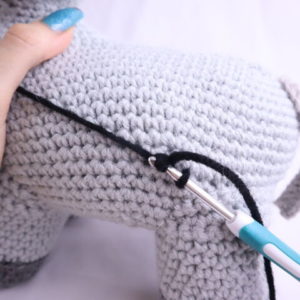
Round 1: Place hook into the neck, where the stitch marker is. Pull main color yarn through. (Use brown for horse, white for zebra, and grey for donkey, Pic 1-3). Ch 1, Sc in the next st. Move stitch marker into the Ch 1 stitch you just made (Pic 4). This will now mark the rounds for the neck. Sc in the next 8 st (Pic 5)
1. 2.
2.
3. 4.
4.
5.
Now we will work on the other side of the neck. Turn to the opposite side (Pic 6), Sc in the next 11 st on the other side of the neck (Pic 7-8). (20)
6. 7.
7.
8.
Now the neck is a full round! We will work around it for the following rounds, just like we did in Round 1 of the neck 🙂
Round 2-3: *Sc* all around (20)
Round 4: *Inc, Sc* all around (30)
Round 5: *Inc, Sc 4* all around (36)
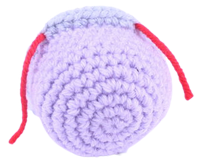
This completes the neck! Now we will form the body, we’ll do this by making a chain at the back of the neck to form the length of the body. Let’s get started on the next page!
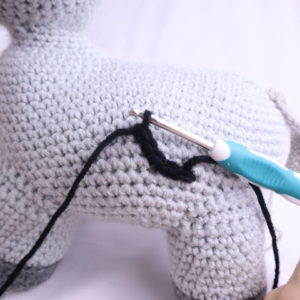
Round 6: Sc in the next 28 st. Ch 15 (Pic 1-2). Sc 4 times into the 2nd Ch from the hook. Sc in the next 13 Ch. Working back onto the neck, Sc in the next 8 st (Pic 3-5). (53)
1. 2.
2.
3. 4.
4.
5.
Round 7: Sc in the next 28 st. Now we meet the chain, Sc in the next 13 Ch. Repeat *Inc, Sc in the next st* 2 times. Continuing on the other side of the neck, Sc in the next 13 st. Sc in the next 8 st along the body (68)
Round 8: Sc in the next 41 st. Repeat *Inc, Sc next 2 st* 2 times. Sc in the next 21 st. (70)
Round 9: Sc in the next 41 st. Repeat *Inc, Sc next 3 st* 2 times. Sc in the next 21 st. (72)
Round 10: Sc in the next 41 st. Repeat *Inc, Sc next 4 st* 2 times. Sc in the next 21 st. (74)
Round 11: Sc in the next 41 st. Repeat *Inc, Sc next 5 st* 2 times. Sc in the next 21 st. (76)
Round 12-21: *Sc* all around (76)
Round 22: Repeat *Dec, Sc 17* 4 times (72)
Round 23: *Dec, Sc 10* all around (66)
Round 24: *Dec, Sc 9* all around (60)
Round 25: *Dec, Sc 8* all around (54)
Round 26: *Dec, Sc 7* all around (48)
Round 27: *Dec, Sc 6* all around (42)
Round 28: *Dec, Sc 5* all around (36)
Stuff the body and neck area very firmly now. Continue stuffing after each round.
Round 29: *Dec, Sc 4* all around (30)
Round 30: *Dec, Sc 3* all around (24)
Round 31: *Dec, Sc 2* all around (18)
Round 32: *Dec, Sc 1* all around (12)
Round 33: *Dec* all around (6)
Finish off, leaving a tail end of yarn for sewing. Sew the remaining stitches closed and weave in ends.
Legs: (Make 4)
Start in brown for horse
Start in Dark Grey for donkey
Start in black for zebra
Round 1: 6 Sc into a Magic Ring (6)
Round 2: *Inc* all around (12)
Round 3: *Inc, Sc* all around (18)
Round 4: *Inc, Sc 2* all around (24)
Round 5: In the BLO (Back Loop Only), *Sc* all around (24)
Round 6-8: In BOTH Loops, *Sc* all around (24)
Round 9: Change to body color. In the BLO *Sc* all around (24)
Round 10-15: In BOTH Loops, *Sc* all around (24)
In the following rounds we will start to work back and forth in rows. This will build up one side of the leg so it fits to the body better.
Row 16: Turn. Sc in the next 14 st (14)
Row 17: Turn. *Dec* 1 time, Sc in the next 10 st, *Dec* 1 time (12)
Row 18: Turn. Sc in the next 12 st (12)
Finish off, leaving a long tail end of yarn for sewing on.
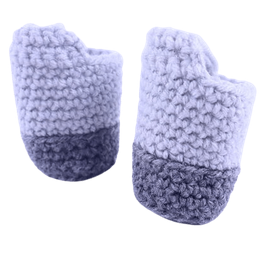
Leg Assembly:
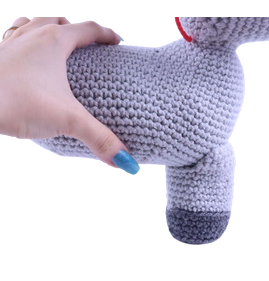
Pin the legs as shown now. The short side of the leg will go towards the inside of the body. The long side of the leg will go towards the outside of the body. Pin on all 4 legs before sewing on, this will help you see if all of the legs look correct. If not, unpin whichever legs look wrong and repin them! Then, sew on. Stuff the leg very firmly before fully sewing on. Once finished sewing, tie the tail end of yarn into a firm knot. Bring the knot into the toy’s body to hide. Weave in ends and cut excess yarn.
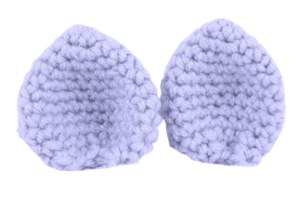
Ears: (Make 2)
Start in Main Color
Round 1: 6 Sc into a Magic Ring (6)
Round 2: *Sc* all around (6)
Round 3: *Inc* all around (12)
Round 4: *Sc* all around (12)
Round 5: *Inc, Sc* all around (18)
Round 6: *Sc* all around (18)
Round 7: *Inc, Sc 2* all around (24)
Round 8-10: *Sc* all around (24)
Round 11: *Dec, Sc 2* all around (18)
Round 12: *Dec, Sc 1* all around (12)
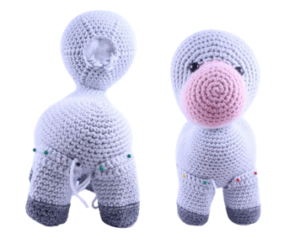
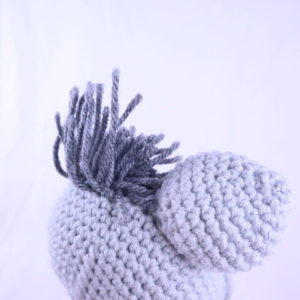
Finish off, leaving a long tail for sewing. Fold the ears slightly inward and pin onto the head as shown. (Ears should be about 13 stitches apart, pinned on Rounds 16-17) Sew on. Weave in ends.
Front Head Hair:
Use dark brown for horse. use dark grey for donkey. use black for zebra.
To make the hair we will cut a lot of pieces of yarn and tie them to the head. How long we do the strands will be different from the horse compared to the zebra and donkey.
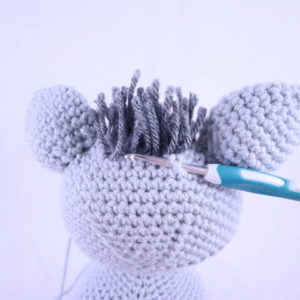
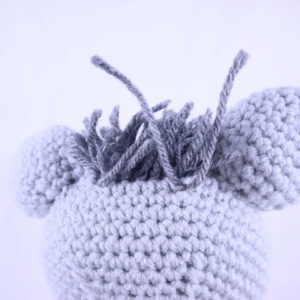
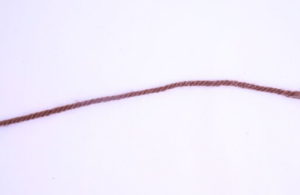
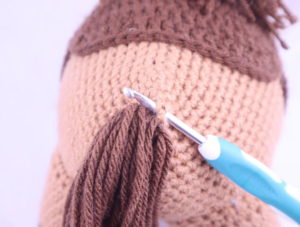
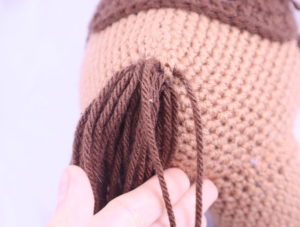
For the front of the head hair, cut many pieces of roughly ~4″ yarn (Pic 1). Insert hook into a stitch between the two ears as show (Pic 2). Fold a piece of the cut yarn in half (Pic 3). Place this yarn on the hook (Pic 4), and pull only half of the yarn through (Pic 5-7)
1. 2.
2.
3. 4.
4.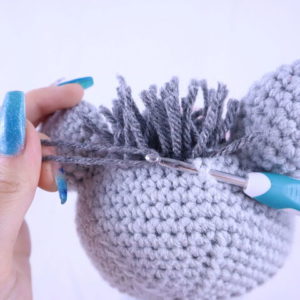
5. 6.
6.
7.
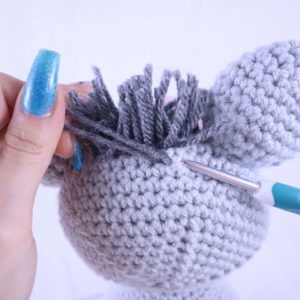
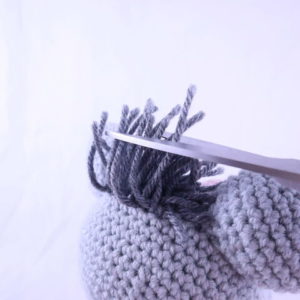
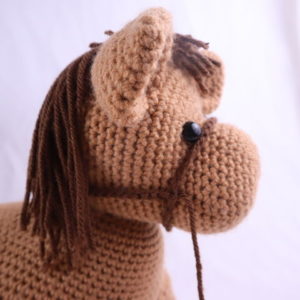
Tie the two pieces into a firm knot 2 times (Pic 8-9). Repeat this for a total of 8 stitches across one row! The hairs will be long. For the zebra/donkey, trim them shorter and straight across (Pic 10-12). For a horse, keep the front head hairs longer, but trim the sides to be a little shorter. Swipe the horse’s head hairs to the front of his face (Pic 13-14).
8. 9.
9.
10. 11.
11.
12. 13.
13.
14. 
Neck Hair:
Use dark brown for horse. use dark grey for donkey. use black for zebra.
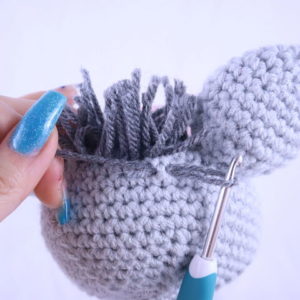
For the donkey and zebra, continue to cut 4″ pieces of yarn and attach them to the back of the head/neck area for 8 stitches across per row. Trim the yarn so it matches the front head of the hair length (Pic 1).
1.
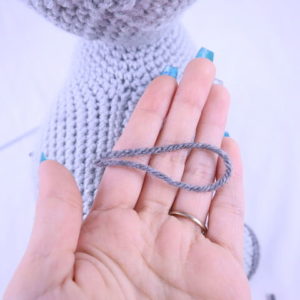
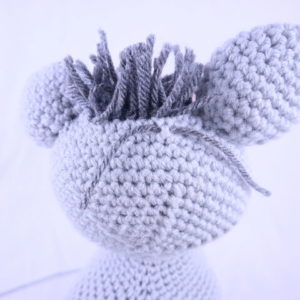
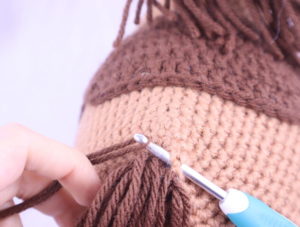
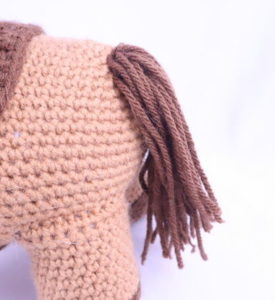
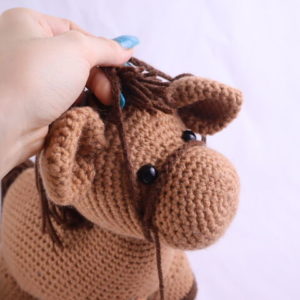
For the horse, cut pieces of yarn that’s about 10″ long. Attach this hair behind the shorter hairs. This will form the long mane! Attach the long hairs to the back of the head/neck area for 8 stitches across per row.
Add hair for about 8 rows total (Pic 2-3).
2. 3.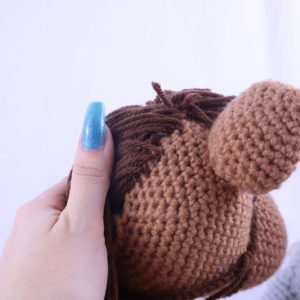
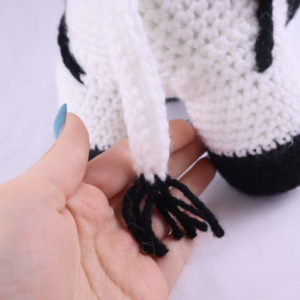
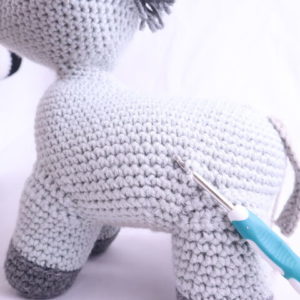
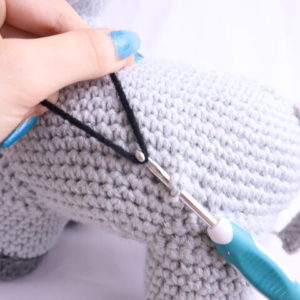
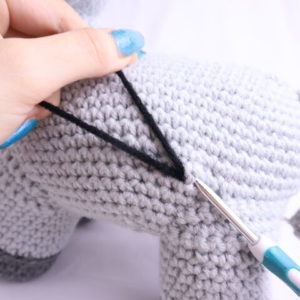
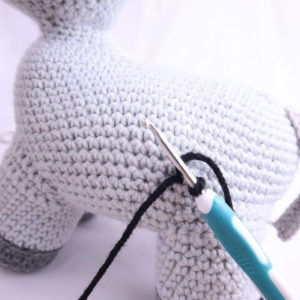
Horse Tail:
In Dark Brown
Cut many pieces of 12″ yarn. Place hook into the upper back of the toy horse (Pic 2). Yarn over and pull through half of the yarn (Pic 3-5). Tie the ends of yarn into a firm knot twice. Repeat this going a few times through the same stitch and a few times through nearby stitches to make a thick tail! (Pic 6)
1. 2.
2.
3. 4.
4.
5. 6.
6.
Zebra & Donkey Tail:
Start in Main Color
Row 1: Ch 17. Sc in the 2nd Ch from the hook. Sc in the next 15 st (16)
Row 2-3: Ch 1 & Turn. Sc in the next 16 st (16)
Finish off, leaving a long tail for sewing on. Pin the tail to the upper back area of the toy as shown. Sew on and weave in ends.

Tail Hairs:
use dark grey for donkey
use black for zebra
Cut 4 pieces of yarn about 4″ in length. Just like we’ve done the previous hairs, attach the yarn to the end of the tail. Trim so the hair all matches the same length.
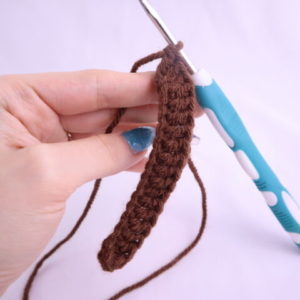
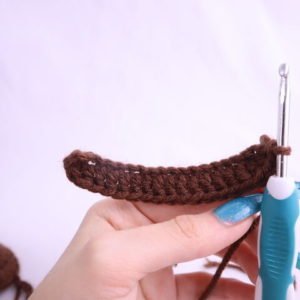
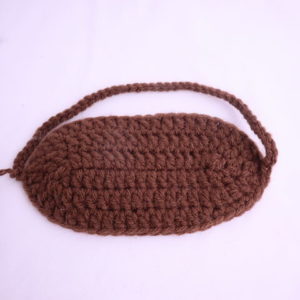
Saddle:
In Dark Brown
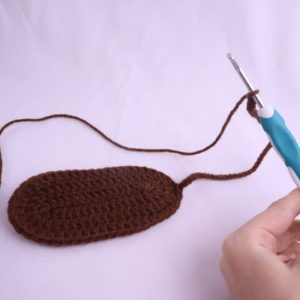
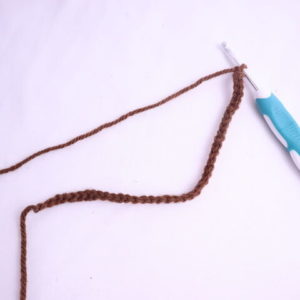
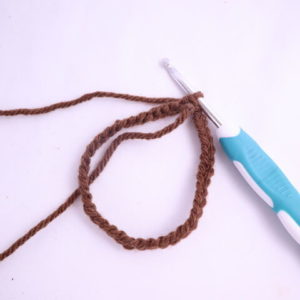
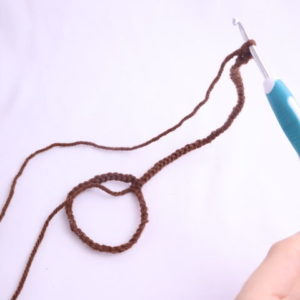
To make the saddle we will first make a chain. We will work entirely around the chain to form an oval!
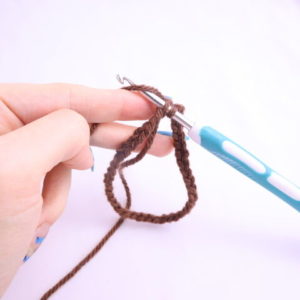
Round 1: Ch 17. Skip the next 2 st, Dc in the 3rd stitch. Dc 2 more times into that same st. Dc in the next 13 st. Dc 3 times into the last ch. Now we meet the end of the chains (Pic 1). Turn to OTHER side, where we haven’t worked any stitches yet (Pic 2). Dc in the next 13 st (Pic 3-4) (32)
1. 2.
2.
3. 4.
4.
Round 2: Dc 2 times into the next 3 stitch. Dc in the next 13 st. Dc 2 times into the next 3 st. Turn to other side. Dc into the next 13 st (38)
Round 3: Repeat *Dc 2 times in next st, Dc next st* 3 times. Dc in the next 13 st. Repeat *Dc 2 times in next st, Dc next st* 3 times. Dc in the next 13 st (44)
Round 4: Slst in the next 6 st. Ch 43 (Pic 5). Skip the next 22 st. Sc in the next st (Pic 6-7).
5. 6.
6.
7. 8.
8.
Finish off, leave a tail for sewing. Place the saddle onto the horse as shown and sew on. Weave in ends.
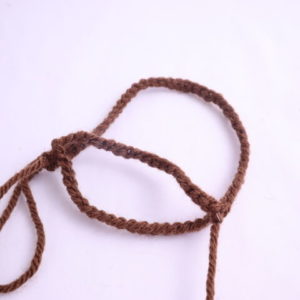
Bridle:
in Dark Brown
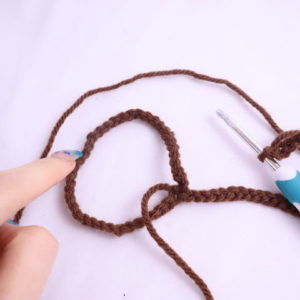
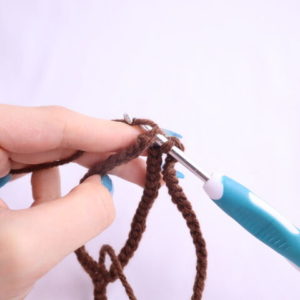
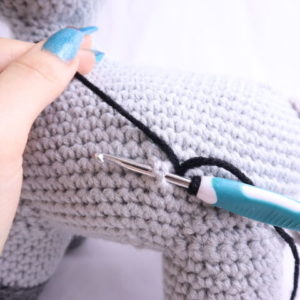
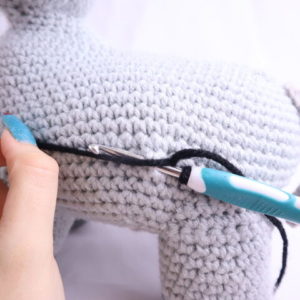
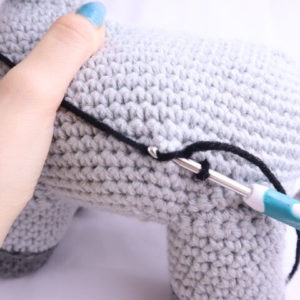
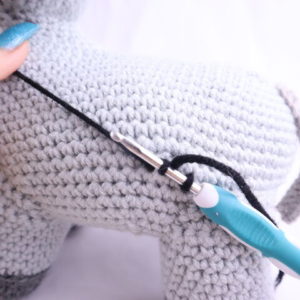
Row 1: Ch 41 (Pic 1). Connect the circle by making 1 Sc into the very first chain (Pic 2-3). Ch 41 (Pic 4). Skip the next 20 st on the circle. Sc in the 21st st (Pic 5-6). This completed the bridal!
1. 2.
2.
3. 4.
4.
5. 6.
6.
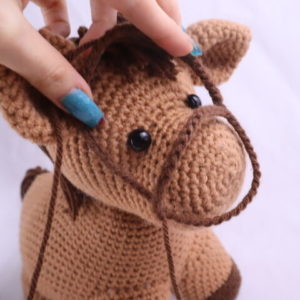
You will have a smaller hole and a larger hole. Place the horse’s nose through the smaller one (Pic 8), the the larger one goes behind it’s head (Pic 9)! You can sew this on if desired.
7. 8.
8.
9. 10.
10.
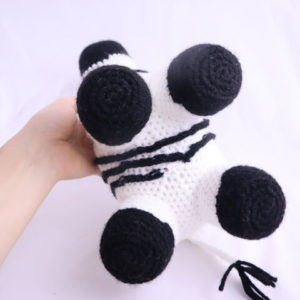
Zebra Stripes:
In Black
Insert hook into any stitch of the leg or body. This is where your stripes will start, so I recommend inserting your hook towards the back of the body! Yarn over with black yarn (Pic 2) and pull it through the stitch (Pic 3-4).
1. 2.
2.
3. 4.
4.
Repeat *Insert your hook into any nearby stitch (Pic 5). Yarn over and pull the yarn through (Pic 6-8). Yarn over again (Pic 9), and pull through both loops to complete one single crochet! (Pic 9-11).*
5. 6.
6.
7. 8.
8.
9. 10.
10.
11.
Do the steps mentioned in between the *stars* to form the stripes. To change direction of the stripe simply insert your hook into a stitch in the other direction!
Done! I hope you had fun making a horse. I would really, really love to see a picture of your horse if you made one! To show me, just post a picture in the comments underneath this post! You can also “try” it on Pinterest.


48 Comments
Olive,
You have got to be one of the kindest people around. Sooooo much work in not just the pattern, but also in all the pictures and guidance throughout the pattern process……Thank you so much for your hard work…..Your patterns are just adorable!!! Again, thank you so much for making these available free of charge!!! You are the best!!!
Oh my gosh, Sharon this was such a nice comment you left! It’s really nice to hear that you can see how much work goes into this, and then to say “thank you” after just meant a lot! It’s a lot of hard work, but then when I see comments like yours it feels all worth it ❤️ You are seriously so kind, I wish I could give you a hug! 😍 I hope you’ll like the new patterns that are coming these next few weeks 🙂
I JUST finished making the horse for my niece as a Christmas gift. Great pattern. I did the mane a little different than in the pattern, but I like how it turned out. 🙂❤🐎
Thank you for a great pattern! 🙂
I love these, my grandchildren and great grandchildren love to come and pull them out of the basket and they will always want to take one home! What can gramma say, ok but only 1 and then I get busy and crochet a new one. They love to come and play with gramma`s barn yard
Hi there, Sue! Aww you sound like such a fun grandma, that sounds like so much fun to pick out a new toy every visit! 😄 It’s hard to turn down adorable kids so you just have to say “okay, take what you want!”
Haha I think you’ll need to get busy with crocheting before they come over! I hope you know that you’re making their childhood memories amazing, because I know I would remember picking out cute handmade toys for years to come 🙂 ❤️
Vielen , vielen Dank !
Es ist so bezaubernd was du immer schaffst um zu setzten . Es ist nicht einfach . Du bist ein sehr lieber Mensch ! Bleib so wie du bist . Und noch mal vielen lieben Dank .
Such a wonderful patten that was easy to follow, thank you!
Hi there, Ellen! Oh my gosh, I’m really impressed at how adorable your horse turned out 😍 It looks so majestic, especially next to those cute star lights! Thank you so much for sharing, your horse is so adorable, I’m obsessed with the colors you used for it 🙂
Hi there, Please can you tell me how big the horse is? I need toys around 5″ for a baby
Hi Gracie! These horses are pretty big, I measured and he’s 11″ tall and the body is about 6.5″ long. If you used a smaller yarn and hook size you could definitely get the horses much smaller! However, I think if you used my chihuahua pattern it would be more suitable for your baby gift 🙂 I wrote a bit at the beginning of this blog post on how to turn that chihuahua into a horse. Let me know if that works out for you or if you have any questions! 🥰
Thank you so much for your quick reply. Was wondering by chance if you have a pics of the chihuahua pattern as a horse? Does he come out as cute as the regular horse pattern?
Such a great pattern to follow, but stuck on the saddle. CANNOT for the life of me figure it out— wishing for a video right about here!
I think I fell through the cracks like I always do. Lol. 😔. Anyways I’ve been waiting to see if you could PLEASE send me a pic of how the horse looks with the chihuahua pattern . Does he come out just as cute? PLEASE answer Anxiously waiting for your reply. Thanks
Aw I’m very sorry, Gracie 🙁 I get lots of comments every day as well as emails so sometimes it’s very hard to keep up 🙁
I’m very sorry, I try to make sure nobody feels left out 💔 The fastest way to always get a response from me is through email, because I get notifications there. Please send me a message through my contact form and it’ll be sent over to my email and I usually get back within a few hours if possible, but I’m only one gal 🙂
I don’t have any pictures of the chihuahua being altered to a horse, but working with amigurumi so much I know it would turn out absolutely adorable and would be pretty easy! I think you’d be super happy with the results 🙂 I can try to find a different free pattern of a horse if that would help!
So sorry again, I feel absolutely horrible that you felt like you fell through the cracks 🙁 It’s truly never my intention to make anybody feel bad, so I truly apologize from the bottom of my heart.
Thank you so much for your response.
Wish you would of had a pic of chihuahua to horse but its ok.
My intention was not to make you feel bad, I’m sure you are very busy with such amazing talent you have.
I think I found a horse I needed already, but again Tyvm.
I wish so, too! I haven’t made the chihuahua as the horse but I know it would be real cute. I’m glad you were able to find a horse pattern, I know you’ll do a great job on it! 🥰
I’m confused on round 7 of the body. I’m new to this kind of crochet. Please help
Hello,
I just wanted to thank you for the amazing free pattern! I had a lot of fun making this one for my nephew, and I was very pleased with the results!
You are awesome!
Oh my gosh, Jessica!!! This is SO CUTE 😍😍😍 I’m beyond happy that you like how it came out, and I have a feeling you’ll have one ecstatic nephew lol! Thank you so much for sharing a picture with me. You did an AWESOME job!!!
I tried making a small horse! Please forgive its slight crookedness, I think I got careless and messed up stitch counts on the body….
The legs turned out too thick for the body using the smaller gauge for whatever reason, so I redid them a round smaller (18st around).
Thanks for this pattern!
Awwww she’s so tiny! 😍 I think it’s amazing you could take such a big pattern and turn it into a small hand-sized toy! I think the tiny amount of crookedness really adds to her character 🙂 As Bob Ross would say, it’s a happy accident! Your little tweak to the legs also looks SUPER great, they fit perfectly. You did such a good job and seeing your tiny horse brought a big smile to my face. Thank you SO MUCH for sharing, you are so talented!
Thank you so much for the pattern! I used it to make my little sister’s Christmas present this year.
I made this horse in 1 day for a secret santa… I worked pretty much all day, right down to the wire (of working on it while literally at the secret santa party) and it was so worth it!! My recip loved it 😀
Thank you for such an awesome pattern. The instructions were so easy to follow, but adding the photos really helped me as a back up to make sure I was doing it right.
How much yarn does it take?
This is Casper, who took a good week to make and is a bit wonky, but I’ve also only been crocheting since January this year and my only other project before him was a giant granny square knee blanket, so not bad for a beginner. Casper was made with a 3.5mm hook, which has made him a big on the diminutive side, but he’s super cute. My mum called me to help me work through a few sections of the pattern which was otherwise quite a good project for a beginner. Thank you so much for this pattern! Casper is looking forward to meeting his brother Ardy when I get more yarn. ☺️
Lovely pattern! About how much yarn did it take you to make?
Tks a ton for the pattern. I’ve never made anything so big earlier, but took it up as a challenge for my niece who loves horses. Though the final outcome is there to see, I think i messed up a bit in the neck region due to which the head is not perfectly aligned and doesn’t stand upright probably due to insufficient stuffing. Anyhow hope to get better with practice and watching a few tutorials! TKS once again for the lovely pattern n accompanying pictures!
Thank you voor the amazing pattern. It is so detailed and well-written! The photos were very helpful to make sure I was getting the instructions right. I really love how my finished horse looks, it’s so cute!
I made a mini version out of superfine yarn for my daughter and added a unicorn horn. She loves it!
I’m excited to try this pattern! Approximately how much yarn is needed to make it? Thanks so much!
i am a beginner and didn’t get some of it, but other than that it was easy to follow. But do you close up the hole when you skip nine stitches on the neck? please get back to me on this as soon as possible, for i am on a deadline
i am a beginner and didn’t get some of it, but other than that it was easy to follow. But do you close up the hole when you skip nine stitches on the neck? please get back to me on this as soon as possible, for i am on a deadline
Hi!
Thank you so very much for all the amazing patterns you make avalible! They are truly great and so easy to follow! This is the blue-dun horse I made for a good friends daughter a while back. I especially love how the back of the horse was constructed, it made it so easy to add the dorsal stripe that is so characteristic for dun horses.
Thank you for the time you put into these patterns and for charing them, that is so kind of you!
Thank you so much for the pattern, was really fun to make and so easy to follow.
I had a request for a very specific type of horse… A Fjord horse
Quisiera saber que significan las abreviaturas sc y st porque no entiendo gracias
SC= single crochet… Es punto bajo
St= stich… Y es puntada
This pattern was so easy! I usually struggle without a video guide, so the pictures were very helpful 🙂
I made this as a gift for a friend, but unfortunately it ended up a little too heavy so I had to put a curtain weight in it’s rear haha
The saddle was something I did struggle with, so I did change its shape a little in the end.
I’ll definitely check out your other patterns in the future, this one was so fun and easy!
I want to thank you for this wonderful pattern. I have made it 6 times now, all as horses, but with varying colors – both as gifts and I’ve sold a couple. It is such a great pattern that turns out so cute!
Hello!!! (English is not my first language, but I will try)…
I just want to say… THANK YOU SO MUCH, I am really impressed with all your work is amaizing, every step was very clear and easy to understand, and it’s free!!! I made the horse and Iam really happy with the final result
Thank You!!!!
Thank you for all your hard work to create such lovely projects for us to enjoy. You are so talented! Here is my horse which which I converted from your Chihuahua pattern. I hope I managed to do it justice!! It was great fun to do and the pattern was easy to follow. I can’t wait to try out your other patterns now. Many thanks again!
OMG YOUR HORSE IS ADORABLE. i love the colors you used so much. they make it so pretty. good job.
Hola!!!
Muchísimas gracias por compartir tan hermoso y detallado patrón.
Dios 🙏 te bendiga
Pocas personas comparten su tiempo y trabajo ❤️❤️❤️❤️❤️
I love this pattern and I am currently using it for the horse. But it seems mine is coming out quite larger than your pictures. I am a tight crocheter and I am using the suggested yarn size and a 4 mm hook. I am not sure why it’s so huge. What is the expected finished size? I am on round 12 of the body and I am about ready to rip it out and start over.
Love these patterns! Thank you so much for being so generous with your talents!
Made several for our neighbor children. They never look as well as yours, but hopefully the children won’t mind. Looking forward to making more of these posted.
Thank you for the amazing pattern. I made the horse to give to a dear friend who lost their prize horse that they loved dearly as a reminder. I made it in the same colors as their horse and she loved it. Thank you so much!
Hi how big is this horse? I’m interested in making it for someone and they want it about teddy bear size would I have to use a different size hook than you to achieve this sizing?
This turned out so awesome thank you!!