Purchase the PDF version here


Or purchase the entire PDF Bundle here!
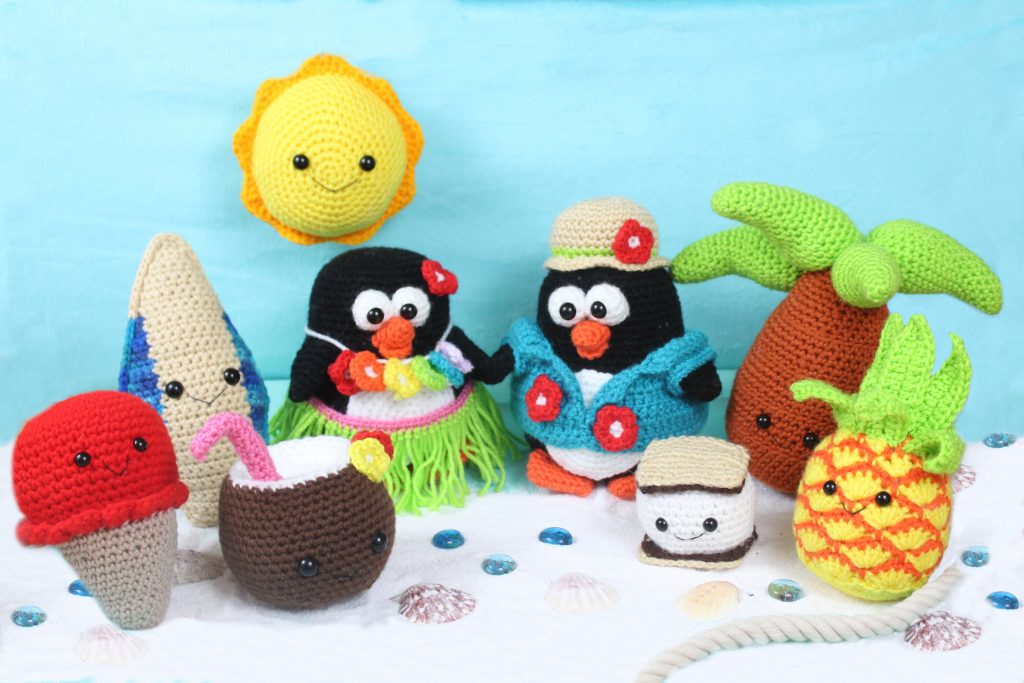
Enter our Summer Amigurumi Crochet Along!
If you make this surfboard amigurumi anytime from July 5-August 31, just post a picture in the CAL blog post to enter in for a chance to win a $25 gift card to a craft store of your choice!
Supplies:
4/Medium weight yarn in the following:
Any Main Color
Any Contrast Color
12mm safety eyes, black embroidery thread, tapestry needle, scissors, and stuffing.
Additional Information:
Difficulty: Easy
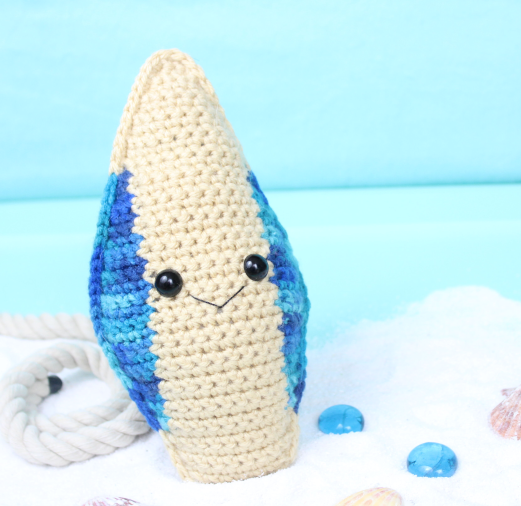
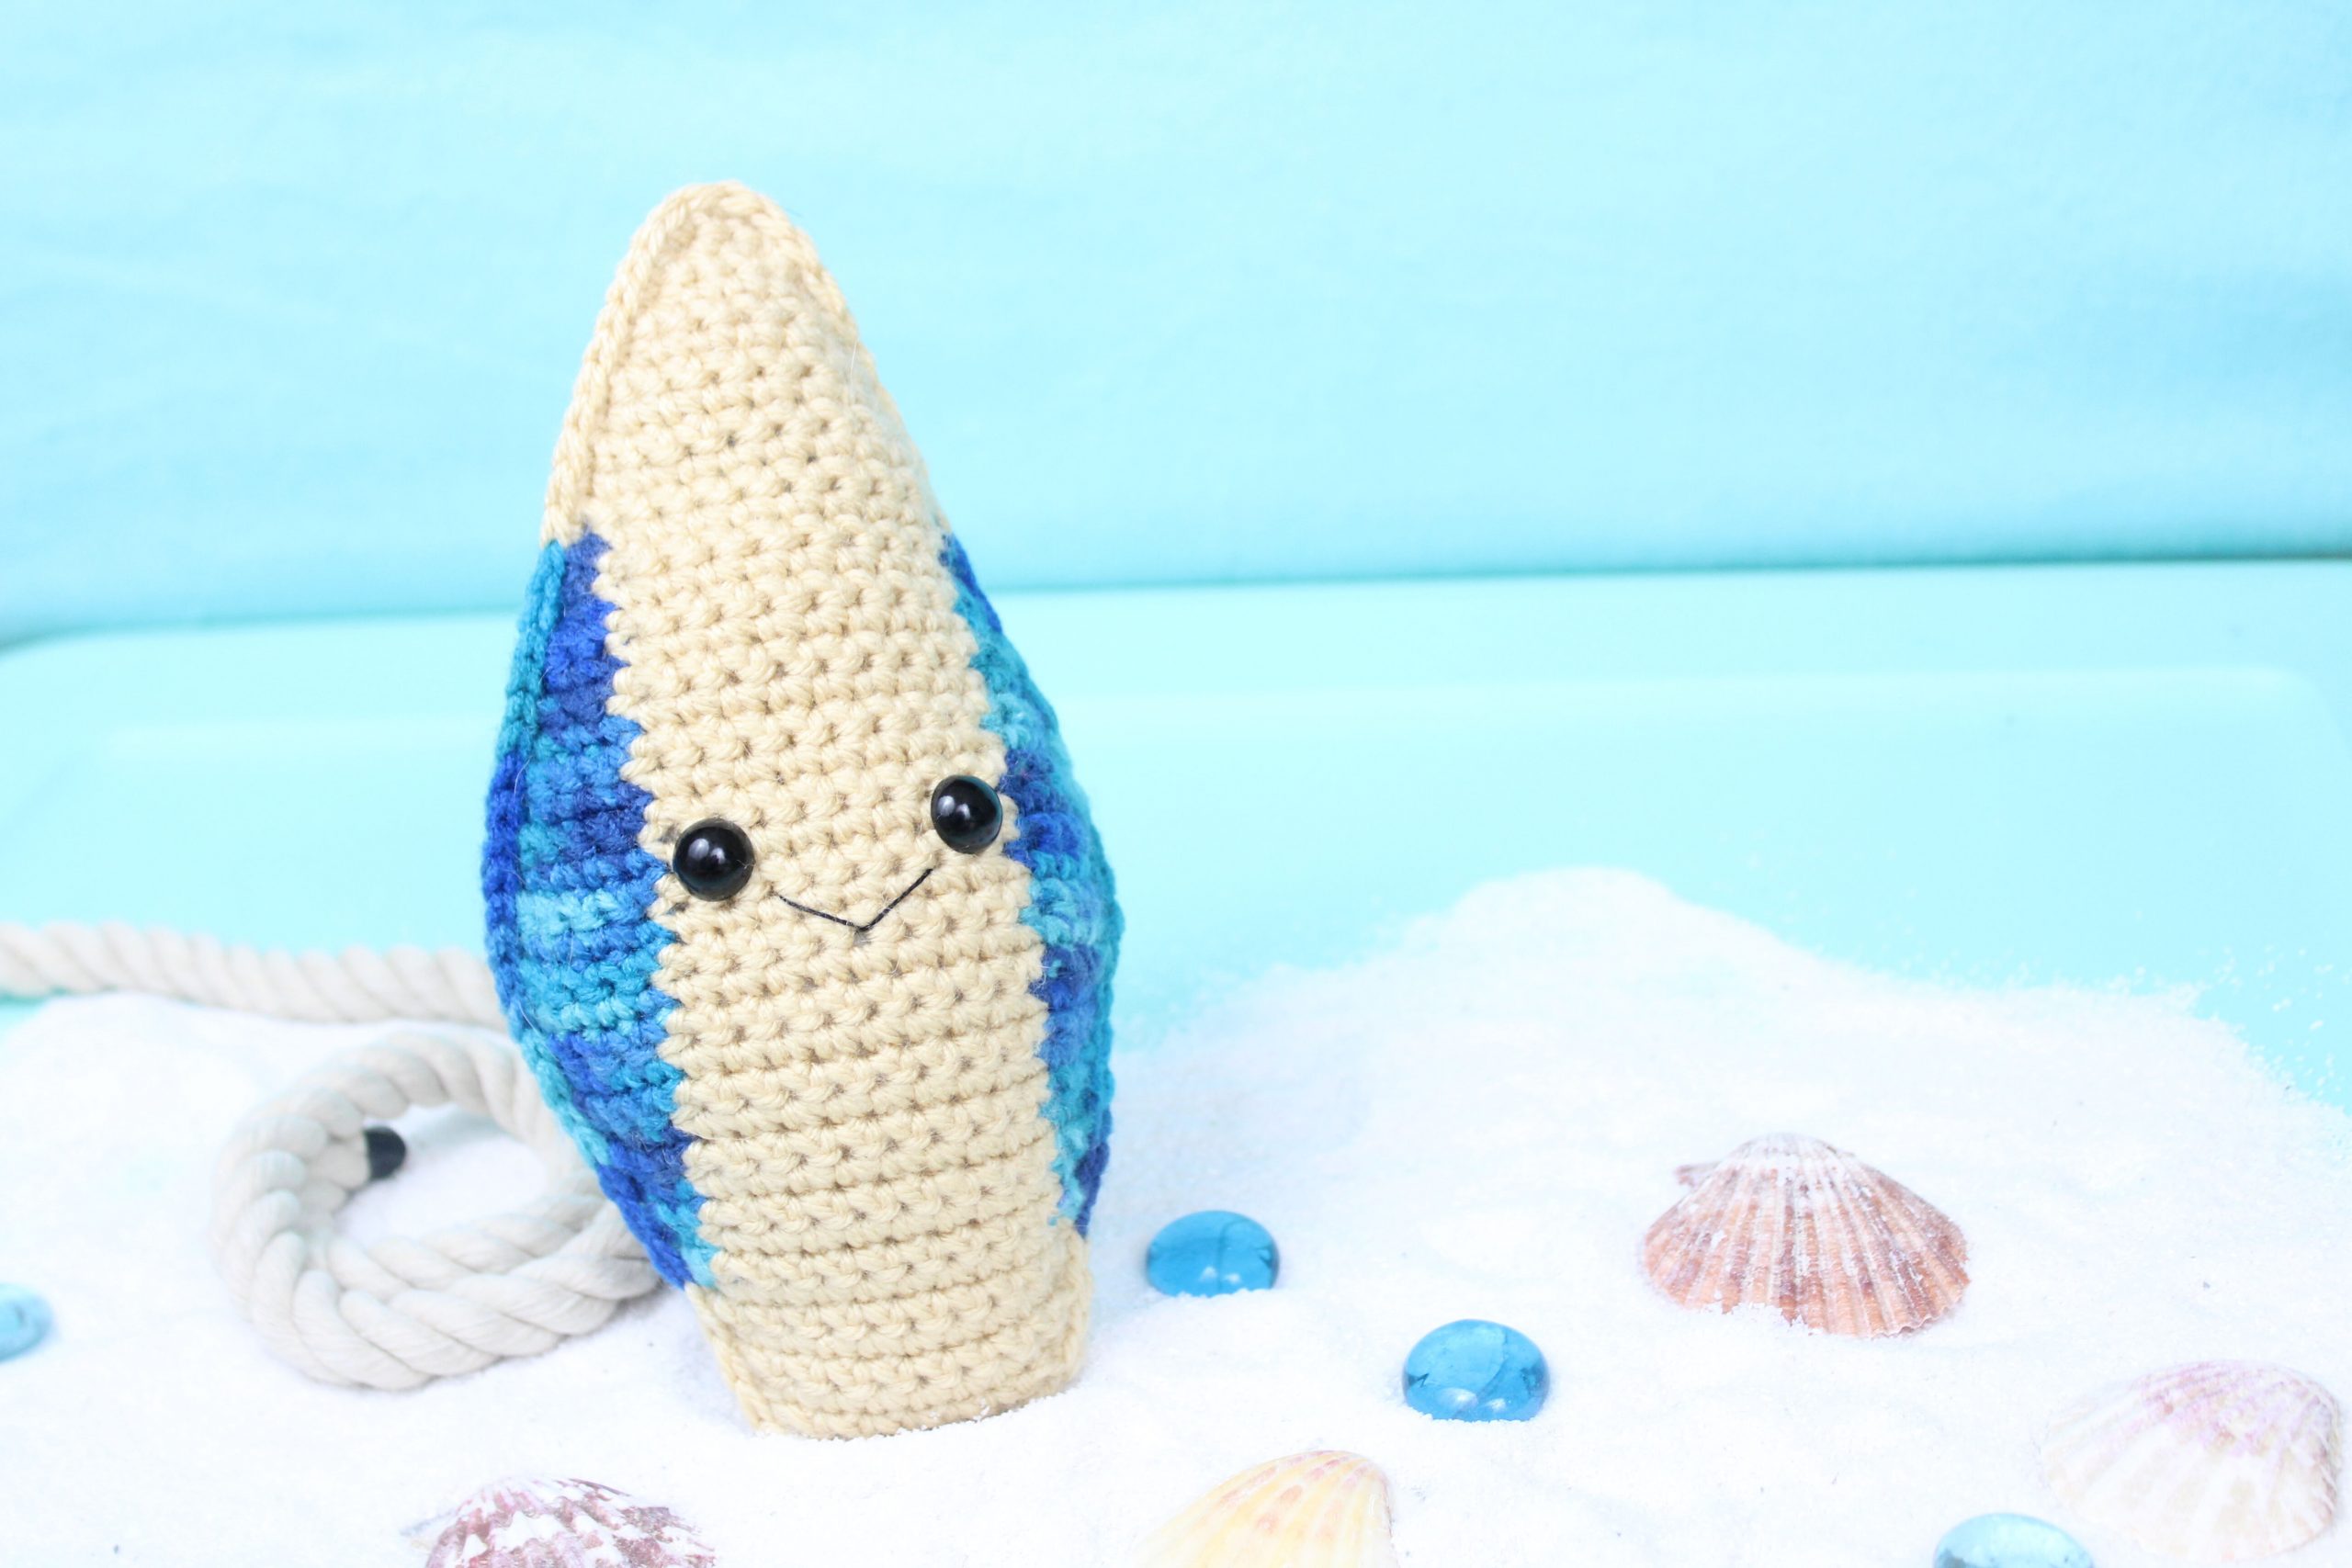
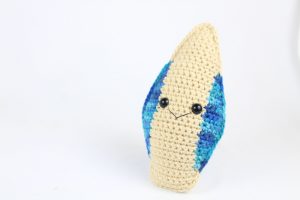
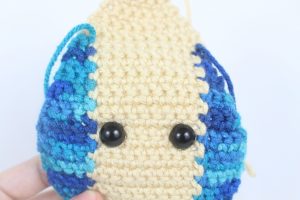
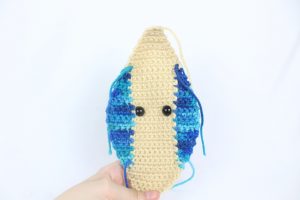
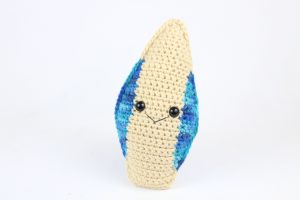
We make the front and back of the surfboard. The surfboard starts from the top and works our way to the bottom. We change colors as well, Main Color being the cream color and Contrast color being the variegated blue. After we make the front and back surfboard, we crochet them together. Next, we make the fin and sew on a smile!
Surfboard:
We start by creating the front and then the back of the surfboard. After creating both pieces, we will crochet them together! Note: Main color (abbreviation MC) is the color going down the middle, contrast color (abbreviation CC) is the colors on the sides.
Surfboard: (Make 2, 1 front and 1 back)
In Main Color
Row 1: Ch 4, Sc in the 2nd ch from the hook, Sc in the next 2 st (3)
Row 2: Turn, Sc in the next 3 st (3)
Row 3: Turn, Inc in the first st, Sc in the next st, Inc in the last st (5)
Row 4: Turn, Sc in the next 5 st (5)
Row 5: Turn, Inc in the first st, Sc in the next 3 st, Inc in the last st (7)
Row 6: Turn, Sc in the next 7 st (7)
Row 7: Turn, Inc in the first st, Sc in the next 5 st, Inc in the last st (9)
Row 8: Turn, Sc in the next 9 st (9)
Row 9: Turn, Inc in the first st, Sc in the next 7 st, Inc in the last st (11)
Row 10: Turn, Sc in the next 11 st (11)
Row 11: Turn, Change to Contrast Color and Sc 1, Change to Main Color and Sc in the next 9 st, Change to Contrast Color Sc in the next st (11)
Row 12: Turn, In CC Inc in the first st, In MC Sc in the next 9 st, In CC Inc in the last st (13)
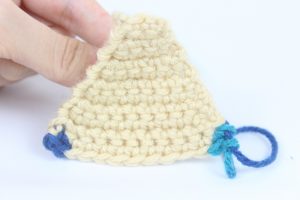
Row 12 Will Look Like This
Row 13-14: Turn, In CC Sc in the next 2 st, In MC Sc in the next 9 st, In CC Sc in the next 2 st (13)
Row 15: Turn, Inc in the first st, Sc in the next st, In MC Sc in the next 9 st, In CC Sc in the next st, Inc in the last st (15)
Row 16-17: Turn, Sc in the next 3 st, In MC Sc in the next 9 st, In CC Sc in the next 3 st (15)
Row 18: Turn, Inc in the next st, Sc in the next 2 st, In MC Sc in the next 9 st, In CC Sc in the next 2 st, Inc in the last st (17)
Row 19-20: Turn, Sc in the next 4 st, In MC Sc in the next 9 st, In CC Sc in the next 4 st (17)
Row 21: Turn, Inc in first st, Sc in the next 3 st, In MC Sc in the next 9 st, In CC Sc in the next 3 st, Inc in the last st (19)
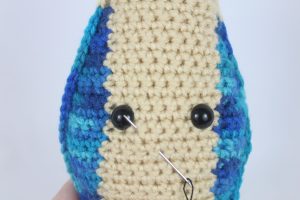
Note: In Round 22 we will add eye stitch markers to mark the eyes. Do this for only one side. If you’re making the back non-face side, simply don’t add eye markers.
Row 22: Turn, Sc in the next 5 st, In MC Sc in the next st. Sc in the next st and add a different colored st marker to the Sc just made. This marks where to place the eye. Sc in the next 5 st. Sc in the next st and add a different colored st marker to Sc just made. Sc in the next st, In CC Sc in the next 5 st (19)
Row 22 Eye Markers will look like this
Row 23-26: Turn, Sc in the next 5 st, In MC Sc in the next 9 st, In CC Sc in the next 5 st (19)
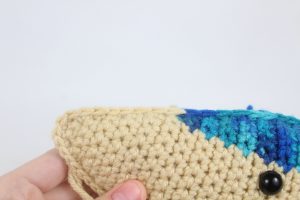
Add safety eyes in the marked areas from Round 22 now
Row 27: Turn, Dec 1 time, Sc in the next 3 st, In MC Sc in the next 9 st, In CC Sc in the next 3 st, Dec 1 time (17)
Row 28-29: Turn, Sc in the next 4 st, In MC Sc in the next 9 st, In CC Sc in the next 4 st (17)
Row 30: Turn, Dec 1 time, Sc in the next 2 st, In MC Sc in the next 9 st, In CC Sc in the next 2 st, Dec 1 time (15)
Row 31-32: Turn, Sc in the next 3 st, In MC Sc in the next 9 st, In CC Sc in the next 3 st (15)
Row 33: Turn, Dec 1 time, Sc in the next st. In MC Sc in the next 9 st, In CC Sc 1, Dec 1 time (13)
Row 34-35: Turn, Sc in the next 2 st, In MC Sc 9, In CC Sc 2 (13)
We will now work in the Main Color for the rest of the rows.
Row 36: In MC Turn, Dec 1 time, Sc in the next 9 st, Dec 1 time (11)
Row 37-38: Turn, Sc in the next 11 st (11)
Row 39: Turn, Dec 1 time, Sc in the next 7 st, Dec 1 time (9)
Row 40: Turn, Sc in the next 9 st (9)
Row 41: Turn, Dec 1 time, Sc in the next 5 st, Dec 1 time (7)
Row 42: Turn, Sc in the next 7 st (7)
Finish off. Make the second surfboard. Then continue on to Surfboard Assembly.
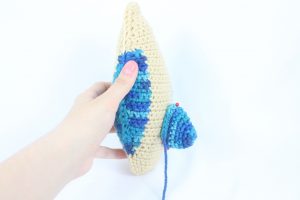
Surfboard Assembly:
Now we will crochet both pieces together. You can crochet the pieces together in a color of your choice, but I crocheted the surfboard together matching the Main Color and Contrast Color when needed. The example photos show otherwise just so you can see the yarn easier!
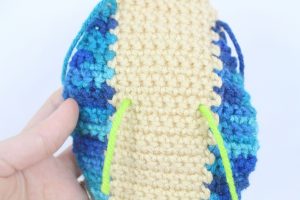
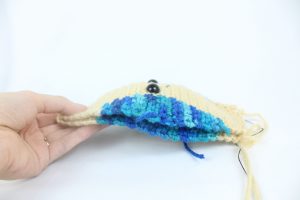
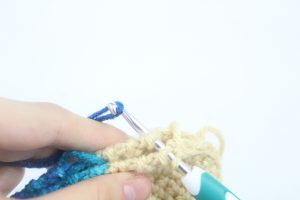
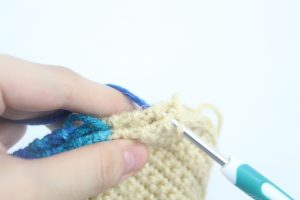
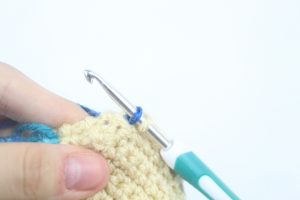
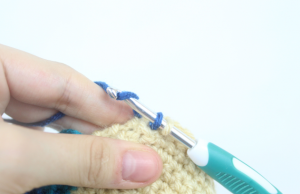
Place both surfboard pieces together, making sure the face is facing out and the stitches line up (Pic 1-2). Insert your crochet hook under BOTH stitches from the front and back surfboard (Pic 3). Pull yarn of your color choice through both of the stitches (Pic 4-6).
1. 2.
2.
3. 4.
4.
5. 6.
6.
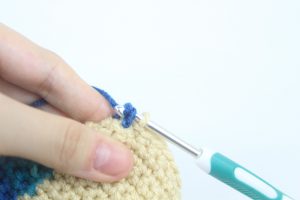
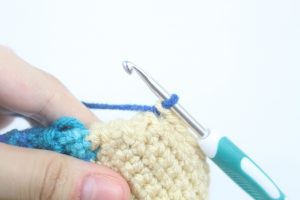
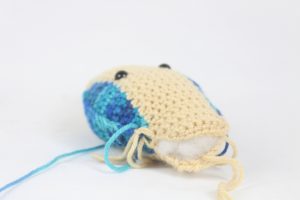
Single crochet around the entirety of the surfboard (Pic 7-9). Change colors to match the surfboard if you’d like (Pic 10). Be sure to stuff the surfboard before fully crocheting closed (Pic 11). Once you crochet around the entire thing, finish off and weave in the ends.
7. 8.
8.
9. 10.
10.
11. 12.
12.
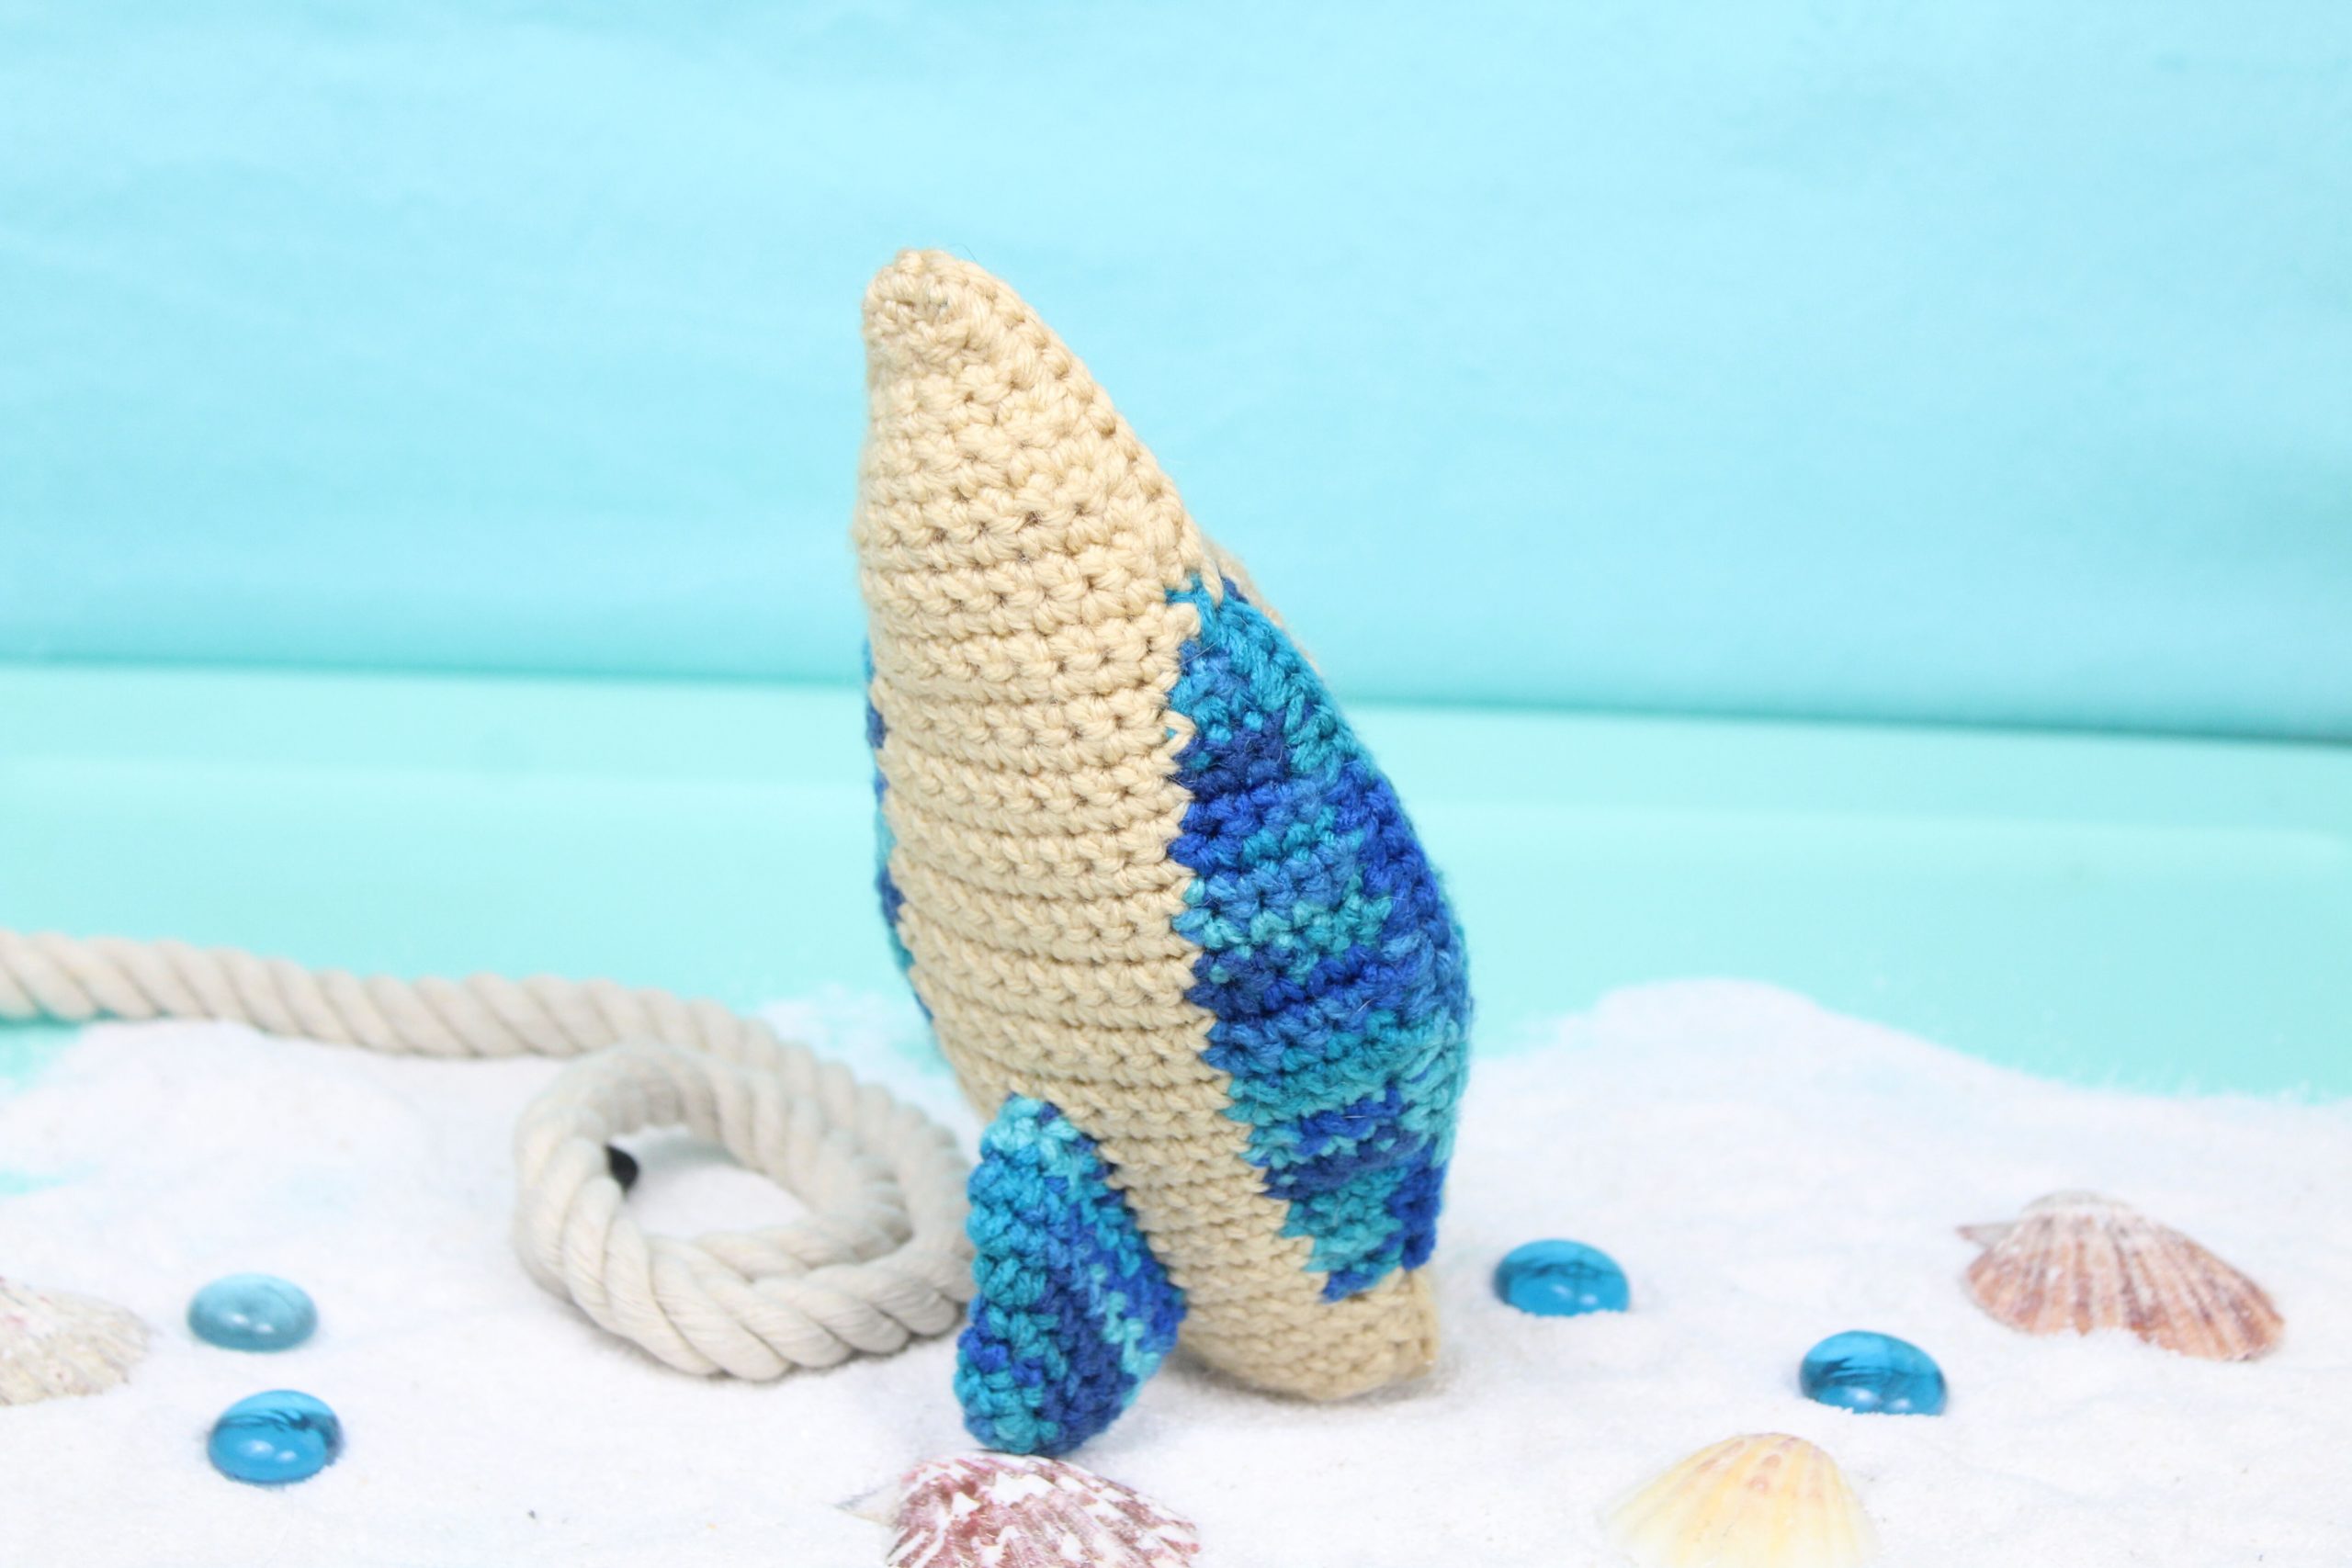
Fin:
In Contrast Color
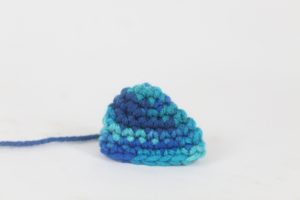
Round 1: 6 Sc in Magic Ring (6)
Round 2: Sc in the next st, *Inc* in the next 3 st, Sc in the next 2 st (9)
Round 3: *Sc* all around (9)
Round 4: Sc in the next st, Repeat *Inc in the next st, Sc in the next st* 3 times, Sc in the next 2 st (12)
Round 5: Sc in the next 5 st, *Inc* in the next 3 st, Sc in the next 4 st (15)
Round 6: Sc in the next 8 st, *Inc* in the next 2 st, Sc in the next 5 st (17)
Finish off and fold the fin flat. Pin to the back of the surfboard and sew on. No need to stuff the fin.
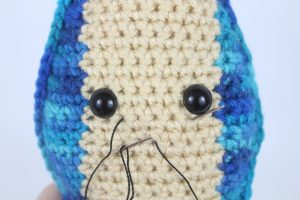
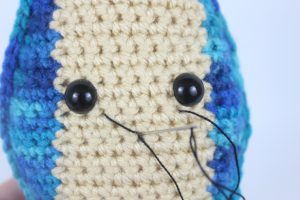
Smile:
In Black Embroidery Thread
Insert the needle into the middle of the mouth area and pull out next to the left eye (Pic 1). Reinsert needle into the middle of the mouth and pull out next to the right eye (Pic 2). Reinsert needle into the middle of the mouth (Pic 3). Tie the ends and weave them into the surfboard.
1. 2.
2.
3. 4.
4.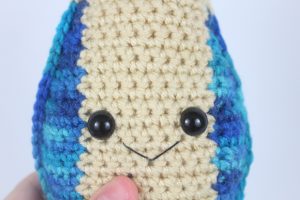
Done! If you made this surfboard I would LOVE to see! You can show me by “trying” it on Pinterest.


9 Comments
I made the surfboard! These are seriously adorable, I plan to use my summer amigurumi as props for our end of summer tea party! Thanks for these great patterns! In row 1 where you ch 4 has the stitch count in parenthesis as (4), at the end of the row there are only 3 sc.
Oh my gosh how cute! LOL I love him with all of the other surfboards. Yay you’re making so many of the summer patterns and I LOVE that!! The tea party sounds adorable, I’m hoping that you’ll have tons of fun! I hope you’re including some fruit punch though 😋
Thank you so much for letting me know about the 4 needing to be a 3!
Yes they’re all so cute & my daughters love them and fight over them when I’m done! It’s bitter sweet really 😂
& you’re very welcome! You have done an awesome job designing these patterns!
Haha oh my gosh that’s so cute! I think that means you did a pretty good job making the toys if they’re fighting over it 😍
I watched your Youtube video of making the Pineapple and that was SO fun to watch! You crochet so fast, I don’t think I can ever make something in one sitting 😱 Oh and you can do french knots!! For some reason I can’t do them 🙁 If you want to do more tutorials, I would love to see one on french knots!
Thanks so much again Grace for sharing your makes. They’re so wonderful! I hope you and your lovely daughters are doing well 😍
Thank you so much! I was planning on doing a video on my favorite way to make ami faces! I’m currently working on the penguins, but it’s a rainy day here so there isn’t very good lighting. 😒
But it means so much to me that you checked out my YouTube channel! ❤
Oh I would really love to see that! The faces look so great and you do it so effortlessly! It takes me a few tries before I get the perfect smile 😂 Yay that’s awesome you’re working on the penguins! So excited to see them 🤩 They have a lot of little accessories but it’s worth it in the end for sure. Keep up all of the awesome amigurumis and videos! I love to find new crocheters to watch so thanks for sharing your channel 🥰
I’ve fallen a little behind on these but still having fun working my way through. Thanks again for the patterns!
Your surfboard is so cuuute! The blue and white go really well together. Oh and I love how small he looks!
I’m so glad you’re having fun with all of these patterns 🙂 Don’t rush yourself, it’s all for fun! Plus we still got some time until August 31 😋 Thanks for sharing all of your cute makes!
Thank you so much for this adorable pattern. My nephew’s first birthday is Beach themed and this will be a great addition.