
Purchase the PDF Version Here

Or purchase the entire PDF bundle!
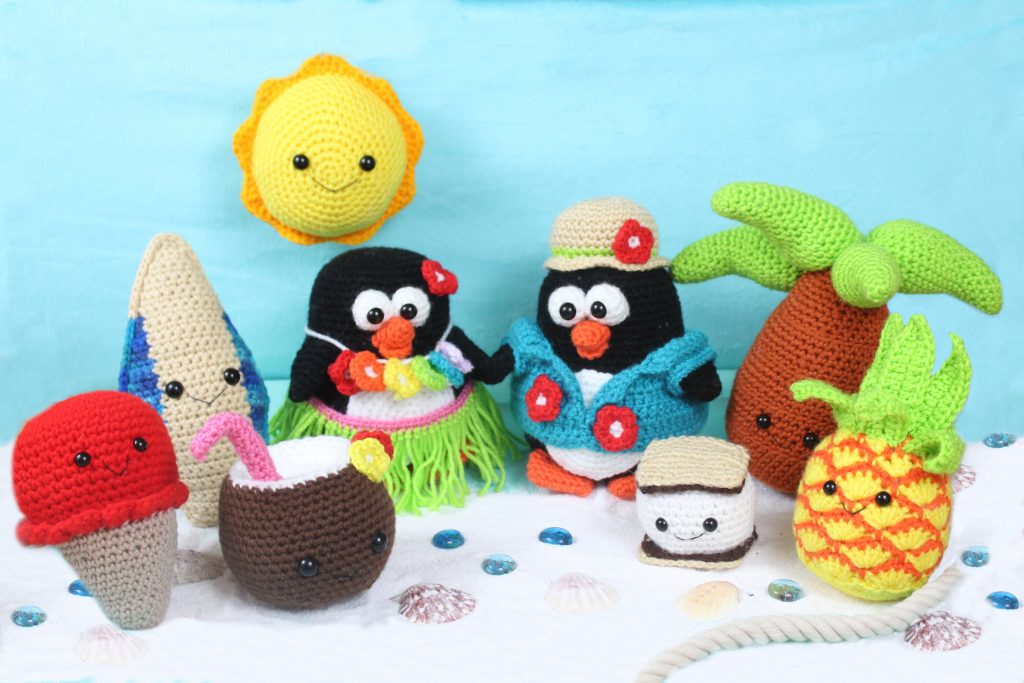
Enter our Summer Amigurumi Crochet Along!
If you make a penguin anytime from July 5-August 31, just post a picture in the CAL blog post to enter in for a chance to win a $25 gift card to a craft store of your choice!
Supplies:
4/Medium weight yarn in the following:
For the penguin body:
Black, white, and orange
For the skirt:
Pink, Green
For the lei:
Red, orange, yellow, green, blue, and purple
Any color for the shirt & hat
10mm safety eyes, tapestry needle, scissors, and stuffing.
Additional Information:
Difficulty: Easy
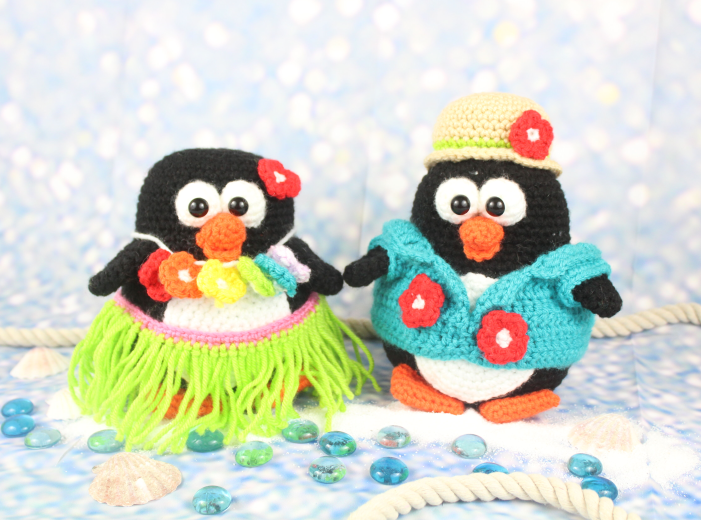
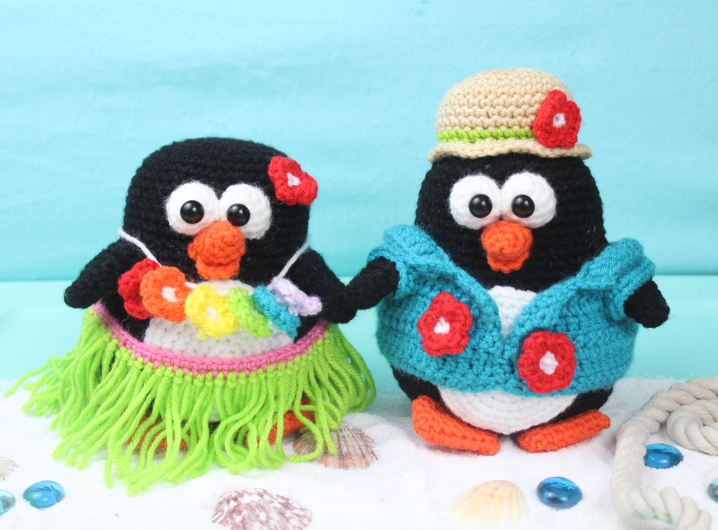
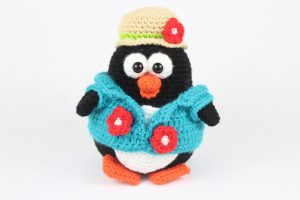
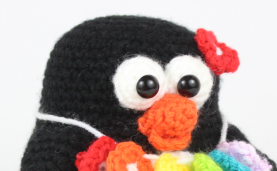
We start by making the body of the penguin, then create the eyes, beak, belly, feet, and arms. Next we make the accessories, such as the skirt, lei, shirt, and hat!
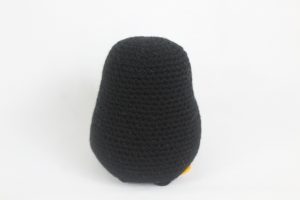
Body
In Black
We start by making the tip of the head and work our way down to the bottom of the body.
Round 1: 6 Sc in Magic Ring (6)
Round 2: *Inc* all around (12)
Round 3: *Inc, Sc* all around (18)
Round 4: *Inc, Sc 2* all around (24)
Round 5: *Inc, Sc 3* all around (30)
Round 6: *Inc, Sc 4* all around (36)
Round 7: *Inc, Sc 5* all around (42)
Round 8-16: *Sc* all around (42)
Round 17: *Inc, Sc 6* all around (48)
Round 18: *Inc, Sc 7* all around (54)
Round 19-22: *Sc* all around (54)
Round 23: *Inc, Sc 8* all around (60)
Round 24-29: *Sc* all around (60)
Round 30: *Dec, Sc 8* all around (54)
Round 31: *Dec, Sc 7* all around (48)
Round 32: *Dec, Sc 6* all around (42)
Round 33: *Dec, Sc 5* all around (36)
Stuff here. Add stuffing after completing each round.
Round 34: *Dec, Sc 4* all around (30)
Round 35: *Dec, Sc 3* all around (24)
Round 36: *Dec, Sc 2* all around (18)
Round 37: *Dec, Sc* all around (12)
Round 38: *Dec* all around (6)
Finish off. Set aside body for now.
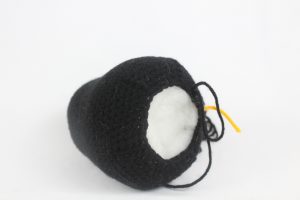
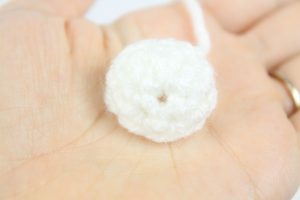
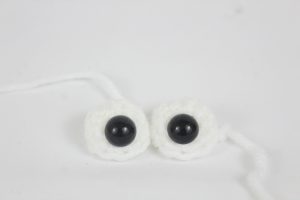
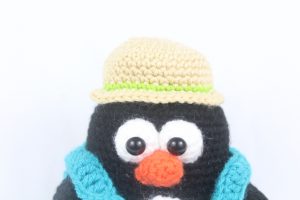
Eyes: (Make 2)
In White
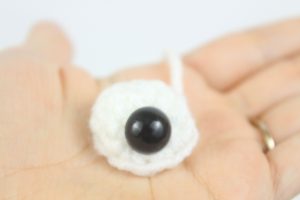
Round 1: 6 Sc in Magic Ring (6)
Round 2: *Inc, Sc* all around (9)
Round 3-4: *Sc* all around (9)
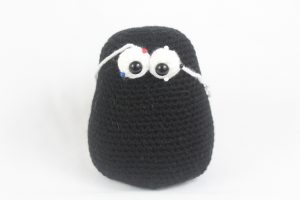
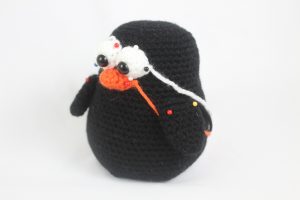
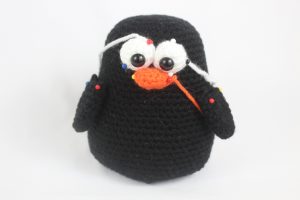
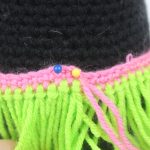
Finish off, leaving a long tail for sewing. Add in safety eyes in between Round 2 & 3. Pin each eye on as shown, making sure the pupils are next to each other.
Beak:
In Orange
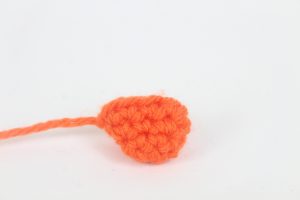
Round 1: 6 Sc in Magic Ring (6)
Round 2: *Sc* all around (6)
Round 3: *Inc, Sc* all around (9)
Round 4: *Sc* all around (9)
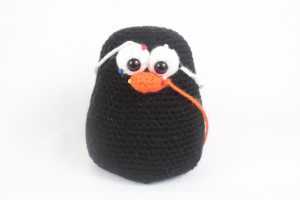
Finish off and pin on as shown. Sew onto the penguin, stuffing before fully sewing shut.
Arms: (Make 2)
In Black
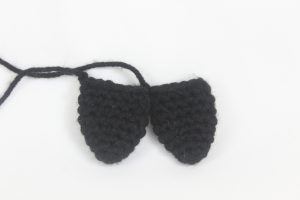
Round 1: 6 Sc in Magic Ring (6)
Round 2: *Sc* all around (6)
Round 3: *Inc, Sc* all around (9)
Round 4: *Sc* all around (9)
Round 5: *Inc, Sc 2* all around (12)
Round 6-9: *Sc* all around (12)
Finish off and pin onto the penguin as shown. Sew on, no need to add stuffing as we want the arms flat.
Belly:
In White
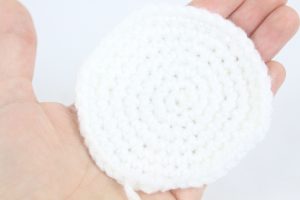
Round 1: 6 Sc in Magic Ring (6)
Round 2: *Inc* all around (12)
Round 3: *Inc, Sc* all around (18)
Round 4: *Inc, Sc 2* all around (24)
Round 5: *Inc, Sc 3* all around (30)
Round 6: *Inc, Sc 4* all around (36)
Round 7: *Inc, Sc 5* all around (42)
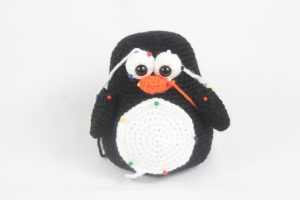
Finish off and pin onto the penguin as shown. Sew on.
Note: To make your penguin look happier, you can make a bottom piece to the beak. Simply Ch 5, Sc in the 2nd Ch from the hook, Sc in the next 3 st. Pin beneath the beak and sew on.
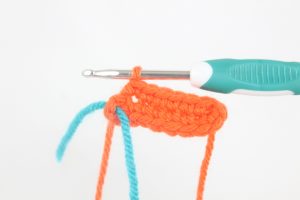
Feet (Make 2):
In Orange
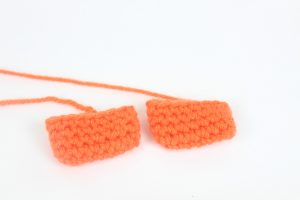
To make the feet we start by creating a chain. We crochet around the entire chain. So once we reach the end of the chain, we turn it to the other side of the chain and crochet on that side, creating a round.
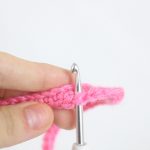
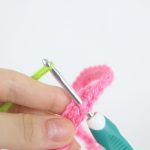
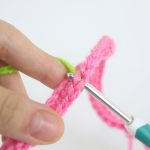
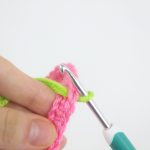
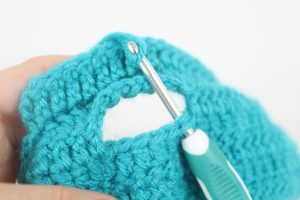
Round 1: Ch 9 (Pic 1). Sc 2 times in the 2nd Ch from the hooks. Sc in the next 6 st, Inc in the next st (Pic 2). Now we meet the end of the chain. Turn the chain to the other side of the Ch (Pic 3). Sc in the next 7 st (Pic 4) (17)
1. 2.
2.
3. 4.
4.
Round 2-5: *Sc* all around (17)
Finish off, no need to stuff the feet. Pin each foot to the penguin as shown and sew on.
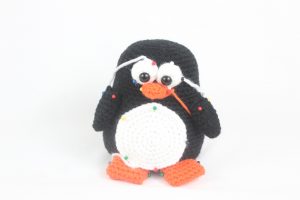
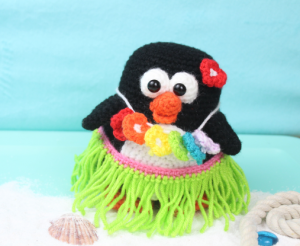
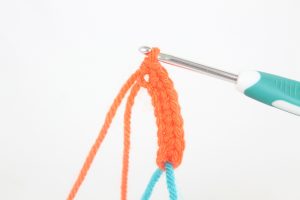
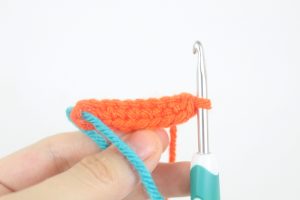
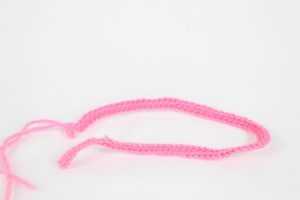
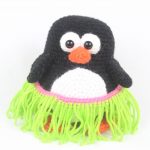
Skirt:
To create the skirt, we make a long chain that will be the top of the skirt. We then cut lots of small green strands of yarn and tie them to the skirt to make the “grass”.
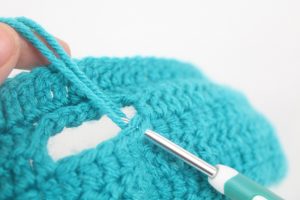
Row 1: Ch 81. Sc in the 2nd Ch from the hook. Sc in the next 79 st (Pic 1) (80)
Finish off leaving a long tail for sewing the skirt onto the penguin later.
1.
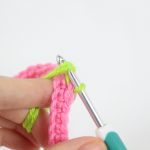
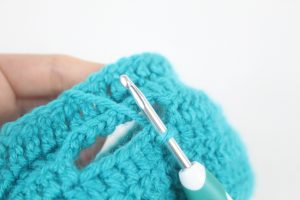
Now, take green (or any desired) color yarn. Cut a ~5″ piece of yarn (Pic 2). Insert your hook into a stitch of the skirt (Pic 3). Place the green yarn onto the hook (Pic 4).
2. 3.
3.
4. 5.
5.
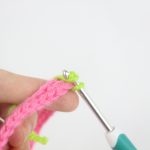
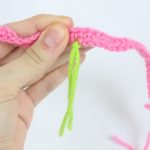
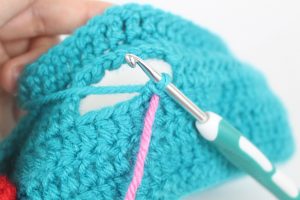
Pull the green yarn through the stitch (Pic 5-6). Yarn over with both ends of green yarn (Pic 7), and pull through the stitch (Pic 8). You can tug the ends of yarn at the same time to make the grass tighter (Pic 9)
6. 7.
7.
8. 9.
9.
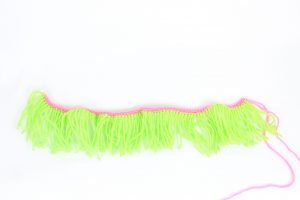
Repeat for each stitch of the skirt (Pic 10). Now pin the skirt around the penguin and sew the ends of the skirt together (Pic 11-12).
10. 11.
11.
12.
Flowers:
Start in white. Flower Color can be in any color, or one in red, orange, yellow, green, blue, and purple for lei.
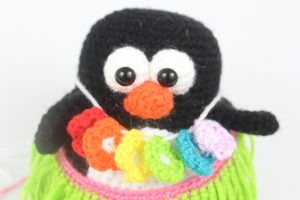
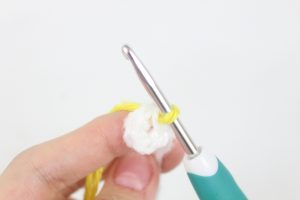
Round 1: 5 Sc in Magic Ring (Pic 1) (5)
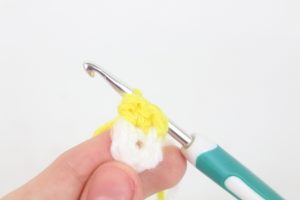
Round 2: Switch to Flower Color. *SlSt in the next st, 3 Hdc in that same st* 5 times. SlSt in the last st (Pic 2-4) (21)
1. 2.
2.
3. 4.
4.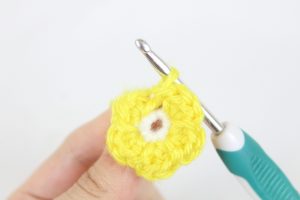
Finish off. Tie the ends firmly together at the back of the flower and cut any ends you won’t need. Be sure to save an end if you’ll use it for sewing onto a hat, shirt, or head of the penguin.
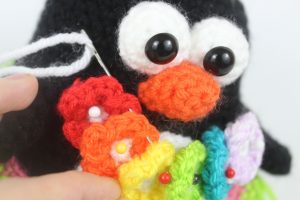
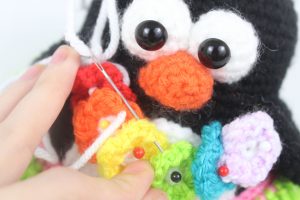
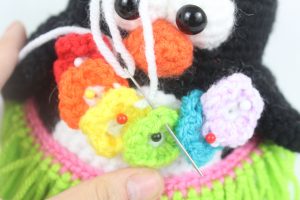
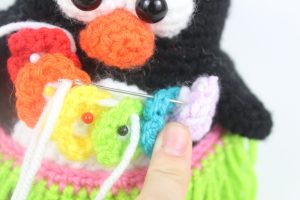
Lei Assembly:
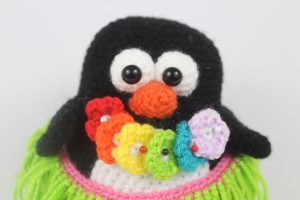
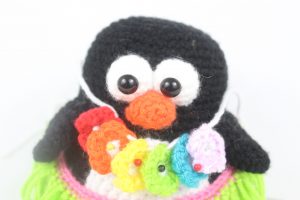
Pin each flower onto the penguin as shown (Pic 1). Now take a long piece of white yarn and place it onto a needle. Place the needle through the top of the red flower (Pic 2), going to the top of the orange flower (Pic 3) and so on (Pic 4-6)
1. 2.
2.
3. 4.
4.
5. 6.
6.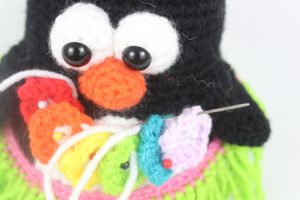
Once each flower is on the white yarn, tie a firm knot at the back of the necklace (Pic 7-8). You can sew weave the back of the necklace into the penguin to secure it.
7. 8.
8.
9.
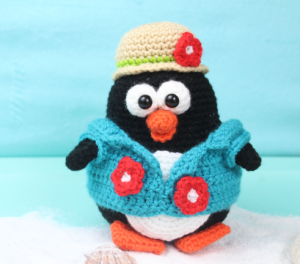
Shirt:
We start by creating the bottom of the shirt and work our way up. We also create arm hole spaces in this process.
Row 1: Ch 66. Dc in the 2nd Ch from the hook. Dc in the next 64 st
Row 2-4: Turn, Dc in the next 64 st (64)
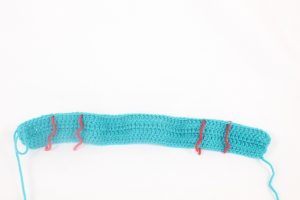
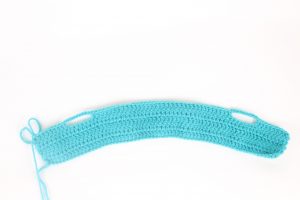
Row 4 is shown in Pic 1. The red markers show where we will make the arm holes. In Row 5 we will be making the arm holes.
1.
Row 5: Turn, Dc in the next 9 st (Pic 2). Ch 10 (Pic 3). Skip the next 6 st and Dc in the next st (Pic 4). Dc in the next 34 st. Ch 10, skip the next 6 st, Dc in the next 9 st (Pic 5).
2.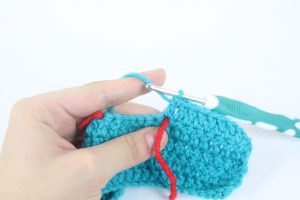 3.
3.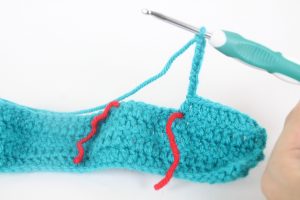
4. 5.
5.
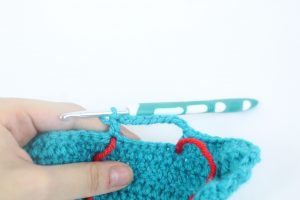
Row 6: Turn, Sc in the next 4 st. Hdc in the next 3 st, Dc in the next 2 st. Repeat *Skip the next st, Dc in the next st* 4 times. Dc in the next 39 st. Repeat *Skip the next st, Dc in next st* 4 times. Dc in the next 2 st, Hdc in the next 3 st, Sc in the next 4 st (Pic 6).
6.
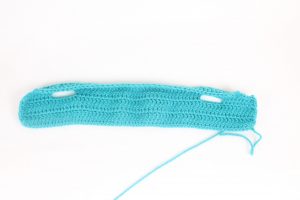
In Row 7 we will be making the collar of the shirt.
Row 7: SlSt in the next 6 st. Ch 3, in the BLO (Back Loop Only) Trc in the next 8 st, Dc in the next 4 st. Repeat *Sk in the next st, Dc in the next 2 st* 9 times. Skip the next st, Dc in the next 5 st. Trc in the next 8 st, Ch 3, SlSt in the next 6 st. Row 7 pictured below.
7.
Armholes:
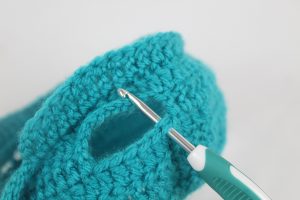
Note: Crocheting around the arm holes may be a bit fiddly, so no worries on getting the exact stitch count. Getting roughly around the stitch count will work perfectly fine!
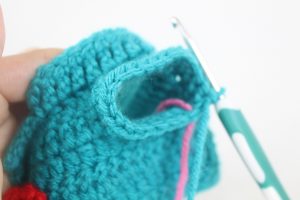
Place hook into any stitch of the arm hole (Pic 1). Yarn over with the shirt color (Pic 2) and pull the yarn through the stitch (Pic 3-4).
1. 2.
2.
3. 4.
4.
Sc in the next st. Add a stitch mark to the Sc just made (Pic 5). Sc in the next ~20 st (approximate but no need to be exact) for a total of 2 rounds (Pic 7). Now you can sew the front of the shirt together to close it or keep it casual by not sewing it!
5. 6.
6.
7. 8.
Hat:
In Hat Color

Round 1: 6 Sc in Magic Ring (6)
Round 2: *Inc* all around (12)
Round 3: *Inc, Sc* all around (18)
Round 4: *Inc, Sc 2* all around (24)
Round 5: *Inc, Sc 3* all around (30)
Round 6: *Inc, Sc 4* all around (36)
Round 7-10: *Sc* all around (36)
Switch to Green
Round 11: *Sc* all around (36)
Switch to Hat Color
Round 12: In the FLO (Front Loop Only) *Inc, Sc 5* all around (42)
Round 13: In BOTH Loops, *Inc, Sc 6* all around (48)
Finish off and pin onto the head as shown. Sew on, adding stuffing before fully sewing on. You can also add a flower if you want!
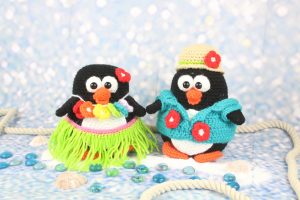 All done! If you made a penguin (or both) I would love to see! You can show me by “trying” it on Pinterest. You can also upload a photo in the comments of this post!


6 Comments
Confused making the shirt, do I need to ch 3 for a turning chain at the start of the DC rows? Is all of row 7 in BLO or only 8 tr? What is Sk in next st? Thanks for any help.
Hi Tanya! The Ch 3 is used to build up a large stitch at the very beginning of the collar 🙂 So no need to turn after making the chain 3, just continue on with making the next “trc” stitches.
For Row 7, we work in the back only when called for. So you would work the bolded part in the BLO! Row 7: SlSt in the next 6 st. Ch 3, in the BLO (Back Loop Only) Trc in the next 8 st, Dc in the next 4 st. Repeat *Sk in the next st, Dc in the next 2 st* 9 times. Skip the next st, Dc in the next 5 st. Trc in the next 8 st, Ch 3, SlSt in the next 6 st.
And “sk” stand for “skip”! So skip the next stitch when you see “sk”.
I hope this helps! I would really love to see your finished penguin 🙂 Please let me know if you have any questions ❤️
Loved making these.
Hi
Love your patterns… so much fun! Can you just let me know what size hooks you are using for the Tropical Penguin project? Huge thanks Xx
Would you perhaps be able to provide me with the finished size of the penguins (height)?
Thanks so much for the pattern!! Here are my cuties!!!!