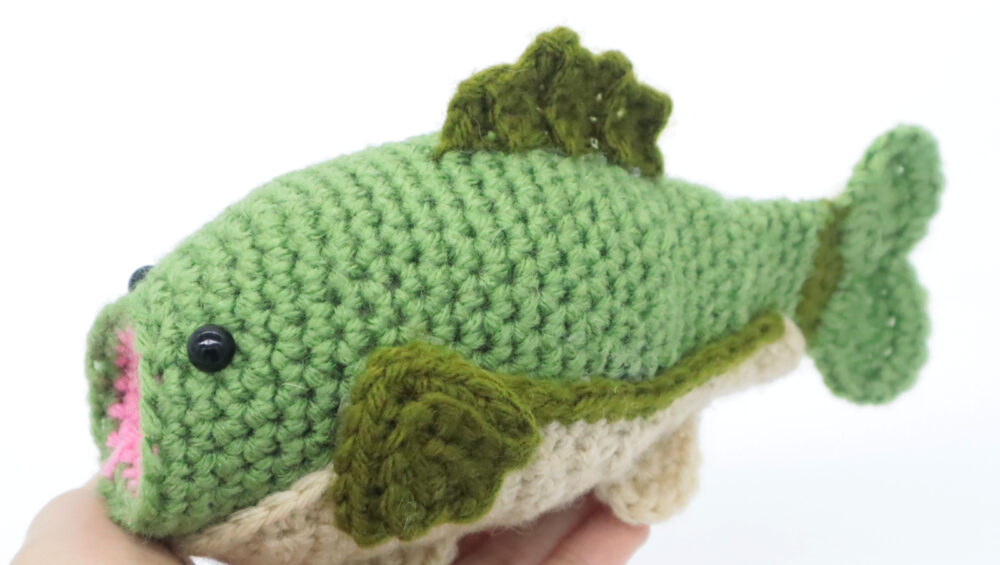
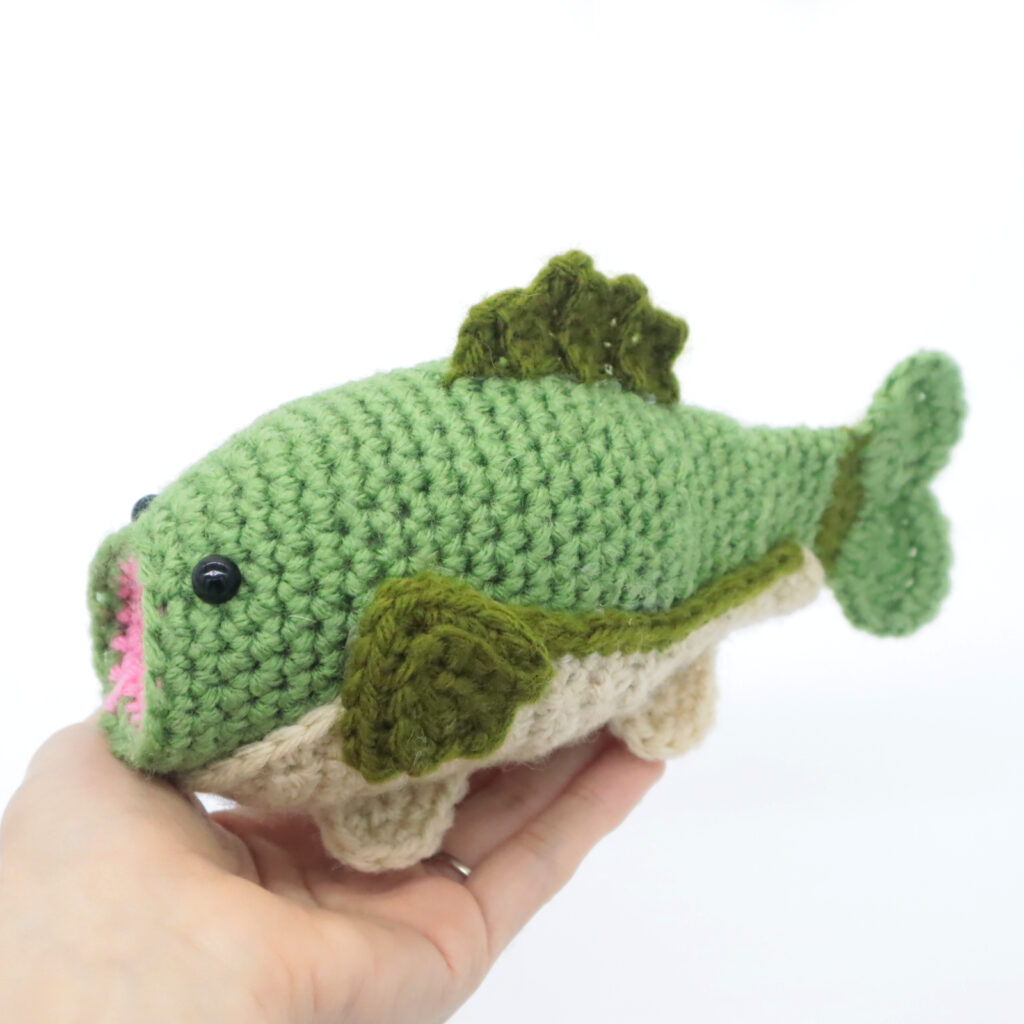
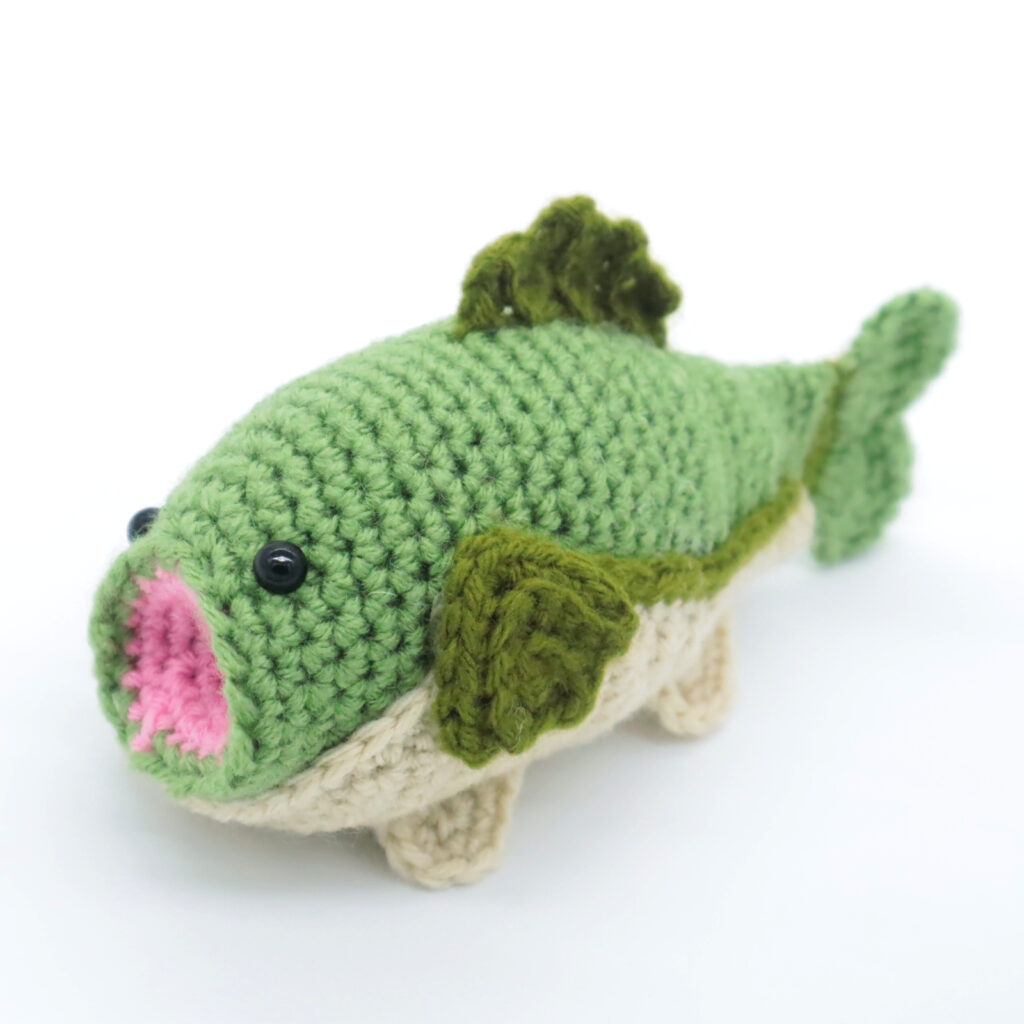
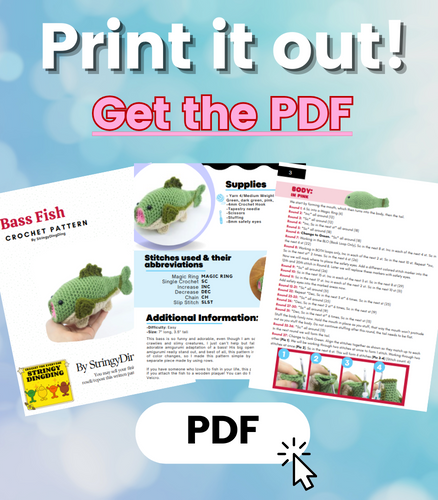
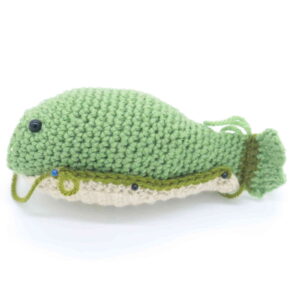
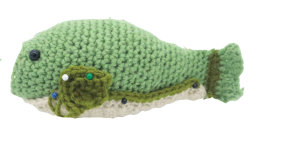
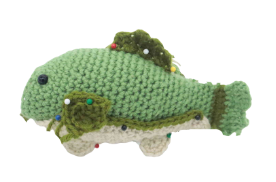
Bass Fish Amigurumi – Free Crochet Pattern
Print this pattern out – purchase the PDF version here!

 Supplies:
• Yarn 4/Medium Weight Yarn in…
Green, dark green, pink, and cream
•4mm Crochet Hook
•Tapestry needle
•Scissors
•Stuffing
•8mm safety eyes
Additional Information:
•Difficulty: Easy
•Size: 7″ long, 3.5″ tall
This bass is so funny and adorable, even though I am so scared of creepy crawlies and slimy creatures, I just can’t help but fall in love with this adorable amigurumi adaptation of a bass! His big open mouth makes this amigurumi really stand out, and best of all, this pattern is easy! I loathe tons of color changes, so I made this pattern simple by making the belly a separate piece made by using rows.
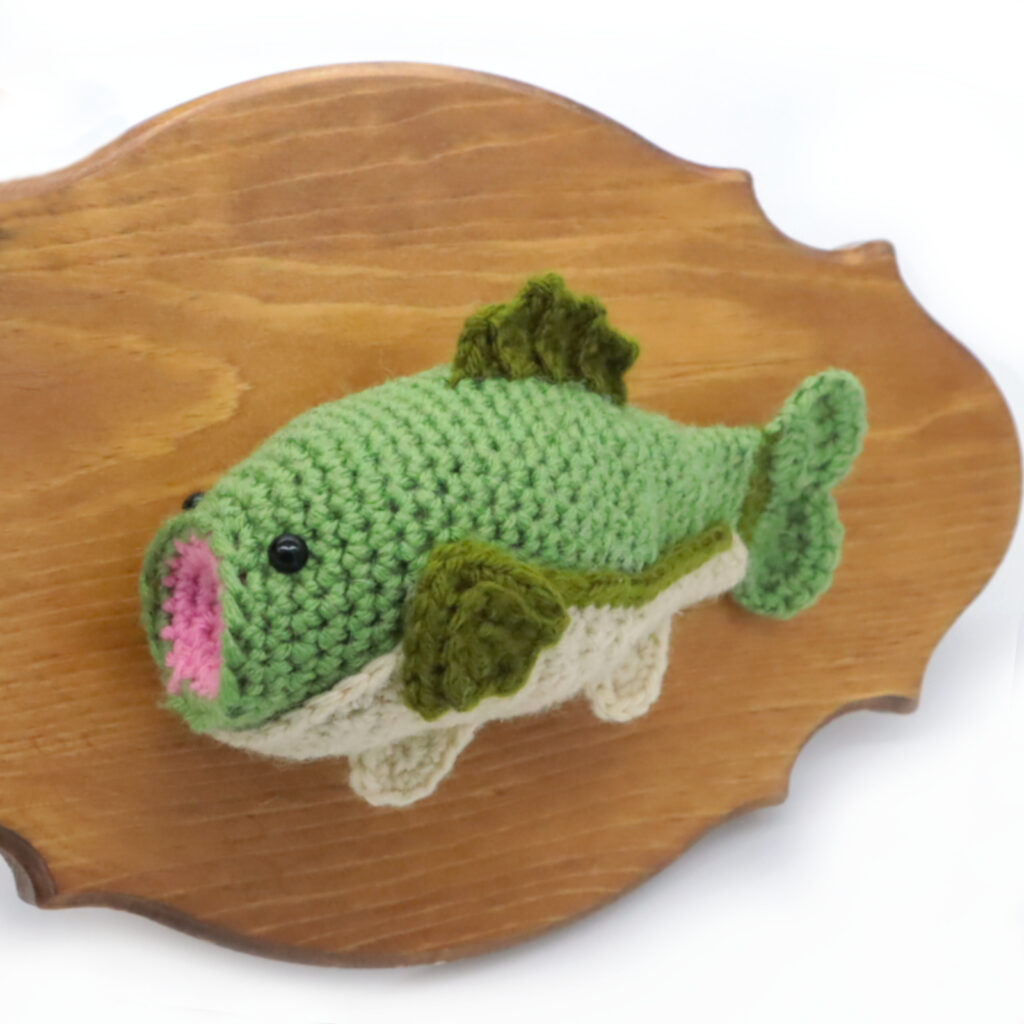
If you have someone who loves to fish in your life, this pattern is even better if you attach the fish to a wooden plaque! You can do this by using adhesive Velcro.
Body:
In Pink

We start by forming the mouth, which then turns into the body, then the tail.
Round 1: 6 Sc into a Magic Ring (6)
Round 2: *Inc* all around (12)
Round 3: *Sc* all around (12)
Round 4: *Inc, Sc in the next st* all around (18)
Round 5: *Sc* all around (18)
Round 6: Change to Green. *Sc* all around (18)
Round 7: Working in the BLO (Back Loop Only), Sc in the next 8 st. Inc in each of the next 4 st. Sc in the next 6 st (22)
Round 8: Working in BOTH loops only, Inc in each of the next 2 st. Sc in the next 10 st. Repeat *Inc, Sc in the next st* 2 times. Sc in the next 6 st (26)
Now we will mark where to place the safety eyes. Add a different colored stitch marker into the 12th and 20th stitch in Round 8. Later we will replace these markers with safety eyes.
Round 9: *Sc* all around (26)
Round 10: Sc in the next 15 st. Inc in each of the next 3 st. Sc in the next 8 st (29)
Round 11: Sc in the next 17 st. Inc in each of the next 2 st. Sc in the next 10 st (31)
Add safety eyes into the marked areas now.
Round 12-21: *Sc* all around (31)
Round 22: Repeat *Dec, Sc in the next 3 st* 6 times. Sc in the next st (25)
Round 23-25: *Sc* all around (25)
Round 26: *Dec, Sc in the next 2 st* 6 times, Sc in the next st (19)
Round 27-30: *Sc* all around (19)
Round 31: *Dec, Sc in the next st* 6 times, Sc in the next st (13)
Stuff the body firmly now. Hold the mouth in place as you stuff, that way the mouth won’t protrude out as you stuff the body. Do not continue stuffing after this round, the tail needs to be flat.
Round 32-36: *Sc* all around (13)
In the next round we will form the tail.
Round 37: Change to Dark Green. Align the stitches together as shown so they match up to each other (Pic 1).
1.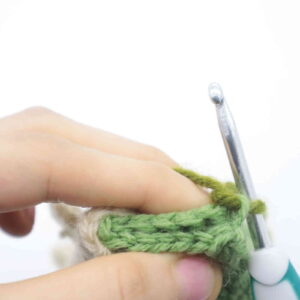
We will be working through two stitches at once to form 1 stitch. Working through two stitches at once (Pic 2), Sc in the next 6 st. This will form 6 stitches (Pic 3-4) (Stitch count: 6)
2. 3.
3.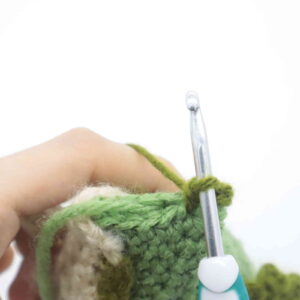 4.
4.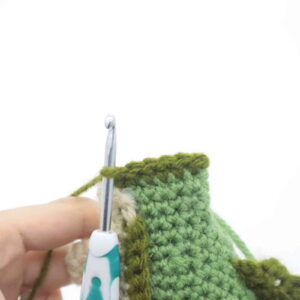 Row 38: Ch 1 and turn. Sc in the next 6 st (6)
Row 39: Change to Green. Ch 2 and turn. Dc in the next st, Dc 2 times in the next st, Sc in the next 2 st, Dc 2 times in each of the next 2 st. The Ch 2 we made at the start of this row counts as a stitch. (10)
Row 40: Ch 2 and turn. Dc in the next 4 st, Sc in the next 2 st, Dc in the next 2 st, Dc 2 times in the next st (10)
Row 41: Ch 1 and turn. Skip the next st, Inc in each of the next 2 st, Sc in the next st, SlSt in the next 2 st, Sc in the next st, Inc in each of the next 2 st, Sc in the next st (14)
Finish off, leaving a long tail for sewing. Weave in ends and cut any excess yarn.
Belly:
In Cream Color
Row 1: Ch 9. Inc in the 2nd Ch from the hook, Sc in the next 6 st, Inc in the next st (10)
Row 2: Ch 1 and turn. Inc, Sc in the next 8 st, Inc in the next st (12)
Row 3: Ch 1 and turn. Inc in the next st, Sc in the next 10 st, Inc in the next st (14)
Row 4: Ch 1 and turn. Sc in the next 14 st (14)
Row 5: Ch 1 and turn. Inc, Sc in the next 12 st, Inc in the next st (16)
Row 6-13: Ch 1 and turn. Sc in the next 16 st (16)
Row 14: Ch 1 and turn. Dec, Sc in the next 12 st, Dec (14)
Row 15: Ch 1 and turn. Dec, Sc in the next 10 st, Dec (12)
Row 16: Ch 1 and turn. Dec, Sc in the next 8 st, Dec (10)
Row 17: Ch 1 and turn. Dec, Sc in the next 6 st, Dec (8)
Row 18-20: Ch 1 and turn. Sc in the next 8 st (8)
Row 21: Ch 1 and turn. Dec, Sc in the next 4 st, Dec (6)
Row 22: Ch 1 and turn. Sc in the next 6 st (6)
Row 23: Ch 1 and turn. Dec, Sc in the next 2 st, Dec (4)
Row 24-27: Ch 1 and turn. Sc in the next 4 st (4)
Row 28: Crochet around the entire belly piece, this will make the edges of the belly smooth.
Row 29: In dark green, insert your hook onto the side of belly as shown (Pic 1-2).
1.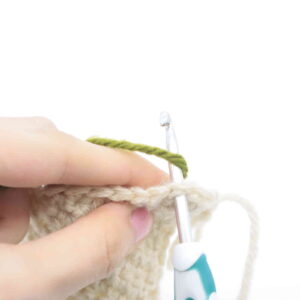 2.
2.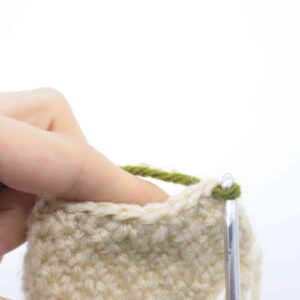
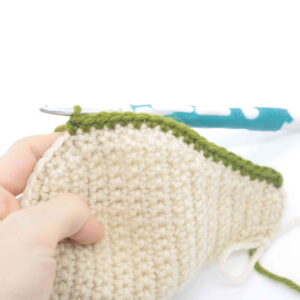
Sc in the next 19 stitches (Pic 3). You can crochet more of less on this area if desired. Repeat this on the other side of the belly. Once done, finish off. Weave in tail ends of yarn. Pin the belly on as shown (Pic 4) and sew or hot glue on. I hot glued the belly on since it was easier this way.
3. 4.
4.
Fins: (Make 2)
In Dark Green
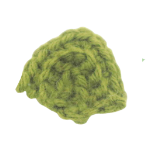
Row 1: Ch 4. Inc in the 2nd Ch from the hook, Sc in the next st. Sc 3 times in the next st. Now working on the OTHER side of the chain, where we haven’t made any stitches yet, Sc in the next 2 st (8)
Row 2: Ch 1 and turn. Working in the FLO, Sc in the next 3 st. Sc 3 times in the next st. Sc in the next 3 st (9)
Row 3: Ch 1 and turn. Working in the BLO, Sc in the next 4 st. Sc 3 times in the next st. Sc in the next 4 st (11)
Finish off, leaving a long tail for sewing. Pin the arms on as shown and sew or hot glue on. Once done, weave in ends and cut any excess yarn.
Bottom Pieces: (Make 2)
In Cream Color
Round 1: 6 Sc into a Magic Ring (6)
Round 2: Inc in each of the next 4 st
Finish off, leaving a long tail for sewing. Pin the pieces on as shown and sew or hot glue on. Once done, weave in ends and cut any excess yarn.

Top Fin:
In Dark Green
Row 1: Ch 4. Sc in the 2nd Ch from the hook, Sc in the next 2 st (3)
Row 2: Ch 1 and turn. Working in the FLO, Sc in the next 4 st (4)
Row 3: Ch 1 and turn. Working in the BLO, Sc in the next 4 st (4)
Row 4: Ch 1 and turn. Working in the FLO, Sc in the next 2 st, Sc 3 times in the next st (5)
Row 5: Ch 1 and turn. Working in the BLO, Dec, Sc in the next 3 st (4)
Row 6: Ch 1 and turn. Working in the FLO, Sc in the next 3 st (3)
Row 7: Ch 1 and turn. Working in the BLO, Dec, Sc in the next st (2)
Finish off, leaving a long tail for sewing. Pin the top fin on as shown and sew or hot glue on. Once done, weave in ends and cut any excess yarn.


3 Comments
Cute and fun to make!
.
So cute! You did an amazing job 🙂 Thanks for sharing!