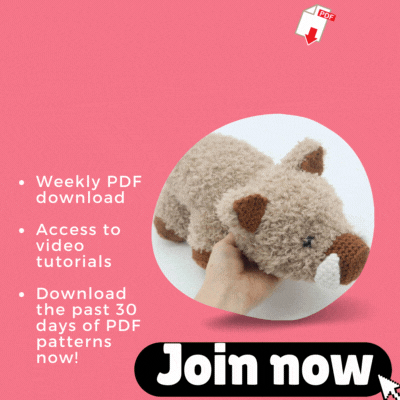
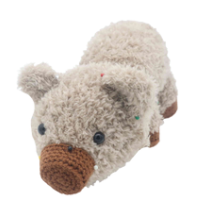
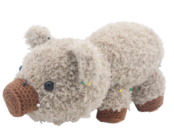
Boar Amigurumi – Free Crochet Pattern
Print this pattern out – purchase the PDF here!

 Supplies:
• Yarn 4/Medium Weight Yarn in…
Fuzzy light brown, regular medium brown and white
•4mm Crochet Hook
•12mm Safety Eyes
•Tapestry needle
•Scissors
•Stuffing
•Plastic pellets for weighing down (optional but recommended)
Additional Information:
•Difficulty: Easy if comfortable working with fuzzy yarn
•Size: 11″ long, 5″ tall
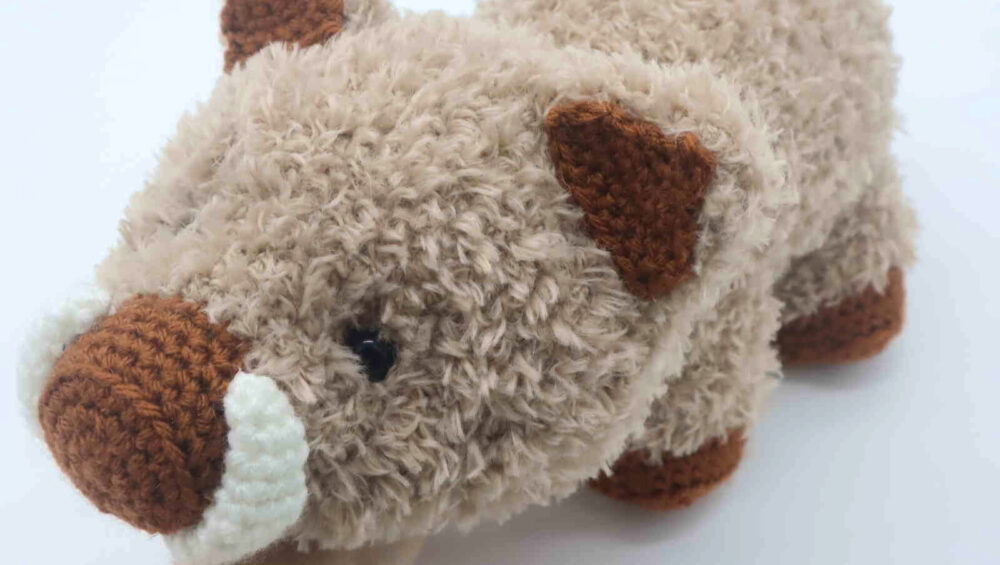
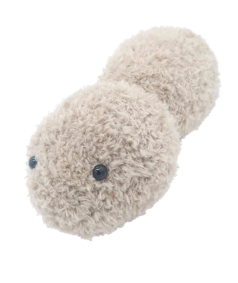
This cute pattern is definitely not a bore! You’ll have tons of fun creating this super cute boar amigurumi. The use of fuzzy yarn makes him not only super soft, but also much more realistic.
Fuzzy yarn may be intimidating for beginners, but here’s a tip! Don’t worry about seeing the stitches. Instead, “feel” for the stitches, and just count as you work. Since the yarn is fuzzy, it’s hard to see any mistakes. So if you end up with the wrong stitch count, simply increase or decrease however many stitches until you get the stitch count 🙂
Let’s get started!
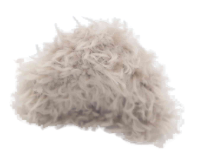
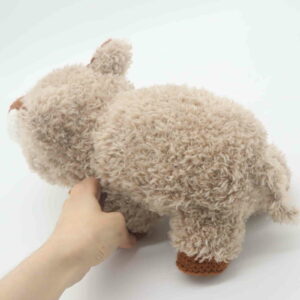
Body:
Start in Fuzzy Yarn
Round 1: 6 Sc into a Magic Ring (6)
Round 2: *Inc* all around (12)
Round 3: *Inc, Sc in the next st* all around (18)
Round 4: *Inc, Sc in the next 2 st* all around (24)
Round 5: *Inc, Sc in the next 3 st* all around (30)
Round 6: In the FLO (Front Loop Only), *Sc* all around (30)
Round 7-11: In BOTH loops, *Sc* all around (30)
Round 12: In the FLO, repeat *Inc, Sc in the next 4 st* all around (36)
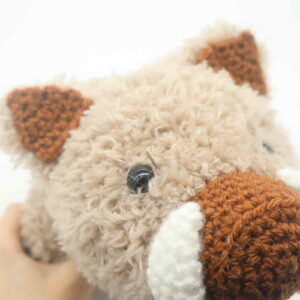
Add safety eyes between Round 9 and 10, spaced apart about 10 stitches. It’s hard to see the stitches with fuzzy yarn, so place them where you think they look best.
Round 13: In BOTH loops, repeat *Inc, Sc in the next 5 st* all around (42)
Round 14: *Inc, Sc in the next 6 st* all around (48)
Round 15: *Inc, Sc in the next 7 st* all around (54)
Round 16-24: *Sc* all around (54)
Round 25: *Dec, Sc in the next 7 st* all around (48)
Round 26: *Dec, Sc in the next 6 st* all around (42)
Round 27: *Dec, Sc in the next 5 st* all around (36)
Round 28: *Dec, Sc in the next 4 st* all around (30)
Round 29: *Dec, Sc in the next 3 st* all around (24)
Round 30: In the FLO, repeat *Inc, Sc in the next 3 st* all around (30)
Round 31: *Inc, Sc in the next 4 st* all around (36)
Round 32: *Inc, Sc in the next 5 st* all around (42)
Stuff the head here.
Round 33: *Inc, Sc in the next 6 st* all around (48)
Round 34: *Inc, Sc in the next 7 st* all around (54)
Round 35-46: *Sc* all around (54)
Round 47: *Dec, Sc in the next 7 st* all around (48)
Round 48: *Dec, Sc in the next 6 st* all around (42)
Round 49: *Dec, Sc in the next 5 st* all around (36)
Round 50: *Dec, Sc in the next 4 st* all around (30)
Round 51: *Dec, Sc in the next 3 st* all around (24)
Stuff the body here. Add plastic pellets to weigh down the body. Continue stuffing after each round.
Round 52: *Dec, Sc in the next 2 st* all around (18)
Round 53: *Dec, Sc in the next st* all around (12)
Round 54: *Dec* all around (6)
Finish off, leaving a long tail for sewing. Sew the remaining stitches together, then weave in ends. Cut any excess yarn.
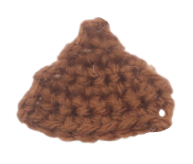
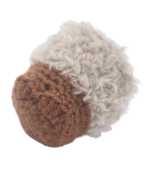
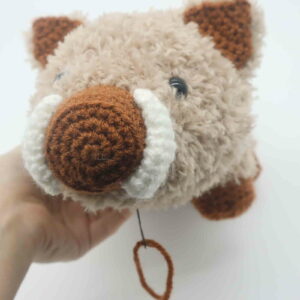
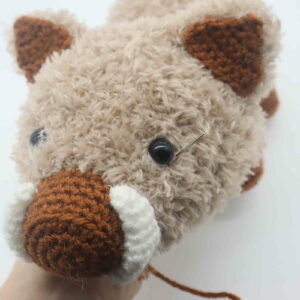
Nose:
In Brown
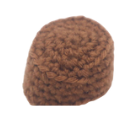
Round 1: 6 Sc into a Magic Ring (6)
Round 2: *Inc* all around (12)
Round 3: *Inc, Sc in the next st* all around (18)
Round 4: *Inc, Sc in the next 2 st* all around (24)
Round 5: In the BLO, *Sc* all around (24)
Round 6-8: In BOTH loops, *Sc* all around (24)
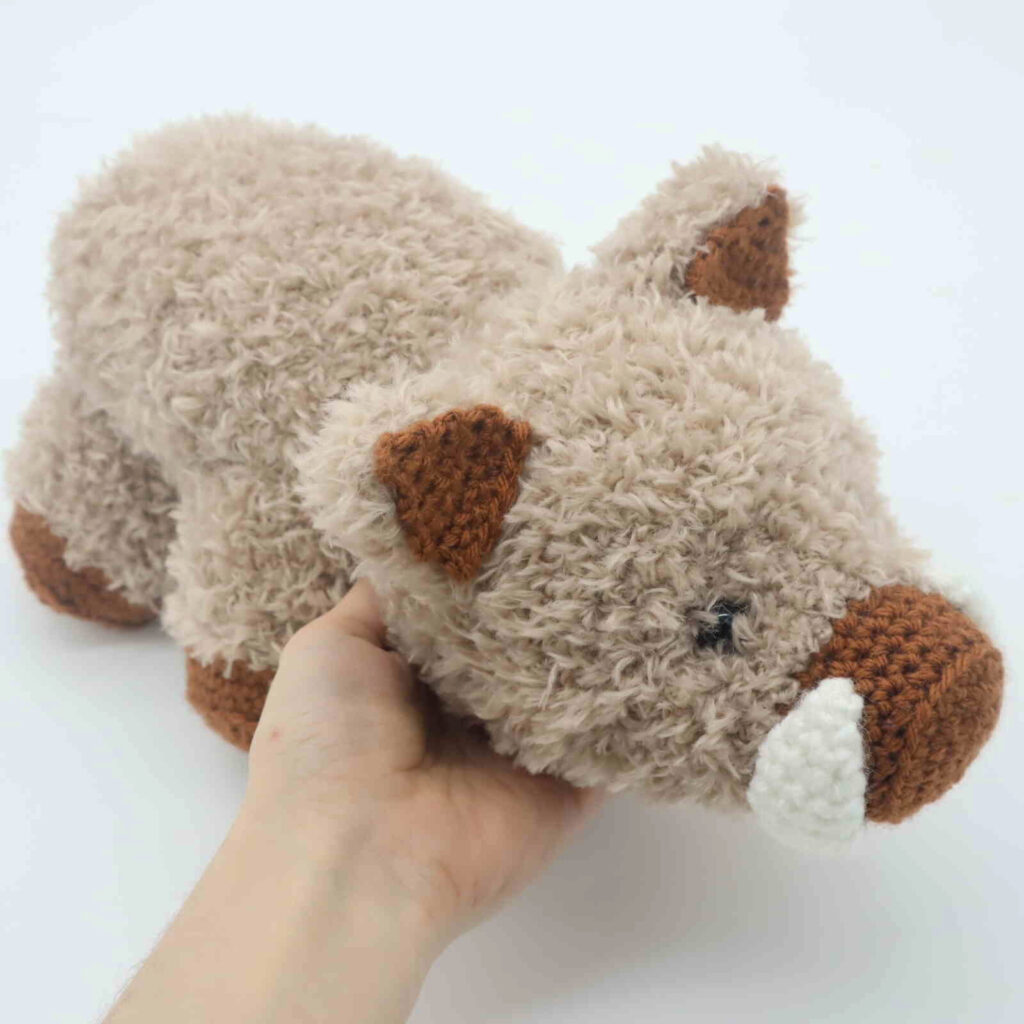
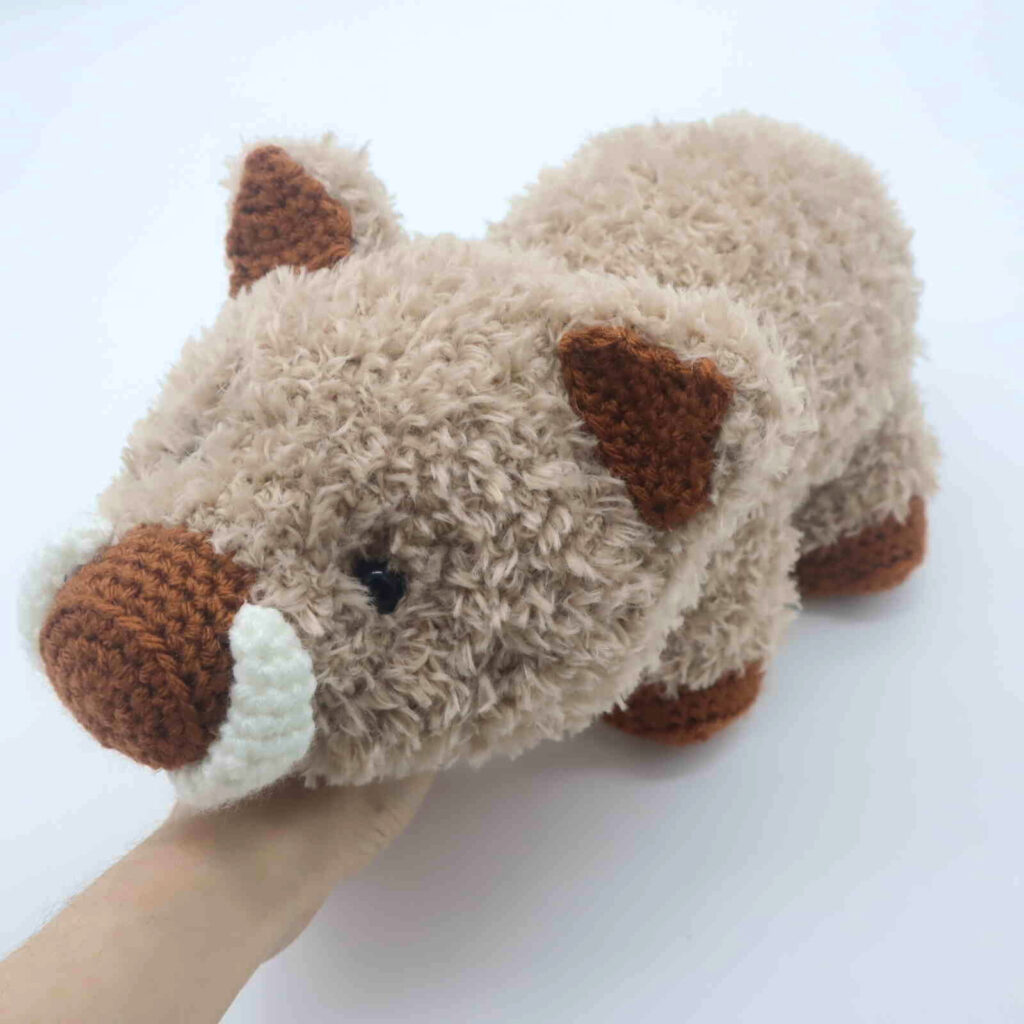
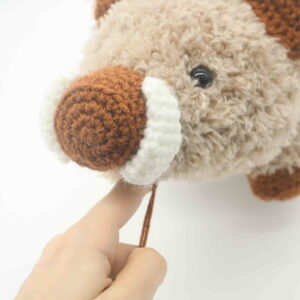
Finish off, leaving a long tail for sewing. Pin the nose on as shown and sew on. Be sure to add stuffing before fully sewing closed. Once done, weave in ends and cut any excess yarn.
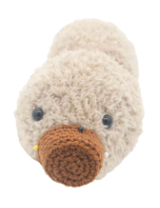
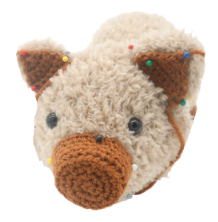
Ears: (Make 2)
In Fuzzy Yarn
Round 1: 6 Sc into a Magic Ring (6)
Round 2: *Inc* all around (12)
Round 3-4: *Sc* all around (12)
Round 5: *Inc, Sc in the next st* all around (18)
Round 6: *Sc* all around (18)
Round 7: *Inc, Sc in the next 2 st* all around (24)
Round 8-10: *Sc* all around (24)
Finish off, leaving a long tail for sewing. Pin the ears on as shown and sew on. Once sewn on, weave in ends and cut any excess yarn.
Ear Insides: (Make 2)
In Brown Yarn
Row 1: Ch 2. Sc 2 times in the 2nd Ch from the hook (2)
Row 2: Ch 1 and turn. Sc in the next 2 st (2)
Row 3: Ch 1 and turn. Inc in the next 2 st (4)
Row 4: Ch 1 and turn. Inc in the next st, Sc in the next 2 st, Inc in the next st (6)
Row 5-6: Ch 1 and turn. Sc in the next 6 st (6)
Finish off, leaving a long tail for sewing. Place the ear on as shown and sew/hot glue on. Once done, weave in ends and cut any excess yarn.
Legs: (Make 2)
In Brown
Round 1: 6 Sc into a Magic Ring (6)
Round 2: *Inc* all around (12)
Round 3: *Inc, Sc in the next st* all around (18)
Round 4: Repeat *Inc in the next st, Sc in the next st* 2 times. Inc in the next st. Make 2 Dc into each of the next 2 st. SlSt in the next 2 st. Make 2 Dc in each of the next 2 st. Sc in the next st. Inc in the next st, Sc in the next 3 st (24)
Round 5: Working in the Back Loop Only (BLO), Sc in the next 12 st. Dec 1 time. Sc in the next 10 st (23)
Round 6-7: Working in BOTH loops, *Sc* all around (23)
Round 8: Change to your fur yarn now. Working in the BLO, *Sc* all around (23)
Round 9-17: Working in BOTH loops, *Sc* all around (23)
Finish off, leaving a long tail for sewing. Stuff the bottom of the foot with plastic pellets, then stuff the rest of the foot. This will help weigh down the toy correctly. Now pin the legs on as shown and sew on. Once sewn on, weave in ends and cut any excess yarn.
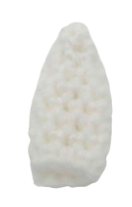
Tusks: (Make 2)
In White
 Round 1: 3 Sc into a Magic Ring (3)
Round 2: *Sc* all around (3)
Round 3: *Inc* all around (6)
Round 4: *Sc*a all around (6)
Round 5: Repeat *Inc, Sc in the next 2 st* all around (8)
Round 6-10: *Sc* all around (8)
Finish off, leaving a long tail for sewing. Pin the tusks on as shown, leaving the tusks unstuffed. Sew/hot glue the tusks on. Once done, weave in ends and cut any excess yarn.
Tail:
In Fuzzy Yarn
Row 1: Ch 16. Sc in the 2nd Ch from the hook. Sc in the next 14 st (15)
Row 2-3: Ch 1 and turn. Sc in the next 15 st (15)
Finish off, leaving a long tail for sewing. Pin the tail on as shown and sew on. Once sewn on, finish off and weave in ends.
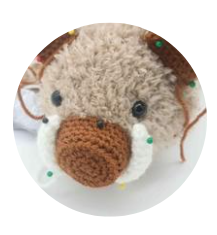
Face Definition:
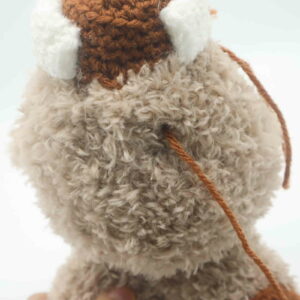
Take a 12″ piece of yarn and place it on a needle. Insert the needle where shown (Pic 1). Pull needle out next to the right of the toy’s eye (Pic 2).
1. 2.
2.
Reinsert needle to the left of the toy’s eye (Pic 3). Pull needle out where shown, about 1 stitch over from where we originally inserted the needle (Pic 4).
3.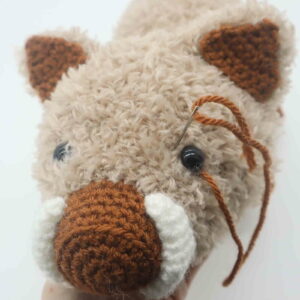 4.
4.
Reinsert needle 1 stitch over (Pic 5). Pull needle out at the right side of the left eye (Pic 6).
5.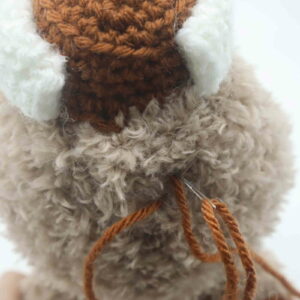 6.
6.
Reinsert needle at the left side of the left eye (Pic 7). Pull needle out at the same stitch where we originally inserted out needle (Pic 8).
7. 8.
8.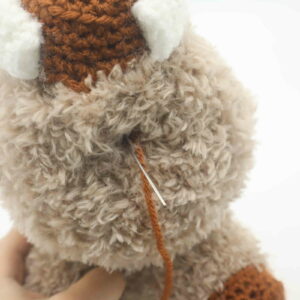
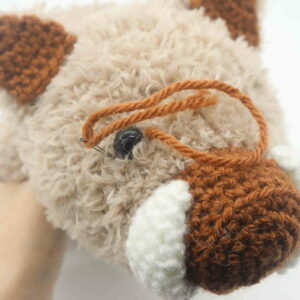
Pull both ends of yarn firmly to tighten the toy’s face (Pic 9). Tie both ends of yarn together a few times to form a knot. Bring the tail ends of yarn into the toy’s head to hide the knot. Cut excess yarn. Done!
9. 10.
10.
Done! If you made a boar, I would LOVE to see! You can show me by posting a picture in the comments underneath this post 🙂


1 Comment
I took one look at this and thought it was a Wombat. Then I noticed the tusks and the name ‘boar.’
I’ve just got the koala, platypus and kangaroo patterns, so I intend making a boar without tusks and saying he’s a wombat since to my Australian mind, that’s what he looks like.