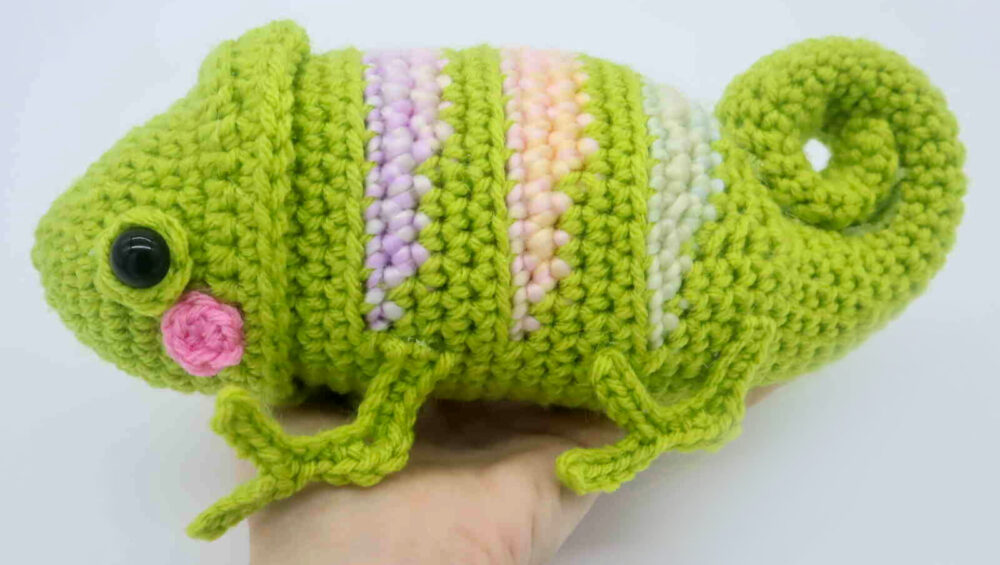
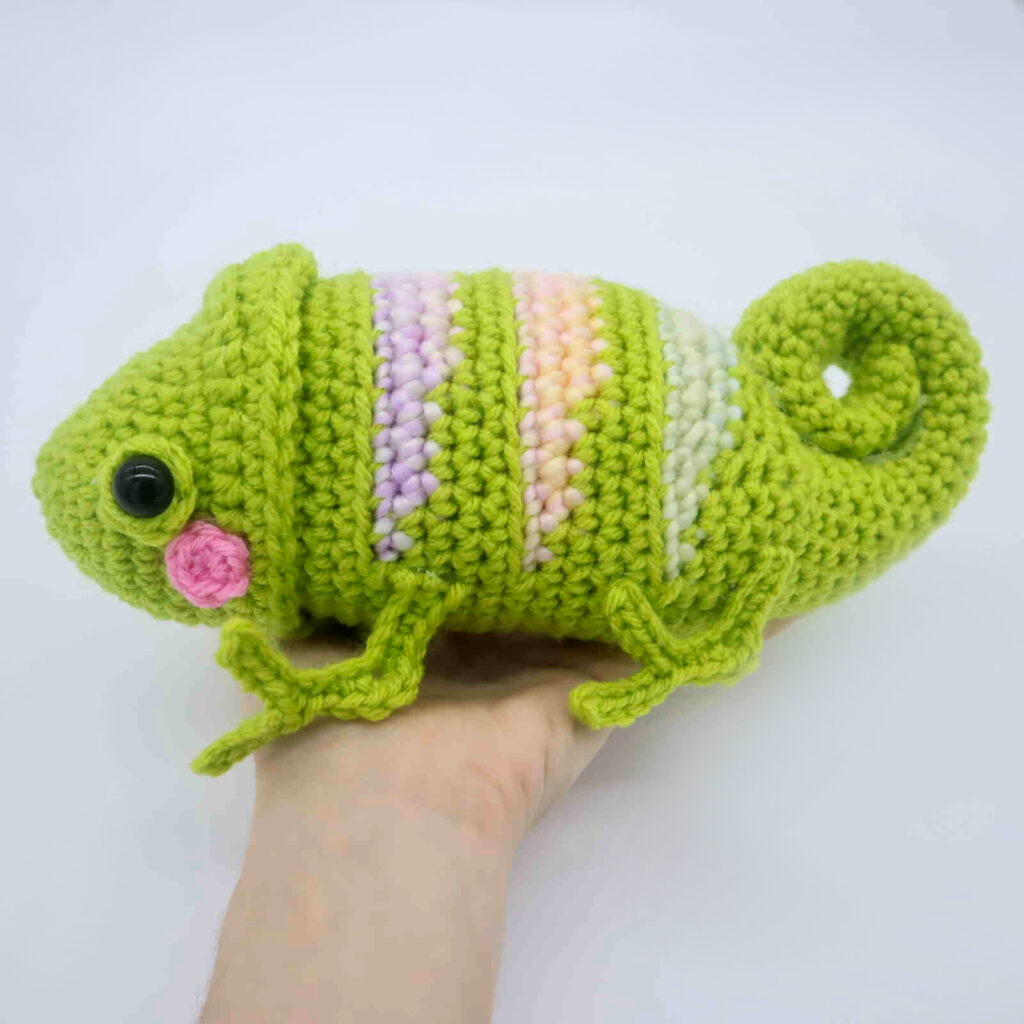
Chameleon Amigurumi – Free Crochet Pattern
 Supplies:
• Yarn 4/Medium Weight Yarn in…
Green, pink, and contrast color
•4mm Crochet Hook
•Tapestry needle
•Scissors
•Stuffing
•Hot glue gun
•12mm safety eyes
Additional Information:
•Difficulty: Intermediate
•Size: 8″ long, 3.5″ tall
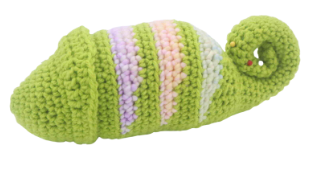
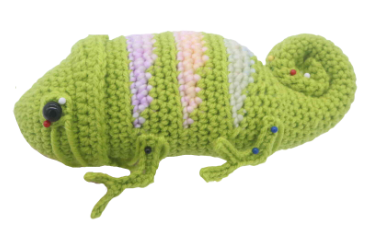
This adorable chameleon is so fun to crochet! The best part is the different color varieties you can make a chameleon in. Pick any colors you like, you can make your chameleon in the entire rainbow! This pattern is easy but does require you to pay attention to the color changes. If you dislike paying attention to the color changes, simply change the yarn when you desire or use a variegated yarn!
Let’s get started!
Eye:
In Green
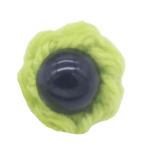
Round 1: 6 Sc into a Magic Ring (6)
Finish off, leaving a long tail for sewing. Place a safety eye into the middle of the circle, do not attach the washer. Later we will place the rest of the safety eye into the toy’s head and attach the washer on the inside of the toy’s head. You can also sew or hot glue this eye piece onto the lizard if that’s easier for you!
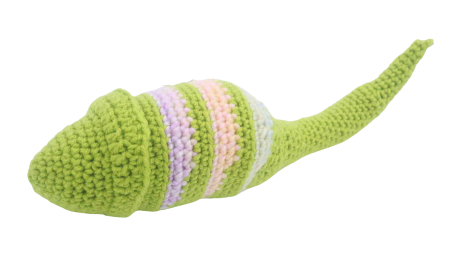
Body:
In Green
Round 1: 6 Sc into a Magic Ring (6)
Round 2: *Inc* all around (12)
Round 3: *Sc* all around (12)
Round 4: *Inc, Sc in the next st* all around (18)
Round 5: *Sc* all around (18)
Round 6: *Inc, Sc in the next 2 st* all around (24)
Round 7-8: *Sc* all around (24)
Now we will mark where to place the safety eyes. Add a different colored stitch marker into the 5th and 17th stitch in Round 8.
Round 9: Sc in the next 5 st. Repeat *Inc, Sc in the next 2 st* 5 times. Sc in the next 4 st (29)
Round 10: Sc in the next 7 st. Repeat *Inc, Sc in the next 2 st* 5 times. Sc in the next 7 st (34)
Round 11: Work in the Front Loop Only (FLO) for this entire round. This round will form the neck area. Hdc in the next 8 st, Dc in the next 16 st, Hdc in the next 10 st (34)
Round 12: Work in BOTH loops for this round. Sc in the next 9 st, Hdc in the next st, Hdc 2 times in the next stitch, Hdc in each of the next 2 st. Repeat *Dc 2 times in the next st, Dc in each of the next 2 st* 2 times. Hdc 2 times in the next st, Hdc in the next st, Sc in the next 13 st (38)
Finish off now.
Add the safety eyes into the marked areas now.
Round 13: Now we will work the body. Attach your hook into the back loop we left in Round 11, be sure to attach your hook into the first stitch in Round 11. Make a ch 1 into this space, Sc in the next st. Add a stitch marker into the Ch 1, this will mark the start of each round. Sc in the remaining 32 st (34)
Round 14-17: *Sc* all around (34)
Round 18: Sc in the next 6 st. Change to contrast color and working in the BLO, Sc in the next 27 st. Change to green and working in BOTH loops, Sc in the next st (34)
Round 19: In green, Sc in the next 8 st. Change to contrast color and Sc in the next 23 st. Change to green and Sc in the next 3 st (34)
Round 20: Change to green and Sc in the next 12 st. Change to contrast color and Sc in the next 15 st. Change to green and Sc in the next 7 st (34)
Round 21-22: In green, *Sc* all around (34)
Round 23: Sc in the next 7 st. Change to contrast color and working in the BLO, Sc in the next 27 st (34)
Round 24: Change to green working in BOTH loops, Sc in the next 9 st. Change to contrast color and Sc in the next 23 st. Change to green and Sc in the next 2 st (34)
Round 25: In green, Sc in the next 13 st. Change to contrast color and Sc in the next 15 st. Change to green and Sc in the next 6 st (34)
Round 26-27: *Sc* all around (34)
Round 28: In green Sc in the next 8 st. Change to contrast color and working in the BLO, Sc in the next 26 st (34)
Round 29: In contrast color, Sc in the next st. Working in green and in BOTH loops, Sc in the next 9 st. Change to contrast color and Sc in the next 2 st. Repeat *Dec, Sc in the next 2 st* 5 times. Sc in the next 2 st (29)
Round 30: Sc in the next st. In green, Sc in the next 11 st. In contrast color, Sc in the next 15 st. In green, Sc in the next 2 st (29)
Round 31: In green Sc in the next 11 st. Repeat *Dec, Sc in the next 2 st* 4 times. Sc in the next 2 st (25)
Round 32: Sc in the next 11 st. Repeat *Dec, Sc in the next st* 4 times. Sc in the next 2 st (21)
Round 33-34: *Sc* all around (21)
Round 35: Sc in the next 11 st. Repeat *Dec, Sc in the next st* 3 times. Sc in the next st (18)
Stuff the body here.
Round 36-38: *Sc* all around (18)
Round 39: *Dec, Sc in the next st* all around (12)
Stuff the tail here. Continue stuffing after each round.
Round 40-55: *Sc* all around (12)
Stuff the tail here.
Round 56: *Dec, Sc in the next st* all around (8)
Round 57-62: *Sc* all around (8)
Round 63: *Dec, Sc in the next 2 st* all around (6)
Round 64-65: *Sc* all around (6)
Round 66: *Dec, Sc in the next st* all around (4)
Finish off, leaving a long tail for sewing. Curl the tail as shown and pin in place. Sew or hot glue the tail in place. Once done, weave in ends and cut any excess yarn.
Arms: (Make 4)
In Green
Row 1: Ch 12. SlSt in the 2nd Ch from the hook. SlSt in the next 4 ch. Ch 6. SlSt in the 2nd Ch from the hook, SlSt in the next 4 ch. Working into the same st where the first finger is, make a SlSt into this same st.
Working into the same st where the first finger is, make a SlSt into this same st. Working on the rest of the Ch, Sc in the next 2 st. Sc 3 times in the next st, Sc in the next 4 st.
Finish off, leaving a long tail for sewing. Pin the arms on as shown and sew or hot glue on. Once done, weave in ends and cut any excess yarn.
Cheeks: (Make 2)
In Pink
Row 1: Ch 12. SlSt in the 2nd Ch from the hook. SlSt in the next 4 ch. Ch 6. SlSt in the 2nd Ch from the hook, SlSt in the next 4 ch. Working into the same st where the first finger is, make a SlSt into this same st. Working on the rest of the Ch, Sc in the next 2 st. Sc 3 times in the next st, Sc in the next 4 st.
Finish off, leaving a long tail for sewing. Pin the arms on as shown and sew or hot glue on. Once done, weave in ends and cut any excess yarn.

Done! If you made this chameleon, I would LOVE to see! You can show me by posting a picture in the comments section underneath this post!


3 Comments
I think your directions for the cheek is a typo? Shoudn’t it just be 6 X Sc into a Magic Circle and finish off? It looks like you have copied the directions for the Arms to where the Cheeks direction is as they are both the exact same. But looking at your picture it looks like the cheek is pretty easy to figure out.
How do you go from 38 stitches to 34 stitches in round 23? (for the body)
Thanks!
This is so cute and it was very easy to follow the pattern