Christmas Sloth with Wreath Amigurumi – Free Crochet Pattern

Print this pattern out – purchase the PDF here!

 Supplies:
• Yarn 4/Medium Weight Yarn in…
Brown, cream, red, green, and fuzzy white yarn
•4mm Crochet Hook
•10mm Safety eyes
•Tapestry needle
•Scissors
Additional Information:
•Difficulty: Easy
•Size: Tip of hat to bottom of sloth 6″
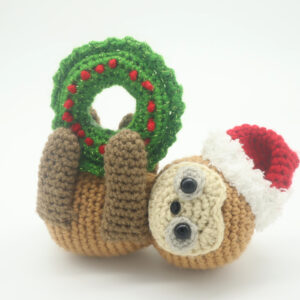
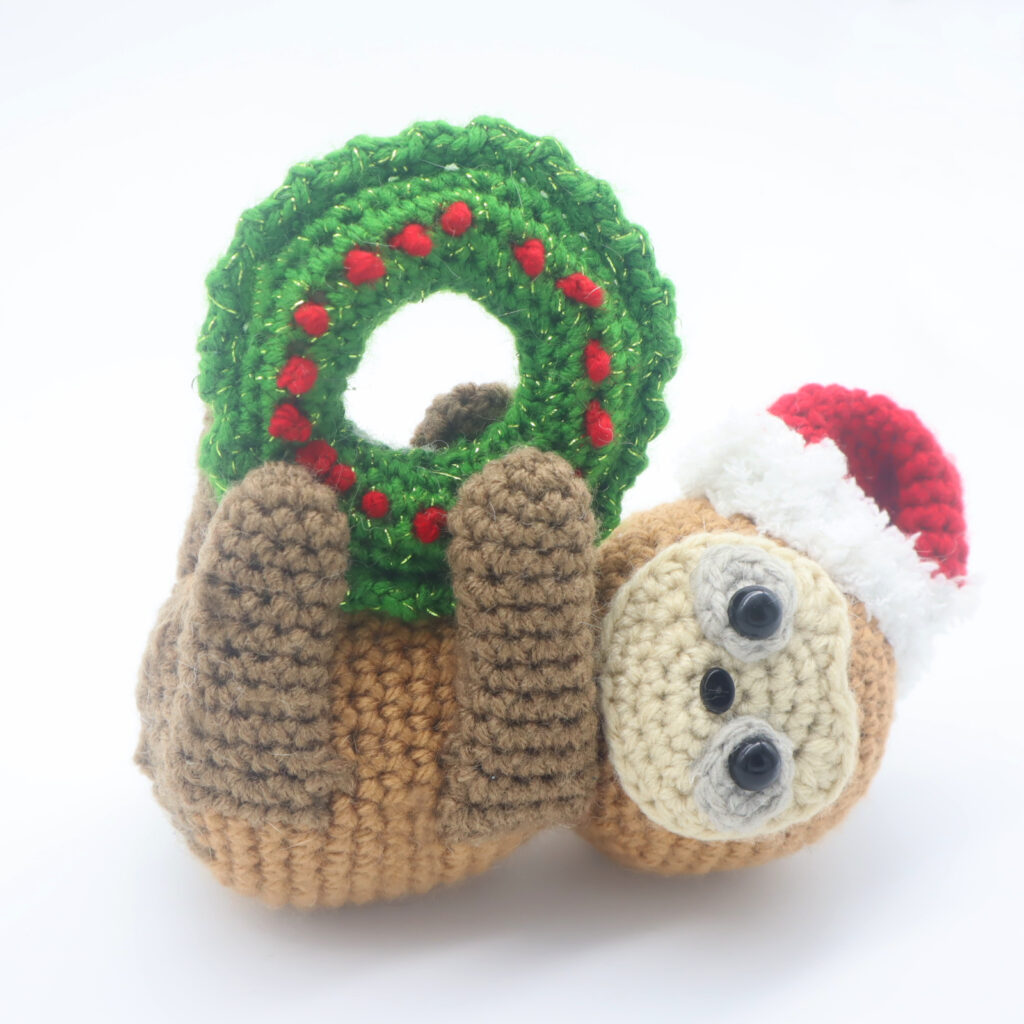
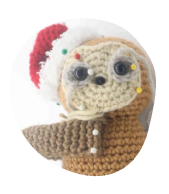
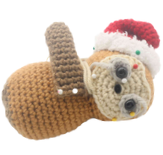
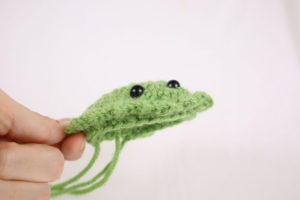
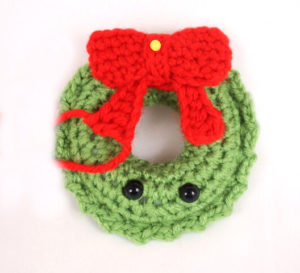
Merry Christmas! This cute sloth has decided to hang out on a wreath! He’s pretty easy to make and oh-so-cute. This pattern includes how to make the sloth, his hat, and the wreath!
Let’s get started!
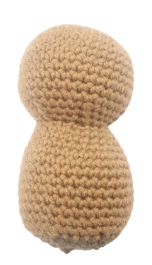
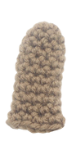
Head/Body:
Start in brown
We start at the top of the head and work our way down. The head and body are made in one continuous piece.
Round 1: 6 Sc into a Magic Ring (6)
Round 2: *Inc* all around (12)
Round 3: *Inc, Sc in the next st* all around (18)
Round 4: *Inc, Sc in the next 2 st* all around (24)
Round 5: *Inc, Sc in the next 3 st* all around (30)
Round 6: *Inc, Sc in the next 4 st* all around (36)
Round 7-14: *Sc* all around (36)
Round 15: *Dec, Sc in the next 4 st* all around (30)
Round 16: *Dec, Sc in the next 3 st* all around (24)
Round 17: *Dec, Sc in the next 2 st* all around (18)
Round 18: In the Front Loop Only, repeat *Inc, Sc in the next 2 st* all around (24)
Round 19: In BOTH loops, repeat *Inc, Sc in the next 3 st* all around (30)
Round 20: *Sc* all around (30)
Round 21: *Inc, Sc in the next 4 st* all around (36)
Round 22-30: *Sc* all around (36)
Stuff the head firmly now.
Round 31: *Dec, Sc in the next 4 st* all around (30)
Round 32: *Dec, Sc in the next 3 st* all around (24)
Round 33: *Dec, Sc in the next 2 st* all around (18)
Stuff the body firmly now. Continue stuffing after each round.
Round 34: *Dec, Sc in the next st* all around (12)
Round 35: *Dec* all around (6)
Finish off now, leaving a long tail for sewing. Sew the remaining stitches closed and weave in ends. Cut any excess yarn.
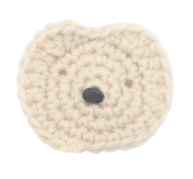
Face:
In Cream Color
Round 1: 6 Sc into a Magic Ring (6)
Round 2: *Inc* all around (12)
Round 3: *Inc, Sc in the next st* all around (18)
Round 4: *Inc, Sc in the next 2 st* all around (24)
Round 5: Sc in the next 4 st, Hdc in the next 2 st, Dc in the next 4 st, Dc 3 times in the next st, Hdc in the next st, SlSt in the next 2 st, Hdc in the next st, Dc 3 times in the next st, Dc in the next 4 st, Hdc in the next st, Sc in the next 3 st. SlSt into the next st to complete (28)
Finish off, leaving a long tail for sewing. Set the face aside for now.
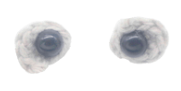
Eye patch: (Make 2)
In Cream Color
Round 1: 6 Sc into a Magic Ring (6)
Round 2: *Inc* in the next 2 st.
Finish off here, leaving a long tail for sewing. Place a safety eye into the center of the magic ring.
Place the eyes onto the toy’s face and sew on. Now sew the toy’s face to the toy’s head. Once done, weave in ends.
Front Arm:
In Brown
Round 1: 6 Sc into a Magic Ring (6)
Round 2: *Inc, Sc in the next st* all around (9)
Round 3-12: *Sc* all around (9)
Round 13: *Inc, Sc in the next 2 st* all around (12)
Finish off now, leaving a long tail for sewing. Very lightly stuff the arm. Pin the arm on as shown, but don’t sew on now. We will sew all the arms and legs on later once we are happy with the placement of each limb.
Front Leg:
In Brown
Round 1: 6 Sc into a Magic Ring (6)
Round 2: *Inc, Sc in the next st* all around (9)
Round 3-11: *Sc* all around (9)
Round 12: *Inc, Sc in the next 2 st* all around (12)
Finish off now, leaving a long tail for sewing. Very lightly stuff the arm. Pin the leg on as shown, but don’t sew on now. We will sew all the arms and legs on later once we are happy with the placement of each limb.
Back Leg and Arm:
In Brown
Round 1: 6 Sc into a Magic Ring (6)
Round 2: *Inc, Sc in the next st* all around (9)
Round 3-10: *Sc* all around (9)
Finish off now, leaving a long tail for sewing. Very lightly stuff the arm. Pin the arm on as shown, but don’t sew on now. We will sew all the arms and legs on later once we are happy with the placement of each limb.
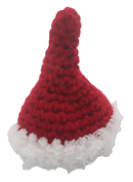
Hat:
In Red
Round 1: 6 Sc into a Magic Ring (6)
Round 2-5: *Sc* all around (6)
Round 6: *Inc, Sc in the next st* all around (9)
Round 7-8: *Sc* all around (9)
Round 9: *Inc, Sc in the next 2 st* all around (12)
Round 10: *Inc, Sc in the next 2 st* all around (16)
Round 11-13: *Sc* all around (16)
Round 14-15: Change to Fuzzy White Yarn. *Sc* all around (16)
Finish off now, leaving a long tail for sewing. Pin the hat on as shown and sew onto the toy’s head now. Sew the tip of the hat down as shown. With white fuzzy yarn, embroider over the tip to make the fuzzy hat tip.
Wreath:
In Green
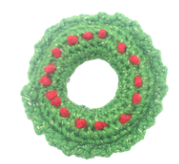
We start by making the center of the wreath
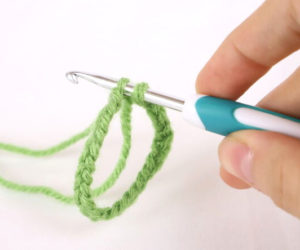
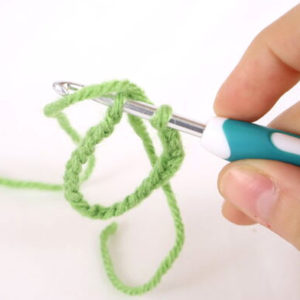
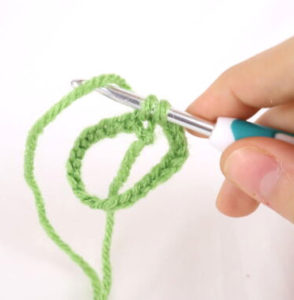
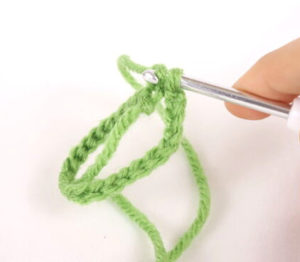
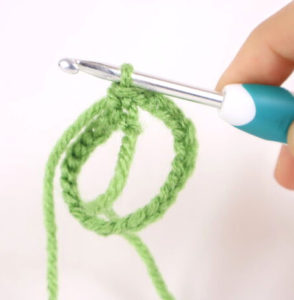
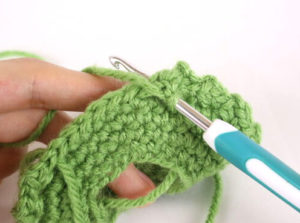
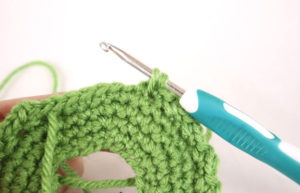
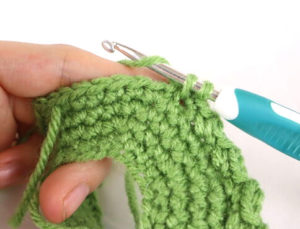
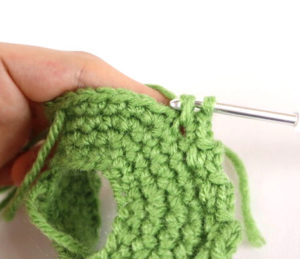
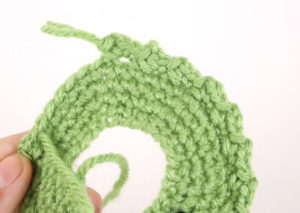
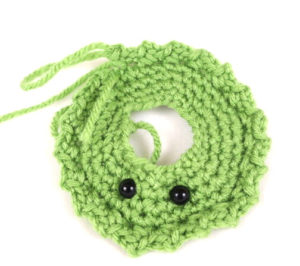
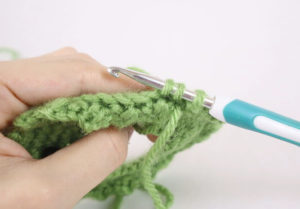
Round 1: Ch 30 (Pic 1). Sc to the very first Ch made (Pic 2-7). This will form the circle to the wreath! Be sure to add a stitch marker to the Sc you just made to mark the round. Sc in the next 29 ch (30)
1.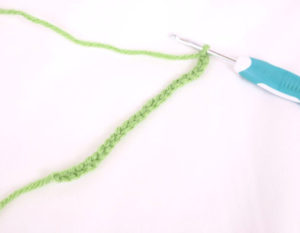 2.
2.
3. 4.
4.
5. 6.
6.
7.
Round 2: *Sc* in each stitch (30)
Round 3: *Inc, Sc 4* all around (36)
Round 4: *Inc, Sc 5* all around (42)
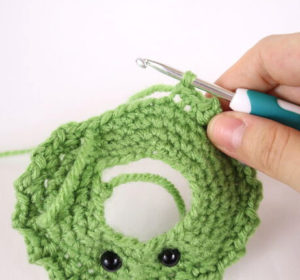
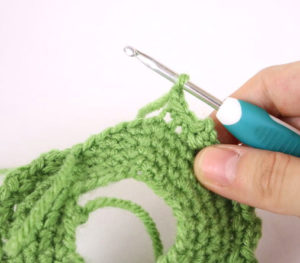
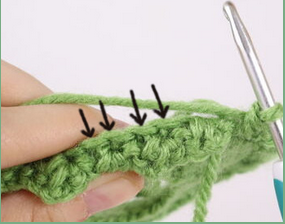
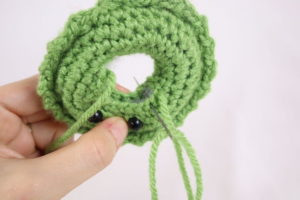
Round 6: *Sc* all around (42)NOTE: We work in the front loops only this round. After this round we will crochet in the back loops that are left! We do this so that we can create the “frill” of the wreath.
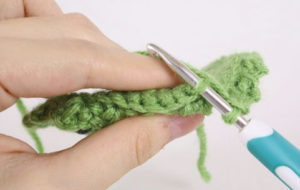
Round 7: In the FLO (Front Loop Only Pic 1), repeat *Sc in the next 2 st Pic 2, Ch 1 Pic 3, Sc in the previous single crochet we just made Pic 5-11* all around until we meet the stitch marker. (Or to be technical repeat it a total of 21 times) Pic 12
1.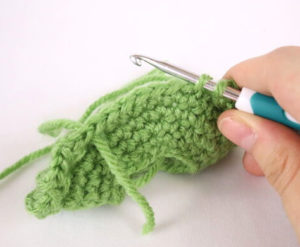 2.
2.
3. 4.
4.
5. 6.
6.
7. 8.
8.
9. 10.
10.
11. 12.
12.
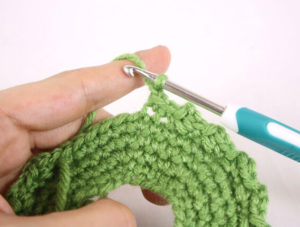
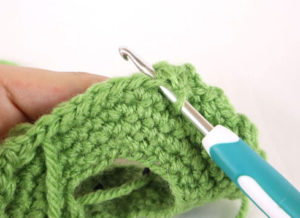
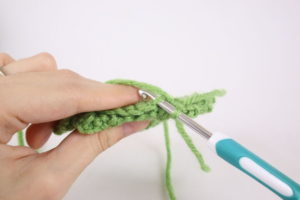
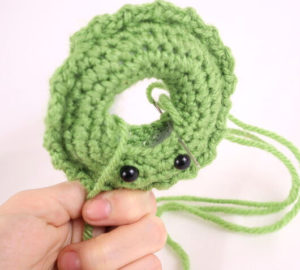
Round 8: In this round we will crochet in the back loops left in Round 6. They will look like Pic 1. Repeat *Dec, Sc 5* all around Pic 2-6 (36)
1. 2.
2.
3. 4.
4.
5.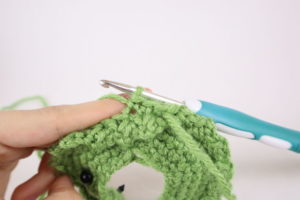 6.
6.
Round 9: *Dec, Sc 4* all around (30)
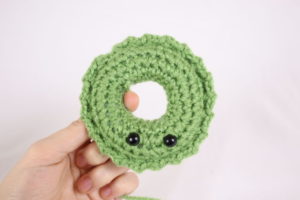
Round 10: *Sc* all around (30)
Finish off, leaving a long tail for sewing shut. Now we will close the piece and stuff it.
Sewing Closed:
Place yarn onto needle and insert it going through BOTH stitches as shown Pic 1. Now repeat this process Pic 2-3. Be sure to lightly stuff the wreath before fully sewing closed Pic 4.
1. 2.
2.
3.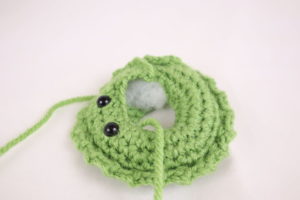 4.
4.
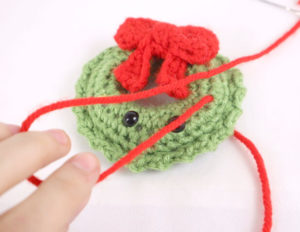
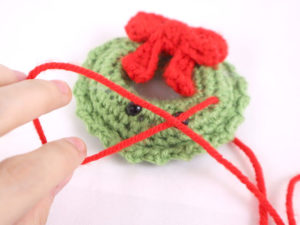
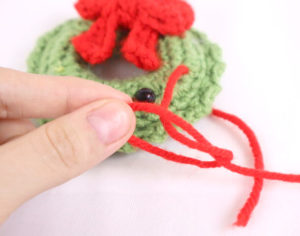
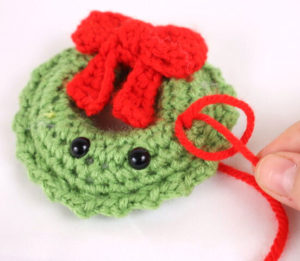
Decorations:
In Red
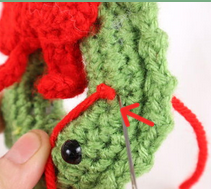
Insert needle with thread roughly where shown Pic 1. Tie a knot very close to the wreath 3 times Pic 2-7. Insert needle one stitch over Pic 8, and pull needle out to the next area. Repeat this process of making knots around the entire circle of the wreath. Once done, weave in ends and cut the excess yarn.
1. 2.
2.
3. 4.
4.
5. 6.
6.
7. 8.
8.
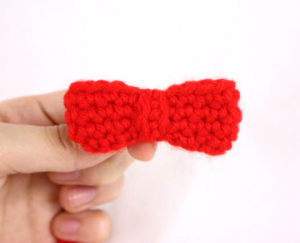
Bow: (Optional)
The bow is made with 3 different pieces. We will create each piece, sew them together, then sew it to the wreath.
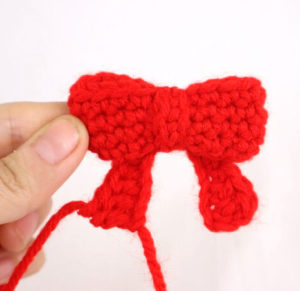
Bow:
In Red
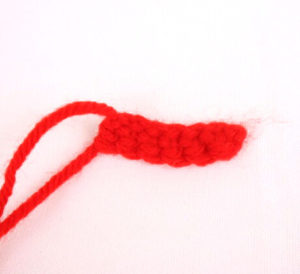
Round 1: Ch 20. Connect to first st. Sc in the next 19 st (20)
Round 2-5: *Sc* all around (20)
Finish off now. No need to leave a long tail of yarn or sewing the bow closed. Weave in tail ends of yarn. Squish this piece in half to make a rectangle.
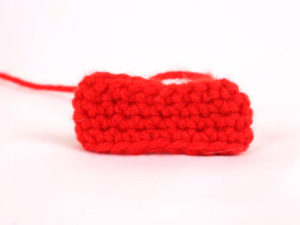
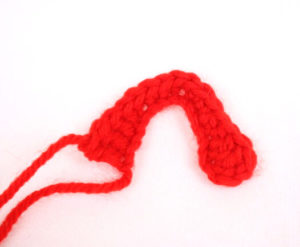
Middle Strip:
In Red
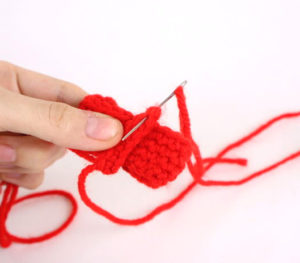
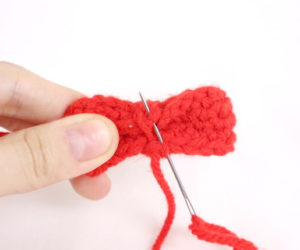
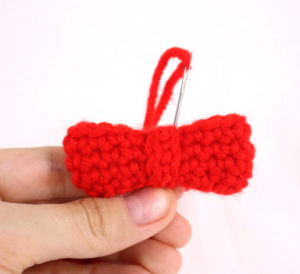
Row 1: Ch 7. Sc in the 2nd Ch from the hook. Sc in the next 5 st (6)
Finish off, leaving a long tail for sewing Pic 1. We will use this tail end of yarn to assemble the entire bow. Place the strip down the middle of the bow Pic 2. Put tail end of yarn onto needle and place needle into the top of the strip as shown Pic 3. Pull the yarn through fairly tight, this will wrap the strip around the bow. Sew the bow ends together one more time Pic 4. Sew the strip to the bow to secure Pic 5. Don’t cut this tail end of yarn, we will use it later to set the bow to the wreath.
1. 2.
2.
3. 4.
4.
5. 6.
6.
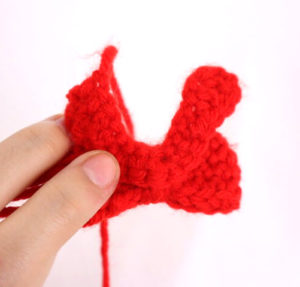
Bow Tie:
In Red
Row 1: Ch 19. Dc into the 3rd Ch from the hook. Dc in the next 2 st, Hdc in the next 2 st, Sc in the next 3 st. Sc 3 times into the next 1 stitch. Sc in the next 3 st, Hdc in the next 2 st, Dc in the next 3 st.
Finish off, no need to leave a tail for sewing. Weave in any ends. Place the bow tie onto the back of the bow, so the larger ends point down. Sew onto the bow using the tail end of yarn from the previous bow piece. Don’t cut yarn yet.
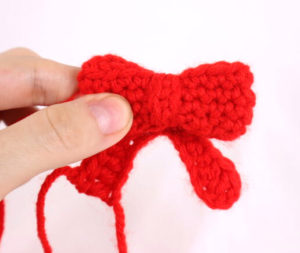
Now…
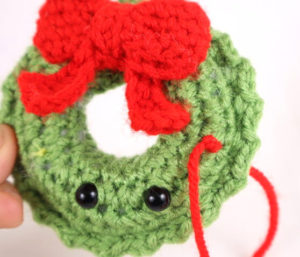
Pin the bow onto the wreath as shown. Sew on using the tail end of yarn, going from the bow, to the front of the wreath. Repeat sewing on until it’s firmly secured. Then, tie a big firm knot and bring the knot into the wreath to hide. Cut any excess yarn.
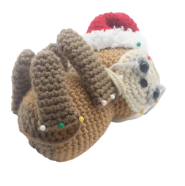
Assembly:
Place the toy sloth’s limbs around the wreath and pin in place. Sew the arms to the wreath. Once done, weave in ends.