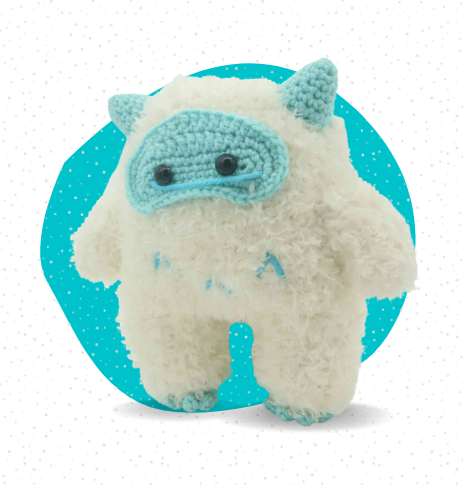
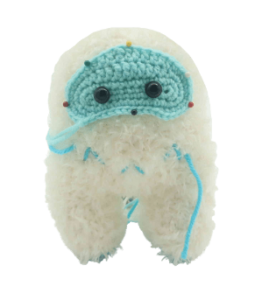
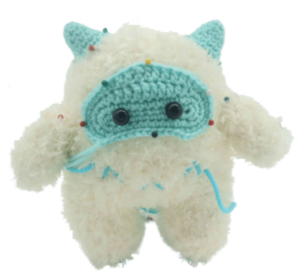
Cute Yeti Amigurumi – Free Crochet Pattern
Print this pattern out! Purchase the PDF version here

 Supplies:
• Yarn 4/Medium Weight Yarn in…
White, white fuzzy yarn, blue, and dark blue
•4mm Crochet Hook
•12mm Safety eyes
•Tapestry needle
•Scissors
Additional Information:
•Difficulty: Easy
•Size: 8″ tall
This fuzzy yeti is so cute and will make any young child light up with joy! This yeti is made by using fuzzy yarn. It’s much easier to crochet with fuzzy yarn if you pair the fuzzy yarn with a regular white yarn 🙂 That’s what I did for this pattern!
This yeti could also double as a regular monster, just change up his colors! Let’s get started!
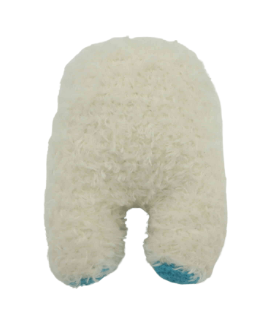
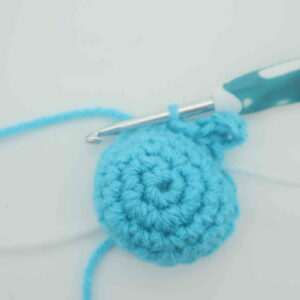
Legs: (Make 2)
In Blue
We will start by making the legs, then we will connect the legs together. This will start to form the body in one continuous piece!
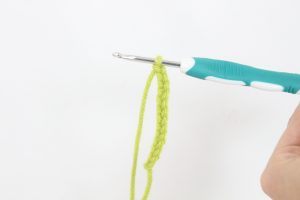
Round 1: 6 Sc into a Magic Ring (6)
Round 2: *Inc* all around (12)
Round 3: *Inc, Sc in the next st* all around (18)
Round 4: Change to White Fuzzy Yarn. In the Back Loop Only, *Sc* all around (18)
Round 5-9: In BOTH loops, *Sc* all around (18)
Finish off the first leg you make now. Do NOT finish off the second leg. Instead, continue onto the next round!
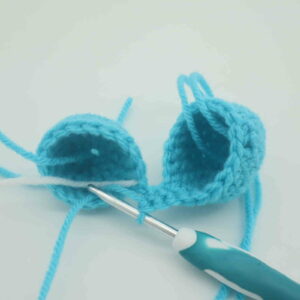
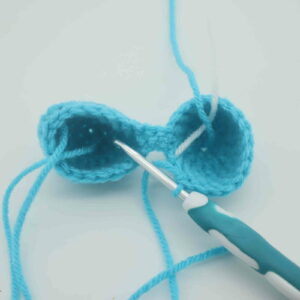
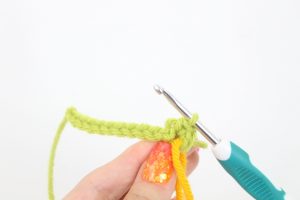
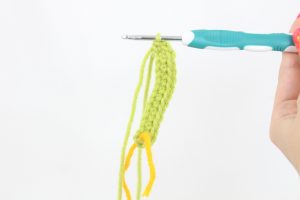
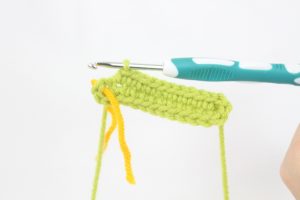
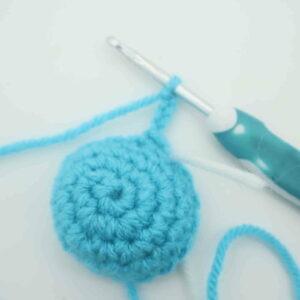
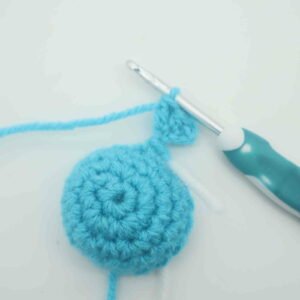
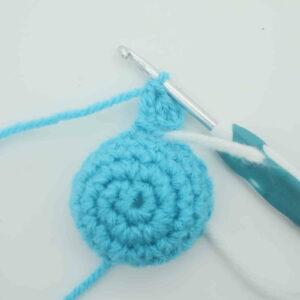
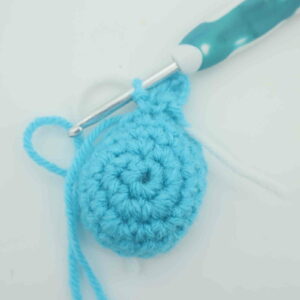
Round 10: Sc in the next st (Pic 1). Ch 4 (Pic 2). Sc into any st on the first leg made (Pic 3). Working on that first leg, Sc in the next 17 st (Pic 4). Now we meet the Ch we made (Pic 4). Sc in the next 4 st along the Ch (Pic 5-6). Working on the other leg, Sc in the next 17 st (Pic 7-8) (Stitch count: 44 when counting both legs and the Ch 4 from both sides)
1.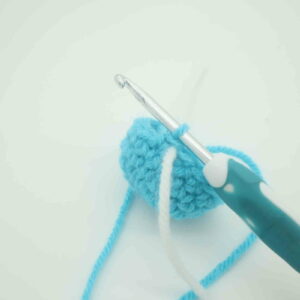 2.
2. 3.
3.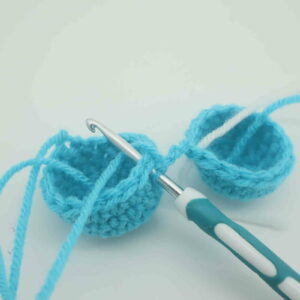 4.
4.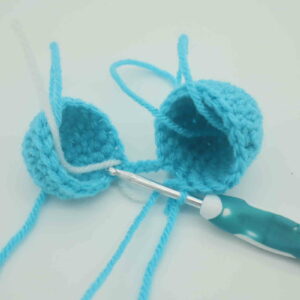 5.
5.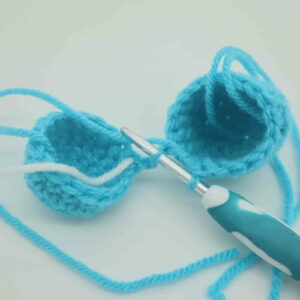 6.
6. 7.
7.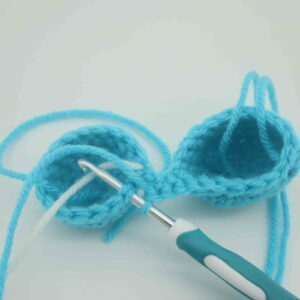 8.
8.
Round 11: Sc in the next st. Sc along the next 4 st between the legs. Sc in the next 18 st. Sc in the next 4 st along the legs. Sc in the next 17 st (44)
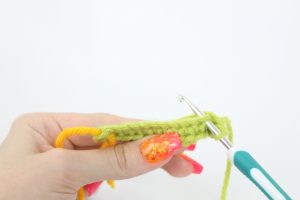
Round 12-28: *Sc* all around (44)
Round 29: Skip the first 2 st. Repeat *Dec, Sc in the next 5 st* all around (36)
Round 30: Repeat *Dec, Sc in the next 4 st* all around (30)
Stuff the legs and body firmly now. Continue stuffing after each round.
Round 31: *Dec, Sc in the next 3 st* all around (24)
Round 32: *Dec, Sc in the next 2 st* all around (18)
Round 33: *Dec, Sc in the next st* all around (12)
Round 34: *Dec* all around (6)
Finish off, leaving a long tail for sewing. Sew the remaining stitches closed and weave in ends. Cut any excess yarn.
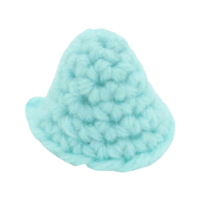
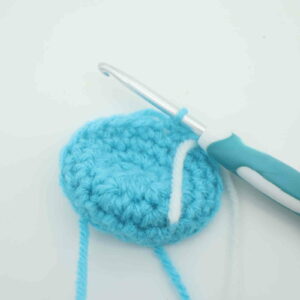
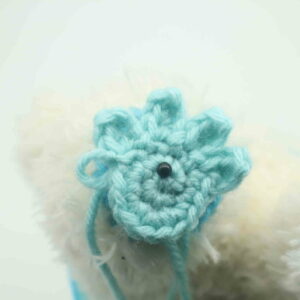
Face:
Start in Blue
The face is made by creating a chain, then working completely around the chain to form a round. This will make an oval shape.
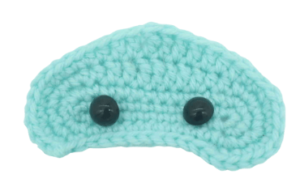
Round 1: Ch 13 (Pic 1). Sc 3 times in the 2nd Ch from the hook (Pic 2). Sc in the next 10 st. Now we meet the last chain, Sc 3 times in this last st (Pic 3). Now turn to the OTHER side of the chain, where we haven’t made any stitches yet. Sc in the next 10 st (Pic 4-5) (26)
1. 2.
2. 3.
3. 4.
4. 5.
5.
Round 2: *Inc* 1 time in the next 3 st, Sc in the next 10 st. *Inc* in the next 3 st. Sc in the next 10 st (32)
Round 3: Repeat *Inc in the next st, Sc in the next st* 3 times. Hdc in the next 2 st, Dc in the next 3 st, Trc in the next 2 st, Dc in the next 2 st, Hdc in the next st. Rep *Inc in the next st, Sc in the next st* 3 times. SlSt in the next 10 st (32)
Round 4: Repeat *Inc in the next st, Sc in the next 2 st* 3 times. Hdc in the next 2 st, Dc in the next 3 st, Trc in the next 2 st, Dc in the next 2 st, Hdc in the next st. Repeat *Inc in the next st, Sc in the next 2 st* 3 times. SlSt in the next st only. Finish off here, leaving a long tail for sewing.
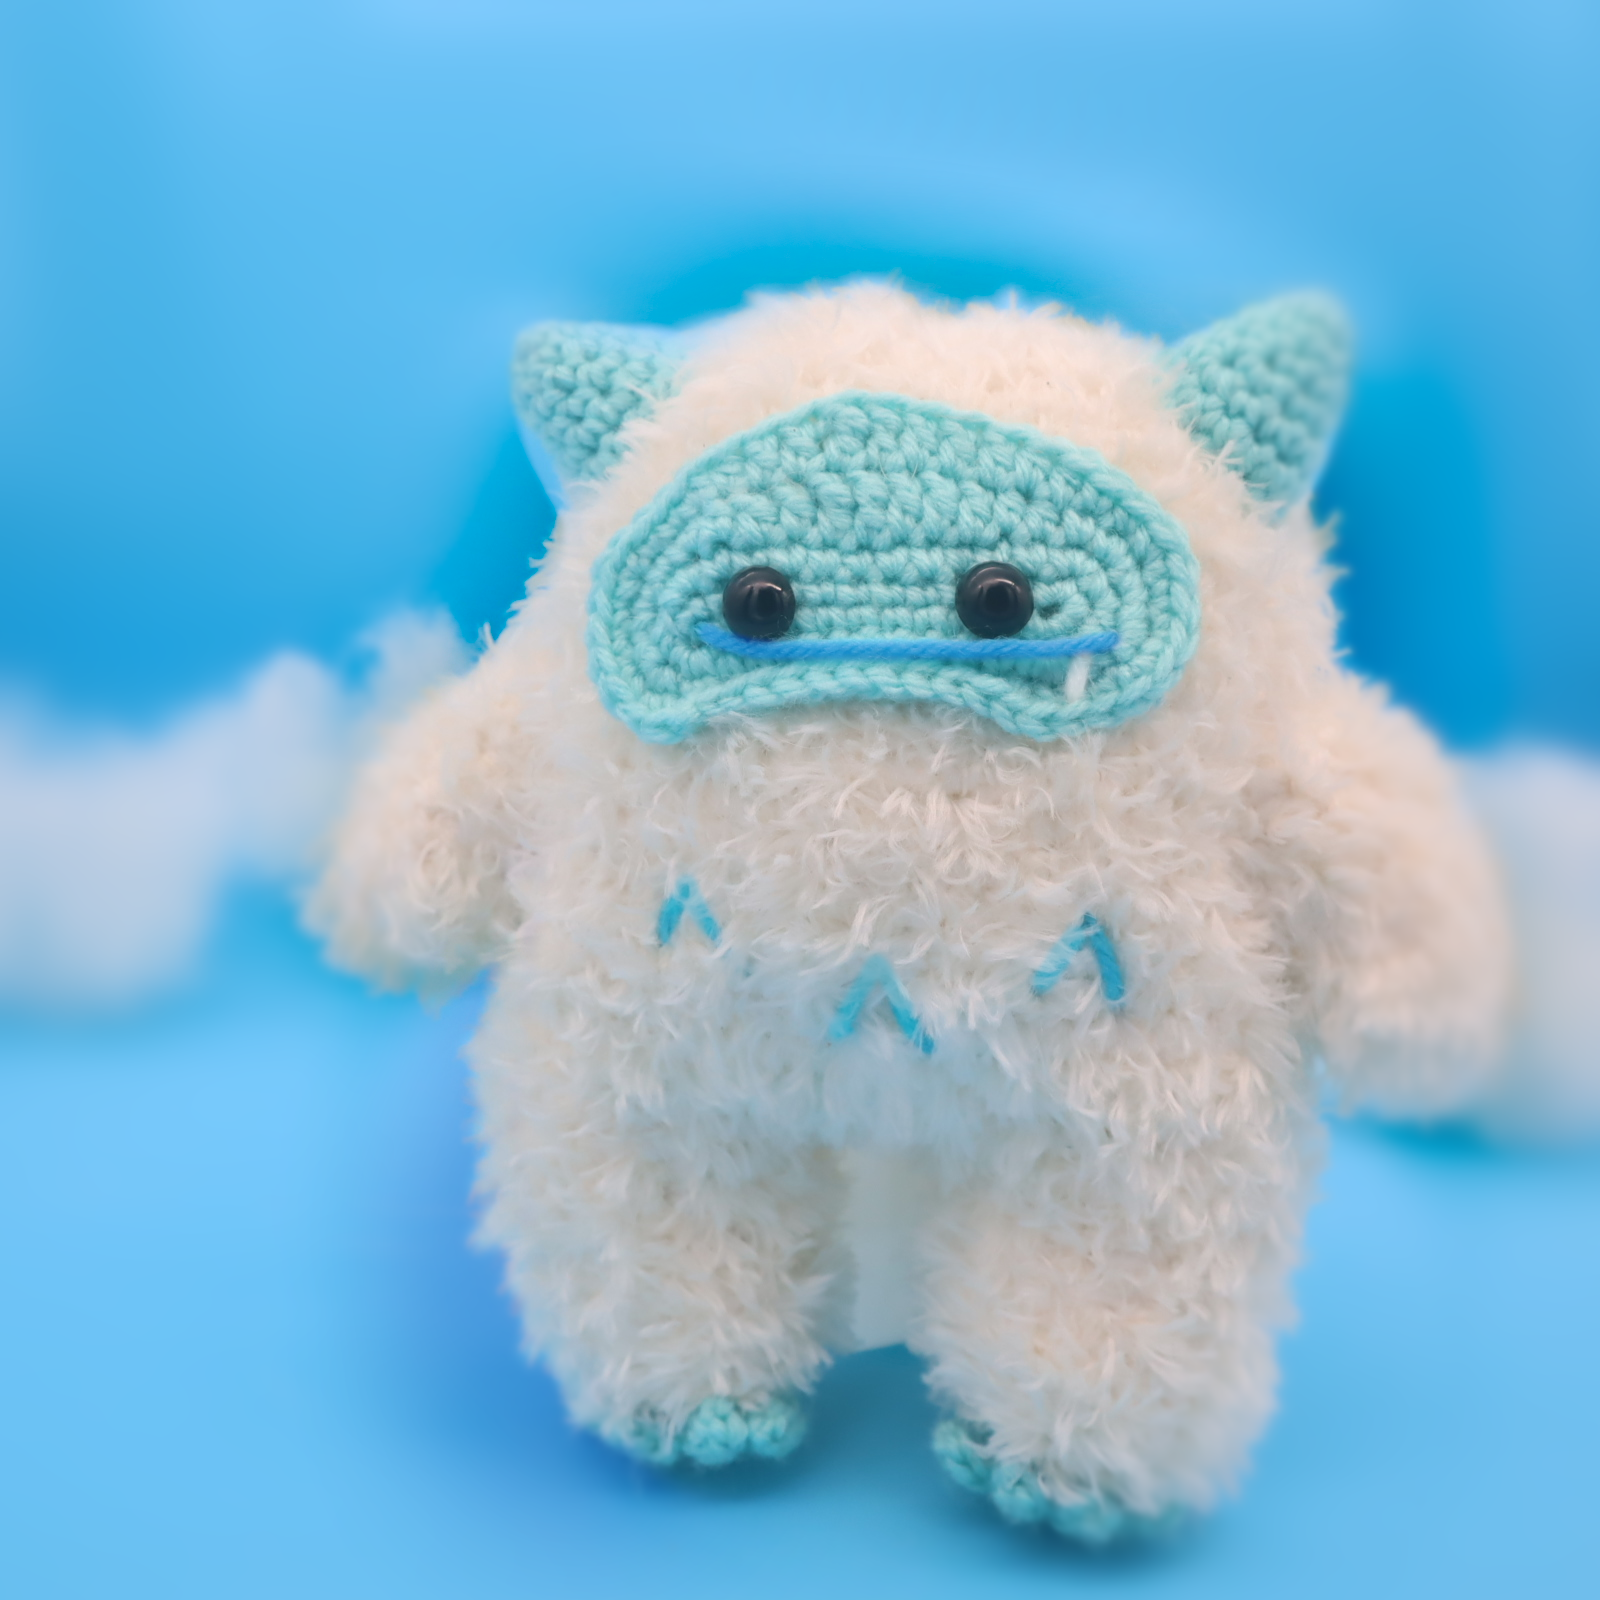
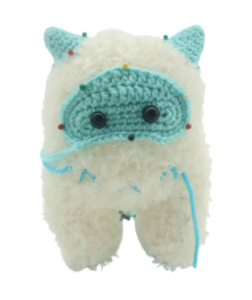
Add the safety eyes into Round 1, 7 stitches apart. Place the face onto the toy’s body as shown and sew on. Once sewn on, weave in ends and cut any excess yarn.
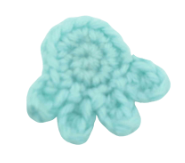
Horns: (Make 2)
In Blue
Round 1: 6 Sc into a Magic Ring (6)
Round 2: *Sc* all around (6)
Round 3: *Inc, Sc in the next st* all around (12)
Round 4: *Inc, Sc in the next 2 st* all around (18)
Round 5: *Inc, Sc in the next 3 st* all around (24)
Round 6: *Sc* all around (24)
Finish off, leaving a long tail for sewing. Pin the horns onto the toy’s head as shown and sew on. Be sure to stuff the horns before fully sewing them on. Once done, weave in ends and cut any excess yarn.
Arms: (Make 2)
In Fuzzy White Yarn
Round 1: 6 Sc into a Magic Ring (6)
Round 2: *Inc* all around (12)
Round 3-9: *Sc* all around (12)
Finish off, leaving a long tail for sewing. Stuff the arm now, leaving the last few round of the arm very lightly stuffed. Pin the arms onto the toy’s body as shown and sew on. Once sewn on, weave in ends and cut any excess yarn.
Feet: (Make 2)
In Blue
Round 1: 6 Sc into a Magic Ring (6)
Round 2: *Inc* all around (12)
Round 3: Sc in the next 2 st (Pic 1). Repeat *Ch 4 (Pic 2), Sc in the 2nd Ch from the hook, Hdc in the next ch, Dc in the last ch (Pic 3). Working back on the circle, SlSt in the same st (Pic 5). SlSt in the next st (Pic 6)* 3 times. Working back on the circle, Sc in the next 2 st, SlSt in the next st.
1. 2.
2. 3.
3. 4.
4. 5.
5. 6.
6.
Finish off here, leaving a long tail for sewing. Pin the foot onto the bottom of the toy’s leg as shown and sew on. Once sewn on, weave in ends and cut any excess yarn.
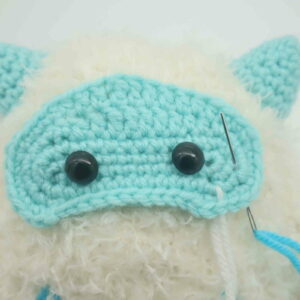
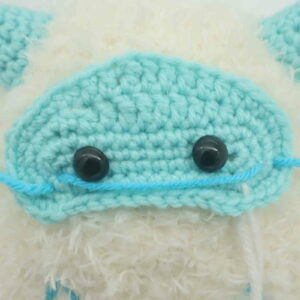
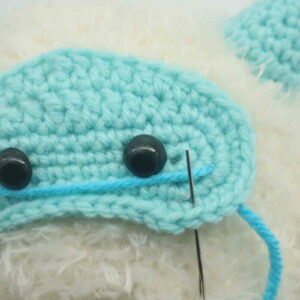
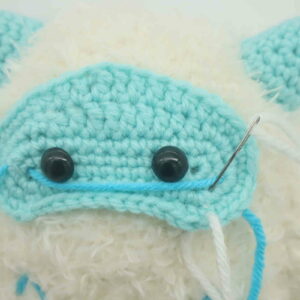
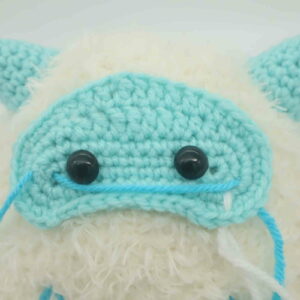
Smile:
In Dark Blue Yarn
Insert needle with thread into the right side of the toy’s mouth as shown (Pic 1). Reinsert needle into the left side of the toy’s mouth (Pic 2). Tie both ends of yarn into a firm knot and bring the knot inside the toy to hide. Cut any excess yarn. Done!
1. 2.
2. 3.
3.
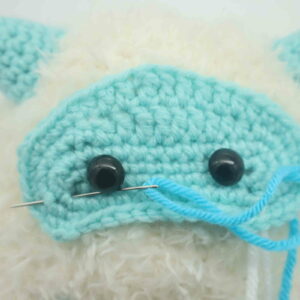
Tooth:
In White
Insert needle with thread into the bottom right side of the toy’s mouth (Pic 1). Reinsert needle under the toy’s smile (Pic 2). Tie the end of yarn into a firm knot and bring the knot inside the toy to hide. Cut any excess yarn. Done!
1. 2.
2. 3.
3.
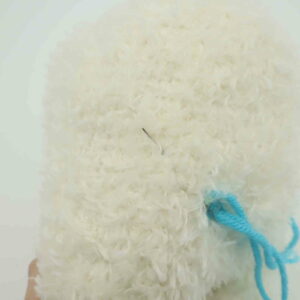
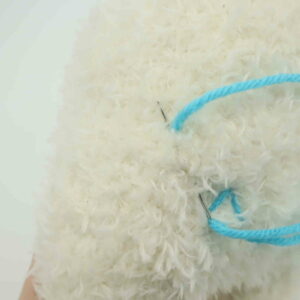
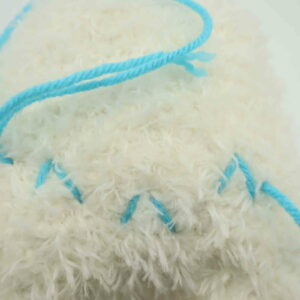
Belly Arrows:
In Dark Blue Yarn
Insert needle with thread into the toy’s belly. Pull needle out diagonally as shown (Pic 1). Reinsert needle into the original insertion spot (Pic 2) and pull needle out at the same diagonal area (Pic 2). Insert needle to the left as shown (Pic 3). Done! Make 2 more belly triangles.
1. 2.
2. 3.
3. 4.
4.
All done!


2 Comments
I didn’t have white fuzzy yarn but I had Brown so instead of making a yeti I made a big foot
Hi, I noticed a possible error in the pattern for the ears on round 3. Round 3 states a total of 12 stitches from previous having 6 stitches in round 2, which would make the stitch for round 3 be *increase all around* but it states to *increase, 1 stitch all around*