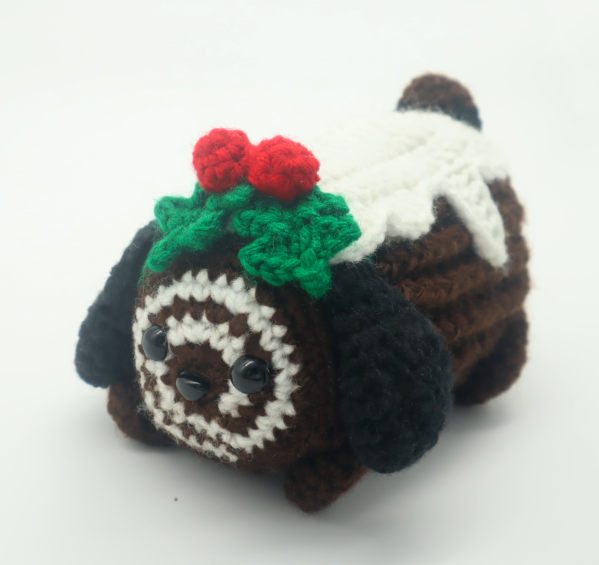
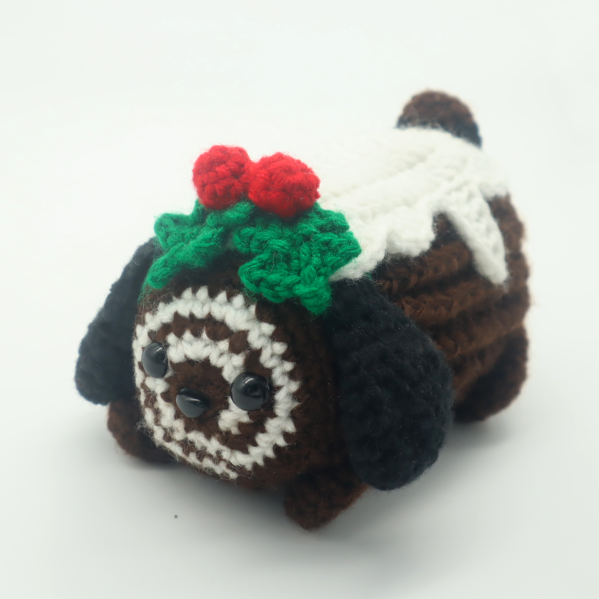
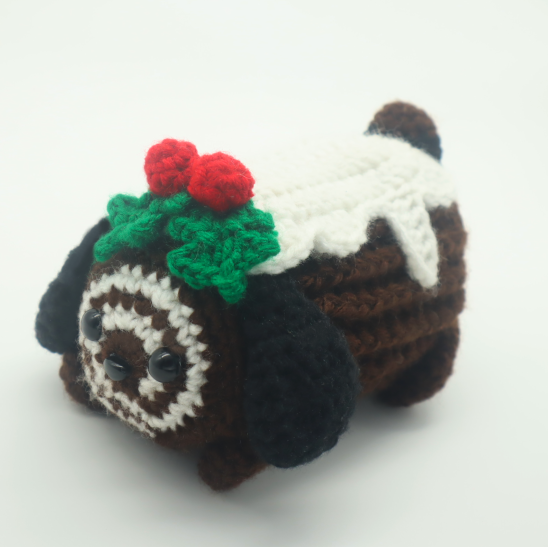
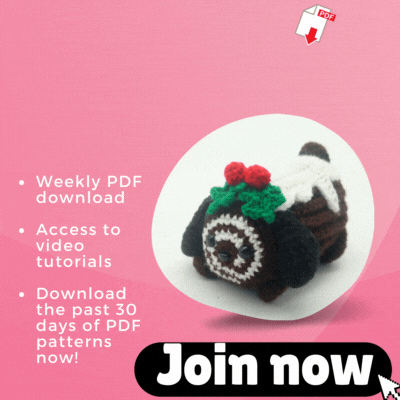
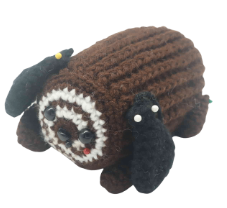
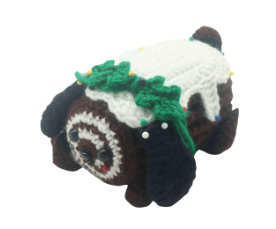
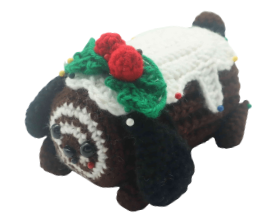
Yule Log Dog Amigurumi – Free Crochet Pattern
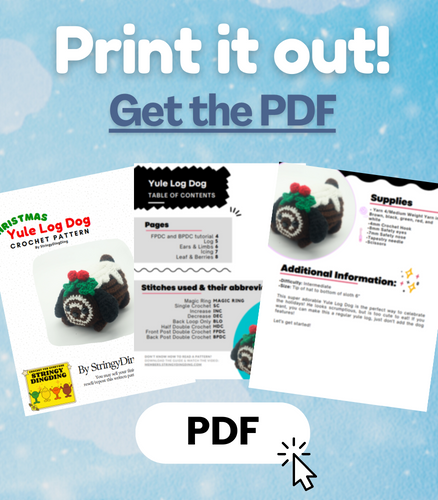
Print this pattern out – purchase the PDF here!

 Additional Information:
•Difficulty: Intermediate
•Size: 5.5″ long, 3″ width
This super adorable Yule Log Dog is the perfect way to celebrate the holidays! He looks scrumptious, but is too cute to eat! If you want, you can make this a regular yule log, just don’t add the dog features!
Let’s get started!
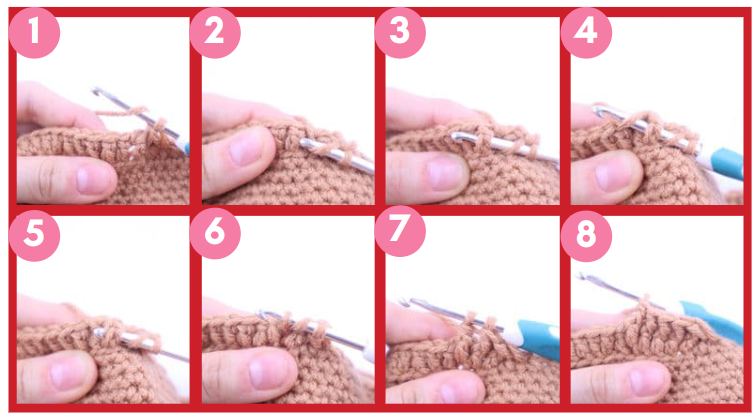
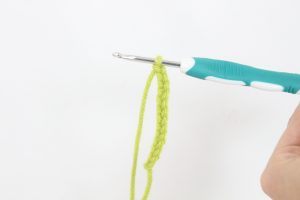
How to do a Front Post Double Crochet (FpDc)
Yarn over (Pic 1). Insert hook through the next double crochet by inserting your hook from the right side of the double crochet, over to the left (Pic 1-2). Yarn over (Pic 4). Pull yarn through (Pic 5-6). You will have 3 loops on your hook (Pic 6). Yarn over and pull through two loops. You will now have 2 loops left on your hook (Pic 7). Yarn over and pull through those remaining two loops (Pic 8).
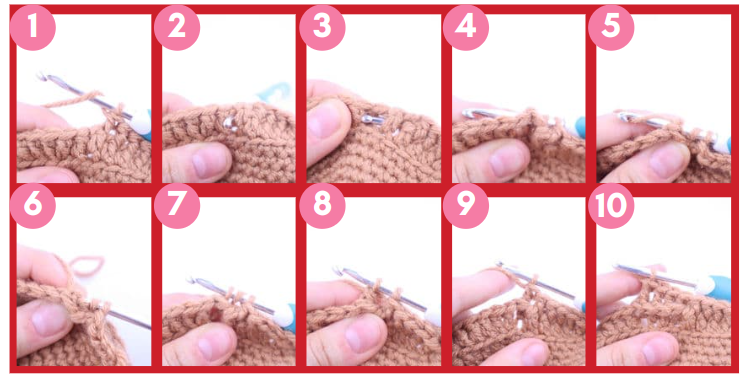
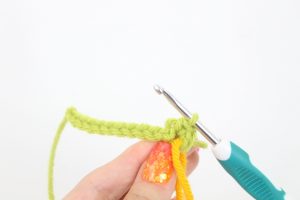
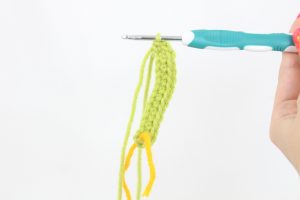
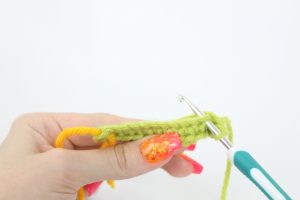
How to do a Back Post Double Crochet (BpDc)
Yarn over (Pic 1). Insert hook through the back of the next double crochet by inserting your hook to the right side of the double crochet (Pic 2), over to the left and above the double crochet (Pic 3-4). Yarn over (Pic 5). Pull yarn through (Pic 6-7). You will have 3 loops on your hook (Pic 7). Yarn over and pull through two loops. You will now have 2 loops left on your hook (Pic 8). Yarn over and pull through those remaining two loops (Pic 9). This makes a Back post double crochet!
Log:
Start in Dark Brown

Round 1: 6 Sc into a Magic Ring (6)
Round 2: *Inc* all around (12)
Round 3: Change to white. *Inc, Sc in the next st* all around (18)
Now we will mark where to place the safety eyes. Add a different colored stitch marker into the 4th and 11th stitch in Round 3.
Round 4: Change to brown. *Inc, Sc in the next 2 st* all around (24)
Round 5: Change to white. *Inc, Sc in the next 3 st* all around (30)
Round 6: Change to brown. *Inc, Sc in the next 4 st* all around (36)
Add the eyes into the marked areas now. Add a safety nose into the middle of the magic ring.
Round 7: *Inc, Sc in the next 5 st* all around (42)
Round 8: In the Back Loop Only (BLO), *Dc* all around (42)
Round 9-24: Repeat *FpDc next st, BpDc next st* all around (42)
Round 25: In the BLO, repeat *Dec, Sc in the next 5 st* all around (36)
Round 26: In BOTH loops, repeat *Dec, Sc in the next 4 st* all around (30)
Round 27: Change to white. *Dec, Sc in the next 3 st* all around (24)
Stuff the log firmly here. Continue stuffing after each round.
Round 28: Change to brown. *Dec, Sc in the next 2 st* all around (18)
Round 29: Change to white. *Dec, Sc in the next st* all around (12)
Round 30: Change to brown. *Dec* all around (6)
Finish off, leaving a long tail for sewing. Sew the remaining stitches closed and weave in ends. Cut any excess yarn.
Ears: (Make 2)
In Black
Round 1: 6 Sc into a Magic Ring (6)
Round 2: *Inc* all around (12)
Round 3: *Inc, Sc in the next st* all around (18)
Round 4-6: *Sc* all around (18)
Round 7: *Dec, Sc in the next st* all around (12)
Round 8-9: *Sc* all around (12)
Round 10: *Dec* all around (6)
Round 11-12: *Sc* all around (6)
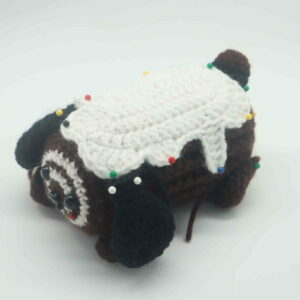
Finish off, leaving a long tail for sewing. Pin the ears onto the toy as shown and sew on. Once sewn on, weave in ends and cut any excess yarn.
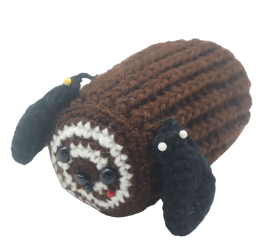
Limbs: (Make 4)
In Brown
Round 1: 6 Sc into a Magic Ring (6)
Round 2: *Inc* all around (12)
Round 3-8: *Sc* all around (12)
Finish off, leaving a long tail for sewing. Lightly stuff the limbs. Pin each limb on as shown, making sure the toy balances nicely where the limbs are pinned. Sew the limbs on. Once sewn on, weave in ends and cut any excess yarn.
Icing:
In White
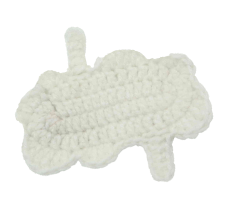
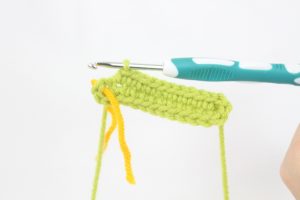
Round 1: Ch 16 (Pic 1). Skip the next 2 chains. Dc 3 times in the next Ch (Pic 2). Dc in the next 12 st. Now we meet the last ch (Pic 3). Dc 3 times in the next st. Turn your work so we’re on the OTHER side of the chain, where we haven’t made any stitches yet. Dc in the next 12 st on that other side of the ch (Pic 4, Stitch count: 30)
1. 2.
2. 3.
3. 4.
4. 5.
5.
Round 2: Make 2 dc in each next 3 st. Dc in the next 12 st. Make 2 dc in each of the next 3 st, Dc in the next 12 st (36)
Round 3: SlSt Next st. Dc 2 times in each of the next 2 st. SlSt in the next 2 st.
•2 Dc in the next st, 3 Trc in the next st, 2 Dc in the next st, SlSt in the next 2 st.
•2 Dc in the next 2 st, SlSt in the next 4 st.
•Ch 7. Sk the next 2 ch, Dc in the next Ch. Dc in the next 4 Ch. Working back on the round, skip the next 2 st, SlSt in the next st.
•2 Dc in the next st, 2 Trc in the next st, 2 Dc in the next st. SlSt in the next 2 st.
•Hdc in the next st, Dc into that same st. Dc in the next st, Hdc into the same st. SlSt in the next 2 st.
•2 Dc in the next st, 2 Trc in the next st, 2 Dc in the next st. SlSt in the next 2 st.
•Ch 7. Sk the next 2 ch, Dc in the next Ch. Dc in the next 4 Ch. Working back on the round, skip the next 2 st, SlSt in the next st.
•Dc 4 times in the next st. SlSt to the next st to complete.
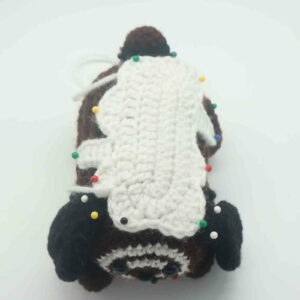
Finish off, leaving a long tail for sewing. Pin the icing on as shown and sew on. Weave in ends.
Leaf: (Make 2)
In Green
The leaf is made by creating a chain, then working completely around the chain.
Row 1: Ch 9. Skip the next 2 ch from the hook, SlSt in the 3rd ch.
SlSt in the next ch.
•Repeat *Ch 3. SlSt in the 2nd ch from the hook, Hdc in the next ch. Working back on the leaf, Skip the next st, SlSt in the next st.* twice.
•Now we meet the last Ch. Sc 1 time in the last ch.
•Now working on the OTHER side of the chain, where we haven’t made any stitches yet, SlSt in the next st.
•Repeat *Ch 3. SlSt in the 2nd ch from the hook, Hdc in the next ch. Working back on the leaf, Skip the next st, SlSt in the next st.* twice.
•Finish off now, leaving a long tail for sewing. Pin the two leafs on as shown and sew on. Once sewn on, weave in ends and cut any excess yarn.
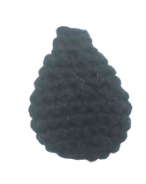
Berries: (Make 2)
In Green
Round 1: 6 Sc into a Magic Ring (6)
Round 2-4: *Sc* all around (6)
Finish off, leaving a long tail for sewing. Pin the berries on as shown and sew on. Once sewn on, weave in ends and cut any excess yarn.
Tail:
In Brown
Round 1: 6 Sc into a Magic Ring (6)
Round 2: *Inc* all around (12)
Round 3-4: *Sc* all around (12)
Finish off, leaving a long tail for sewing. Stuff the tail lightly. Pin the tail onto the toy as shown and sew on. Once sewn on, weave in ends and cut any excess yarn.
Done! If you made this yule log dog, I would LOVE to see! You can show me by posting a picture in the comments underneath this post!


