
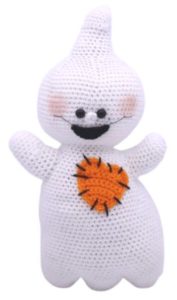
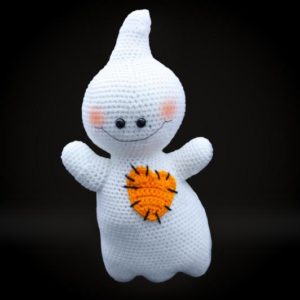
Country Ghost Amigurumi – Free Crochet Pattern
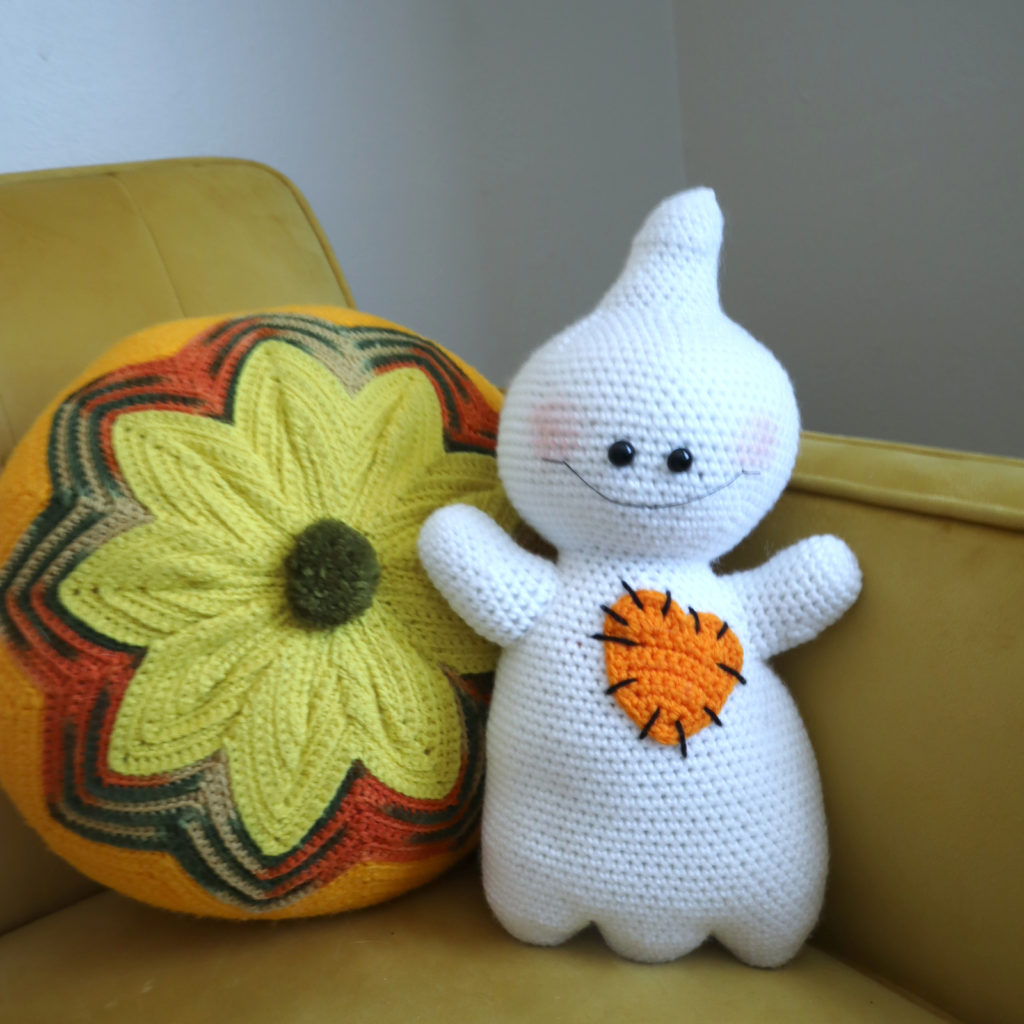
Hi everyone! I’m really excited to release this Halloween themed pattern. It’s a ghost, but he’s quite big and I’m using it on my couch as a spooky pillow for all of October! I also thought he would make a great doorstop, you’d just have to put a lot of plastic pellets into him to weight it down. This just makes a cute decoration, no matter what you decide to do with it! If you have any ideas on what you’ll do with yours, let me know 🙂
Since you’re here, you must like free Halloween patterns! You’re in luck – this year I’m releasing my biggest free Halloween bundle yet, with 10 free patterns. If you’d like to see those other upcoming patterns, here’s a picture. (You can click on the picture of the set below and you’ll be taken to a post which shows each upcoming pattern’s release date.)
View the other free Halloween patterns >>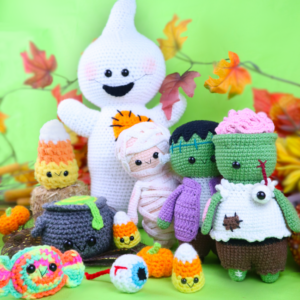
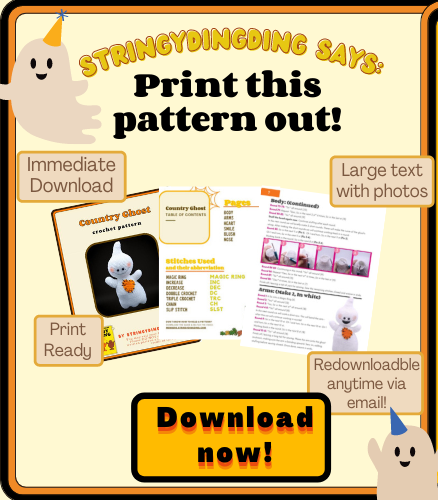
Print this pattern out – purchase the PDF here!


This is just 1 out of 10 patterns included in the Spooky Halloween Amigurumi Bundle! Every week 1 or more Halloween themed amigurumis will be released.
Want to see the other Halloween patterns and their release date? See them here!
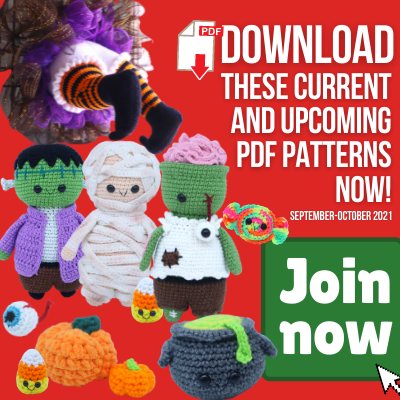
Become a member to unlock each PDF pattern as they’re released!
Supplies:
• Yarn 4/Medium Weight in…
Orange, Black, and White
•4mm Crochet Hook
•Tapestry needle
•Scissors
•Stuffing
•Sewing Pins
•12mm safety eye
Additional Information:
Difficulty: Intermediate
• Before we get started…
This ghost is pretty big (15″ tall from tip to bottom, 8.5″ wide from arm to arm). It’s a great decoration as a doorstop if you weight it with pellets, or it even makes a great couch pillow for October!
• Let’s Get Started!
We will start by making the bottom of the ghost and working our way up. First, we will make 3 separate pieces of the ghost’s bottom, crochet them together, then work our way up the body. The body, head, and whisp are all made in one continuous piece.
After this, we will create the arms and facial features! Let’s get started!
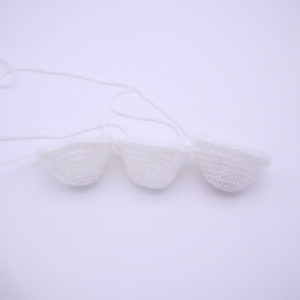
Bottom Pieces: (Make 3)
In White
Round 1: 6 Sc into a Magic Ring (6)
Round 2: *Inc* all around (12)
Round 3: *Inc, Sc in the next st* all around (18)
Round 4-5: *Sc* all around (18)
Round 6: *Inc, Sc in the next 2 st* all around (24)
Round 7: *Sc* all around (24)
Round 8: *Inc, Sc in the next 3 st* all around (30)
Round 9: *Sc* all around (30)
Round 10: *Sc* all around (30)
Finish off the first 2 pieces you make. Do NOT finish off the third piece you’ll make. Instead, continue on the next step:
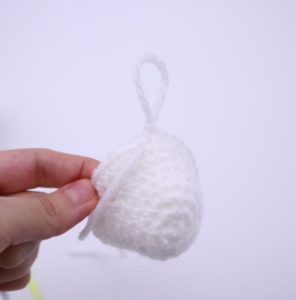
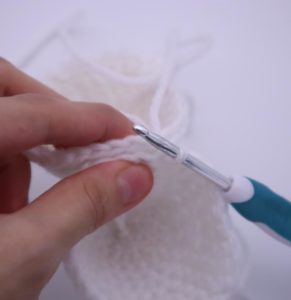
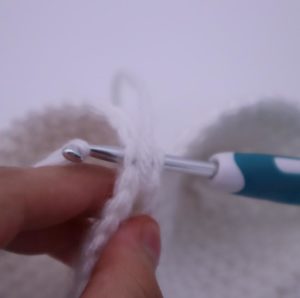
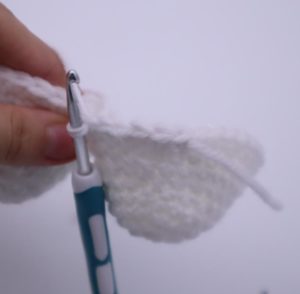
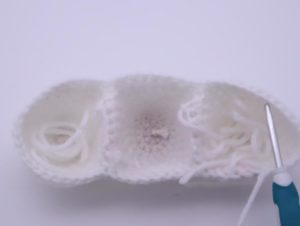
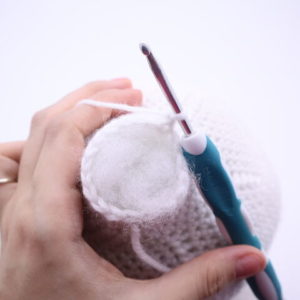
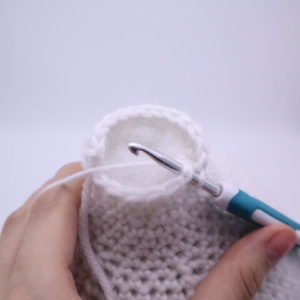
With the 3rd piece, cut your yarn about 8″ away from the piece but DON’T finish it off. We will continue to use the working loop later. Take your hook away from this piece for now. Let’s now connect the 3 pieces together, then we’ll come back to the working loop 🙂 See pic below:
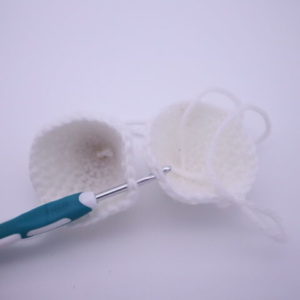
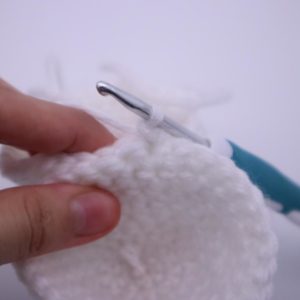
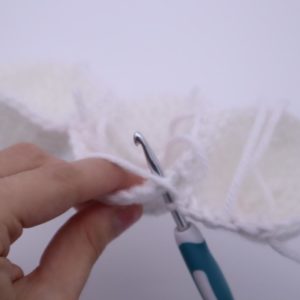
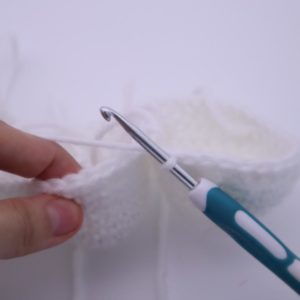
Take your current working piece and count 7 stitches away from your current stitch. Line up any bottom piece to that 7th stitch (Pic 2). Insert your hook going through BOTH stitches on the pieces (Pic 3). Yarn over (Pic 4).
1. 2.
2.
3. 4.
4.
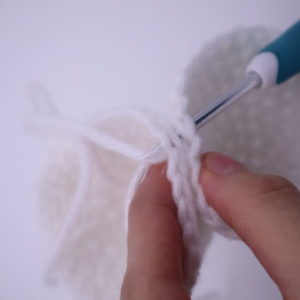
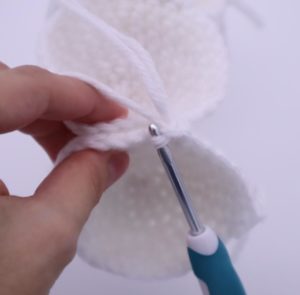
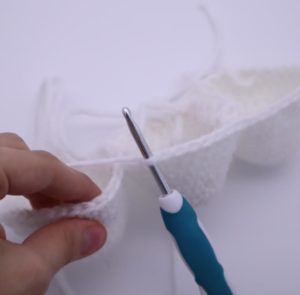
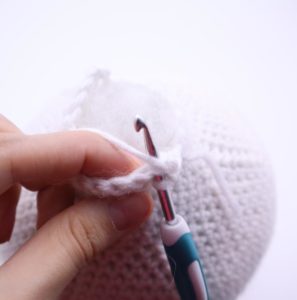
and pull through both stitches (Pic 5-6). Chain 1, and make 1 Sc into that same stitch, making sure to go through both stitches at the same time (Pic 7). Continue to make 1 Sc in the next 5 st making sure to go through BOTH pieces (Pic 8). Once done, finish off and weave in ends. Now 2 pieces are connected.
5. 6.
6.
7. 8.
8.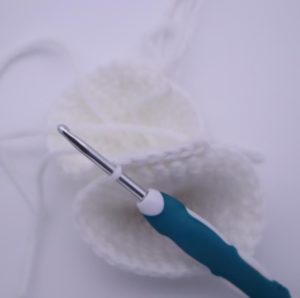
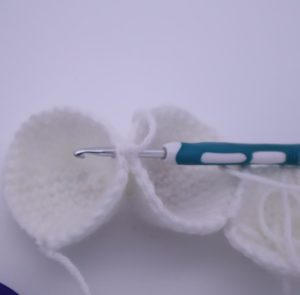
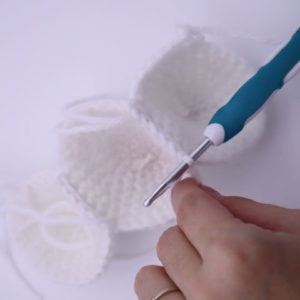
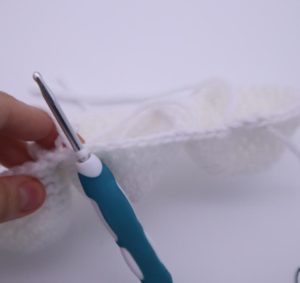
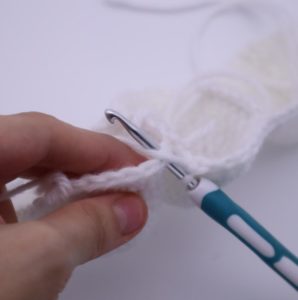
On the second piece we connected, count 11 stitches after where we first connected it. Line up the 3rd piece to that 11th stitch. Insert your hook going through BOTH stitches on the pieces (Pic 2). Yarn over (Pic 3) and pull through both stitches (Pic 4). Chain 1, and make 1 Sc going through both stitches at the same time. Continue to make 1 Sc in the next 5 st making sure to go through BOTH pieces (Pic 5). Once done, finish off and weave in ends. Now 3 pieces are connected (Pic 6).
1. 2.
2.
3. 4.
4.
5. 6.
6.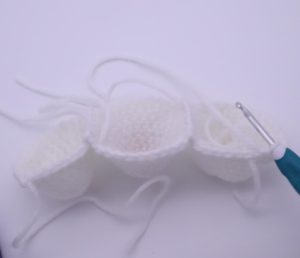
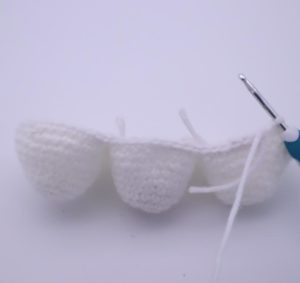
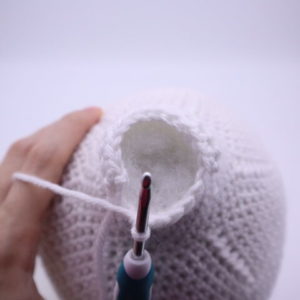
Round 11: Now we will continue by inserting our hook into the working loop we left in the last piece we made, pic 6 above shows the hook being placed into the original working loop we left. Sc in the next 6 st, Pic 1 (since we only left 8″ of yarn in this part, you will have to attach your main color again by using the typical color change method.) Now we meet the middle piece. Make 1 Sc in the next 9 st of the middle piece (Pic 2-3).
1. 2.
2.
3.
Now we meet the last piece. Sc in the next 24 st on the last piece (Pic 4). Now we meet the middle piece again (Pic 5), make 1 Sc in the next 9 st (Pic 6). Now we meet the first piece, make 1 Sc in the next 18 st (66)
4. 5.
5.
6. 7.
7.
8.
Round 12-29: *Sc* all around (66)
Round 30: Sc in the next 22 st. Repeat *Dec, Sc in the next 4 st* 4 times. Sc in the next 20 st (62)
Round 31: *Sc* all around (62)
Round 32: Sc in the next 22 st. Repeat *Dec, Sc in the next 3 st* 4 times. Sc in the next 20 st (58)
Round 33: *Sc* all around (58)
Round 34: Sc in the next 22 st. Repeat *Dec, Sc in the next 2 st* 4 times. Sc in the next 20 st (54)
Round 35: *Sc* all around (54)
Round 36: Sc in the next 22 st. Repeat *Dec, Sc in the next st* 4 times. Sc in the next 20 st (50)
Round 37-40: *Sc* all around (50)
Round 41: *Dec, Sc in the next 6 st* 6 times. *Dec* 1 time (43)
Round 42: *Sc* all around (43)
Round 43: *Dec, Sc in the next 5 st* 6 times. Sc in the last st (37)
Round 44: *Sc* all around (37)
Round 45: Repeat *Dec, Sc in the next 4 st* 6 times. Sc in the last st (31)
Round 46-48: *Sc* all around (31)
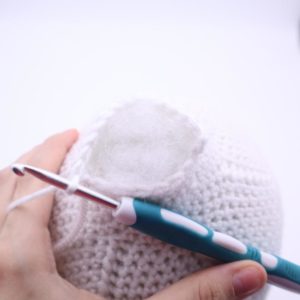
Stuff the body now. Now we will be creating the head!
Round 49: In the FLO repeat *Inc, Sc in the next 4 st* 6 times. Sc in the last st (37)
Round 50: In BOTH loops repeat *Inc, Sc in the next 5 st* 6 times, Sc in the last st (43)
Round 51: Repeat *Inc, Sc in the next 6 st* 6 times, Sc in the last st (49)
Round 52: Repeat *Inc, Sc in the next 7 st* 6 times, Sc in the last st (55)
Round 53: Repeat *Inc, Sc in the next 8 st* 6 times, Sc in the last st (61)
Round 54: Repeat *Inc, Sc in the next 9 st* 6 times, Sc in the last st (67)
Round 55-67: *Sc* all around (67)
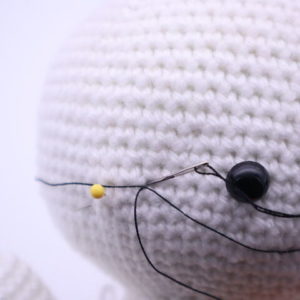
Add safety eyes in between rounds 58 and 59, 4 stitches apart.
Round 68: Repeat *Dec, Sc in the next 9 st* 6 times, Sc in the last st (61)
Round 69: Repeat *Dec, Sc in the next 8 st* 6 times, Sc in the last st (55)
Round 70: Repeat *Dec, Sc in the next 7 st* 6 times, Sc in the last st (49)
Round 71: Repeat *Dec, Sc in the next 6 st* 6 times, Sc in the last st (43)
Round 72: Repeat *Dec, Sc in the next 5 st* 6 times, Sc in the last st (37)
Round 73: Repeat *Dec, Sc in the next 4 st* 6 times, Sc in the last st (31)
Round 74: Repeat *Dec, Sc in the next 3 st* 6 times, Sc in the last st (25)
Stuff the head here.Sew the remaining stitches closed and weave in ends.
Round 75-78: *Sc* all around (25)
Round 79: Repeat *Dec, Sc in the next 2 st* 6 times, Sc in the last st (19)
Round 80-82: *Sc* all around (19)
Stuff the head again now. Continue stuffing after each round.
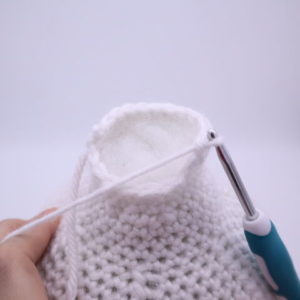
In the next round we will briefly make 2 short rounds. These will make the curve of the ghost’s whisp. After making the short rounds we will continue working back in a round.
Round 83: Sc in the next 11 st (Pic 1). Ch 1 and turn. Sc in the next 11 st (Pic 2).
1. 2.
2.
Ch 1 and turn, Sc in the next 11 st (Pic 3-4).
3. 4.
4.
Working back in the round, Sc in the next 8 st (Pic 5-6).
5. 6.
6.
Round 84-85: Continuing in the round, *Sc* all around (19)
Round 86: Repeat *Dec, Sc in the next st* 6 times, Sc in the last st (13)
Round 87: *Sc* all around (13)
Round 88: *Dec* 6 times, Sc in the last st (7)
Finish off, leaving a tail of yarn for sewing. Sew the remaining stitches closed and weave in ends.
Arms: (Make 2)
In White
Round 1: 6 Sc into a Magic Ring (6)
Round 2: *Inc* all around (12)
Round 3: *Inc, Sc in the next st* all around (18)
Round 4-8: *Sc* all around (18)
In the next round we will work a short row. This will bend the arm – after this we will continue working in rounds!
Round 9: Sc in the next 10 st. Ch 1 and turn. Sc in the next 10 st. Ch 1 and turn, Sc in the next 10 st.
Working back in the round, Sc in the next 8 st (18)
Round 10-13: *Sc* all around (18)
Finish off, leaving a long tail for sewing. Place the arm onto the ghost as shown, making sure the arm is bending upward. Sew on, adding stuffing before sewing closed. Once done, weave in ends.
Heart:
In Orange
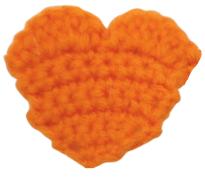
Row 1: Ch 3. Sc in the 2nd Ch from the hook. Sc in the next st (2)
Row 2: Ch 1 and turn. *Inc* in the next 2 st (4)
Row 3: Ch 1 and turn. *Inc* in the first st, Sc in the next 2 st, *Inc* in the next st (6)
Row 4: Ch 1 and turn. *Inc* in the first st, Sc in the next 4, *Inc* in the last st (8)
Row 5-8: *Sc* all around (8)
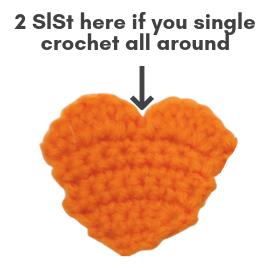
Row 9: Ch 1 and turn. Sc in the next st, 2 Dc into the next st, 4 Trc into the next st, SlSt into the next 2 st, 4 Trc into the next st, 2 Dc into the next st, Sc in the next st (16)
To make the edges cleaner, *Sc* all around the ENTIRE heart! When you reach the “dip” of the heart, make 2 SlSt. Once done, finish off and weave in ends.
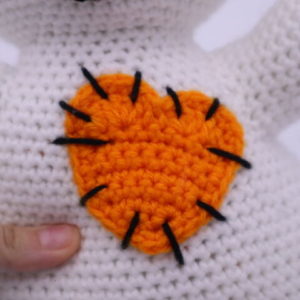
Take a long piece of black yarn. Pin the heart onto the ghost as shown. Sew on “poorly” using the black yarn, see the picture below. Once done, weave in ends.
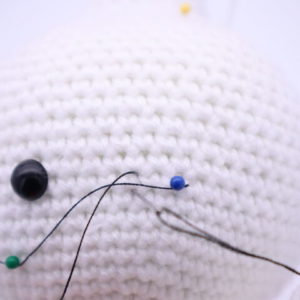
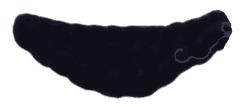
Smile:
In black embroidery thread
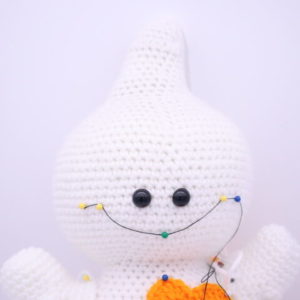
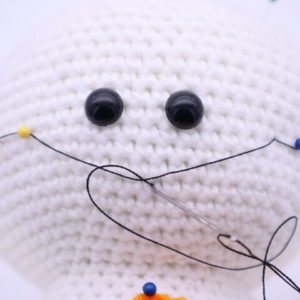
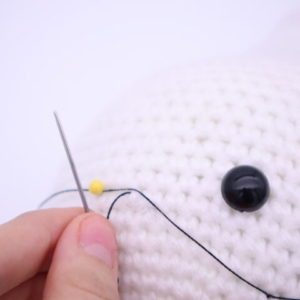
Pin the smile onto the ghost as shown (Pic 1). The pins will temporarily hold the smile in place. Place the thread onto a needle, then insert your needle right next to the corner of the mouth (Pic 2), and pull needle out ABOVE the second corner of the mouth as shown (Pic 2). Insert needle BELOW that same corner (Pic 3). Pull needle out at the middle of the mouth, above the thread (Pic 4).
1. 2.
2.
3. 4.
4.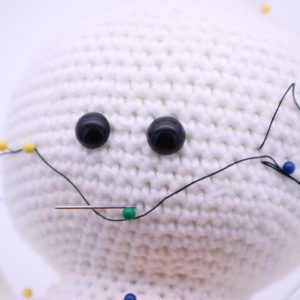
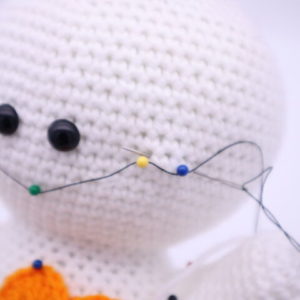
Insert needle below the thread of the middle of the mouth (Pic 5). Pull needle out at the left corner of the left side of the mouth, below the thread as shown (Pic 6). Insert needle above the thread now (Pic 7). Pull needle out a few stitches away. Place the other end of thread onto your needle and pull this thread out to the same spot as the other thread. Tie them together firmly, then bring into the ghost’s head to hide.
5. 6.
6.
7. 8.
8.
Smile: (Optional)
In Black Yarn
Row 1: Ch 11. Sc in the next 2st, Hdc in the next st, Dc in the next st, Trc in the next 2 st, Dc in the next st, Hdc in the next st, Sc in the next 2 st (10)
Finish off, leaving a long tail for sewing. Place the mouth below the smile and sew on. Weave in ends.
Nose: (optional)
In White Yarn

Round 1: 8 Sc into a Magic Ring (8)
Finish off, leaving a long tail for sewing. Pin the nose on below the eyes. Sew on and weave in ends.
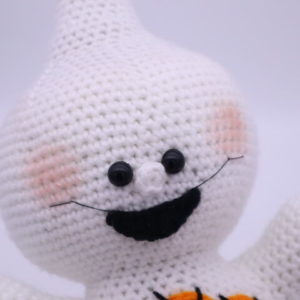
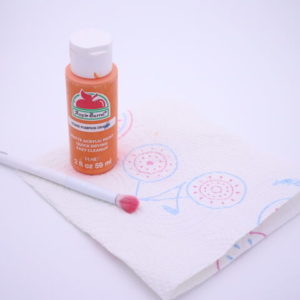
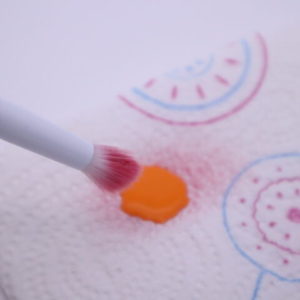
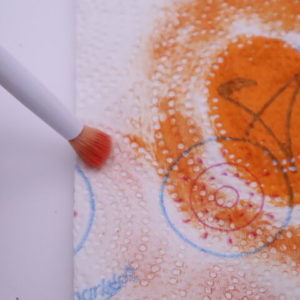
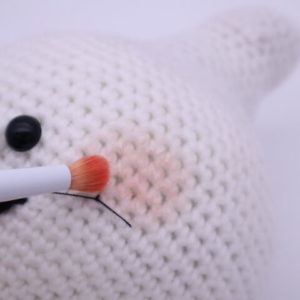
Blush:
Use small makeup brush and acrylic paint
Dab a small amount of orange acrylic yarn onto a paper towel. Dab your brush into the paint (Pic 2). Rub off most of the paint onto a paper towel, leaving almost none left on the brush (Pic 3). You can see how much comes off the brush and onto a paper towel (Pic 4). Now, lightly go over a cheek area with the brush. Swipe over an area only a few times (Pic 5). You can always add more but you can’t take blush away! Repeat this for the other cheek (Pic 5).
1. 2.
2.
3. 4.
4.
5.
All done! If you made this ghost, I would LOVE to see it! You can show me by posting a picture in the comments below this post.


6 Comments
So much fun making this Halloween ghost, thanks for the pattern!
Awww what a cutie! 😍 Ours look so similar that I almost thought you had my ghost LOL! I love how adorable he came out, I can tell that you’re a fantastic crocheter. Thank you so much for sharing! I hope you have a wonderful Halloween 🙂
So cute!!!!!! I didn’t have any white yarn so I switched the color palette for a warm fall vibe 😍
I did my face a little different on mine, but he was such a joy to make. he turned out too stinking cute! love it! & i love your patterns!
Like how my ghost turned out!
So fun to make! Your pattern was very detailed and easy to understand. Thank you!