Cowboy Kitty Amigurumi – Free Crochet Pattern
Print this pattern out – purchase the PDF version here!

 Supplies:
• Yarn 4/Medium Weight Yarn in…
Light yellow, brown, and red
•4mm Crochet Hook
•Tapestry needle
•Scissors
•Stuffing
•10mm safety eyes
•Black Embroidery Thread
Additional Information:
•Difficulty: Easy
•Size: 5″ tall
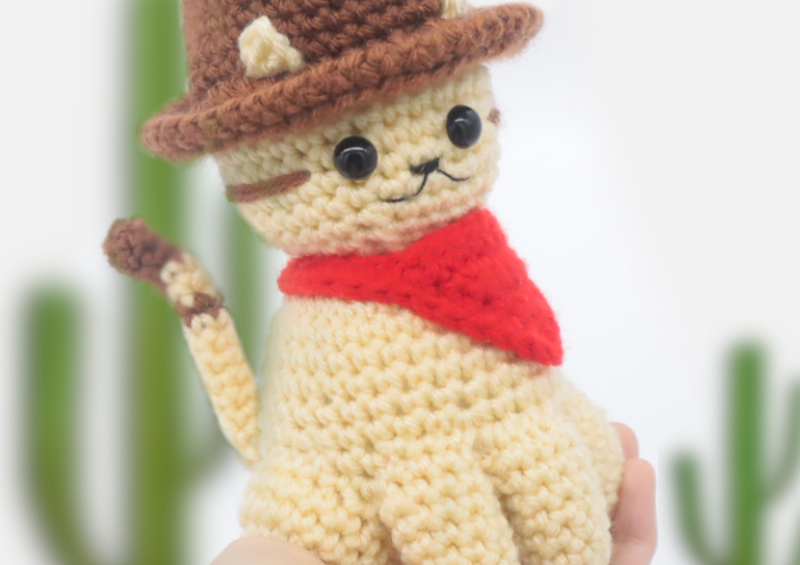
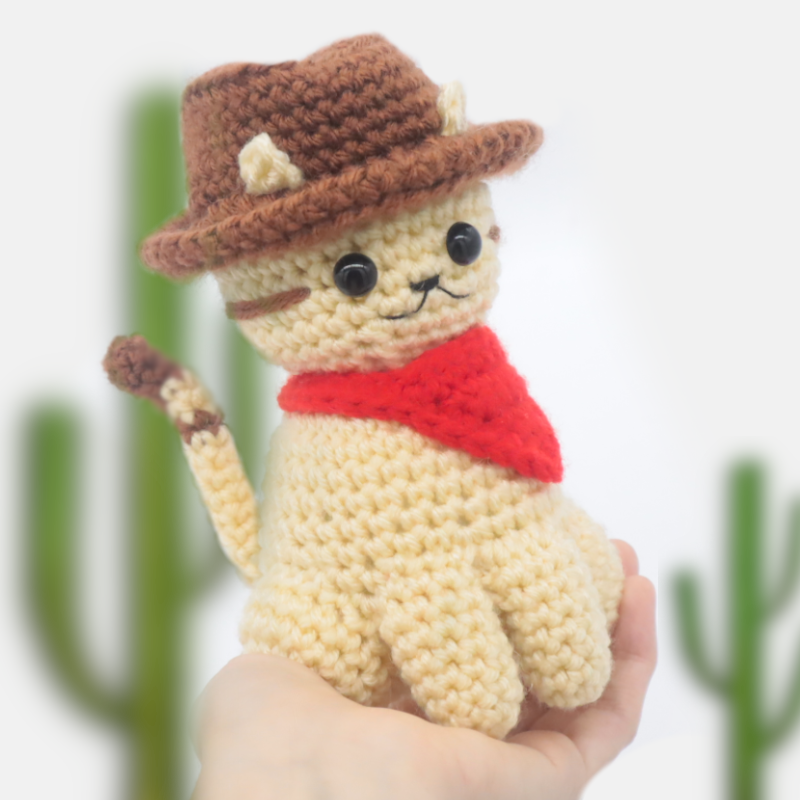
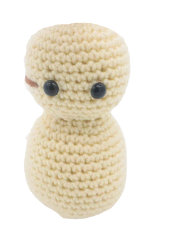
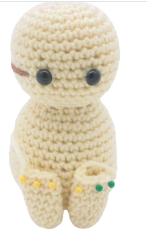
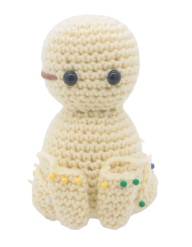
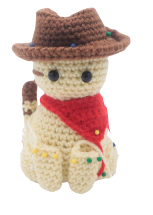
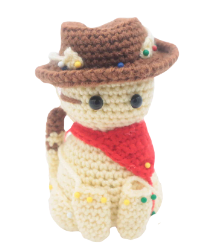
This cowboy kitty is the cutest thing to come out of the Wild West! His hat and bandanna make him look so adorable, and the best part is – this pattern is very easy to make! If you love kitties just like I do, this fella will make for a cute desk companion. Let’s get started making this cowboy kitty!
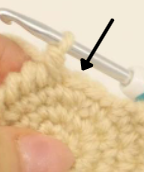
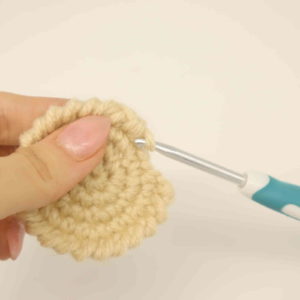
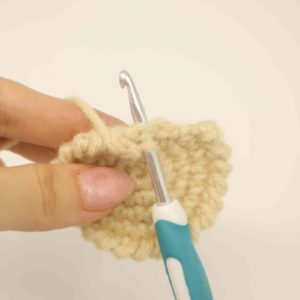
The crab stitch tutorial is used when we make the edging of the hat.
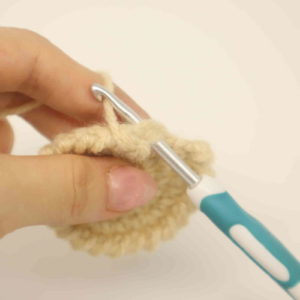
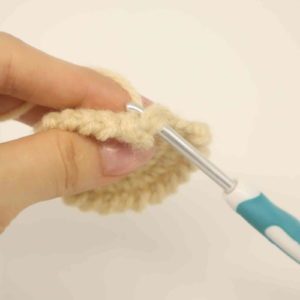
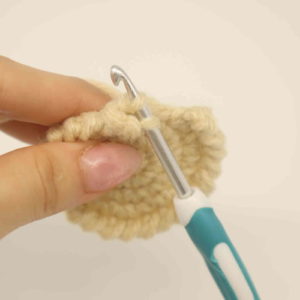
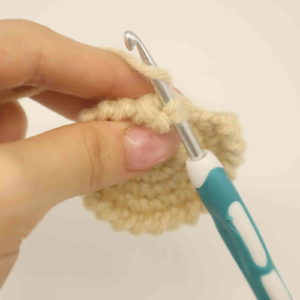
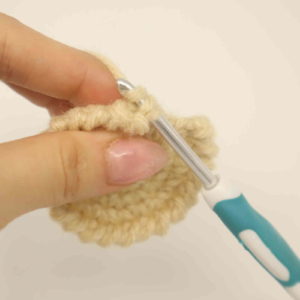
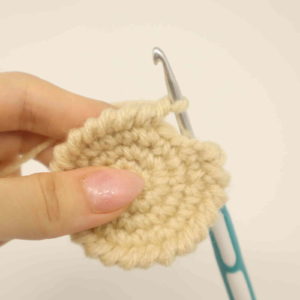
How to make a crab stitch:
Making a crab stitch is simply making 1 single crochet into the next stitch to your right. Insert your hook into the next stitch to your right (Pic 1-3). Yarn over, and pull the yarn through (Pic 4-6). You will have two loops on your hook (Pic 6). Yarn over and pull through both loops (Pic 7-9). You have completed 1 crab stitch! Repeat making 1 crab stitch all around until you’ve completed a round.
1. 2.
2. 3.
3. 4.
4. 5.
5. 6.
6. 7.
7. 8.
8. 9.
9. 10.
10.
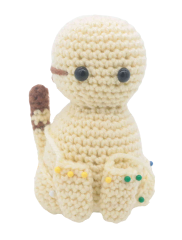
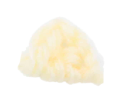
Head/Body:
In Yellow
Round 1: 6 Sc into a Magic Ring (6)
Round 2: *Inc* all around (12)
Round 3: *Inc, Sc in the next st* all around (18)
Round 4: *Inc, Sc in the next 2 st* all around (24)
Round 5: *Inc, Sc in the next 3 st* all around (30)
Round 6: *Inc, Sc in the next 4 st* all around (36)
Round 7-11: *Sc* all around (36)
Now we will mark where to place the safety eyes. Add a different colored eye stitch marker into the 15th and 19th stitch in Round 11. Later we will replace these eye markers with safety eyes.
Round 12-13: *Sc* all around (36)
Round 14: Repeat *Dec, Sc in the next 4 st* all around (30)
Add the safety eyes into the marked areas now.
Round 15: *Dec, Sc in the next 3 st* all around (24)
Round 16: *Dec, Sc in the next 2 st* all around (18)
Round 17: Working in the Front Loop Only (FLO), *Inc, Sc in the next 2 st* all around (24)
Round 18: Working in BOTH loops, repeat *Inc, Sc in the next 3 st* all around (30)
Round 19: *Inc, Sc in the next 4 st* all around (36)
Round 20-23: *Sc* all around (36)
Stuff the head firmly now.
Round 24: *Inc, Sc in the next 5 st* all around (42)
Round 25-28: *Sc* all around (42)
Round 29: *Dec, Sc in the next 5 st* all around (36)
Round 30: *Dec, Sc in the next 4 st* all around (30)
Round 31: *Dec, Sc in the next 3 st* all around (24)
Round 32: *Dec, Sc in the next 2 st* all around (18)
Stuff the body firmly now. Continue stuffing after each round.
Round 33: *Dec, Sc in the next st* all around (12)
Round 34: *Dec* all around (6)
Finish off, leaving a long tail for sewing. Sew the remaining stitches closed and weave in ends.
Arms: (Make 2)
In Yellow
Round 1: 6 Sc into a Magic Ring (6)
Round 2: *Inc, Sc in the next st* all around (9)
Round 3-8: *Sc* all around (9)
Finish off, leaving a long tail for sewing. Pin the arm on as shown and sew on, making sure to lightly stuff before fully sewing on. Sew the sides of the toy’s arm down to the toy’s body to better blend the arm and body. Once done, weave in ends and cut any excess yarn.
Legs: (Make 2)
In Yellow
Round 1: 6 Sc into a Magic Ring (6)
Round 2: *Inc* all around (12)
Round 3: *Inc, Sc in the next st* all around (18)
Round 4-5: *Sc* all around (24)
Finish off, leaving a long tail for sewing. Pin the legs on as shown and sew on, making sure to firmly stuff the legs before fully sewing on. Once done, weave in ends and cut any excess yarn.
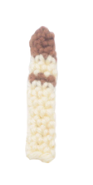
Tail:
In Brown
Round 1: 6 Sc into a Magic Ring (6)
Round 2-4: *Sc* all around (6)
Round 5-6: Change to yellow. *Sc* all around (6)
Round 7: Change to brown. *Sc* all around (6)
Round 8-16: Change to yellow. *Sc* all around (6)
Finish off, leaving a long tail for sewing. I didn’t stuff the tail, but you can now if you’d like. Pin the tail on as shown and sew on. Once done, weave in ends and cut any excess yarn.
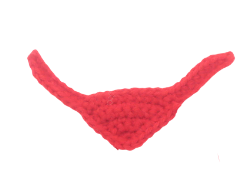
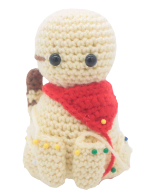
Bandanna:
In Red
Row 1: Ch 2, Inc in the 2nd Ch from the hook (2)
Row 2: Ch 1 and turn. Inc in the next 2 st (4)
Row 3: Ch 1 and turn. Inc in the next st, Sc in the next 2 st, Inc in the next st (6)
Row 4: Ch 1 and turn. Inc in the next st, Sc in the next 4 st, Inc in the next st (8)
Row 5: Ch 1 and turn. Inc in the next st, Sc in the next 6 st, Inc in the next st (10)
Row 6: Ch 1 and turn. Inc in the next st, Sc in the next 8 st, Inc in the next st (12)
Row 7: Ch 10. Sc in the 2nd Ch from the hook. Sc in the next 2 st, Hdc in the next 7 st. Working back on the bandanna, Sc in the next st, SlSt in the next 10 st. Ch 10. Sc in the 2nd Ch from the hook, Sc in the next 2 st, Hdc in the next 7 st. Working back on the bandanna, SlSt in the next st.
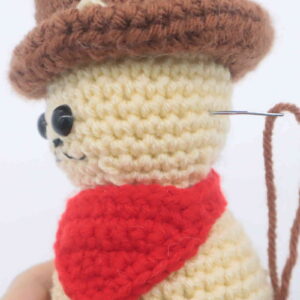
Row 8: Sc around the edge of the bandanna for a finished clean look. When you meet the tip of the bandanna, Sc 2 times in that tip. Once you meet the strap of the bandanna, stop and finish off. Leave a long tail for sewing. Pin the bandanna on as shown and sew or hot glue on. Weave in ends and cut any excess yarn.
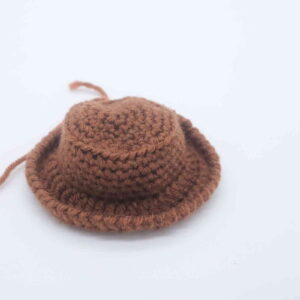
Hat:
In Brown
Round 1: 6 Sc into a Magic Ring (6)
Round 2: *Inc* all around (12)
Round 3: *Inc, Sc in the next st* all around (18)
Round 4: *Inc, Sc in the next 2 st* all around (24)
Round 5: *Inc, Sc in the next 3 st* all around (30)
Round 6: *Inc, Sc in the next 4 st* all around (36)
Round 7: Working in the BLO, *Sc* all around (36)
Round 8-11: *Sc* all around (36)
Round 12: Working in the FLO, *2 Dc into the next st, Dc in each of the next 5 st* all around (42)
Round 13: Working in BOTH loops, repeat *2 Hdc in to the next st, Hdc in each of the next 7 st* all around (48)
Round 14: Crab stitch all around (48) (tutorial at the beginning of the page)
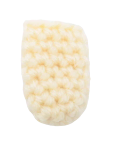
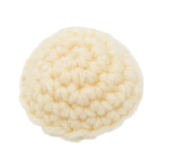
Finish off, leaving a long tail for sewing. Fold the inside of the half to create the creased look of the cowboy hat (Pic 2-3). Using a new piece of brown yarn, sew this pinched area (Pic 3). Once sewn together, tie the tail ends of yarn into firm knots to secure, then cut any excess yarn. Pin the hat on as shown and sew or hot glue on (Pic 4). Stuff lightly before fully sewing on. Once done, weave in ends and cut any excess yarn.
1. 2.
2.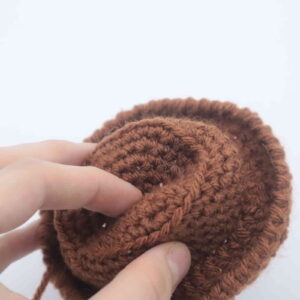 3.
3.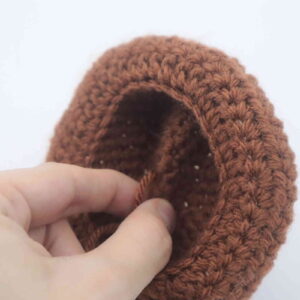 4.
4.
Ears: (Make 2)
In Yellow
Row 1: Ch 3. Sc in the 2nd Ch from the hook, Hdc in the next st.
Finish off, leaving a long tail for sewing. Pin the ears on as shown and sew on. Once done, weave in ends and cut any excess yarn.
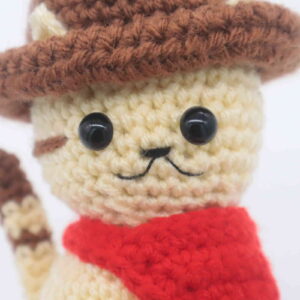
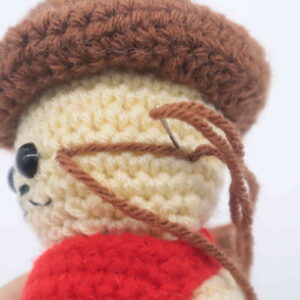
Face Stripes:
On each side of the toy’s face
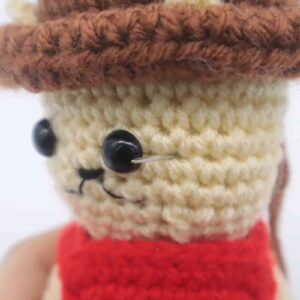
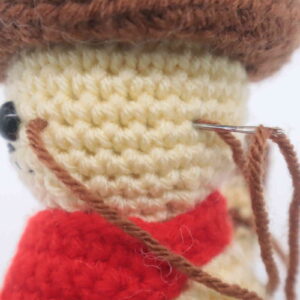
Insert needle with brown yarn into the back side of the toy‘s head (Pic 1) and pull needle out at the front of the face as shown (Pic 2). Reinsert into original insertion spot (Pic 3), and pull needle out at the front area again (Pic 3). Reinsert into original insertion spot (Pic 4). Tie ends of yarn into firm knots, bring knots inside toy to hide, and cut any excess yarn.
1. 2.
2. 3.
3. 4.
4.
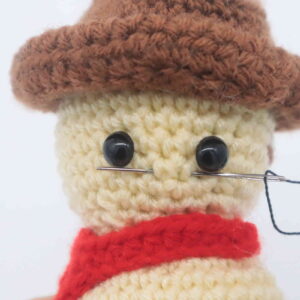
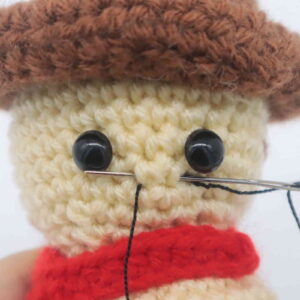
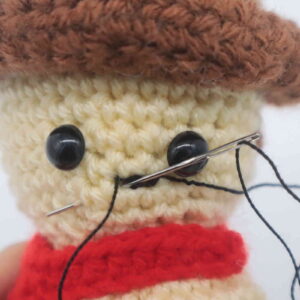
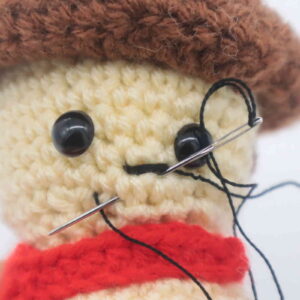
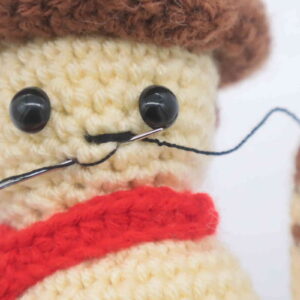
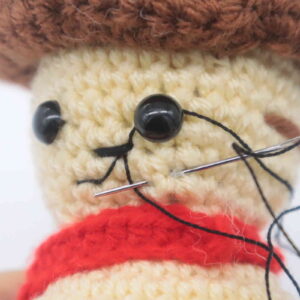
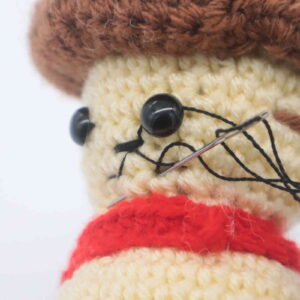
Smile:
In Black Embroidery Thread
Insert needle into the middle nose area (Pic 1) and pull needle out to the left (Pic 1). Reinsert needle into the original insertion spot, then pull needle out to the left again (Pic 2). Repeat this process until the nose thickness is how you like it. Then, insert needle below the nose in the middle (Pic 3) and pull needle out to the lower left (Pic 3). Reinsert needle into the middle nose area (Pic 4). Pull needle out at the left area ABOVE the thread as shown (Pic 5). Reinsert needle into the same spot we just pulled out of, but make sure your needle is now ABOVE the thread, then pull needle out at the middle nose area (Pic 6). Insert needle to the lower right, then pull needle out at the lower left making sure the needle lands ABOVE the thread (Pic 7). Reinsert needle into the same area we just pulled out of, making sure needle lands BELOW the thread (Pic 8). Tie ends of yarn into firm knots. Bring the knots of thread inside the toy to hide. Cut any excess yarn.
1. 2.
2. 3.
3. 4.
4. 5.
5. 6.
6. 7.
7. 8.
8. 9.
9.