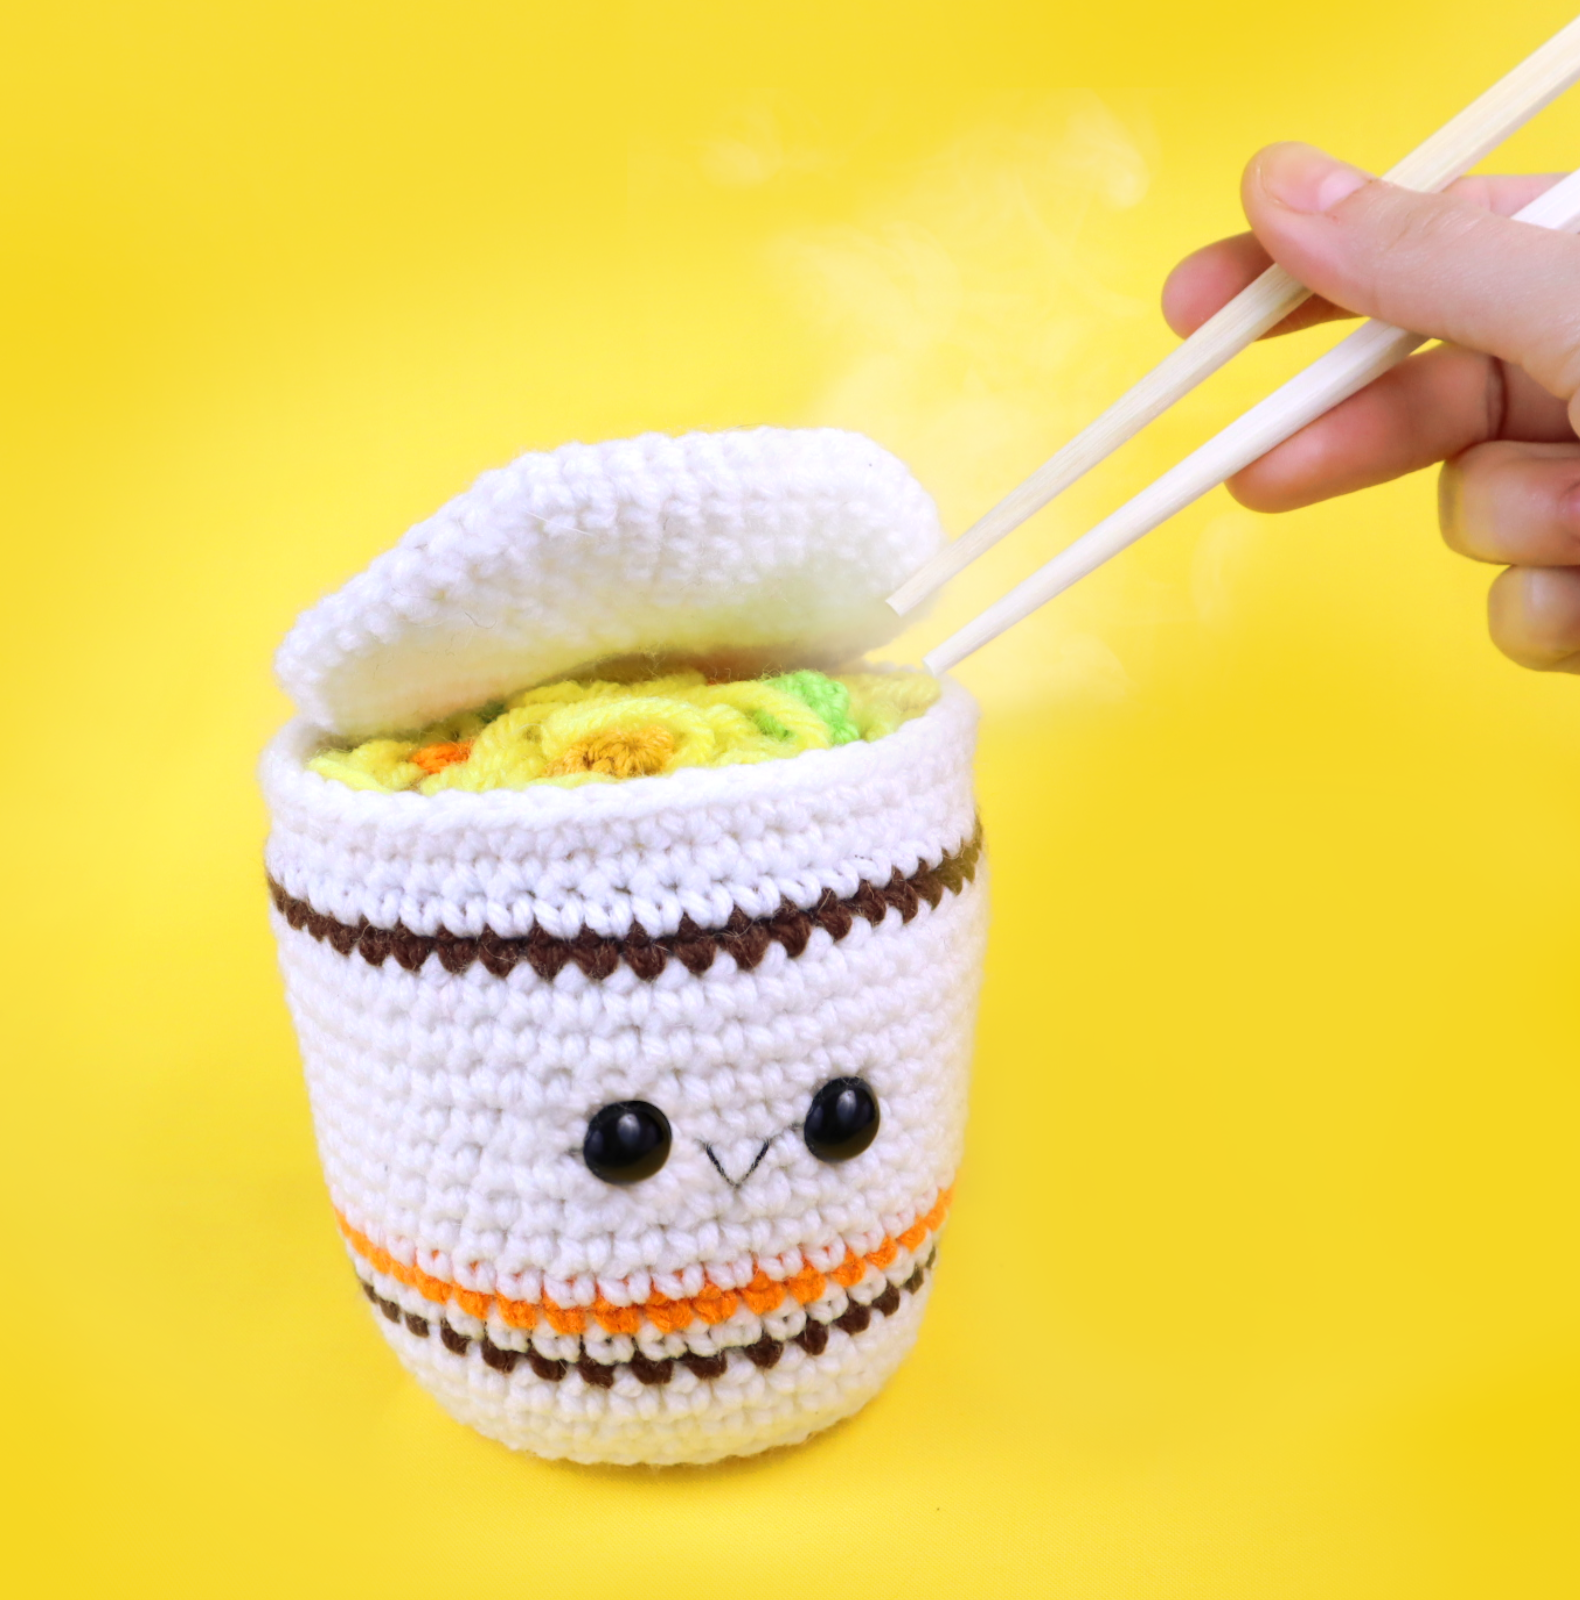
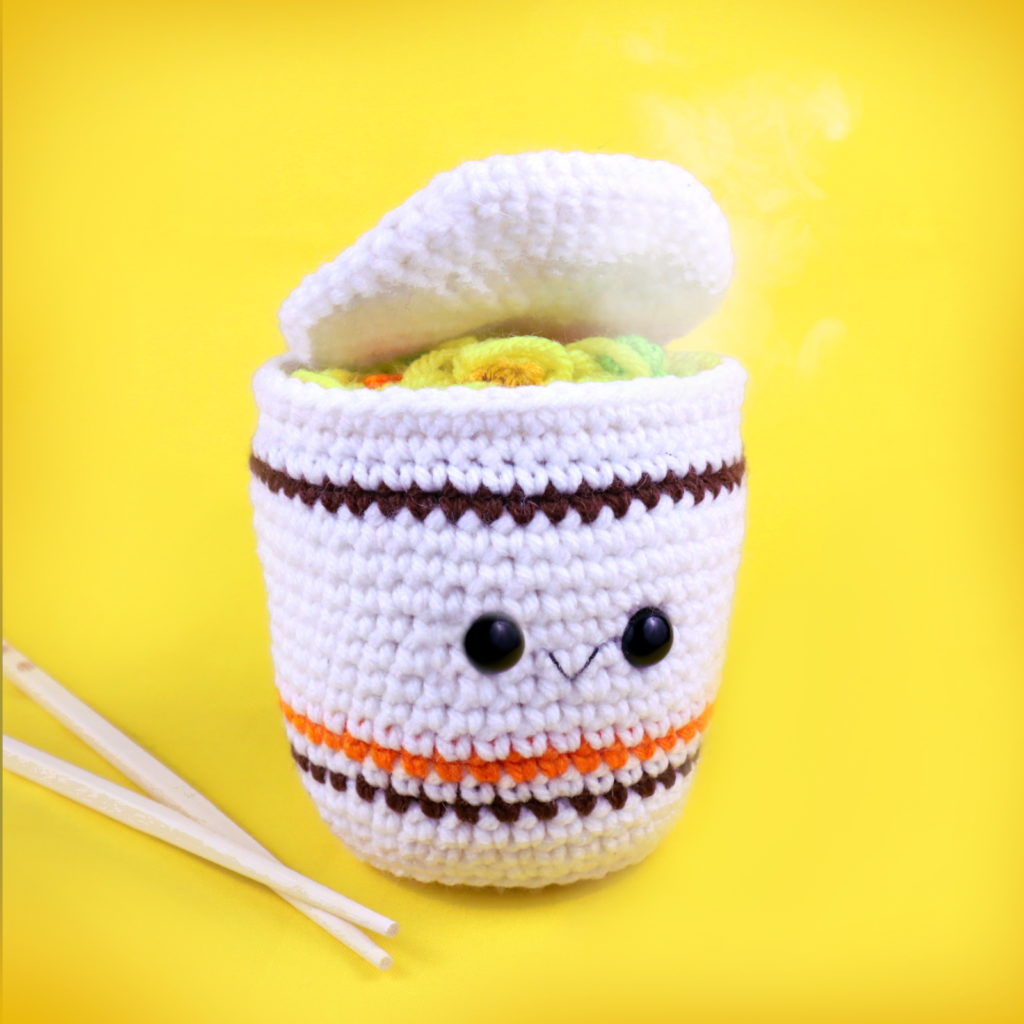
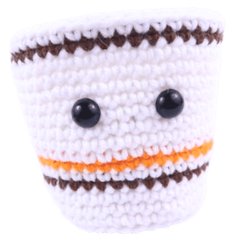
Cup Ramen Amigurumi Free Crochet Pattern
I hope you know what this weeks pattern is – a free ramen amigurumi crochet pattern! The few people that I showed this ramen to said they loved it! I think it’s because ramen is such a culturally relevant thing to us, we all know what it is and most of us LOVE it 🙂 I know when I was younger this was one of the things I ate most. Can any of you relate?
I’m sure most of you know that these ramen cups are cheap to buy. What’s not to love, a cheap meal that’s made in only a few minutes?! It’s no wonder this cup ramen is so loved throughout Asia to America! Are these popular in other parts of the world, like Australia or something? Let me know 🙂
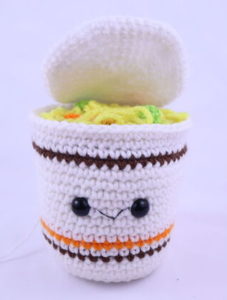
This version of the ramen is probably the classic chicken kind, but you can spice it up. Maybe add a piece of shrimp in there, or an egg. It’s up to you! Included in this pattern are the peas, carrots, and corn. Hopefully this pattern brings a smile to your face, make it for somebody you love!
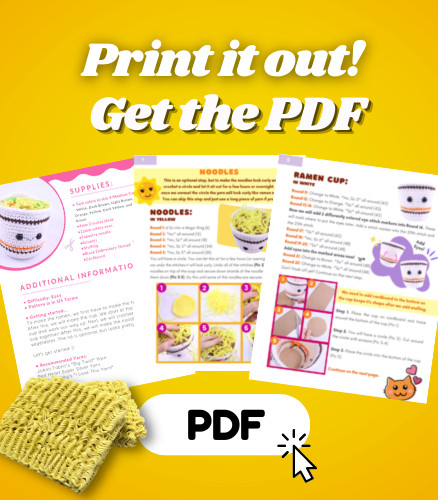
Print out this pattern! Purchase the PDF here.
Supplies:
• Yarn colors in size 4/Medium Yarn…
White, Dark Brown, Light Brown, Orange, Yellow, Dark Yellow, and Green
•4mm Crochet Hook
•12mm safety eyes
•Tapestry needle
•Scissors
•Stuffing
•Black Embroidery Thread
•Cardboard
Additional Information:
- Difficulty: Easy
- Pattern is in US Terms
• Getting started…
To make the ramen, we first have to make the top “soup part”. After this, we will make the cup. We start at the bottom of the cup and work our way up. Next, we will crochet the soup and cup together! After this, we will make the noodles and vegetables. The lid is optional, but looks pretty cute with it!
Let’s get started 🙂
• Recommended Yarns:
JoAnn Fabric’s “Big Twist” Yarn
Red Heart Super Saver Yarn
Hobby Lobby’s “I Love This Yarn!”
Ramen
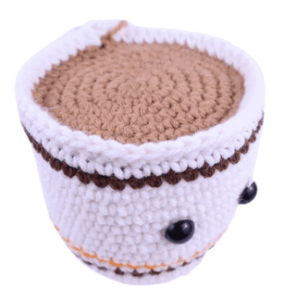
To make the ramen, we first make to make the top soup part. This is because later when we make the cup, we will crochet the cup and soup together! So be sure to make the soup part first.
Ramen Soup:
In Light Brown
Round 1: 6 Sc into a Magic Ring (6)
Round 2: *Inc* all around (12)
Round 3: *Inc, Sc* all around (18)
Round 4: *Inc, Sc 2* all around (24)
Round 5: *Inc, Sc 3* all around (30)
Round 6: *Inc, Sc 4* all around (36)
Round 7: *Inc, Sc 5* all around (42)
Round 8: *Inc, Sc 6* all around (48)
Finish off now. Weave in ends and set aside.
Ramen Cup:
In White
Round 1: 6 Sc into a Magic Ring (6)
Round 2: *Inc* all around (12)
Round 3: *Inc, Sc* all around (18)
Round 4: *Inc, Sc 2* all around (24)
Round 5: *Inc, Sc 3* all around (30)
Round 6: *Inc, Sc 4* all around (36)
Round 7: In the FLO (Front Loop Only), *Sc* all around (36)
Round 8-9: In BOTH Loops *Sc* all around (36)
Round 10: Change to Dark Brown. *Sc* all around (36)
Round 11: Change to White. *Inc, Sc 5* all around (42)
Round 12: Change to Orange. *Sc* all around (42)
Round 13-16: Change to White. *Sc* all around (42)
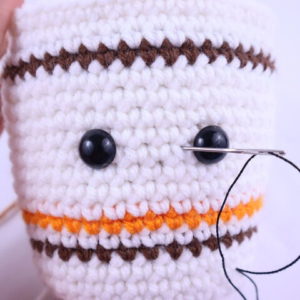
Now we will add 2 differently colored eye stitch markers into Round 16. These will mark where to put the eyes later. Add a stitch marker into the 20th stitch and the 25th stitch.
Round 17: *Sc* all around (42)
Round 18: *Inc, Sc 6* all around (48)
Round 19-20: *Sc* all around (48)
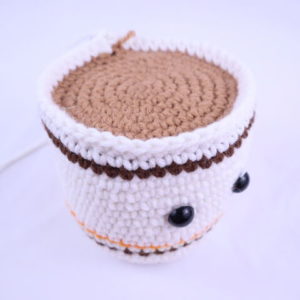
Add eyes into the marked areas now!

Round 21: Change to Brown. *Sc* all around (48)
Round 22: Change to White. *Sc* all around (48)
Don’t finish off yet! Continue on this next step:
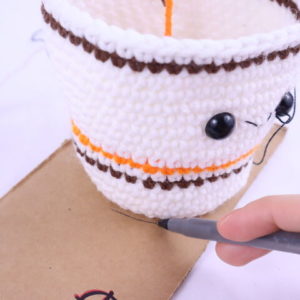
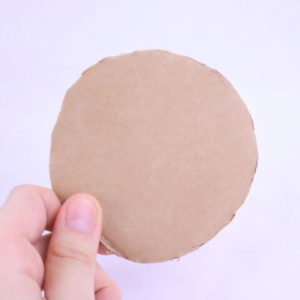
We need to add cardboard to the bottom so the cup keeps it’s shape after we add stuffing.
Step 1. Place the cup on cardboard and trace around the bottom of the cup (Pic 1)
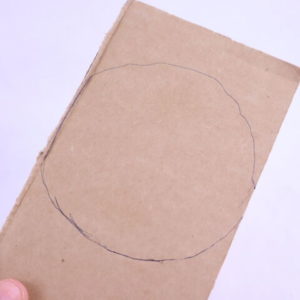
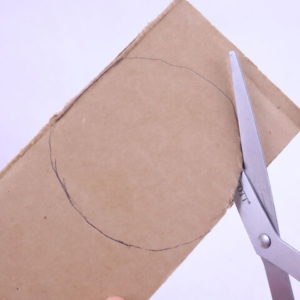
Step 2. You will have a circle (Pic 2). Cut around the circle with scissors (Pic 3-4)
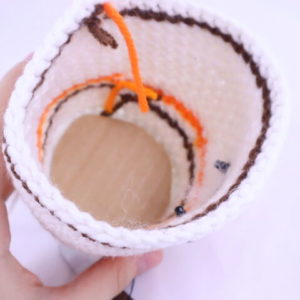
Step 3. Place the circle into the bottom of the cup (Pic 5).
1. 2.
2.
3. 4.
4.
5.
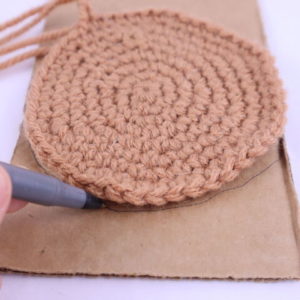
We also need to trace the “soup” part, as we will add this cardboard to the ramen later.
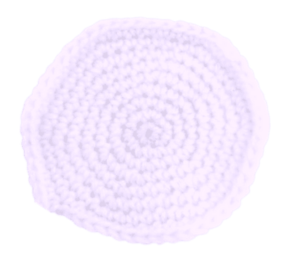
Step 1. Place the soup on cardboard and trace around the entire circle (Pic 1)
Step 2. You will have a circle (Pic 2). Cut around the circle with scissors (Pic 3-4)
Step 3. Set aside the cardboard for now.
1. 2.
2.
3. 4.
Ramen Cup: (Continued)
In White
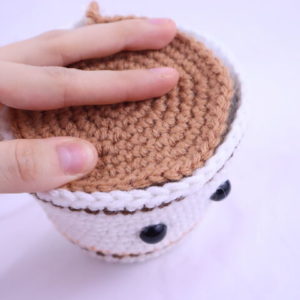
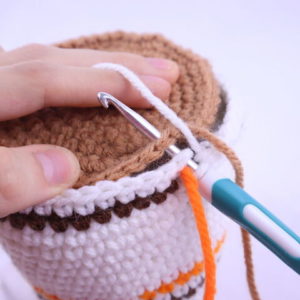
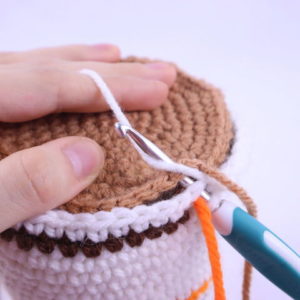
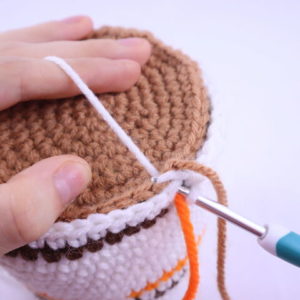
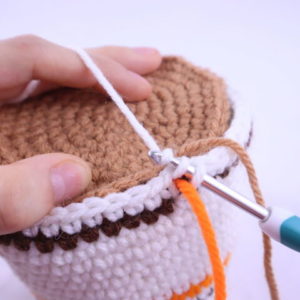
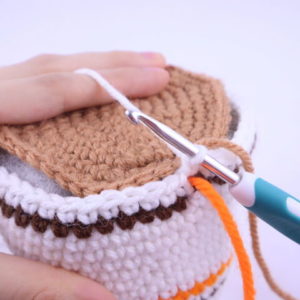
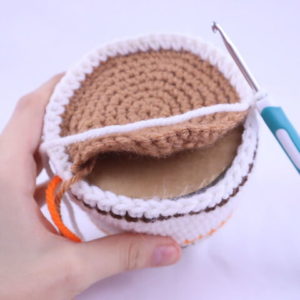
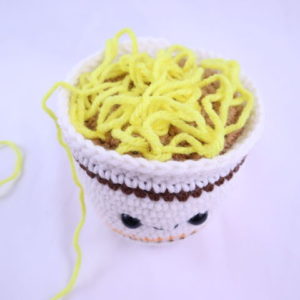
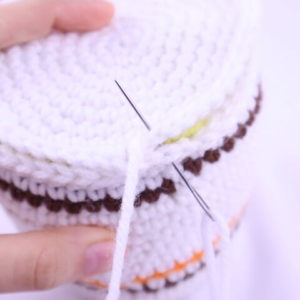
Round 23: Place the soup on top of the cup as shown, making sure the stitches line up (Pic 1). Insert hook going through BOTH the cup and soup (Pic 2). *Sc* all around going through BOTH the cup and soup stitches (Pic 3-6). Add the cardboard in when you’re about half way through (Pic 7). (48)
1. 2.
2.
3. 4.
4.
5. 6.
6.
7. 8.
8.
Round 24: *Sc* all around (48)
Finish off. Weave in ends.
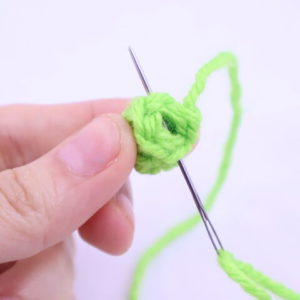
Noodles:
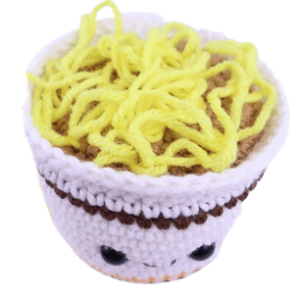
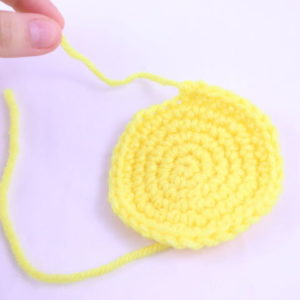
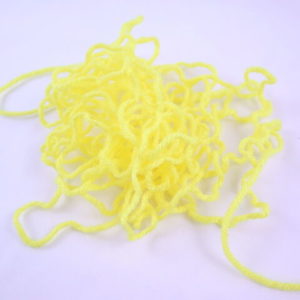
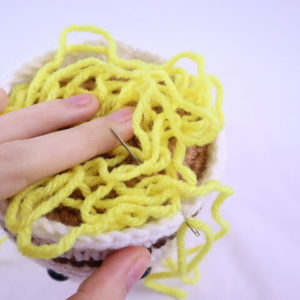
This is an optional step, but to make the noodles look curly we can crochet a circle and let it sit out for a few hours or overnight. Then, once we unravel the circle the yarn will look curly like ramen noodles! You can skip this step and just use a long piece of yarn if preferred.
Round 1: 6 Sc into a Magic Ring (6)
Round 2: *Inc* all around (12)
Round 3: *Inc, Sc* all around (18)
Round 4: *Inc, Sc 2* all around (24)
Round 5: *Inc, Sc 3* all around (30)
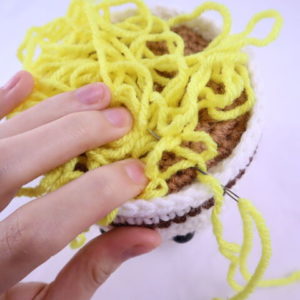
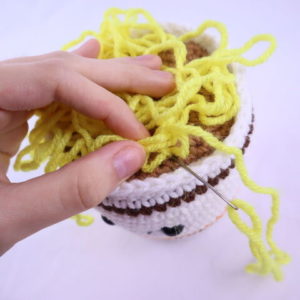
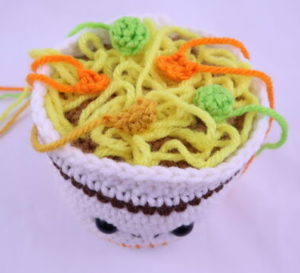
You will have a circle. You can let this sit for a few hours (or overnight) so when we undo the stitches it will look curly. Undo all of the stitches (Pic 2). Place the noodles on top of the soup and secure down strands of the noodles by sewing them down (Pic 3-5). Do this until some of the noodles are secures.
1. 2.
2.
3. 4.
4.
5. 6.
6.
Peas: (Make 2)
In Green
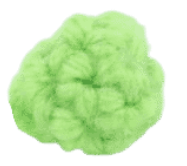
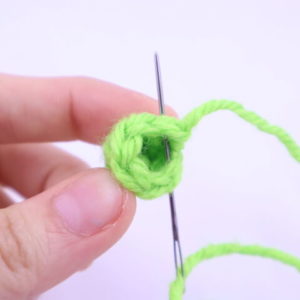
Round 1: 6 Sc into a Magic Ring (6)
Round 2-3: *Sc* all around (6)
Finish off, leaving a tail of yarn.
Sew the remaining stitches closed. Place the peas onto the cup as shown and sew on. Weave in ends.
Carrots: (Make 2)
In Orange

Row 1: Ch 4. Skip the next 3 ch. Dc in the last Ch.
Finish off, leaving a tail of yarn. Place the carrots onto the cup as shown and sew on. Weave in ends.
Corn:
In Yellow

Row 1: Ch 4. Skip the next 3 ch. Dc in the last Ch.
Finish off, leaving a tail of yarn. Place the carrots onto the cup as shown and sew on. Weave in ends.
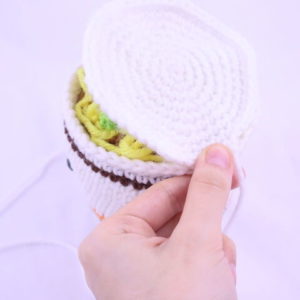
Lid: (Optional)
In White
Round 1: 6 Sc into a Magic Ring (6)
Round 2: *Inc* all around (12)
Round 3: *Inc, Sc* all around (18)
Round 4: *Inc, Sc 2* all around (24)
Round 5: *Inc, Sc 3* all around (30)
Round 6: *Inc, Sc 4* all around (36)
Round 7: *Inc, Sc 5* all around (42)
Round 8: *Inc, Sc 6* all around (48)
Round 9: *Inc, Sc 7* all around (54)
Finish off, leaving a tail for sewing. Align the lid to the back stitches on the cup (Pic 1). Sew on, going from the cup to the lid (Pic 2). Sew together for a total of 11 stitches (Pic 3). Once done, weave in ends!
1. 2.
2.
3. 4.
4.
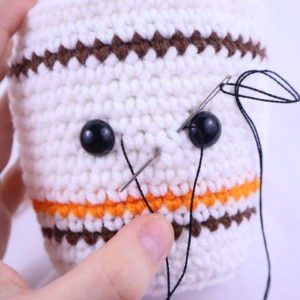
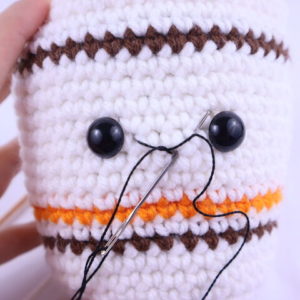
Smile:
In Black Embroidery Thread
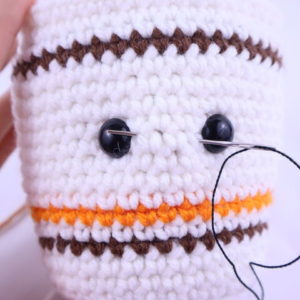
Insert needle with thread one stitch over from the right eye (Pic 1). Pull needle out one stitch over from the left eye (Pic 2). Reinsert needle into the original insertion spot, and pull needle out where shown, making sure the needle lands ABOVE the thread (Pic 3). Insert needle into the same area, but making sure the needle lands BELOW the thread (Pic 4). Pull needle out the original insertion spot (Pic 4). Tie both ends of thread into a firm knot and bring into the amigurumi to hide. Cut any excess yarn.
1. 2.
2.
3. 4.
4.
5.
Done!


14 Comments
This pattern is sooCool! Can’t wait to do it!!! Thank you for sharing !
This pattern made me smile as soon as I seen so I knew I needed to make it. Love how it turned out, thanks
Thank you for sharing this pattern. So much fun to make. I lived off these in my late teens/ early 20s lol
I saw your cup of noodles ramen on Pamela’s Adoring Crochet. I love your pattern. I’ve never made amigurumi before but I would love to try this! Your pattern page layout is very inviting. I can’t wait to see what else you have. Thanks.
Saw your pattern and made one for a very surprised friend. Now I have to make 4 more because everyone loved it so much! Thanks for the great pattern.
I’m new to crochet, nearly a month in I discovered your pattern and just HAD to give it a try! So easy to follow, and so creative! Thankyou for sharing it with us ❤
Just finished! This was my first amid project! I made them for my 2 teens. I used plastic canvas circles nstead of tracing cardboard.
Just finished! These were my first amigurumi projects! I made them for my 2 teens. I used plastic canvas circles instead of tracing cardboard. My kids were noticeable excited. Totally worth it!
My very first amigurimi ever!! I love it!! She’s adorable. I followed the pattern exactly. I don’t know why she came out so fat rather than tall. Any ideas?? But none the less she’s adorable!!
PS…I added a hard boiled egg as my daughter loves eggs in her ramen 😉
De que tamaño queda?
Thank you so much for sharing this pattern!! I just love all your patterns, and when I saw this one, I knew I HAD to make it! I love cup-n-noodles and there is a very funny story I have about them. I’ll try too make a brief summary tho. So basically when I was like three or four me and my family went to big bear and my brother was asking my mom if he could bring some ramen cups. And my mom thought he would bring like 4 or 5 little cups but he brought the entire package! Skip forward a little and there was a large snow storm that had completely covered our car. My parents had only bought enough food for the weekend. And we stayed there three extra days surviving on cup-n-noodles and snow cones. And it was thanks to my older brother. (Sry it was so long)
Thank you so much for sharing this free pattern. It’s so adorable.
Wow!!! You did a great job for only doing it for 1 month. I haven’t started yet, but in the process. Lol. My husband bought me a beginners crochet set for xmas so when we go camping I have a little hobby. Gives me hope that it’s not going to be as difficult as I thought.