
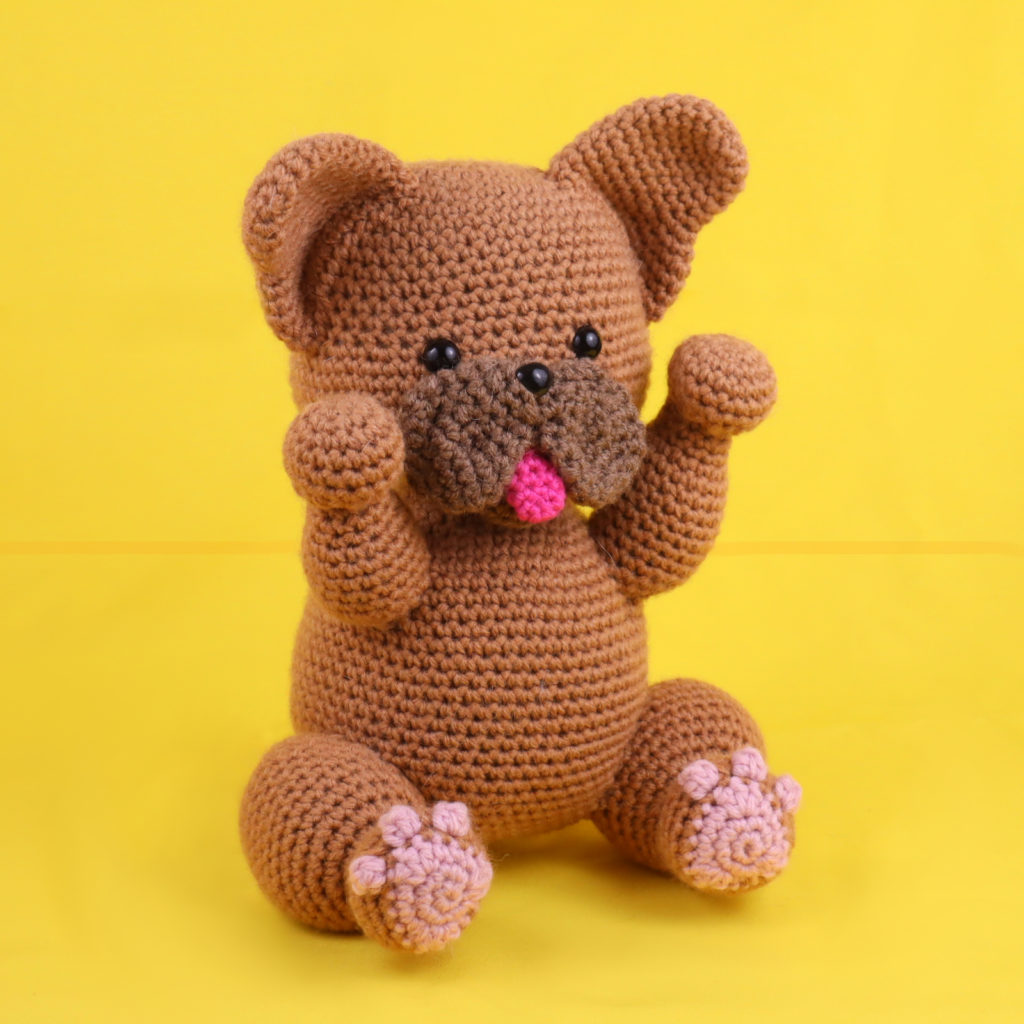
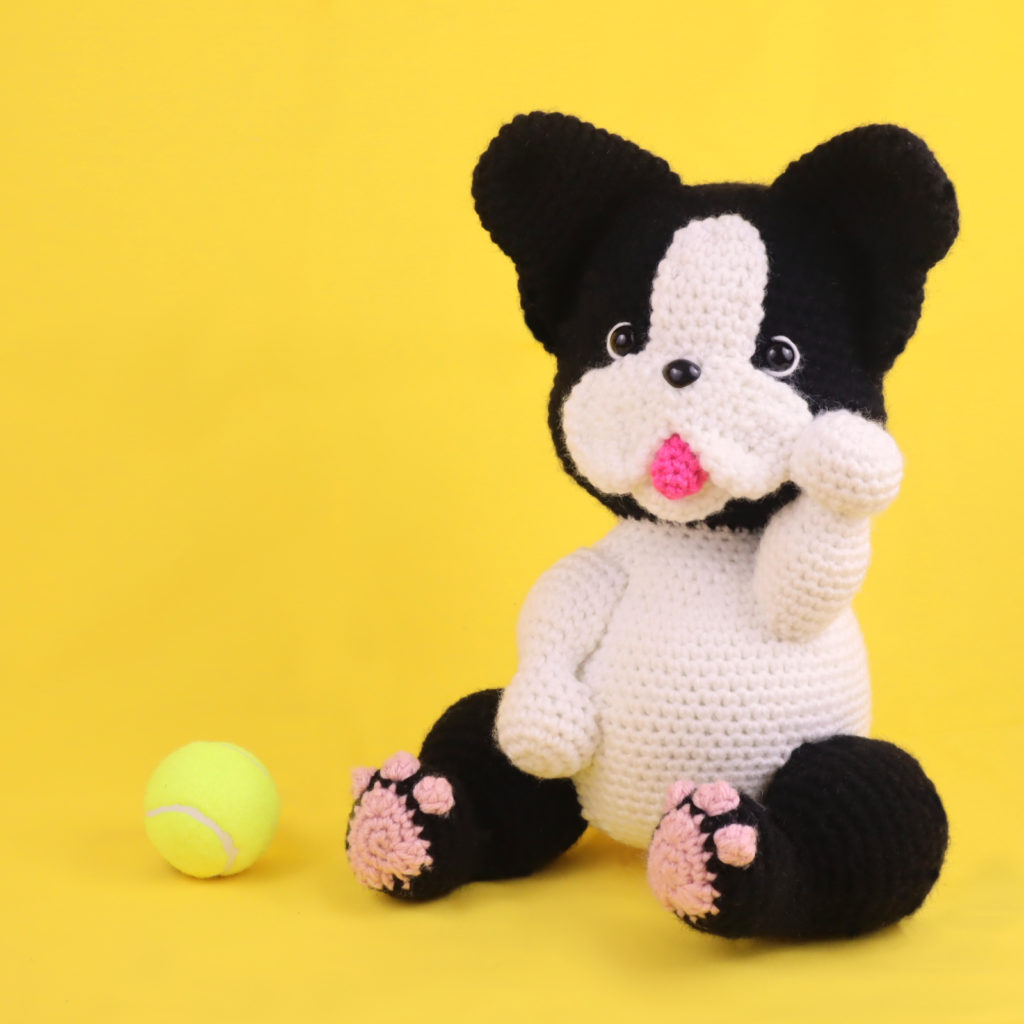
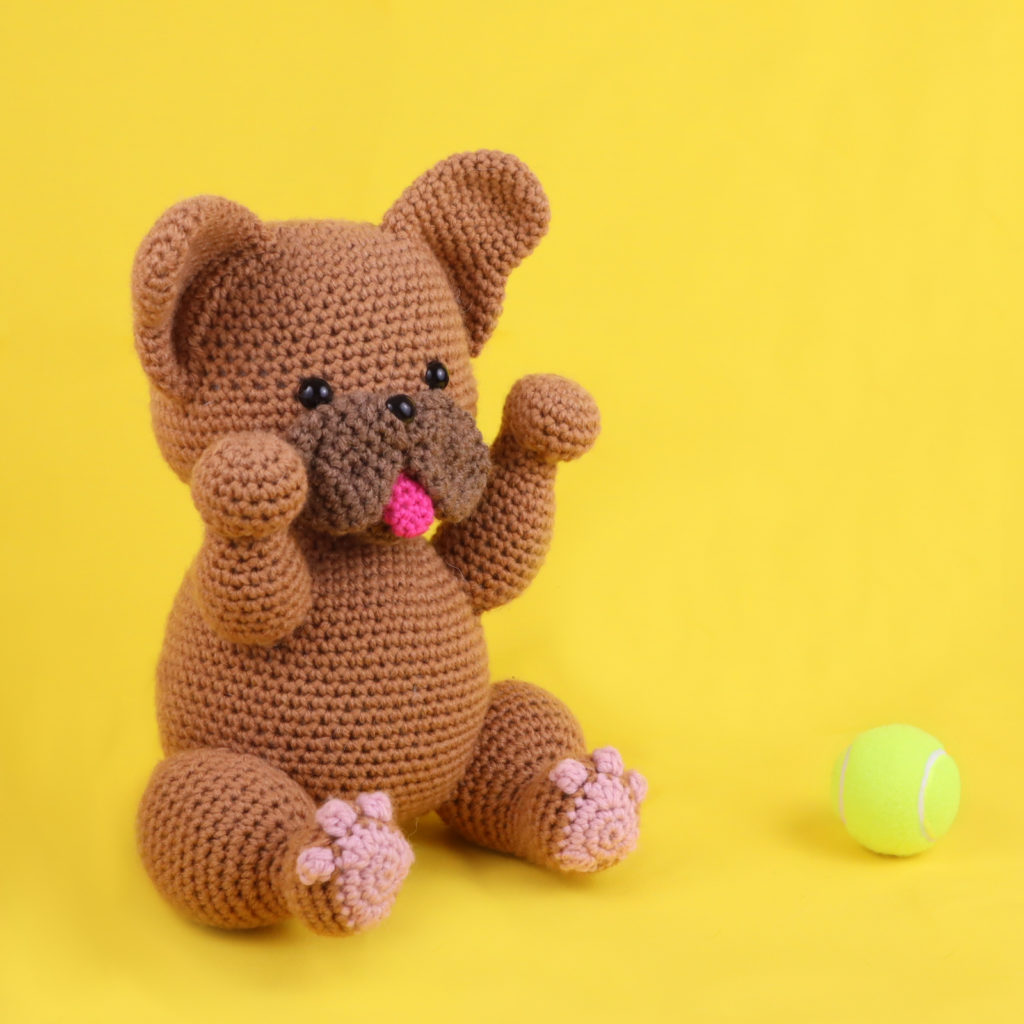
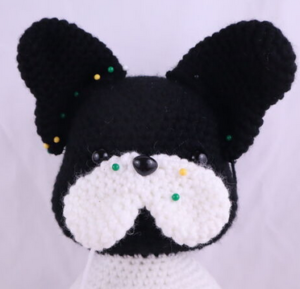
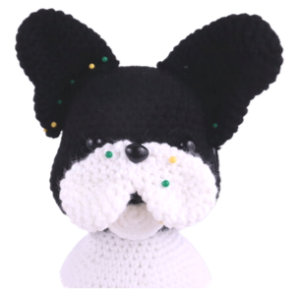
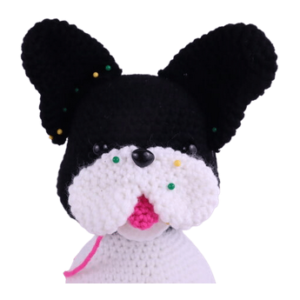
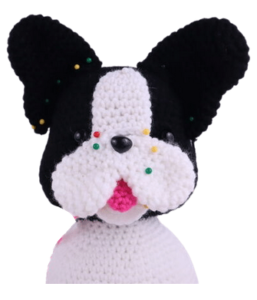
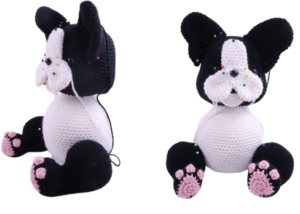
French Bulldog & Boston Terrier Amigurumi – Free Crochet Pattern
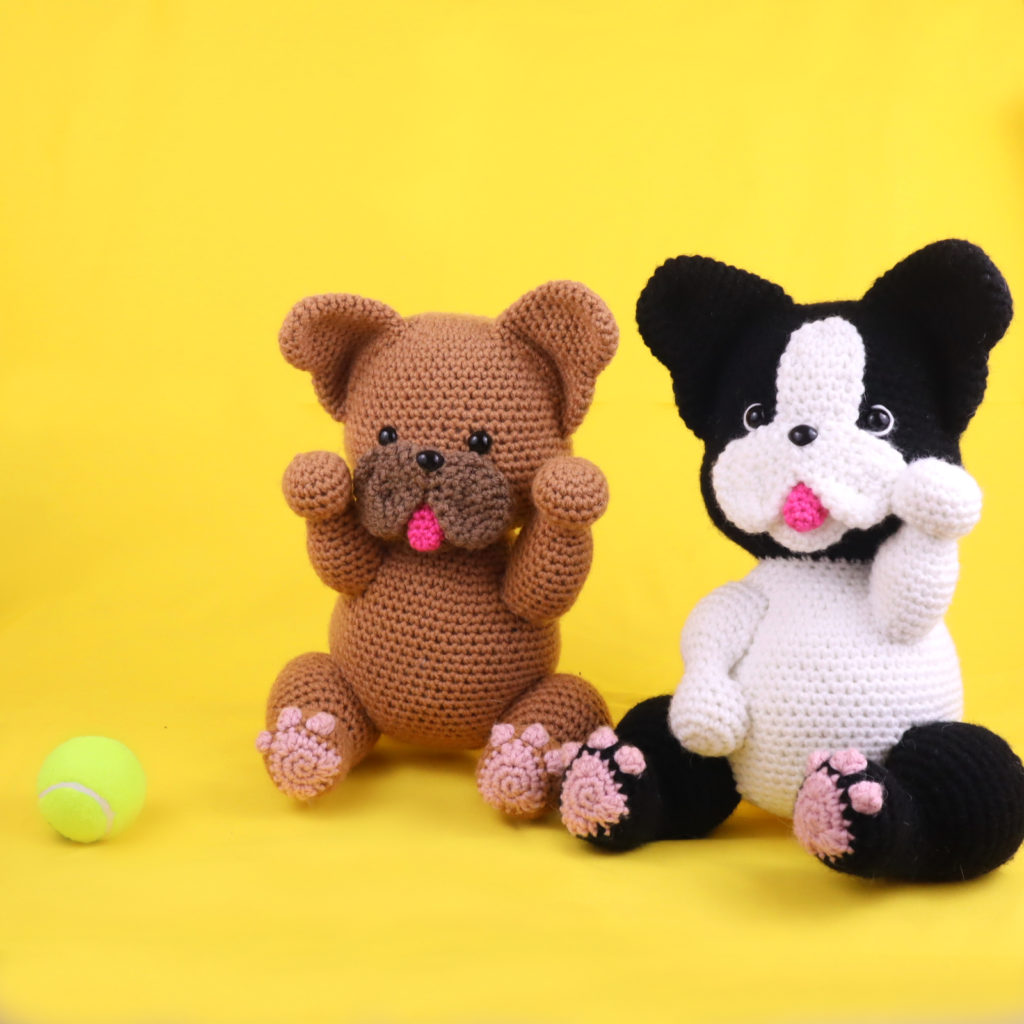
Hi there everyone! I decided that we need more dog patterns, because every time I make a dog pattern you guys really like them! A lot of the times I can turn one pattern into another, which is exactly what I did here 🙂 I first started with making a French Bulldog, then realized it could easily also be turned into a Boston Terrier. So here you go, another 2 in 1 pattern! A few weeks ago I had a horse pattern that could be turned into either a horse, donkey, or zebra. I hope you like when I do that with patterns!
French Bulldogs and Boston Terriers are super cute, I’m not sure if it’s their small size that makes them so lovable or if it’s because they have a small snout? Either way, they are loved by everyone from around the world. Do any of you have one of these dogs? If so, I’d love to see a picture of yours, post a picture in the comments!
Now let’s get into this week’s new pattern. I have to warn you that this is a more involved pattern, it uses a lot of sewing and making a lot of pieces. Let me know if you have any questions!
Print this pattern out! Purchase the PDF pattern here:
Supplies:
• Yarn 4/Medium Weight Yarn in…
Main Color for body, White for Boston Terrier nose, Dark Brown for French Bulldog nose, Pink for tongue. Light pink for feet.
• 4mm Crochet Hook
•12mm safety eyes
•12mm safety nose
•Tapestry needle
•Scissors
•Stuffing
Additional Information:
Difficulty: Intermediate
• Getting started
This pattern can be used to make both a French Bulldog and Boston Terrier, the only difference being what colors you use! To start, we will make the head, which will lead into the body. The head and body are worked in one continuous piece. Next, we will make all of the face pieces and sew them on. Then, we will make the legs, arms, tail, and collar!
• Important Tip
This pattern involves a lot of sewing. Take your time sewing each part, and make sure to sew on every part so it’s very secure.
• Recommended Yarns:
JoAnn Fabric’s “Big Twist” Yarn
Red Heart Super Saver Yarn
Hobby Lobby’s “I Love This Yarn!”
Head/Body:
In Main Color
Round 1: 6 Sc into a Magic Ring (6)
Round 2: *Inc* all around (12)
Round 3: *Inc, Sc* all around (18)
Round 4: *Inc, Sc 2* all around (24)
Round 5: *Inc, Sc 3* all around (30)
Round 6: *Inc, Sc 4* all around (36)
Round 7: *Inc, Sc 5* all around (42)
Round 8: *Inc, Sc 6* all around (48)
Round 9-17: *Sc* all around (48)
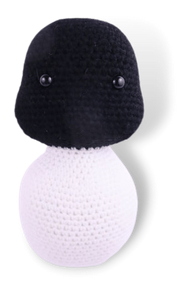
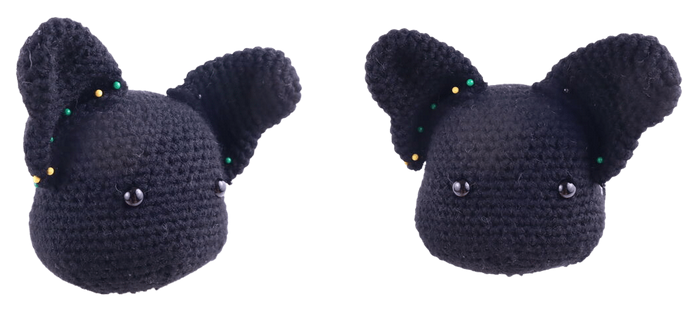
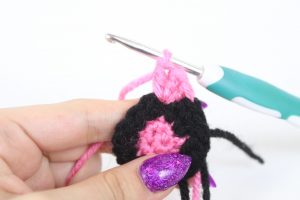
Now we will add 2 different colored eye stitch markers into Round 17. Add a marker in the 21th stitch, and another in the 28th stitch. These will mark where to place the eyes later.
Round 17 eye markers pictured above
Round 18: Sc in the next 10 st. Repeat *Inc, Sc in the next st* 4 times. Sc in the next 15 st. Repeat *Inc, Sc in the next st* 4 times. Sc in the next 7 st (56)
Round 19: Sc in the next 10 st. Repeat *Inc, Sc in the next 2 st* 4 times. Sc in the next 15 st. Repeat *Inc, Sc in the next 2 st* 4 times. Sc in the next 7 st (64)
Round 20-23: *Sc* all around (64)
Add eyes here
Round 24: Repeat *Dec, Sc in the next 18 st* 3 times. Dec 1 time, Sc in the last 2 st (60)
Round 25: *Dec, Sc 8* all around (54)
Round 26: *Dec, Sc 7* all around (48)
Round 27: *Dec, Sc 6* all around (42)
Round 28: *Dec, Sc 5* all around (36)
Round 29: *Dec, Sc 4* all around (30)
Round 30: *Dec, Sc 3* all around (24)
Stuff the head firmly now. If you’re making the Boston Terrier, change to white now.
Round 31: In the FLO (Front Loop Only), *Sc* all around (24)
Round 32: In BOTH Loops, *Sc* all around (24)
Round 33: *Inc, Sc 3* all around (30)
Round 34: *Sc* all around (30)
Round 35: *Inc, Sc 4* all around (36)
Round 36: *Inc, Sc 5* all around (42)
Round 37: *Inc, Sc 6* all around (48)
Round 38: *Inc, Sc 7* all around (54)
Round 39: *Inc, Sc 8* all around (60)
Round 40-57: *Sc* all around (60)
Round 58: *Dec, Sc 8* all around (54)
Round 59: *Dec, Sc 7* all around (48)
Round 60: *Dec, Sc 6* all around (42)
Round 61: *Dec, Sc 5* all around (36)
Stuff the body firmly here. Continue to stuff after each round.
Round 62: *Dec, Sc 4* all around (30)
Round 63: *Dec, Sc 3* all around (24)
Round 64: *Dec, Sc 2* all around (18)
Round 65: *Dec, Sc* all around (12)
Round 66: *Dec* all around (6)
Finish off, leaving a long tail for sewing. Sew the remaining stitches closed and weave in ends.
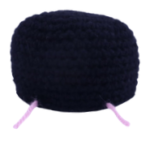
Ears: (Make 2)
In Main Color
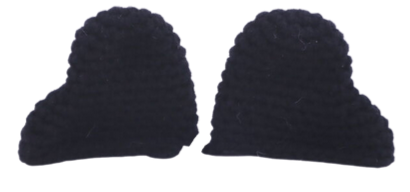
Round 1: 6 Sc into a Magic Ring (6)
Round 2: *Inc* all around (12)
Round 3: *Inc, Sc* all around (18)
Round 4-8: *Sc* all around (18)
Round 9: Sc in the next 6 st. *Inc* in the next 4 st. Sc in the next 8 st (22)
Round 10: Sc in the next 6 st. Repeat *Inc, Sc in the next st* 4 times. Sc in the next 8 st (26)
Round 11: Sc in the next 6 st. Repeat *Inc, Sc in the next 2 st* 4 times. Sc in the next 8 st (30)
Round 12-14: *Sc* all around (30)
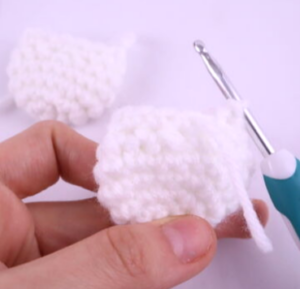
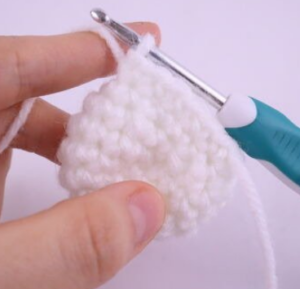
Finish off, leaving a long tail for sewing. Pin the ear onto the dog as shown, making sure to lightly bend the ear’s placement for a more realistic effect.
 Sew on, going from the next stitch on the head to the next stitch of the ear. Repeat this until the ear is fully sewn on. Weave in ends.
Mouth:
In White for Boston Terrier. In Dark Brown for French Bulldog
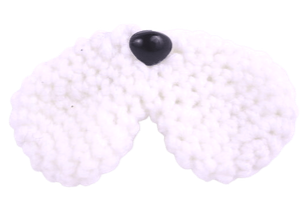
Now we will start making the top mouth! This is made by creating 2 separate circles. We will then crochet the circles together to form 1 entire piece. Let’s get started on the next page.
Round 1: 6 Sc into a Magic Ring (6)
Round 2: *Inc* all around (12)
Round 3: *Inc, Sc* all around (18)
Round 4-5: *Sc* all around (18)
Round 6: *Dec, Sc in the next st* all around (12)
Round 7: *Sc* all around (12)
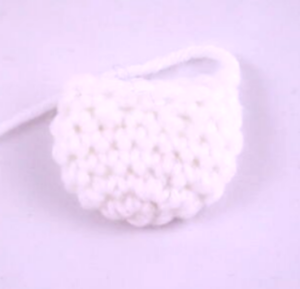
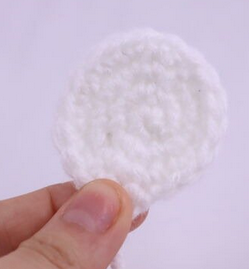
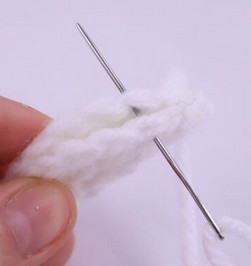
Finish off the first circle you make now (Pic 1). Make the second circle now, but DON’T finish off after Round 7. Instead, continue on to Round 8:
Round 8-9: Continuing on the second circle, Sc in the next 6 st (Pic 2-3). Now on the first circle you made, Sc in the next 12 st (Pic 4-5). Continuing on the second mouth, Sc in the last 6 st (Pic 6-8) (24)
1. 2.
2.
3. 4.
4.
5. 6.
6.
7. 8.
8.
Round 10: *Dec, Sc* all around (16)
Round 11: *Dec* all around (8)
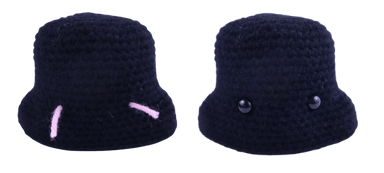
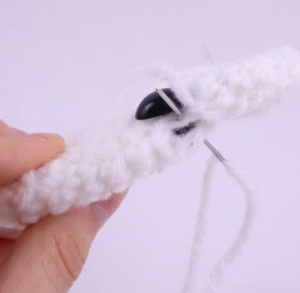
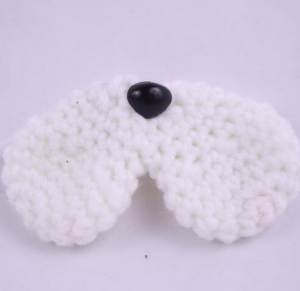
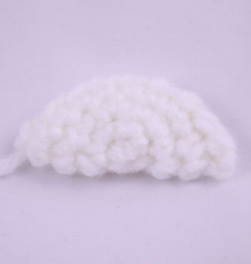
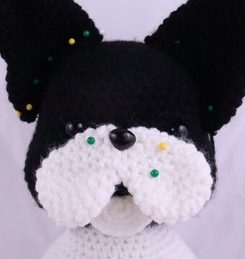
Finish off, leaving a long tail for sewing. Place a 12mm safety nose into the top middle of the mouth mask as shown (Pic 9). Sew the remaining stitches closed (Pic 10). Pin the mask onto the dog as shown, below the eyes (Pic 12). Sew on and weave in ends.
9. 10.
10.
11. 12.
12.
NOTE: When sewing the mouth on, only sew the top half on (where we connected the mouths together). We need to leave the two flaps not sewed on so they look more realistic! This will also give us room to place the tongue under the mouth. We can’t do that if we sew the flaps down.
Bottom Mouth:
In Dark Brown for French Bulldog. In White for Boston Terrier
Round 1: 6 Sc into a Magic Ring (6)
Round 2: *Inc* all around (12)
Round 3: *Inc, Sc* all around (18)
Round 4: *Sc* all around (18)
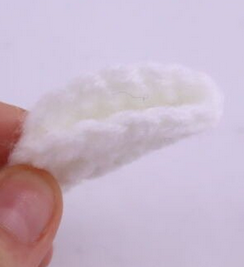
Finish off, leaving a long tail for sewing. You will have a circle (Pic 1), fold the circle in half as shown (Pic 2). Place the tail end of yarn onto a needle and sew the circle in half as shown (Pic 3-4). Pin the bottom mouth to the dog as shown (Pic 5), making sure the round part faces down and the flat part is by the tongue. Sew on and weave in ends.
1. 2.
2.
3. 4.
4.
5.
Tongue:
In Pink
Round 1: 6 Sc into a Magic Ring (6)
Round 2-5: *Sc* all around (6)
Finish off, leaving a long tail for sewing. Pin the tongue between the top and bottom mouth and sew on. Make sure to sew on underneath the top mouth, not to the top mouth, as that will show.
Face Patch: (Only do for Boston Terrier)
In White
Round 1: 6 Sc into a Magic Ring (6)
Round 2: *Inc* all around (12)
Round 3-9: *Sc* all around (12)
Finish off, leaving a long tail for sewing. Pin the patch above the nose, as shown. Make sure you pin it on centered! Sew on and weave in any ends.
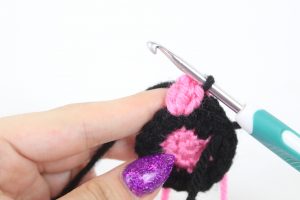
Legs: (Make 2)
Start in Pink
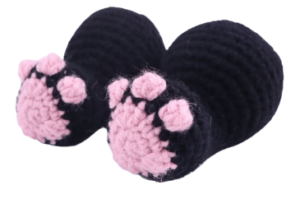
Round 1: 6 Sc into a Magic Ring (6)
Round 2: *Inc* all around (12)
Round 3: Dc 3 times into the next st. Sc in the next 3 st. Dc 3 times into the next st. Sc in the next 4 st. Dc 3 times into the next st. Loosely SlSt in the last 2 st (18)
Round 4: Change to Main Color. *Sc* all around (18)
Round 5: Inc in the next st, Sc in the next 2 st. Inc in the next st, Sc in the next st.
Repeat *Change to pink, 3 dc in the next st (Pic 1), Remove hook from current st and insert it into the first Dc made (Pic 2). Now also insert your hook into the current working loop (Pic 3). Yarn over with Main Color (Pic 4) and pull through both loops (Pic 5-6). This makes 1 popcorn st. Now continuing in Main Color, Inc in the next st (Pic 7)* 3 times, Sc in the next 7 st (23)
1. 2.
2.
3. 4.
4.
5. 6.
6.
7. 8.
8.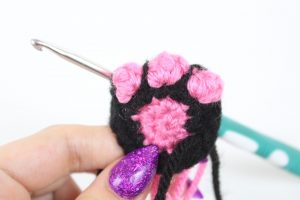
Round 6: Sc next 7 st. Repeat *Sc over the next popcorn St. Sc in the next 2 st* 3 times, Sc in the next 7 st.
Note: we made a total of 3 popcorn stitches in the previous round. Simply Sc where each popcorn stitch is (Pic 1-2). (23)
1. 2.
2.
Round 7: *Sc* all around (23)
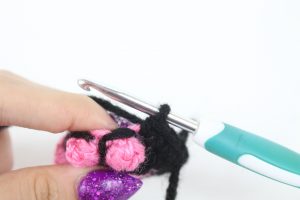
Round 8: Sc in the next 6 st, *Dec* 6 times, Sc in the last 5 st (17)
Round 9: Sc in the next 6 st, *Dec* 3 times, Sc in the last 5 st (14)
Round 10-12: *Sc* all around (14)
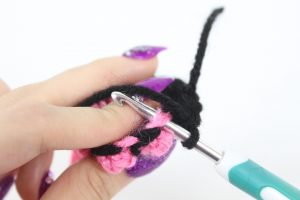
Round 13: Sc in the next 6 st, *Inc* in the next 6 st, Sc in the last 2 st (20)
Round 14: Sc in the next 6 st, Repeat *Inc, Sc* 6 times, Sc in the last 2 st (26)
Round 15: Sc in the next 6 st, *Inc, Sc 2* 6 times, Sc in the last 2 st (32)
Round 16-22: *Sc* all around (32)
Round 23: Repeat *Dec, Sc 3* 6 times. *Dec* 1 time (25)
Round 24: *Dec, Sc 2* 6 times. Sc in the last st (19)
Stuff firmly here. Continue stuffing after each round.
Round 25: *Dec, Sc* 6 times. Sc in the last st (13)
Round 26: *Dec* 6 times. Sc in the last st (7)
Finish off, leaving a very long tail for sewing. Pin each leg on as shown. It looks more realistic to have the legs slightly tilted to the outer sides! Sew on, taking your time. To sew, remember to go from 1 stitch in the toy’s leg, to the next closest stitch in the toy’s body. Once fully sewed on, weave in ends.
Arms: (Make 2)
In Main Color
NOTE: These are supposed to look like the arms are begging. Try to place them with that in mind 🙂
Round 1: 6 Sc into a Magic Ring (6)
Round 2: *Inc* all around (12)
Round 3: *Inc, Sc* all around (18)
Round 4-6: *Sc* all around (18)
Round 7: Sc in the next 3 st. *Dec* 6 times. Sc in the last 3 st (12)
Round 8: Sc in the next 3 st. *Dec* 3 times. Sc in the last 3 st (9)
Round 9: Sc in the next 3 st. In the FLO *Inc* in the next 3 st. In BOTH loops Sc in the last 3 st (12)
Stuff firmly here.
Round 10-11: *Sc* all around (12)
Round 12: *Inc, Sc* all around (18)
Round 13-17: *Sc* all around (18)
Stuff firmly here. Continue stuffing after each round.
Round 18: *Dec, Sc* all around (12)
Round 19: *Dec* all around (6)
Finish off, leaving a long tail for sewing. Pin the arms on as shown! Make sure the arms are pinned more on the outside of the body rather than the inside. This will make them look more like they’re begging arms.
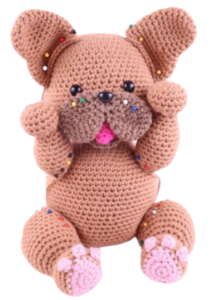
You can also pin one arm down for a more regular dog arm. Just pin on as seen in the picture below!

Tail:
In Main Color
Round 1: 6 Sc into a Magic Ring (6)
Round 2: *Sc* all around (6)
Round 3: *Inc* all around (12)
Round 4: *Inc, Sc in the next 5 st* 2 times (14)
Round 5-7: *Sc* all around (14)
Finish off, leaving a long tail for sewing. Pin the tail on to the back of the toy as shown. Sew on, be sure to add a small amount of stuffing before completely sewing closed! Once done, weave in ends.
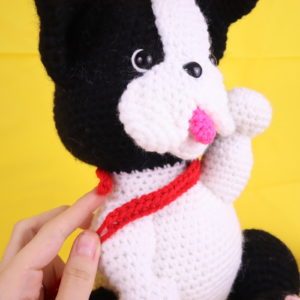
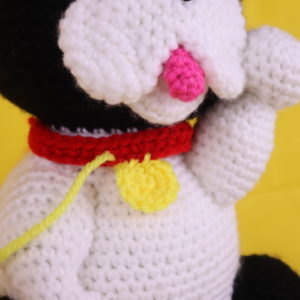
Collar:
In Any Color
Row 1: Ch 35 (or however many chains are needed until the chain fits around the toy’s neck). Sc in the 2nd Ch from the hook. Sc in the remaining 33 chains (34)
Finish off, leaving a tail for sewing. Place the strip around the toy dog’s neck as shown (Pic 2). Each end of the strip will meet as shown. Sew the ends together with the remaining tail end of yarn (Pic 3-4). Once it’s sewed together, weave in ends.
1. 2.
2.
3. 4.
4.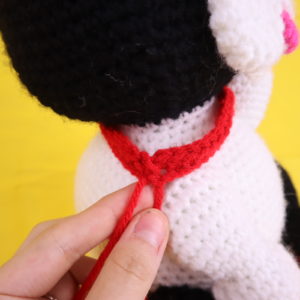
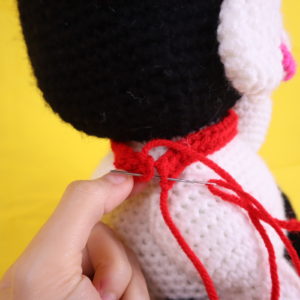
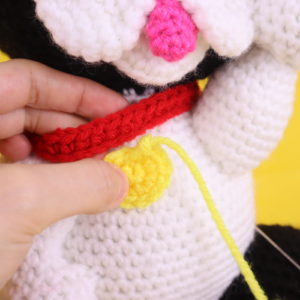
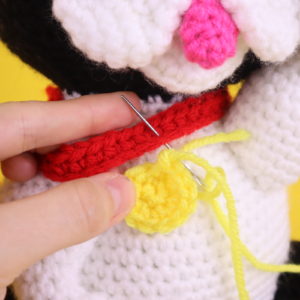
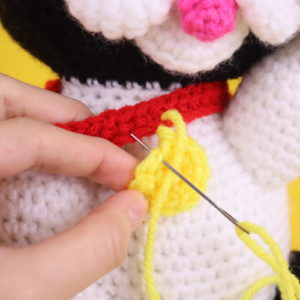
Tag:
In Yellow

Round 1: 6 Sc into a Magic Ring (6)
Round 2: *Inc* all around (12)
Finish off, leaving a long tail for sewing. Place the tag next to the middle of the collar as shown (Pic 1). Sew on, going from the collar, then to the next stitch on the tag a total of 3 times (Pic 2-4). Once it’s fully sewn on, weave in ends! (Add a name or initials, use puffy paint for an easier time!)
Done! If you made one of these dogs I would LOVE to see! You can show me by posting a picture in the comments below this post 🙂


22 Comments
For the bulldog/terrier. There are several missing steps on the head. 20&21, 32&33, and 61-67. Other then that can’t wait to make one or both of these Thank you
Hi there HeatherJean, thank you so much for letting me know! I looked at the rounds mentioned and from what I can see it looks like Rounds 20 & 21 are there, but I could be misunderstanding at that part, please let me know! 🙂
As for Rounds 32 & 33 I added them in, it’s a *Sc* all around round, and then an increase round! Rounds 61-67 are the same, but the Round number had a typo! So I went ahead and fixed the Round numbers to be correct 😍 Thank you so much for letting me know, I truly truly appreciate it!
They are adorable. Thanks for sharing.
Oh my gosh this is soooo cute! I can’t say enough how adorable of a job you did on making your dog 🙂 It looks super good, I hope you had a fun time making it. Thank you so much for sharing, it’s so cute!!! 😍
Lovely patten. Good instructions and easy to follow. Done the Boston terrier in dark brown and white. Really happy with the final outcome
Hi there, Sandra! Oh my gosh this came out SO cute! I love yours soooo much 😍 It looks so professional and it’s very well made! You’re really talented when it comes to crochet… whatever your crochet secrets are, I want to know! I’m really glad that you had a nice time with the pattern, too. That’s wonderful to hear 🙂 Thank you so much for sharing a picture!
Hola! Cuanto mide al finalizar? Me podrás decir, gracias!
When completed what what size will they be. I just love the pattern and look forward to making it.
Hi! I’m super excited to make this dog pattern. Can anyone tell me the finished size of the dog?
This was very fun to make! (I’m still new to crocheting so it’s not exactly the same)
I just love this pattern because the results are so cute as you can see…thanks so much for sharing it!
Merci pour ce partage j espère faire aussi bien que vous
Hi Sandra I am looking for to making a boston terrier. We had a puppy that passed away a few years back. I am send photo of Coco
Still a new-bee @ this, so had’ta skip the foot pads, but here’s my rainbow frenchie 🤩 almost as cute as my real-life one!
Lhasa Apso- everyone does the other dogs and even a Shih Tzu but our Lhasa is the world to us and I wish all could have a dog like him. A phone call we got after giving up because scammers were scamming pets especially dogs and asking outrageous prices AND then they were always wanted payment BEFORE we can see the dog. I tried and tried and said I cannot give the money and just let one ad in and doubted anything would happen but within 2 weeks we got the call and we went through the snow storm to bring home our 2 year old wild boy who was not taken inside and was catching wild turkeys to eat.
He is perfect for us and I sleep in a wheelchair because of brittle bone disease I was born with and husband sleeps next to me on the bed. Our Cooper now sleeps between us both and is so gentle with me… <3
I know you are long past this site but maybe if you do peek in- who knows~
Blessings All <3 <3 <3
Super cute pattern – what’s the finished size?
Supermooi patroon en duidelijk. Toppie!
Very cute! I had fun!
He turned out cute
Thanks for this spectacular pattern. I’m really pleased with how he turned out.
Thanks for the pattern!
Our mother is currently unfortunately in the hospital and even more than us, she misses Ayla the little dog from my sister. Because Ayla is not allowed to join her in the hospital, I crocheted her one to cuddle.
Leuk om te maken ❤️