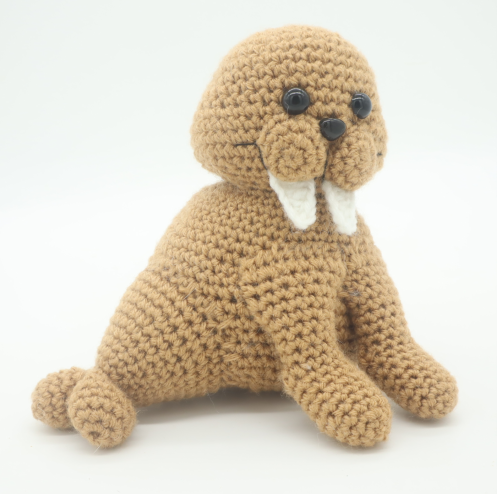
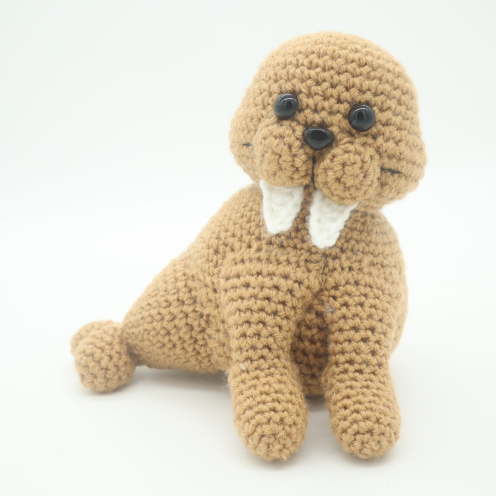
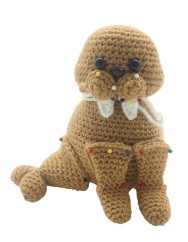
Cute Walrus Amigurumi – Free Crochet Pattern
Print this pattern out – purchase the PDF here!

 Supplies:
• Yarn 4/Medium Weight Yarn in…
Brown and white
•4mm Crochet Hook
•12mm Safety eyes, 12mm safety nose
•Tapestry needle
•Scissors
•Black Embroidery Thread
Additional Information:
•Difficulty: Intermediate
•Size: 7″ long from end to end, 6″ tall from top to bottom
Invite this cute walrus to live with you and he won’t even ask you for fish! This pattern has a few techniques which are great for beginner crocheters to learn! Such as how working in short rows and crocheting two pieces together.
Let’s get started!
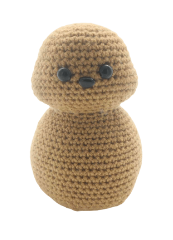
Walrus Body:
In Brown
 Round 1: 6 Sc into a Magic Ring (6)
Round 2: *Inc* all around (12)
Round 3: *Inc, Sc in the next st* all around (18)
Round 4: *Inc, Sc in the next 2 st* all around (24)
Round 5: *Inc, Sc in the next 3 st* all around (30)
Round 6: *Inc, Sc in the next 4 st* all around (36)
Round 7-11: *Sc* all around (36)
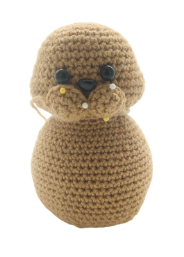
Now we will mark where to place the safety eyes. Add a different colored stitch marker into the 18th and 23rd stitch in Round 11.
Round 12: Sc in the next 7 st. *Inc* in each of the next 6 st. Sc in the next 11 st. *Inc* in each of the next 6 st. Sc in the next 6 st (48)
Round 13: *Sc* all around (48)
Now we will mark where to place the safety nose. Add a different colored stitch marker into the 26th stitch in Round 13.
Round 14-15: *Sc* all around (48)
Round 16: Sc in the next 8 st. *Dec* 6 times. Sc in the next 12 st. *Dec* 6 times. Sc in the next 4 st (36)
Round 17: Repeat *Dec, Sc in the next 4 st* all around (30)
Round 18: Repeat *Dec, Sc in the next 3 st* all around. Make another Sc into the last st, this will create an increase in the last stitch (25)
Round 19: In the Front Loop Only, repeat *Inc, Sc in the next 2 st* 2 times. Inc in the next st, Sc in the next st. In BOTH loops, repeat *Dec, Sc in the next 2 st* 3 times. In the Front Loop Only, Sc in the next 2 st, Inc in the next st, Sc in the next 2 st (26)
Round 20: In BOTH loops, repeat *Inc in the next st, Sc in the next 2 st* 3 times. In the FLO, Inc in the next 4 st, Sc in the next 2 st, Inc in the next 2 st, Sc in the next 2 st, Inc in the next 4 st. In BOTH loops, Sc in the next 3 st (39)
Round 21: Repeat *Inc, Sc in the next 2 st* 4 times. Sc in the next st. Repeat *Inc, Sc in the next st* 2 time. Sc in the next 13 st. Repeat *Inc, Sc in the next st* 2 times. Sc in the next 5 st (47)
Round 22-25: *Sc* all around (47)
Round 26: Repeat *Inc, Sc in the next 6 st* 6 times. Sc in the next 3 st. *Dec* 1 time (52)
Round 27-35: *Sc* all around (52)
Round 36: *Dec, Sc in the next 7 st* all around (48)
Round 37: *Dec, Sc in the next 6 st* all around (42)
Round 38: *Dec, Sc in the next 5 st* all around (36)
Round 39: *Dec, Sc in the next 4 st* all around (30)
Round 40: *Dec, Sc in the next 3 st* all around (24)
Round 41: *Dec, Sc in the next 2 st* all around (18)
Round 42: *Dec, Sc in the next st* all around (12)
Round 43: *Dec* all around (6)
Finish off now, leaving a long tail for sewing. Sew the remaining stitches shut and weave in ends. Cut any excess yarn.
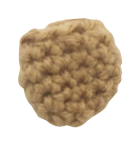
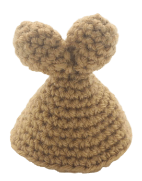
Cheeks: (Make 2)
In Brown
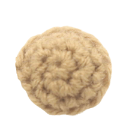
Round 1: 6 Sc into a Magic Ring (6)
Round 2: *Inc* all around (12)
Round 3: *Sc* all around (12)
Finish off, leaving a long tail for sewing. Pin the cheeks on as shown and sew on. Weave in ends and cut any excess yarn.
Teeth: (Make 2)
In White
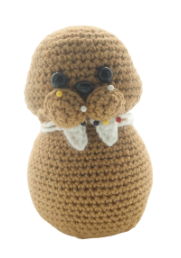
Row 1: Ch 5. Sc in the 2nd Ch from the hook. Hdc in the next st, Dc in the next 2 st. Finish off, leaving a long tail for sewing. Pin the teeth on as shown and sew on. Once sewn on, weave in ends and cut any excess yarn.
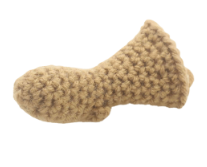
Tail Fins: (Make 2)
In Brown
Round 1: 6 Sc into a Magic Ring (6)
Round 2: *Inc* all around (12)
Round 3-5: *Sc* all around (12)
Finish off the first tail here. Don’t finish off the second tail piece! Instead, continue with the next round.
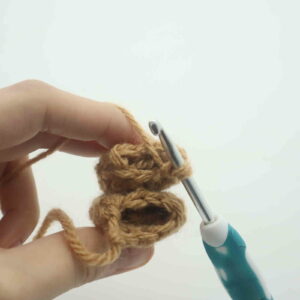
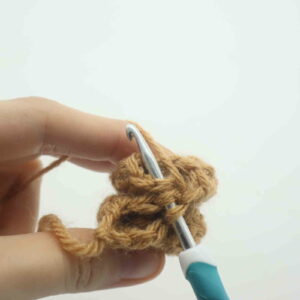
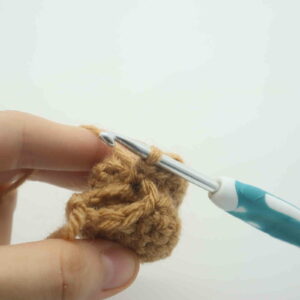
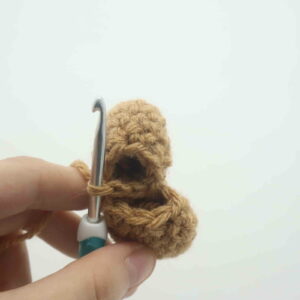
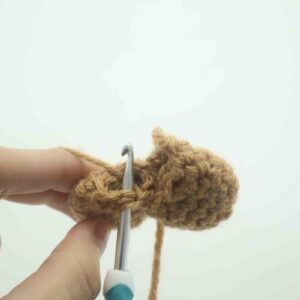
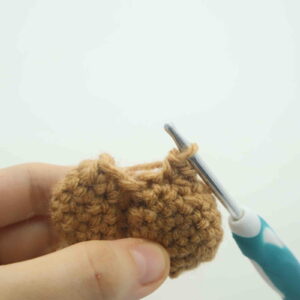
Round 6: Sc in the next 3 st. Align the first and second tail piece together so the stitches align as shown (Pic 1). Going through BOTH stitches of the tail pieces, Sc the next 3 st together (Pic 2-4). Now continuing on the left tail piece (Pic 5), Sc in the next 5 st. Now continuing on the other tail piece, Sc in the next 2 st (Pic 6).
(Stitch count: 10, do not count the 3 stitches connecting the tails)
1. 2.
2. 3.
3. 4.
4. 5.
5. 6.
6.
Round 7: Sc in the next 3 st. Skip the middle part that connects the tails. Continuing on the other tail fin, Inc in the next st, Sc in the next 4 st. On the other tail fin, Inc in the next st, Sc in the next st (12)
Round 8: Repeat *Inc, Sc in the next st* all around (18)
Round 9-10: *Sc* all around (18)
Round 11: Repeat *Inc, Sc in the next 2 st* all around (24)
Round 12-13: *Sc* all around (24)
Round 14: *Inc, Sc in the next 3 st* all around (30)
Round 15-16: *Sc* all around (30)
Finish off, leaving a long tail of yarn for sewing. Pin the tail on as shown and sew on, making sure to add stuffing to the tail before fully sewing closed. Once done, weave in ends and cut any excess yarn.
Arms: (Make 2)
In Brown
Round 1: 6 Sc into a Magic Ring (6)
Round 2: *Inc, Sc in the next st* all around (9)
Round 3: *Inc, Sc in the next 2 st* all around (12)
Round 4-9: *Sc* all around (12)
Now we will briefly work in rows. This will turn the hand into the arm.
Row 10: Ch 1 and turn. Sc in the next 6 st.
Row 11: Ch 1 and turn. *Dec* 1 time, Sc in the next 2 st, *Dec* 1 time
Round 12: Continuing on the leg, Sc in the next 6 st. On the row, Sc in the next 4 st (10)
Round 13-15: *Sc* all around (10)
Round 16: Repeat *Inc, Sc in the next 3 st* 2 times. Inc in the next st, Sc in the next st (13)
Round 17-18: *Sc* all around (13)
Round 19: *Inc, Sc in the next 3 st* 3 times. Sc in the next st (16)
Round 20: Sc in the next 4 st. Repeat *Inc, Sc in the next 3 st* 3 tines (24)
Finish off, leaving a long tail for sewing. Stuff the hand and arm firmly. Leave the top half of the arm lightly stuffed, this makes the arm sit closer to the body. Pin the arms as shown and sew on. Weave in ends, cutting any excess yarn.
Smile:
In Black Embroidery Thread
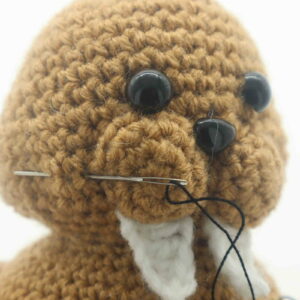
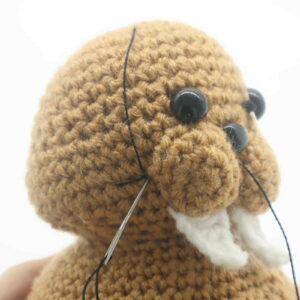
Insert needle with thread into the side of the toy’s left cheek and pull out a few stitches to the left (Pic 1). Reinsert needle into the original insertion spot (Pic 2). Pull needle out at the middle of the toy’s mouth as shown (Pic 3).
1. 2.
2. 3.
3.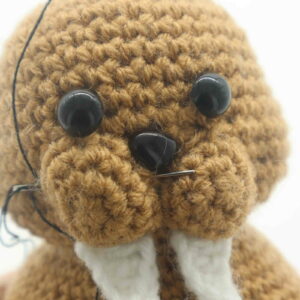
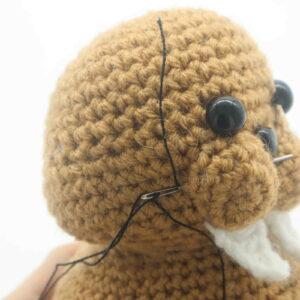
Reinsert needle at the left toy’s cheek area as shown (Pic 4). Pull needle out at the middle mouth area once again as shown in Pic 3. Now insert needle into right cheek area as shown, pulling needle out a few stitches to the right (Pic 5). Reinsert needle a few stitches to the left as shown (Pic 6). Tie both ends of yarn into a firm knot. Bring the knot inside the toy, cut excess yarn.
4. 5.
5.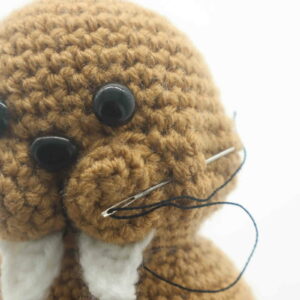 6.
6.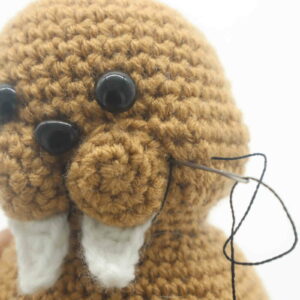 7.
7.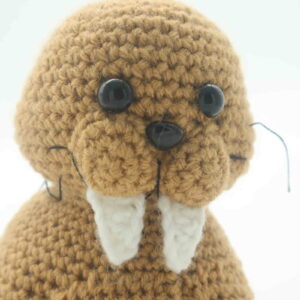
Done! If you made this walrus, I would love to see! You can show me by posting a picture of it in the comments underneath this post 🙂


