Frog on a Swing Amigurumi – Free Crochet Pattern
Print this pattern out – purchase the PDF here!

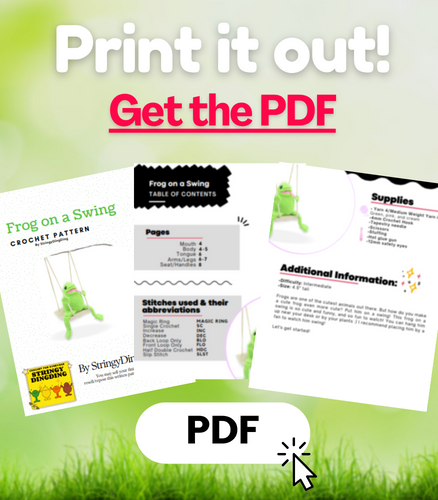
 Supplies:
• Yarn 4/Medium Weight Yarn in…
Green, pink, and cream
•4mm Crochet Hook
•Tapestry needle
•Scissors
•Stuffing
•Hot glue gun
•12mm safety eyes
Additional Information:
•Difficulty: Intermediate
•Size: 4″ tall
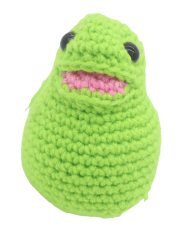
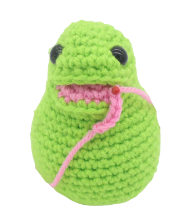
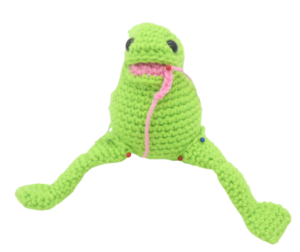
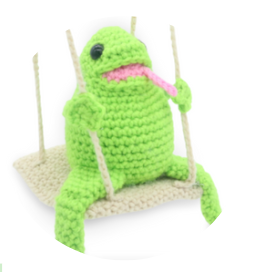
Frogs are one of the cutest animals out there. But how do you make a cute frog even more cute? Put him on a swing! This frog on a swing is so cute and funny, and so fun to watch! You can hang him up near your desk or by your plants 🙂 I recommend placing him by a fan to watch him swing!
Let’s get started!
Mouth: (Make First)
In Pink
Round 1: 6 Sc into a Magic Ring (6)
Round 2: *Inc* all around (12)
Round 3: *Inc, Sc in the next st* all around (18)
Finish off, leaving a long tail for weaving in ends.
Body:
In Green
Round 1: 6 Sc into a Magic Ring (6)
Round 2: *Inc* all around (12)
Round 3: *Inc, Sc in the next st* all around (18)
Round 4: *Sc* all around (18)
Round 5: *Inc, Sc in the next 2 st* all around (24)
Now we will mark where to place the safety eyes. Add a different colored eye stitch marker into the 7th and 15th stitch in Round 7.
Round 6: *Sc* all around (24)
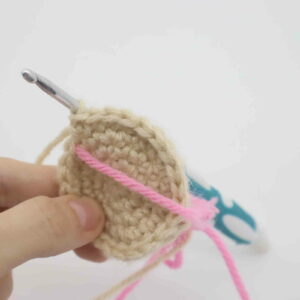
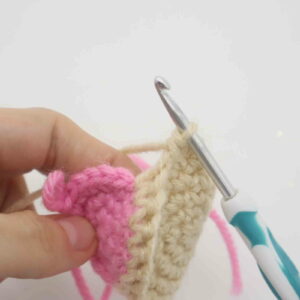
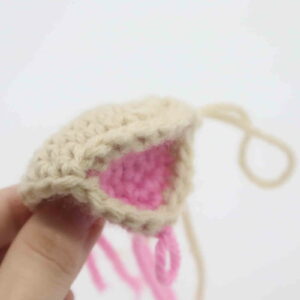
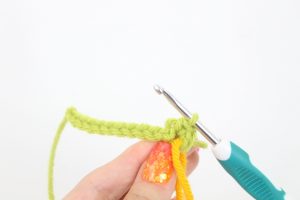
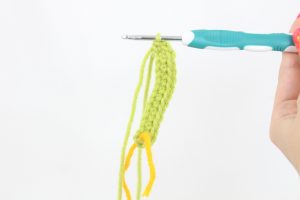
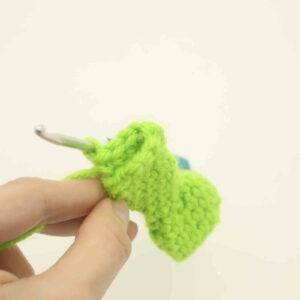
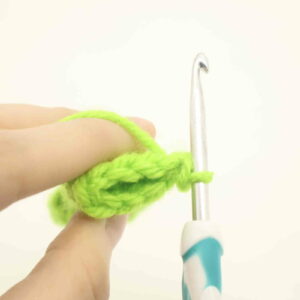
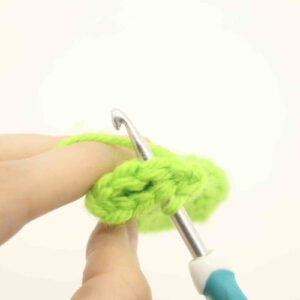
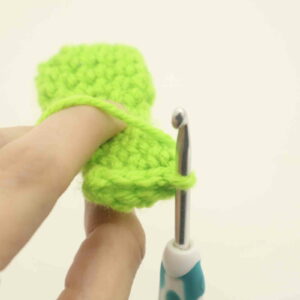
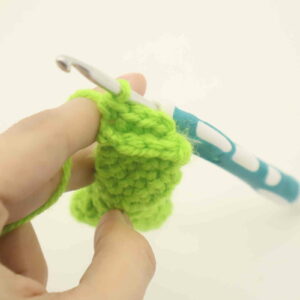
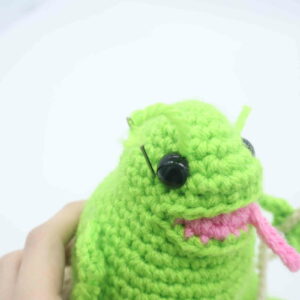
Round 7: Sc in the next 7 st (Pic 1). Align the pink circle’s stitches to the frog as shown (Pic 2). Going through BOTH the pink circle’s stitches and the frog’s stitches, Sc in the next 8 st (Pic 3-4). Working on just the frog now (Pic 5), Sc in the next 9 st (Stitch count: 24 stitches made)
1.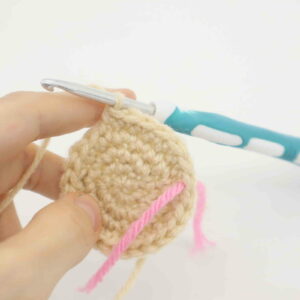 2.
2.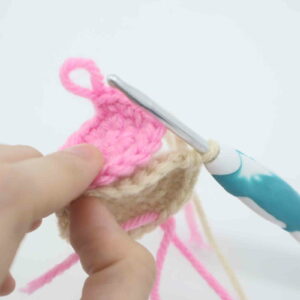 3.
3.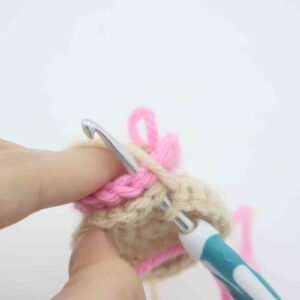 4.
4.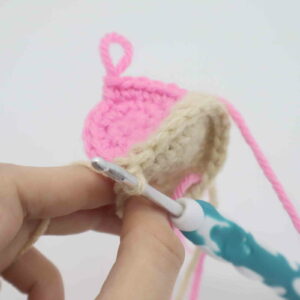 5.
5.
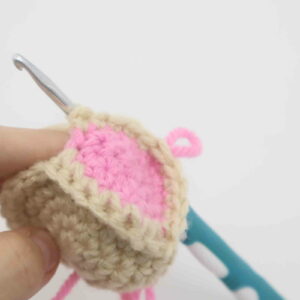
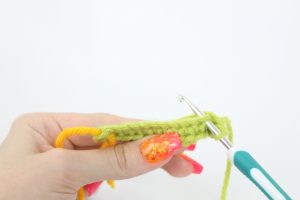
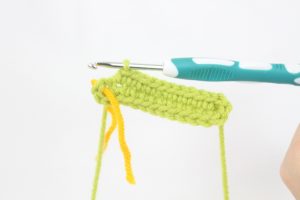
Round 8: Sc in the next 7 st. Now working on the next stitch on just the pink circle, Sc in the next 10 st (Pic 2-3). Working back onto the frog (Pic 4), Sc in the next 9 st (Stitch count: 26 stitches made. Pic 5 shows how the mouth will look at the end of this round.)
1. 2.
2. 3.
3. 4.
4. 5.
5.
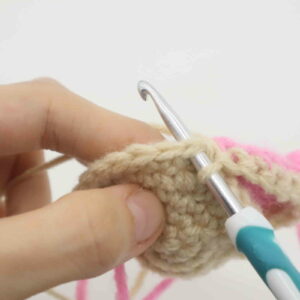
Round 9: Sc in the next 7 st. Working in the BLO (Back Loop Only), Sc in the next 2 st, *Dec* 3 tines, Sc in the next 2 st. Now working in BOTH loops, Sc in the next 9 st (23)
Round 10: Sc in the next 22 st. Inc in the last st (24)
Round 11: *Inc, Sc in the next 3 st* all around (30)
Add the safety eyes into the marked areas now.
Round 12: *Inc, Sc in the next 4 st* all around (36)
Round 13-20: *Sc* all around (36)
Round 21: *Dec, Sc in the next 4 st* all around (30)
Round 22: *Sc* all around (30)
Round 23: *Dec, Sc in the next 3 st* all around (24)
Stuff the body firmly now. Continue stuffing after each round.
Round 24: *Dec, Sc in the next 2 st* all around (18)
Round 25: *Dec, Sc in the next st* all around (12)
Round 26: *Dec* all around (6)
Finish off, leaving a long tail for sewing. Sew the remaining stitches closed and weave in ends. Cut any excess yarn.
Tongue:
In Pink
Row 1: Ch 6.
Finish off, leaving a long tail of yarn for sewing. Pin the tongue on as shown and sew or hot glue on. Once done, weave in ends and cut any excess yarn.
Legs: (Make 2)
In Green
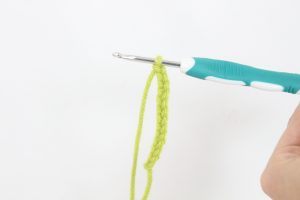
Row 1: Ch 7 (Pic 1).
1.
Sc in the 2nd Ch from the hook (Pic 2),
2.
Sc in the next 4 st, Inc in the last st. Now we meet the end of the chain (Pic 3).
3.
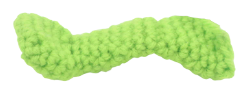
Working on the OTHER side of the chain, where we haven’t made any stitches yet (Pic 4), Sc in the next 3 st, Inc in the last st (Pic 5, Stitch count: 12)
4. 5.
5.
Round 2-4: *Sc* all around (12)
Round 5: Repeat *Dec, Sc in the next st* all around (8)
Round 6: Sc in the next 5 st. Working in the FLO (Front Loop Only), Sc in the next 3 st (8)
Round 7: Sc in the next st. Working in the BLO, Sc in the next 4 st. Working in both loops, Sc in the next 3 st (8)
Round 8-15: *Sc* all around (8)
Round 16: Align the stitches of the leg together as shown (Pic 1-2).
1. 2.
2.
Working through BOTH sides of the leg at the same time (Pic 3), SlSt in the next 4 st (4)
3. 4.
4.
Round 17: Ch 1 and turn (Pic 1). Working on the other side, Sc in the next 4 st (Pic 2). You will see stitches on the opposite side (Pic 3), working through those stitches, Sc in the next 4 st (Pic 8 shoes how it will look after Round 17. Stitch Count: 8)
1. 2.
2. 3. 4.
3. 4.
Round 18: *Inc, Sc in the next 3 st* all around (10)
Round 19: *Inc, Sc in the next 4 st* all around (12)
Round 20-22: *Sc* all around (12)
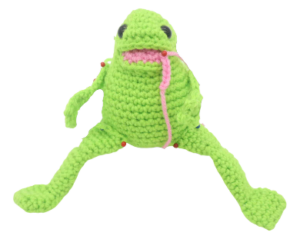
Finish off, leaving a long tail for sewing. I didn’t stuff the leg, but you can if you’d like. Pin the legs on as show and sew on. Once sewn on, weave in ends and cut any excess yarn.
Arms: (Make 2)
In Green

Round 1: 6 Sc into a Magic Ring (6)
Round 2: Repeat *SlSt in the next st, Hdc in the same st, SlSt in the same st* 3 times. SlSt in the next 2 st. Chain 10. Hdc in the 2nd Ch from the hook, Hdc in the next 4 st. SlSt in the next 2 st, Hdc in the next 3 st. Working back on the hand, SlSt in the next st.
Finish off, leaving a long tail for sewing. Pin the arms on as shown, making sure the arms face outwards and can grasp the swing’s handles. Now sew/hot glue on. (I tied a piece of yarn around the middle of the toy’s arm and cut the excess yarn for a more defines arm. This is optional)
Seat:
In Cream Color
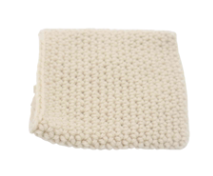
Round 1: Ch 19. Sc 2 times into the 2nd Ch from the hook. Sc in the next 16 ch. Inc in the last ch in last. Now turn to the other side, where we haven’t made any stitches yet. Sc in the next 16 st (36)
Round 2-20: *Sc* all around (36)
Finish off now, leaving a long tail for sewing. Sew the remaining stitches closed and weave in ends.
Handles: (Make 2)
Row 1: Ch 82. Finish off, leaving a long tail for sewing. Sew the handles in place, or place a small strip of hot glue in the area and place the end of the handle over the glue, lightly holding in place for about 20 seconds.
Eyelids:
In Green
Bring a piece of green yarn next to the right side of the toy’s right eye (Pic 1), then insert the needle on the left side of the toy’s right eye (Pic 2). Pull the needle out at the right side of the toy’s left eye (Pic 3), and insert the needle into the left side of the toy’s left eye (Pic 4). Once done, tie the ends of yarn into firm knots and bring the knots inside the frog to hide. Cut any excess yarn.
1.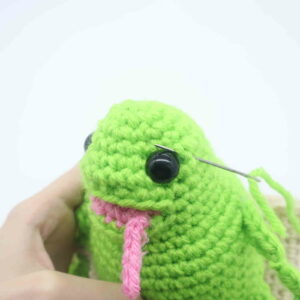 2.
2.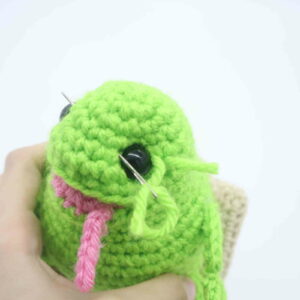 3.
3.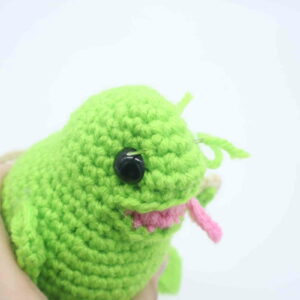 4.
4.
Done! If you made a frog on a swing, I would LOVE to see! You can show me by posting a picture in the comments section underneath this post 🙂


4 Comments
Thank you for such a fun cute project, hopefully he won’t bump too many heads at the doorway – LOL !
I can’t see to figure out attaching the mouth to the head. I come up with the right amount of stitches but there is a gap of unworked stitches not connecting the mouth and head. Any tips??
Had a little trouble with this one but it is complicated. Super cute though! Thank you!
Same Pattern different personalities