
Gingerbread Man Applique/Ornament – Free Christmas Crochet Pattern
Print this pattern out – purchase the PDF version here!


 Supplies:
• Yarn 4/Medium Weight in…
Brown
•4mm Crochet Hook
•Tapestry needle
•3mm safety eyes or beads
•Scissors
•Sewing Pins (Optional for blocking)
•White puffy paint
Additional Information:
Difficulty: Intermediate
• Let’s Get Started!
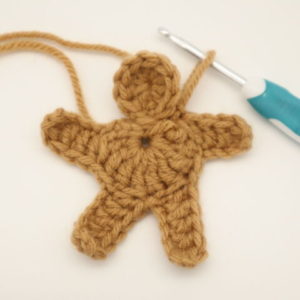
This gingerbread man is all made in one piece.
First, we will make a chain, then connect the chain to form a circle. Next, we will make double crochets into this circle. This will form the head. Next, we make another chain, connect the chain to the body, and work triple crochets into that chain to form the body.
Next, we will work around the body to make the arms and legs. After this, we add the face and icing! Then we’re done!
Gingerbread Man:
In light brown
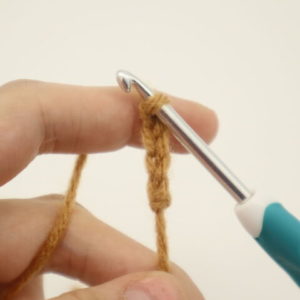
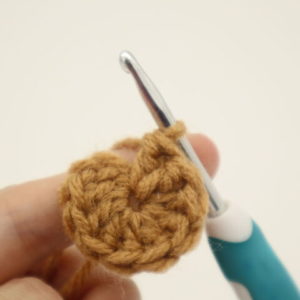
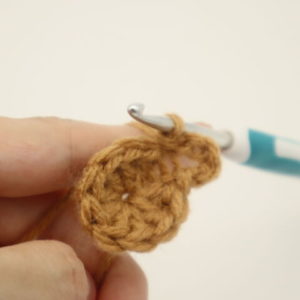
Head: Ch 4. This chain will count as the first Double Crochet. Dc 9 times in the 4th Ch from the hook (Pic 2, Stitch count: 10)
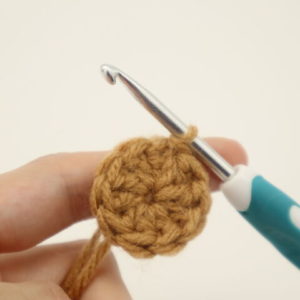
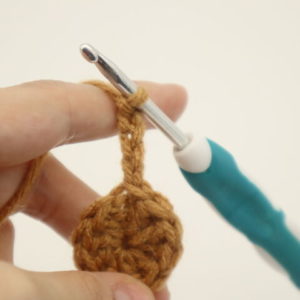
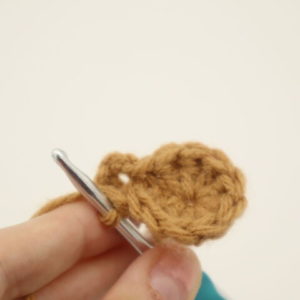
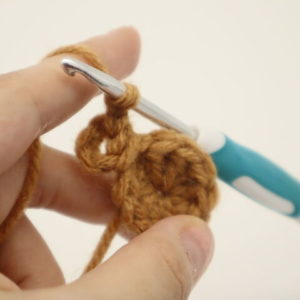
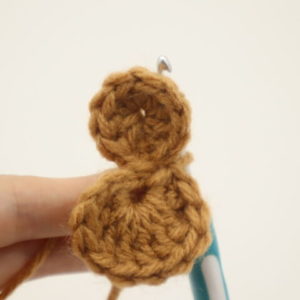
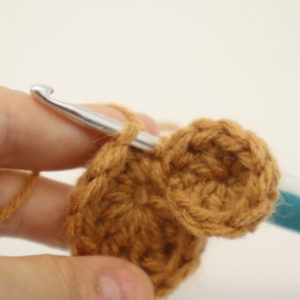
Body: SlSt to the first Dc (Pic 3). Ch 4 (Pic 4), SlSt into the same st (Pic 5). This chain will create a hole. Turn your work so the double crochet circle is on the right, and the chain hole is on the left as shown (Pic 6). Trc 7 times into that hole the Ch 4 created (Pic 8-9, Stitch Count: 8)
1. 2.
2. 3.
3. 4.
4. 5.
5. 6.
6. 7.
7. 8.
8.
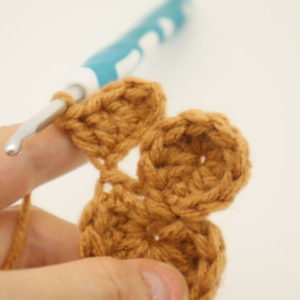
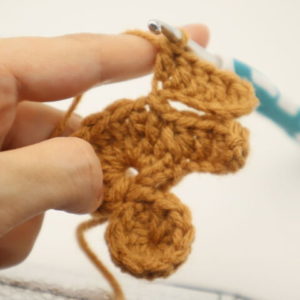
Left arm: Ch 4 (Pic 9). Skip the top circle wit the 10 Double crochets. Skip the next Trc st, then SlSt in the next st (Pic 10). Ch 6 (Pic 11), Dc in the 3rd Ch from the hook, Dc in the next 3 Ch (Pic 12), Skip the next st, SlSt in the next st, Sc in the next st (Pic 13).
9. 10.
10. 11.
11. 12.
12. 13.
13.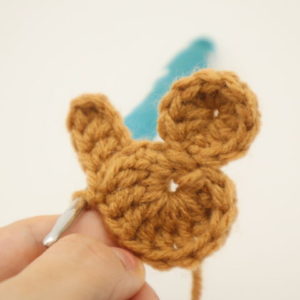
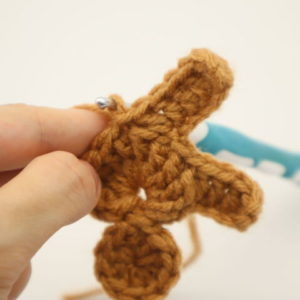
Left leg: Ch 7 (Pic 1), Dc in the 3rd Ch from the hook, Dc in the next 4 ch (Pic 2), Skip the next st on the body, SlSt in the next st (Pic 3)
1.
 2.
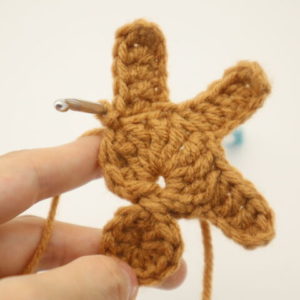
2. 3.
3.
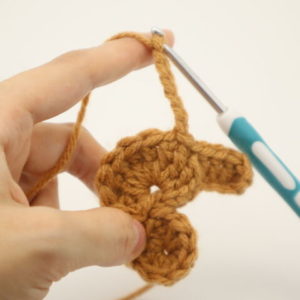
Right leg: Ch 7. Dc in the 3rd Ch from the hook, Dc in the next 4 ch, Skip the next st, Sc in the next st, SlSt in the next st (Pic 4).
4.
Right arm: Ch 6 (Pic 5). Dc in the 3rd Ch from the hook, Dc in the next 3 Ch (Pic 6). Skip the next st, SlSt in the next st (Pic 7). Finish off.
5.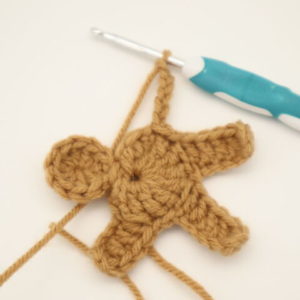 6.
6.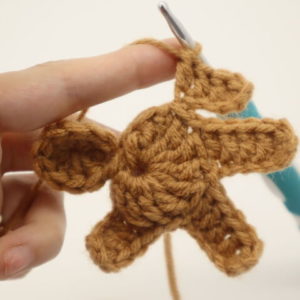 7.
7.
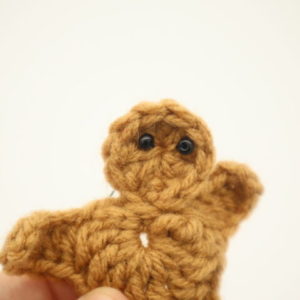
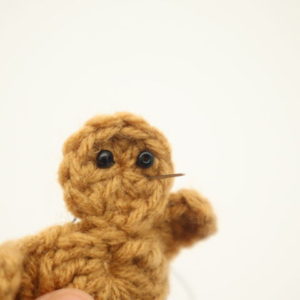
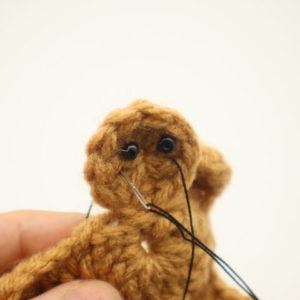
I sewed on 3mm beads for the eyes (Pic 1). Using black embroidery thread, insert needle with thread under the right eye on the cookie (Pic 2). Insert needle under the left eye of the cookie (Pic 3). Bring the needle into the middle of the smile, making sure the needle lands ABOVE the smile thread (Pic 4). Reinsert needle BELOW the smile thread now (Pic 5). Done! (Pic 6). Tie the ends of thread into a firm knot to secure, then cut the excess yarn.
1. 2.
2. 3.
3. 4.
4. 5.
5. 6.
6.
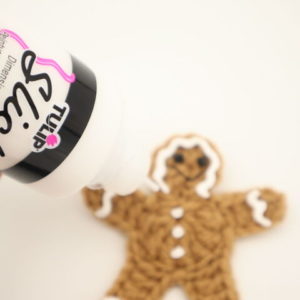
Icing:
You can sew on the icing, but using puffy fabric paint is much easier. The result looks a lot more realistic! I use the brand Tulip, which you can find in most craft stores and Walmart’s craft section.
Using the puffy paint, make squiggly lines around the head, and the arms and legs. Then, do 2 dots for the buttons. Let the paint dry for 4 hours, or overnight.
You can also block the gingerbread man so he doesn’t fold around. To do this, place the gingerbread man on a piece of thick cardboard. Using sewing pins, pin him in place and spray with water. Let him dry overnight.
1. 2.
2. 3.
3.


2 Comments
Left arm, chain 4 pic 9 and 10. Question am I putting the chain 4 behind the head and starting on left side of body?? A little confusing?
Hi there Sherri,
Yes, you will bring the chain behind the head, then make a slip stitch on the left side of the body to start the arm 🙂 I hope this could help!