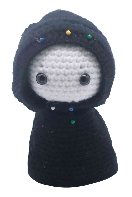
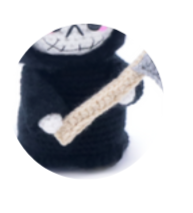
Grim Reaper Amigurumi – Free Crochet Pattern
Print this pattern out – purchase the PDF pattern!

 Supplies:
• Yarn 4/Medium Weight Yarn in…
White, black, grey, cream color, and pink
•4mm Crochet Hook
•Tapestry needle
•Scissors
•Stuffing
•Black embroidery thread
•12mm safety eyes
Additional Information:
Difficulty: Easy
Size: 6″ tall
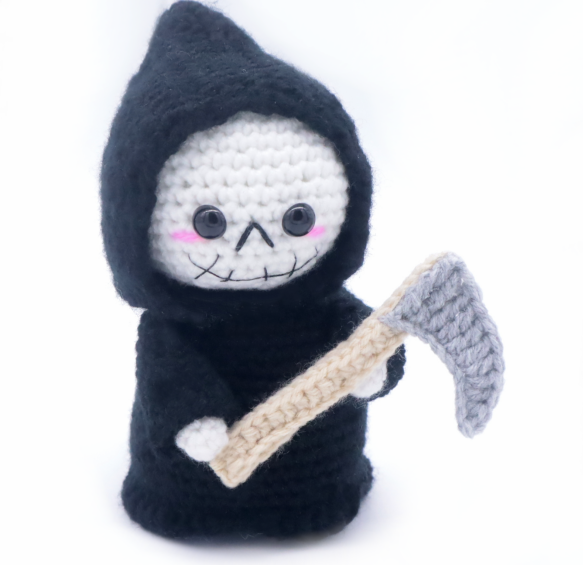
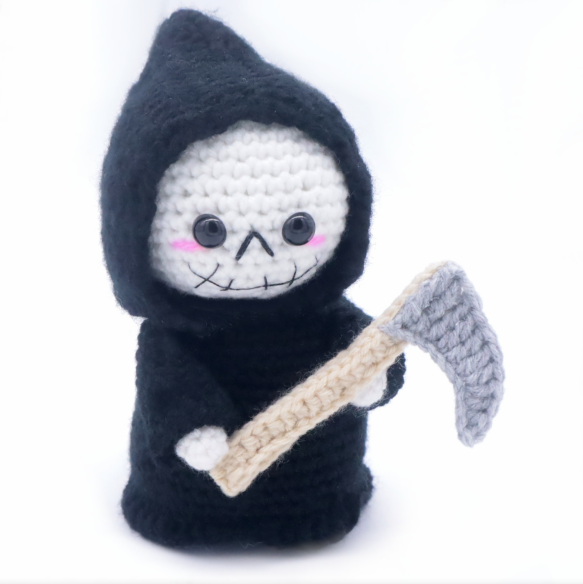
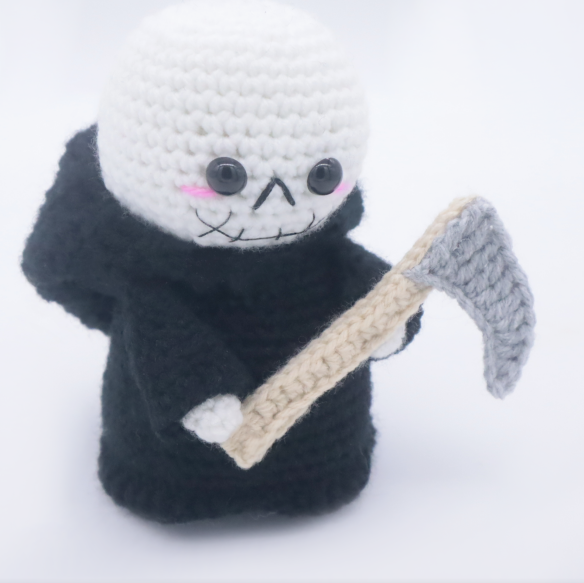
Whether you’re a horror fan or looking to celebrate Halloween, this kawaii Grim Reaper amigurumi is the perfect project! He’s simple to make and looks so adorable! His hood can also be up or down, and his clothes could be made in a lighter color (like pink!) to make an even cuter grim reaper. Let’s get started!
Bottom of Body:
In Black
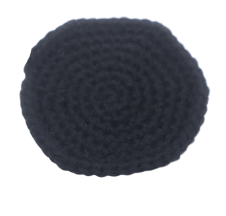
Round 1: 6 Sc into a Magic Ring (6)
Round 2: *Inc* all around (12)
Round 3: *Inc, Sc in the next st* all around (18)
Round 4: *Inc, Sc in the next 2 st* all around (24)
Round 5: *Inc, Sc in the next 3 st* all around (30)
Round 6: *Inc, Sc in the next 4 st* all around (36)
Round 7: *Inc, Sc in the next 5 st* all around (42)
Round 8: *Inc, Sc in the next 6 st* all around (48)
Finish off, leaving a tail for sewing.
Body:
In Black
Round 1: 6 Sc into Magic Ring (6)
Round 2: *Inc* all around (12)
Round 3: *Inc, Sc in the next st* all around (18)
Round 4: *Inc, Sc in the next 2 st* all around (24)
Round 5: *Inc, Sc in the next 3 st* all around (30)
Round 6: Working in the Back Loop Only (BLO), *Sc* all around (30)
Round 7: In BOTH loops, repeat *Inc, Sc in the next 4 st* all around (36)
Round 8-10: *Sc* all around (36)
Round 11: *Inc, Sc in the next 5 st* all around (42)
Round 12-14: *Sc* all around (42)
Round 15: *Inc, Sc in the next 6 st* all around (48)
Round 16-20: *Sc* all around (48)
Now we will align the body and bottom piece together.
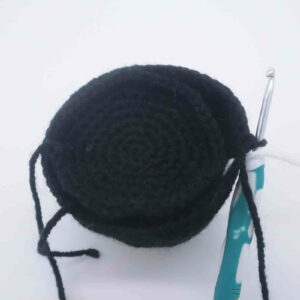
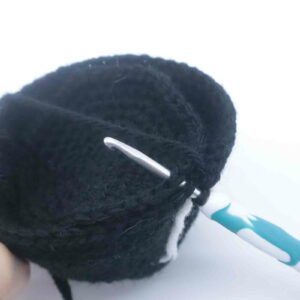
Round 21: Align the bottom piece and the body together so the stitches align as shown (Pic 1). Inserting your hook through BOTH stitches (Pic 2),
1. 2.
2. 3.
3.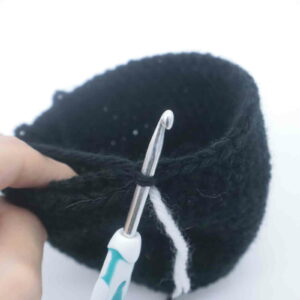
Sc in the next 4 st, Hdc in the next 2 st, Dc in the next 2 st.
Hdc in the next 2 st. Sc in the next 4 st.
Dc in the next 2 st, Trc in the next 5 st, Dc in the next 3 st.
Sc in the next 3 st, Dc in the next 2 st, Trc in the next 3 st.
Stuff the body firmly now. Continue stuffing if needed.
Dc in the next 2 st, Sc in the next 3 st, Trc in the next 4 st.
Dc in the next 4 st, Sc in the next 4 st. Finish off and weave in ends.
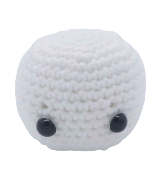
Head:
In White
Round 1: 6 Sc into a Magic Ring (6)
Round 2: *Inc* all around (12)
Round 3: *Inc, Sc in the next st* all around (18)
Round 4: *Inc, Sc in the next 2 st* all around (24)
Round 5: *Inc, Sc in the next 3 st* all around (30)
Round 6: *Inc, Sc in the next 4 st* all around (36)
Round 7-12: *Sc* all around (36)
Now we will mark where to place the safety eyes. Add a different colored eye stitch marker in the 15th and 19th stitch.
Round 13-15: *Sc* all around (36)
Add the safety eyes into the marked areas now.
Round 16: *Dec, Sc in the next 4 st* all around (30)
Round 17: *Dec, Sc in the next 3 st* all around (24)
Round 18: *Dec, Sc in the next 2 st* all around (18)
Stuff the head here. Continue stuffing after each round.
Round 19: *Dec, Sc in the next st* all around (12)
Round 20: *Dec* all around (6)
Finish off, leaving a long tail for sewing. Sew the remaining stitches closed and weave in ends. Cut any excess yarn.
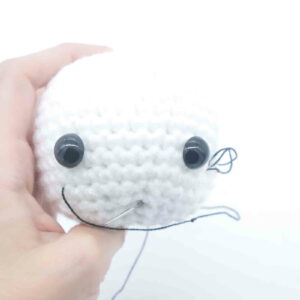
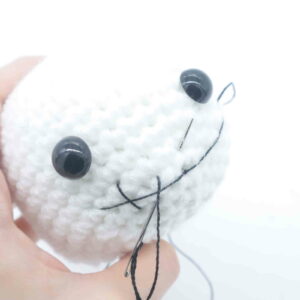
Smile:
In Black Embroidery Thread
Insert needle with thread into the right side of the toy’s face as shown (Pic 1). Pull needle out at the right side of the toy’s face (Pic 2).
1.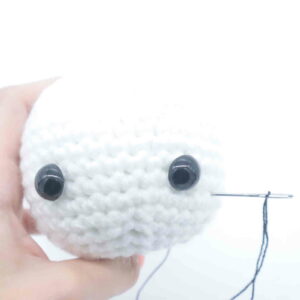 2.
2.
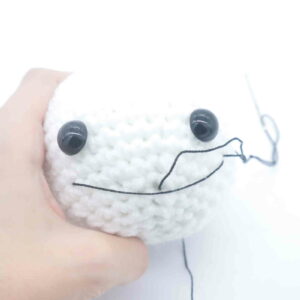
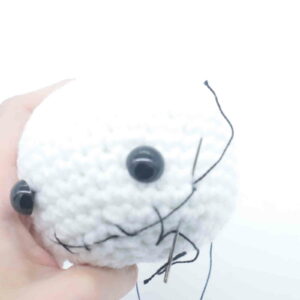
Pull needle out at the middle of the face, making sure the needle lands ABOVE the thread (Pic 3-4).
3. 4.
4.
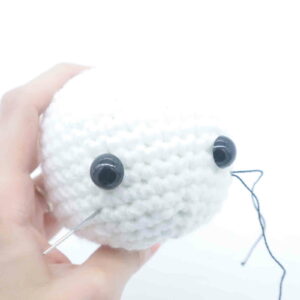
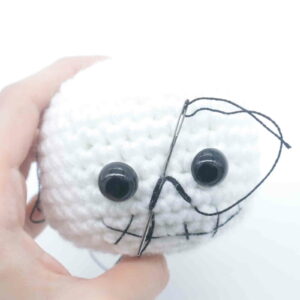
Pull the thread to form the smile. Now reinsert needle into the same stitch, making sure the needle is BELOW the smile (Pic 5). Pull needle where shown (Pic 5).
5.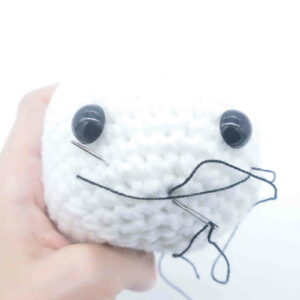
Insert needle below the smile and pull needle out where shown (Pic 6). Repeat this process to continue making the lines of the smile (Pic 7).
6. 7.
7.
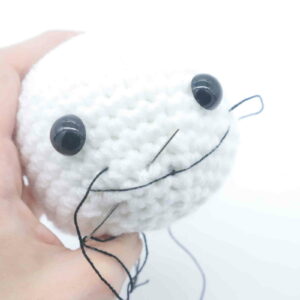
Once done, pull needle out at the corner of the smile (Pic 8). Pull needle out at the lower nose area (Pic 9).
8. 9.
9.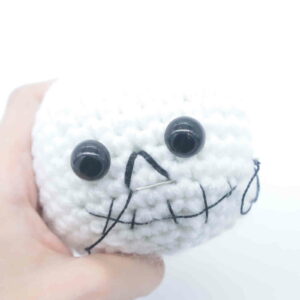
Reinsert needle between the toy’s eyes (Pic 10). Pull needle out at the lower side of the nose area (Pic 10). Reinsert needle into the top of the nose area and pull out where shown (Pic 11). Repeat this process until the nose is as thick as you’d like (I did this 3 times total). Using pink, embroider small lines under the toy’s eyes for blush.
10. 11.
11.
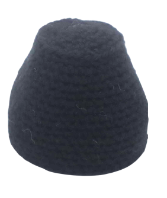
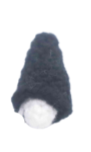
Hood:
In Black

The hood is made by creating a chain, then working in rows around the chain.
Row 1: C 16. Skip the next 2 st, Dc in the next st. Dc in the next 12 st. Dc 2 times in the next st, Ch 2, Dc 2 times in the same st. Continuing on the other side of the chain, Dc in the next 13 st (32)
Row 2: Ch 2 and turn. Dc in the next 13 st, Dc 2 times in each of the next 2 st, skip the Ch 2, Ch 2, Dc 2 times in each of the next 2 st, Dc in the next 13 st (36)
Row 3: Ch 2 and turn. Dc in the next 17 st, skip the Ch 2, Ch 2, Dc in the next 17 st (36)
Row 4: Ch 2 and turn. Dc in the next 15 st, Dec, skip the Ch 2, Ch 2, Dec, Dc in the next 15 st (34)
Row 5-7: Ch 2 and turn. Dc in the next 16 st, skip the Ch 2, Ch 2, Dc in the next 16 st (34)
Row 8: Ch 2 and turn. Dc in the next 16 st. Skip the Ch 2, Dc in the next 16 st (32)
Row 9: Ch 2 and turn. Dc in the next 32 st (32)
Row 10: Ch 2 and turn. Dc in the next 11 st, Dec, Dc in the next 2 st, Dec. Dc in the next 2 st, Dec, Dc in the next 11 st (29)
Row 11: Dc in the next 10 st, *Dec* 4 times, Dc in the next 11 st (25)
Finish off, leaving a long tail for sewing. Pin the hood onto the skull and sew the bottom of the hood on. Don’t sew the top of the hood to the toy, we want to be able to move the hood.
Assembly:
Pin the head onto the body and sew or hot glue on.
Sleeve: (Make 2)
In Black
Round 1: 6 Sc into a Magic Ring (6)
Round 2-3: *Sc* all around (6)
Round 4: *Inc, Sc in the next st* all around (9)
Round 5-6: *Sc* all around (9)
Round 7: *Inc, Sc in the next 2 st* all around (12)
Round 8-10: *Sc* all around (12)
Round 11: *Inc, Sc in the next 3 st* all around (15)
Finish off, leaving a long tail for sewing. Set aside for now.
Arms: (Make 2)
In White
Round 1: 6 Sc into a Magic Ring (6)
Round 2-5: *Sc* all around (6)
Finish off, leaving a tail of yarn for weaving in. The arm will fit into the sleeve. You can either hot glue the toy arm into the sleeve, or sew it on with black yarn. Once done, weave in ends and cut any excess yarn.
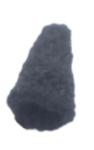
Stick: (Make 2)
In Cream Color
Row 1: Ch 23. Hdc in the 2nd Ch from the hook. Hdc in the next 21 st (22) Finish off, leaving a long tail for sewing. Make a second stick. Once done, sew the two sticks together to form one solid stick.
Scythe:
In Grey
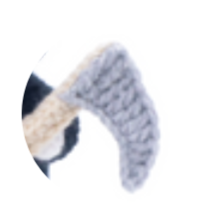
Row 1: Ch 11. Sc in the 2nd Ch from the hook, Hdc in the next st, Dc in the next st, Dc 2 times in the next st, Trc in the next 3 st, Dtrc in the last 3 st (12)
Finish off, leaving a long tail for sewing. Pin the metal piece onto the stick and sew or hot glue on.


10 Comments
cool my dad will love this.
I’m so excited to make this!💀💀🎃 Happy stiching
👍🏻
I’m having a really, really hard time with the hood of my grim reaper… I do not understand the instructions! Any insight?
Thanks for the cute pattern!
I’m struggling with the first row in the hood. What does it mean after the ch 2 and dc 2 in the same stitch? Which is the stitch i’m dc in to?
Chain 2, double crochet
Love him
Grim is such a cute little guy, but the hood instructions are not correct. R1 ends up with 31 stitches (if you count your turning chain as a stitch.) If you adjust it to get a total of 32, and then go on to R2, you end up with 35 stitches. And R3 only totals 35 stitches — turning chain + 17 DC + 17 DC = 35.
I also don’t understand the purpose of the chain 2 spaces, they just leave a line of holes on the top of the hood and why would you want that? Oh, well, I am capable of winging it, and I do appreciate your work!
I can’t for the life of me work the hood out! Please help