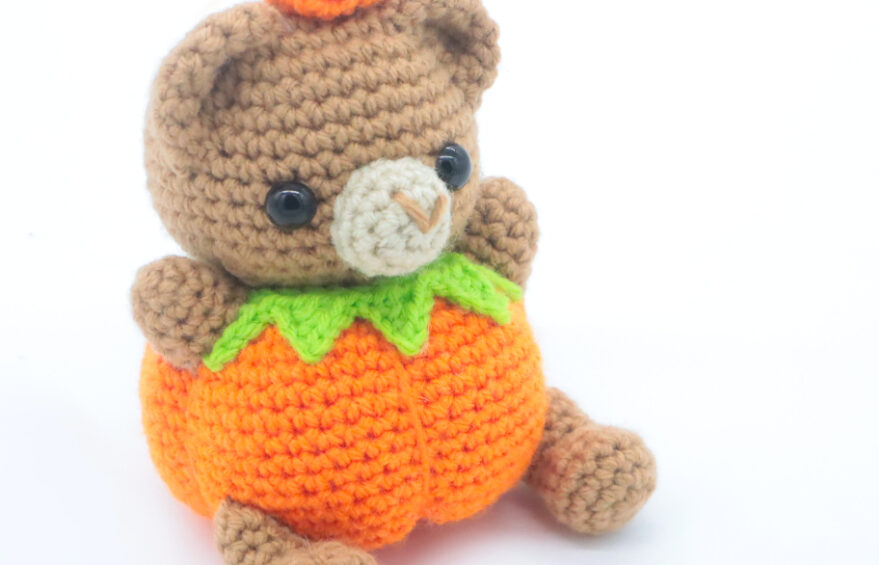
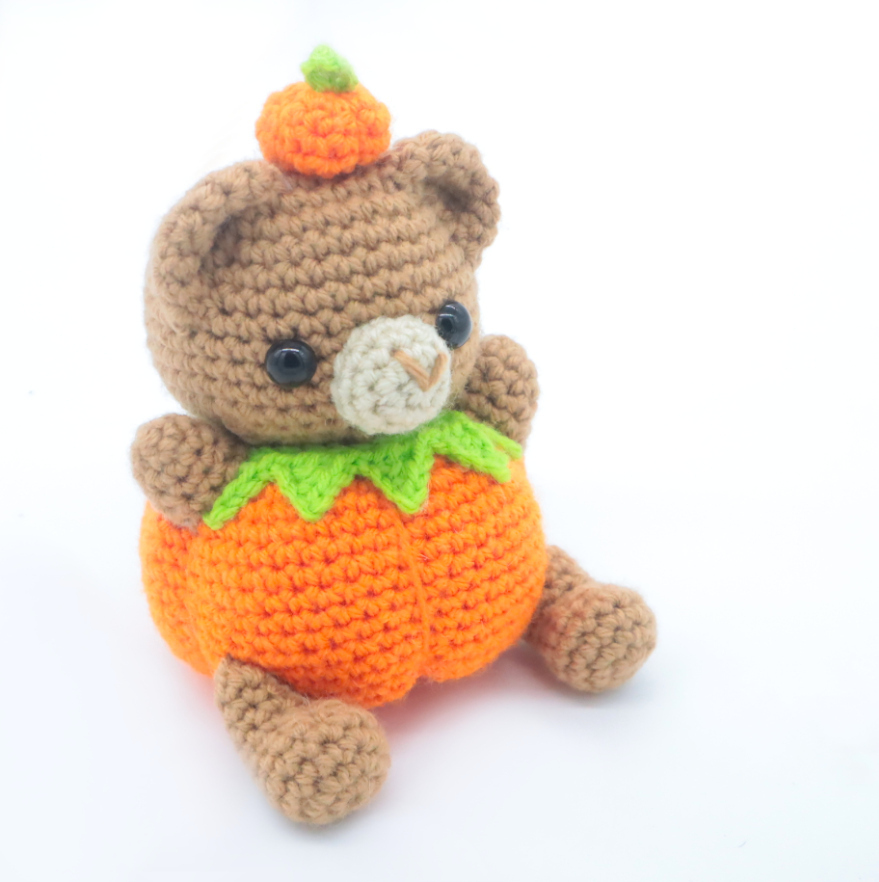
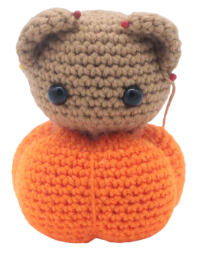
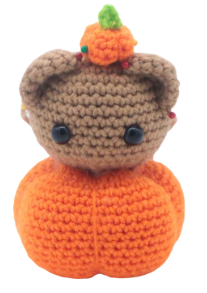
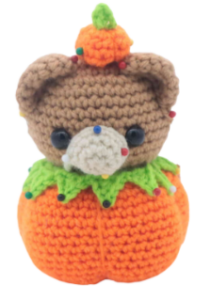
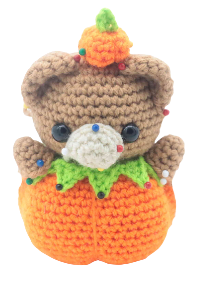
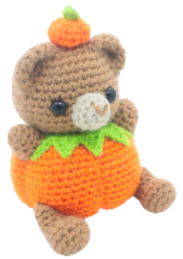
Pumpkin Bear Amigurumi – Free Crochet Pattern
Print this pattern out – purchase the PDF version here!

 Supplies:
• Yarn 4/Medium Weight Yarn in…
Brown, orange, green, and cream color
•4mm Crochet Hook
•Tapestry needle
•Scissors
•Stuffing
•12mm safety eyes
Additional Information:
Difficulty: Easy
Size: 5.5″ tall
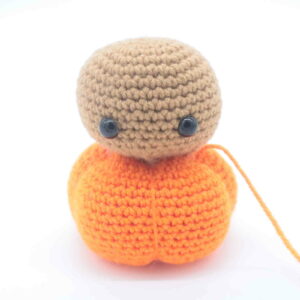
What’s a way to make a bear even cuter? Apparently the answer is to make that bear wear a pumpkin! This pumpkin-bear is very easy to make and works up relatively quickly. The stitches used in this pattern are simple and the way we make the pumpkin “indents” are super easy! If you’re looking for a last minute Halloween project, this is the pattern to use!
Head/Body:
Start in Brown
Round 1: 6 Sc into a Magic Ring (6)
Round 2: *Inc* all around (12)
Round 3: *Inc, Sc in the next st* all around (18)
Round 4: *Inc, Sc in the next 2 st* all around (24)
Round 5: *Inc, Sc in the next 3 st* all around (30)
Round 6: *Inc, Sc in the next 4 st* all around (36)
Round 7-11: *Sc* all around (36)
Now we will mark where to place the safety eyes. Add an eye stitch marker into the 15th and 21st st.
Round 12-14: *Sc* all around (36)
Add the safety eyes into the marked areas now.
Round 15: *Dec, Sc in the next 4 st* all around (30)
Round 16: *Dec, Sc in the next 3 st* all around (24)
Round 17: *Dec, Sc in the next 2 st* all around (18)
Round 18: Change to orange. Working in the Front Loop Only (FLO), *Inc, Sc in the next 2 st* all around (24)
Round 19: *Inc, Sc in the next 3 st* all around (30)
Round 20: *Inc, Sc in the next 4 st* all around (36)
Stuff the head firmly now.
Round 21: *Inc, Sc in the next 5 st* all around (42)
Round 22-31: *Sc* all around (42)
Round 32: *Dec, Sc in the next 5 st* all around (36)
Round 33: *Dec, Sc in the next 4 st* all around (30)
Round 34: *Dec, Sc in the next 3 st* all around (24)
Stuff the body firmly now. Continue stuffing after each round.
Round 35: *Dec, Sc in the next 2 st* all around (18)
Round 36: *Dec, Sc in the next st* all around (12)
Round 37: *Dec* all around (6)
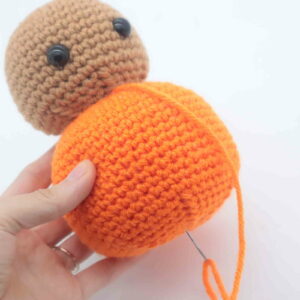
Finish off, leaving a very long tail for sewing (about 14″ long). Sew the remaining stitches closed. Do NOT cut the tail of yarn. We will now use this tail to shape the pumpkin.
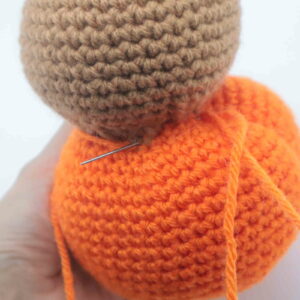
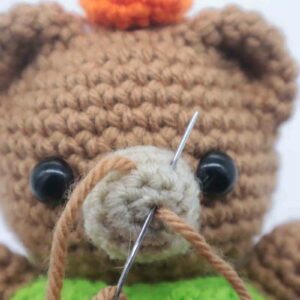
Pumpkin Shaping:
In Orange
Sew the remaining bottom stitches together (Pic 1).
1.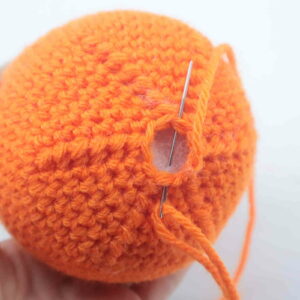
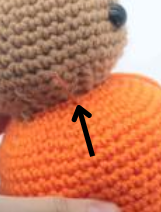
Insert needle into the middle bottom of the pumpkin (Pic 2) and pull needle out at the middle top area of the pumpkin (Pic 3).
2. 3.
3.
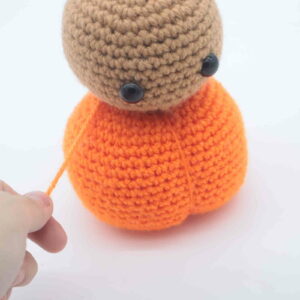
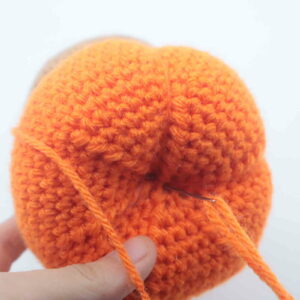
Reinsert needle into the middle bottom of the pumpkin (Pic 4).
4.
Pull needle out at the top left side of the pumpkin where shown (Pic 5).
5.
Pull yarn firmly to tighten the pumpkin‘s shaping (Pic 6).
6.
Reinsert needle into the middle bottom of the pumpkin (Pic 7).
7.
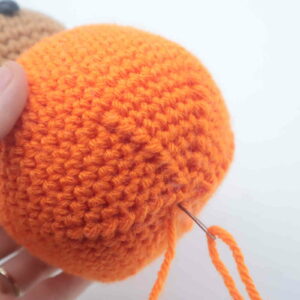
Pull needle out at the top back area of the pumpkin (Pic 8).
8.
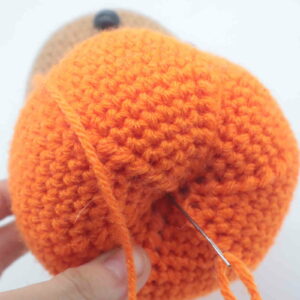
Pull the yarn firmly to tighten the shaping. Repeat this process around the pumpkin, making sure to firmly pull the yarn to tighten each indent (Pic 10). Once done, tie the ends of yarn into firm knots. Bring the knots inside the pumpkin to hide. Cut any excess yarn.
9. 10.
10.
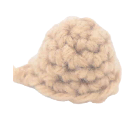
Ears: (Make 2)
In Brown
Round 1: 6 Sc into a Magic Ring (6)
Round 2: *Inc* all around (12)
Round 3: *Inc, Sc in the next st* all around (18)
Round 4: *Sc* all around (18)
Finish off, leaving a long tail for sewing. Pin the ears on as shown and sew on. Once done, weave in ends and cut any excess yarn.
Mini Pumpkin Hat:
In Orange
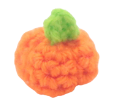
Round 1: 6 Sc into a Magic Ring (6)
Round 2: *Inc* all around (12)
Round 3-5: *Sc* all around (12)
Round 6: *Dec* all around (6)
Stuff the pumpkin firmly now. Finish off, leaving a long tail for sewing. Sew the remaining stitches closed now. Repeat making the pumpkin indents as we did previously. Weave in ends and cut any excess yarn.
Mini Pumpkin Hat Stem:
In Green
Row 1: Ch 3. Sc in the 2nd Ch from the hook. Sc in the Ch.
Finish off, leaving a long tail for sewing. Pin the stem to the top of the small pumpkin and sew on. Once sewn on, weave in ends and cut any excess yarn. Now pin the pumpkin to the top of the toy’s head and sew or hot glue on. Once done, weave in ends and cut any excess yarn.
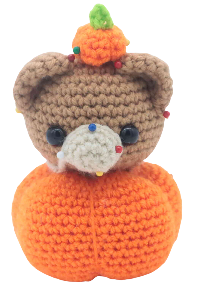
Muzzle:
In Cream Color
Round 1: 6 Sc into a Magic Ring (6)
Round 2: *Inc* all around (12)
Round 3-4: *Sc* all around (12)
Finish off, leaving a long tail for sewing. Pin the nose on and shown and sew on – be sure to add stuffing before fully sewing on. Once done, weave in ends and cut any excess yarn.
Neck Piece:
In Green
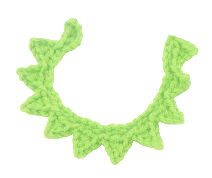
Row 1: Ch 37. Sc in the 2nd Ch from the hook, Hdc in the 2nd Ch from the hook, Dc in the next Ch, Skip the next 2 Ch, SlSt in the next Ch.
Repeat *Ch 4. Sc in the 2nd Ch from the hook, Hdc in the next st, Dc in the next st, Skip the next 2 Ch, SlSt in the next Ch.* 10 times.
Finish off, leaving a long tail for sewing. Pin the neck piece around the toy’s neck and sew or hot glue on. Once done, weave in ends and cut any excess yarn.
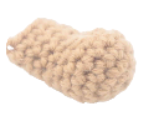
Arms: (Make 2)
In Brown
Round 1: 6 Sc into a Magic Ring (6)
Round 2: *Inc, Sc in the next 2 st* all around (8)
Round 3-4: *Sc* all around (8)
Round 5: *Inc, Sc in the next 3 st* all around (10)
Finish off, leaving a long tail for sewing. Pin the arms on as shown and sew on – be sure to stuff the arms before fully sewing on. Once done, weave in ends and cut any excess yarn.
Legs: (Make 2)
In Brown
Round 1: 6 Sc into a Magic Ring (6)
Round 2: *Inc* all around (12)
Round 3: Sc in the next 5 st, Inc in the next st, Sc in the next 6 st (13)
Round 4: *Sc* all around (13)
Round 5: Sc in the next 5 st, Dec 2 times, Sc in the next 4 st (11)
Round 6: Sc in the next 4 st, Dec 2 times, Sc in the next 3 st (9)
Round 7-10: *Sc* all around (9)
Finish off, leaving a long tail for sewing. Pin the legs on as shown and sew on – be sure to stuff the legs before fully sewing on. Once done, weave in ends and cut any excess yarn.
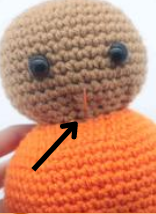
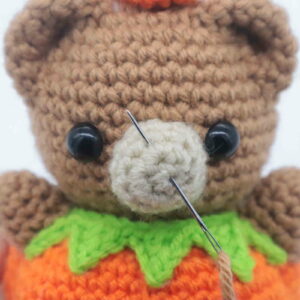
Nose Embroidery:
In Brown
Insert needle into the middle of the toy’s nose area and pull needle out to the left as shown (Pic 1). Reinsert needle into the middle nose area (Pic 2) and pull needle out at the right nose area (Pic 2). Reinsert needle into the middle nose area and pull needle out anywhere. Tie tail ends of yarn into firm knots and bring the knots inside the toy to hide. Cut any excess yarn.
1. 2.
2. 3.
3. 4.
4.
Done! If you made this pumpkin-bear, I would LOVE to see! You can show me by posting a picture in the comments underneath this post 🙂


4 Comments
One of the cutest patterns I’ve used, super easy to follow too!
Fun pattern
Fun pattern.
Such a cute pattern for Halloween!