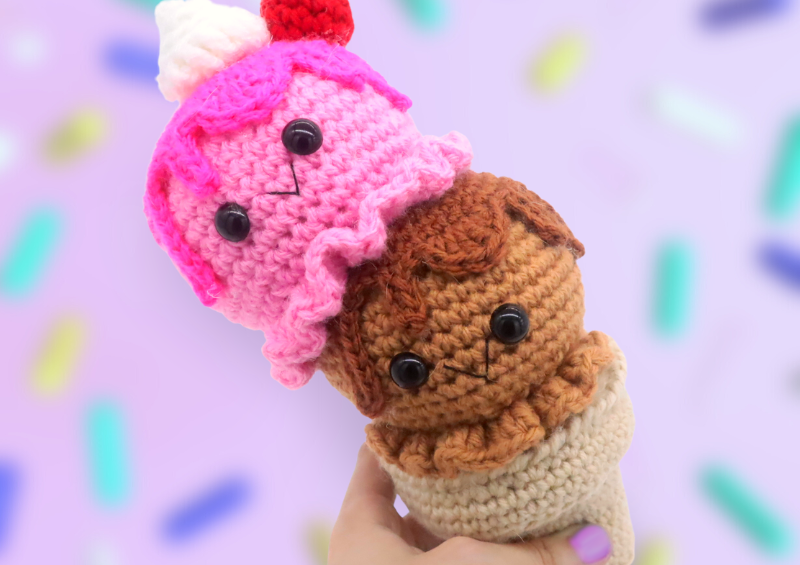
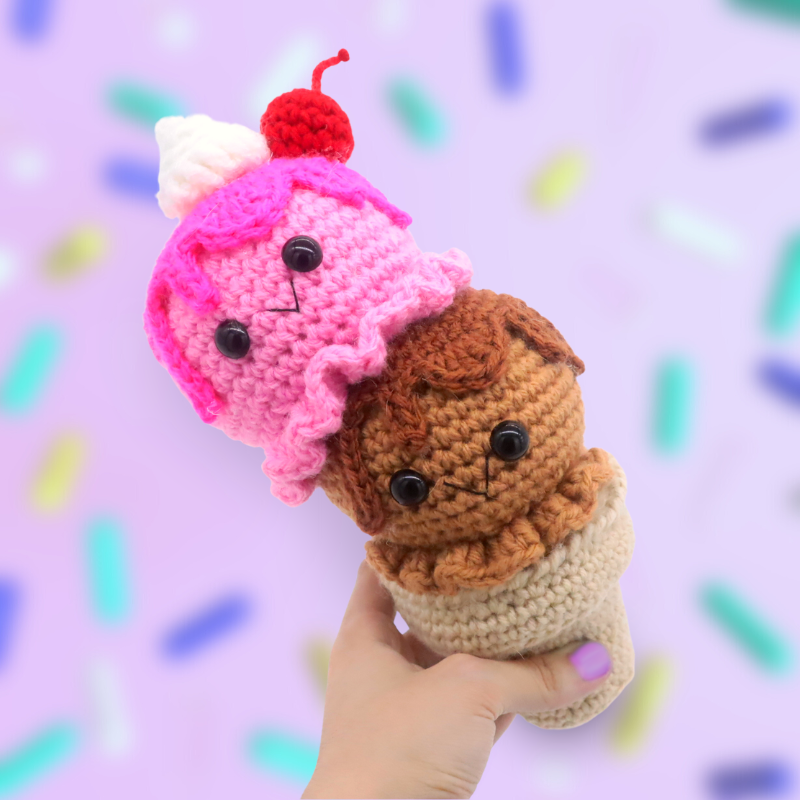
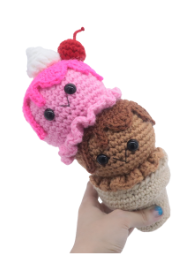
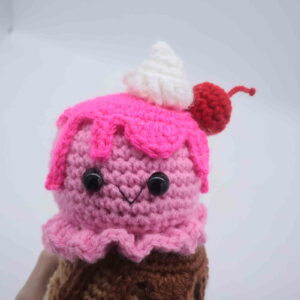
Ice Cream Amigurumi – Free Crochet Pattern
Print this pattern out – purchase the PDF here!

 Supplies:
• Yarn 4/Medium Weight Yarn in…
Main ice cream color, darker main color, cream color for cone, red, and white
•4mm Crochet Hook
•Tapestry needle
•Scissors
•Stuffing
•Hot glue gun
•12mm safety eyes
•Black embroidery thread
•Cardboard
Additional Information:
•Difficulty: Intermediate
•Size: 9.5″ tall from base of cone to tip of whipped cream
Ice cream is so tasty. In fact, just this week the hot weather was making me crave ice cream. I started thinking with my stomach and decided to crochet this adorable ice cream amigurumi! I love the bright colors and the details on this pattern. Fun food patterns like this one give you an outlet to use your creativity and pair some bright colors together! 🙂
Let’s get started!
Ice Cream
In Any Color
Round 1: 6 Sc into a Magic Ring (6)
Round 2: *Inc* all around (12)
Round 3: *Inc, Sc in the next st* all around (18)
Round 4: *Inc, Sc in the next 2 st* all around (24)
Round 5: *Inc, Sc in the next 3 st* all around (30)
Round 6: *Inc, Sc in the next 4 st* all around (36)
Round 7: *Inc, Sc in the next 5 st* all around (42)
Round 8-11: *Sc* all around (42)
Now we will mark where to place the safety eyes. Add a different colored eye stitch marker into the 20th and 25th stitch in Round 11.
Round 12-15: *Sc* all around (42)
Round 16: *Dec, Sc in the next 5 st* all around (36)
Round 17: *Dec, Sc in the next 4 st* all around (30)
Round 18: Working in the Front Loop Only (FLO), make 3 dc into each st.
If you’re making the ice cream that sits on the cone, continue with the following rounds. If you’re making the second ice cream that sits on top of the first ice cream, you can finish off now. The second ice cream doesn’t need a bottom because we’ll sew it directly to the ice cream 🙂
Round 19: Working in the Back Loop Only (BLO) using the stitches we left in Round 18, *Dec, Sc in the next 3 st* all around (24)
Round 20: Working in BOTH loops, *Dec, Sc in the next 2 st* all around (18)
Stuff the ice cream firmly now. Continue stuffing after each round.
Round 21: *Dec, Sc in the next st* all around (12)
Round 22: *Dec* all around (6)
Finish off, leaving a long tail for sewing. Sew the remaining stitches closed.
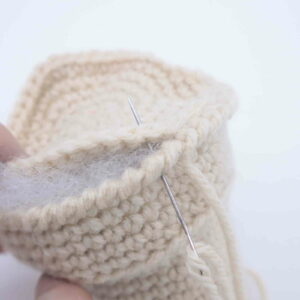
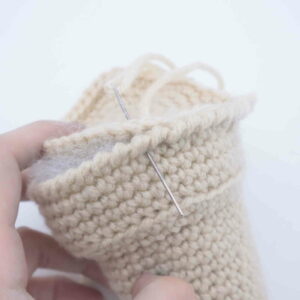
 Pin the second ice cream to the first ice cream, pin on slightly lopsided. Now sew on. Be sure to stuff firmly before fully sewing on. Once done, weave in ends.
Syrup:
In Darker Main Color
Round 1: 6 Sc into a Magic Ring (6)
Round 2: *Inc* all around (12)
Round 3: *Inc, Sc in the next st* all around (18)
Round 4: *Inc, Sc in the next 2 st* all around (24)
Round 5: *Inc, Sc in the next 3 st* all around (30)
Round 6: *Inc, Sc in the next 4 st* all around (36)
Round 7: *Inc, Sc in the next 5 st* all around (42)
Round 8: Sc in the next 2 st, Hdc in the next st, Dc in the nex 2 st, Hdc in the next st, SlSt in the next 2 st
•Ch 6. Sc in the 2nd Ch from the hook, Sc into that same st. Sc in the next 4 ch.
•Working back on the circle, Sc in the next 3 st. Dc 2 times in the next st, Trc 2 times in the next st, Dc 2 times in the next st, SlSt in the next 4 st
•Ch 9. Sc in the 2nd Ch from the hook, Sc in the next 7 ch.
•Working back on the circle, Sc in the next st, SlSt in the next 3 st
•Ch 5. Sc in the 2nd Ch from the hook, Sc in the next 3 ch.
•Working back on the circle, SlSt in the next 3 st, Dc 2 times in the next st, Trc 2 times in the next st, Dc 2 times in the next st, SlSt in the next 3 st
•Ch 5. Sc in the 2nd Ch from the hook. Sc in the next 3 ch. Working back on the circle, SlSt in the next 3 st.
•Ch 7. Sc in the 2nd Ch from the hook. Sc in the next 5 ch.
•Working back on the circle, SlSt in the next 3 st, Dc 2 times in the next st, Trc 2 times in the next st, Dc 2 times in the next st, Hdc in the next st, SlSt in the next st
Finish off, leaving a long tail for sewing. Pin the syrup on as shown and sew or hot glue on. I recommend using hot glue, it’s easier and gives a cleaner finish.
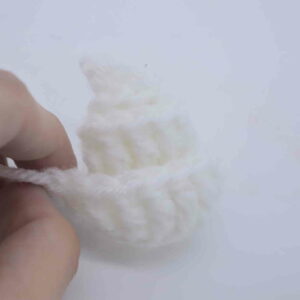
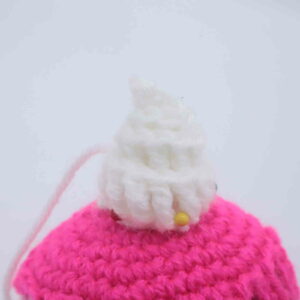
Whipped Cream:
In White
Row 1: Ch 34. SlSt in the 2nd Ch from the hook. Sc in the next 2 st, Hdc in the next st, Dc in the next st, Trc in each remaining Ch.
Finish off, leaving a long tail for sewing. Roll the strip together to form the whipped shape, making sure the tip is pointing out. Sew or hot glue to hold this shape. Pin onto the ice cream as shown and sew or hot glue on. Once done, weave in ends and cut any excess yarn.
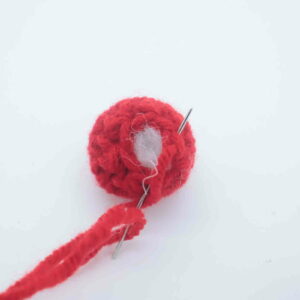
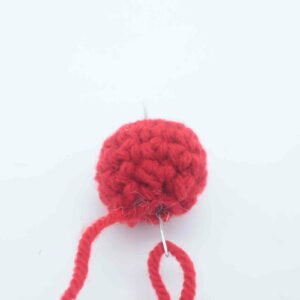
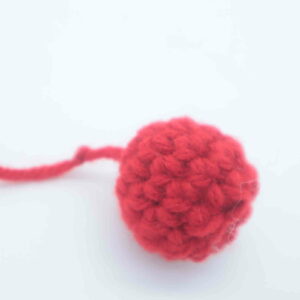
Cherry:
In Red
Round 1: 6 Sc into a Magic Ring (6)
Round 2: *Inc* all around (12)
Round 3-5: *Sc* all around (12)
Round 6: *Dec* all around (6)
Finish off, leaving a long tail for sewing. Stuff the cherry firmly now. Sew the remaining stitches closed. With the tail of yarn, weave the yarn to the other end of the cherry. Tie a firm knot with the tail end of yarn and cut just above the knot. This will form the cherry’s stem. Once done, pin onto the ice cream and sew or hot glue on. Once done, weave in ends.
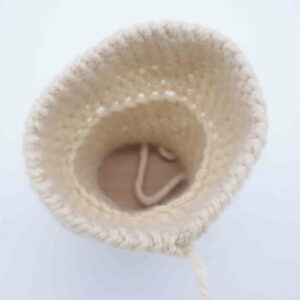
Cone:
In Cream Color
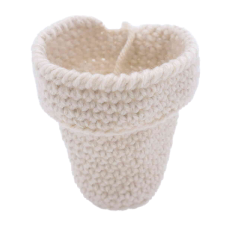
Round 1: 6 Sc into a Magic Ring (6)
Round 2: *Inc* all around (12)
Round 3: *Inc, Sc in the next st* all around (18)
Round 4: *Inc, Sc in the next 2 st* all around (24)
Round 5: Working in the Back Loop Only (BLO), *Sc* all around (24)
Round 6-10: *Sc* all around (24)
Round 11: *Inc, Sc in the next 3 st* all around (30)
Round 12-14: *Sc* all around (30)
Round 15: Working in the FLO, *Inc, Sc in the next 4 st* all around (36)
Round 16: Working in BOTH loops, *Inc, Sc in the next 5 st* all around (42)
Round 17: Working in the BLO, *Sc* all around (42)
Round 18-20: Working in BOTH loops, *Sc* all around (42)
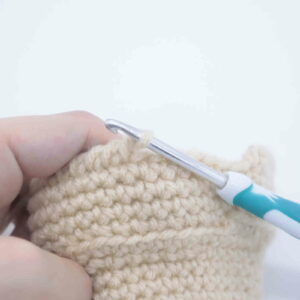
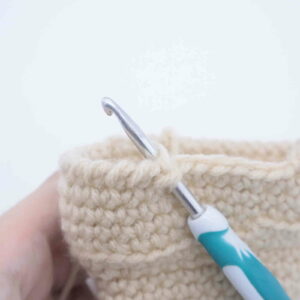
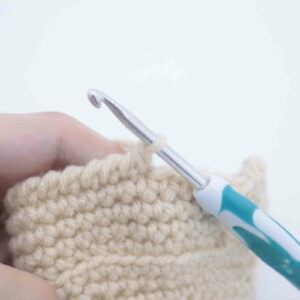
Round 21: Now we will make a crab stitch to make the edging on the cone. The crab stitch is easy, simply make a regular single crochet, except instead of making the next stitch to the left, work the next stitch to the right.
Finish off, leaving a long tail for sewing.
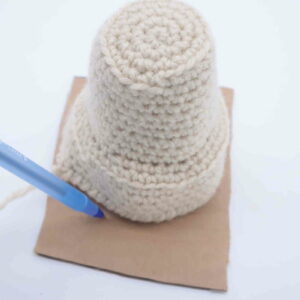
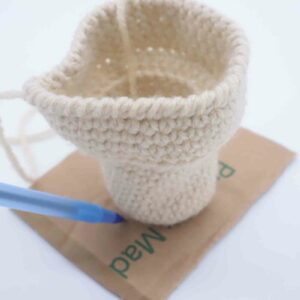
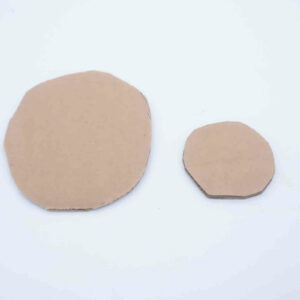
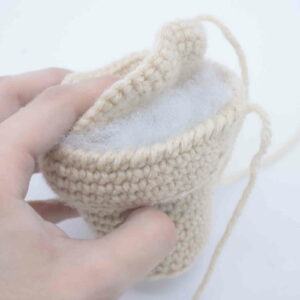
Cardboard:
Place the cone onto a piece of cardboard and trace around the cone as shown. Cut the circle you traced and set aside. Repeat this for the bottom of the cone. Place the small cardboard piece into the bottom of the cone.
Cone Top:
In Cream Color
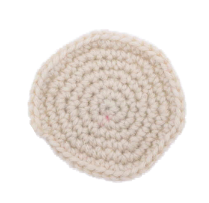
Round 1: 6 Sc into a Magic Ring (6)
Round 2: *Inc* all around (12)
Round 3: *Inc, Sc in the next st* all around (18)
Round 4: *Inc, Sc in the next 2 st* all around (24)
Round 5: *Inc, Sc in the next 3 st* all around (30)
Round 6: *Inc, Sc in the next 4 st* all around (36)
Round 7: *Inc, Sc in the next 5 st* all around (42)
Finish off, leaving a long tail for sewing. Sew this circle to the cone. Be sure to add stuffing before fully sewing closed, and add the bigger cardboard circle into the cone before fully sewing closed. Once done, weave in ends and cut any excess yarn.

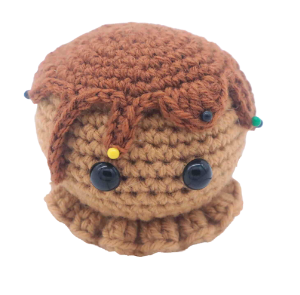
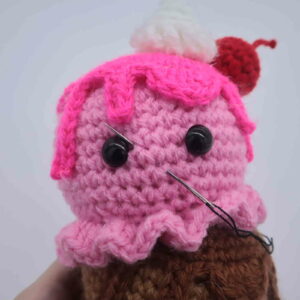
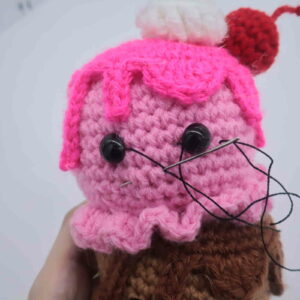
Smile:
In Black Embroidery Thread
Insert needle with thread into the middle mouth area of the toy, and pull the needle out next to the toy’s left eye as shown (Pic 1). Reinsert needle into the middle mouth area (Pic 2) and pull needle out next to the right eye (Pic 2). Reinsert needle into the middle mouth area and pull needle out a few stitches over (Pic 3). Tie the ends of thread into firm knots and bring them inside the toy to hide. This will secure the smile. Done!
1. 2.
2. 3.
3. 4.
4.
Done! If you made an ice cream, I would LOVE to see! You can show me by posting a picture in the comments section underneath this post 🙂


