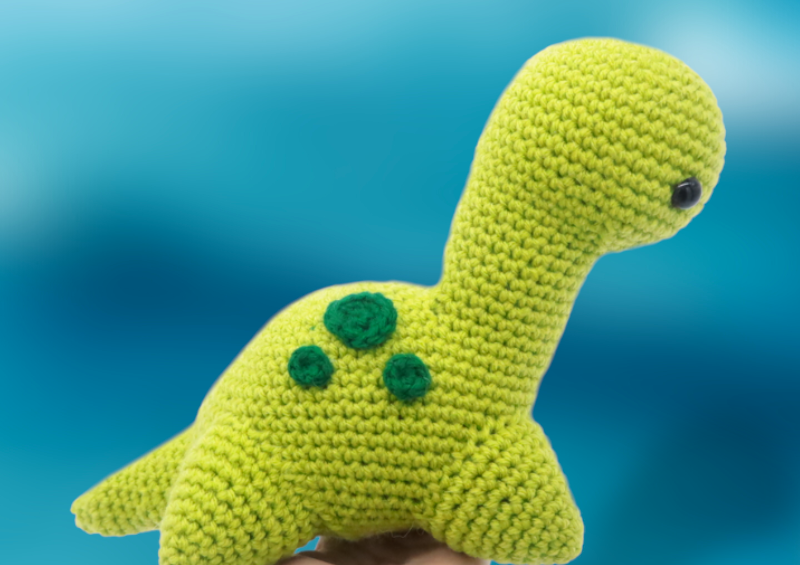
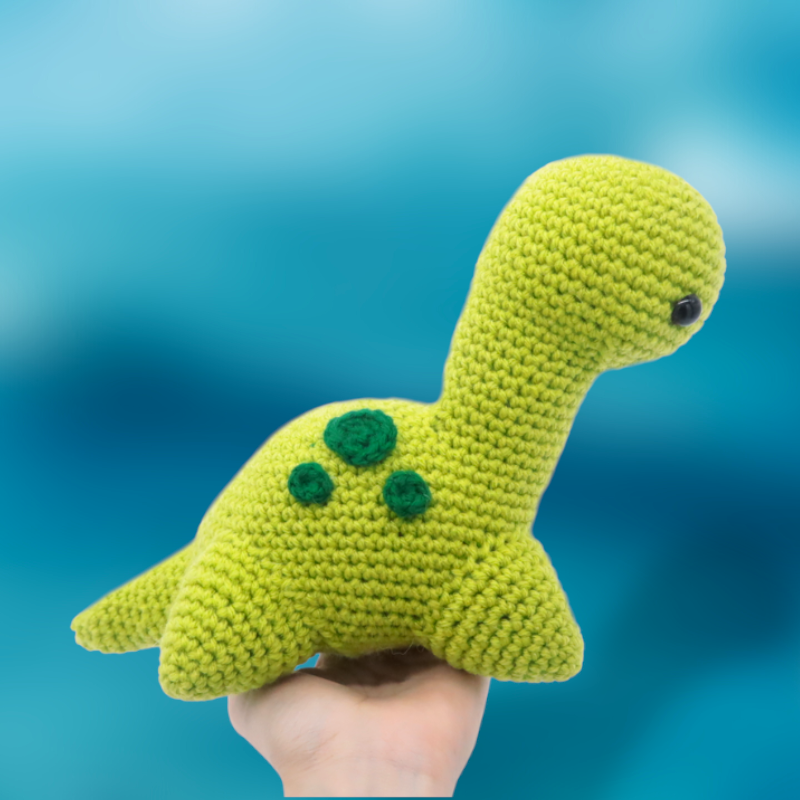
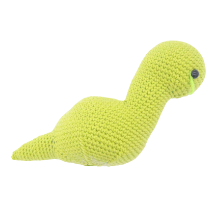
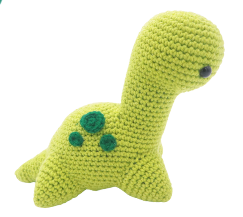
Loch Ness Monster Amigurumi – Free Crochet Pattern
Print this pattern out – purchase the PDF version here!

 Supplies:
• Yarn 4/Medium Weight Yarn in…
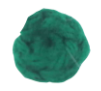
Green and dark green
•4mm Crochet Hook
•Tapestry needle
•Scissors
•Stuffing
•Hot glue gun
•12mm safety eyes
Additional Information:
•Difficulty: Intermediate
•Size: 8″ tall
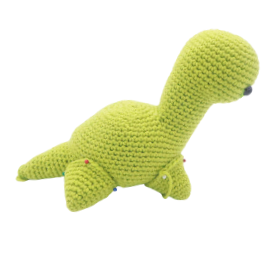
Whether you believe the Loch Ness Monster is real or not, we can all agree that this Loch Ness Monster amigurumi is adorable! This pattern is great for anyone looking to learn a few new crochet techniques. All of this amigurumi, except the arms, are all crocheted together into one continuous piece! Yay for less sewing!
Let’s get started!
To start, we will first make the back of the animal. After making the back, we will finish off and start making the head, which leads into the neck as one continuous piece. Then we will crochet the neck and the back together to form the body.
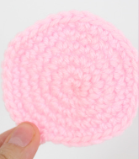
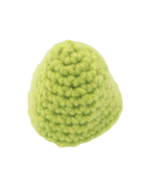
Back:
In Green
Round 1: 6 Sc into a Magic Ring (6)
Round 2: *Inc* in each stitch all around (12)
Round 3: Repeat *Inc in the next st, Sc in the next st* all around (18)
Round 4: Repeat *Inc in the next st, Sc in the next 2 st* all around (24)
Round 5: Repeat *Inc, Sc in the next 3 st* all around (30)
Round 6: *Inc, Sc in the next 4 st* all around (36)
Finish off now. Set the back of the animal aside for now. We will now continue on to making the head on the next page!
Head:
In Green
Round 1: 6 Sc into a Magic Ring (6)
Round 2: *Inc* in each stitch all around (12)
Round 3: Repeat *Inc in the next st, Sc in the next st* all around (18)
Round 4: Repeat *Inc in the next st, Sc in the next 2 stitches* all around (24)
Round 5: Repeat *Inc, Sc in the next 3 st* all around (30)
Round 6: *Inc, Sc in the next 4 st* all around (36)
Round 7: *Inc, Sc in the next 5 st* all around (42)
Round 8-12: *Sc* all around (42)
Now we will mark where to place the safety eyes. Add a different colored stitch marker into the 16th and 27th stitch in Round 12.
Round 13-15: *Sc* all around (42)
Round 16: Sc in the next 12 stitches. Repeat *Dec, Sc in the next 2 stitches* a total of 6 times. Sc in the next 6 st (36)
Round 17: Sc in the next 12 stitches. Repeat *Dec, Sc in the next st* 6 times. Sc in the next 6 st (30)
Round 18: Sc in the next 12 st. Repeat *Dec* 6 times. Sc in the next 6 st (24)
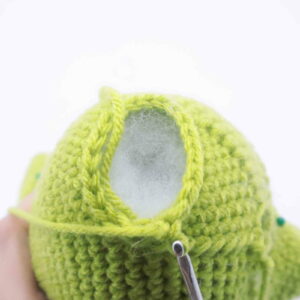
Add safety eyes in the marked areas from Round 12 now. Stuff head after.
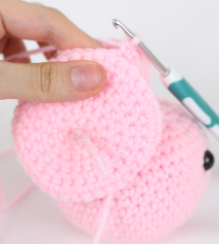
Now we are forming the neck.
Round 19-25: *Sc* all around (24)
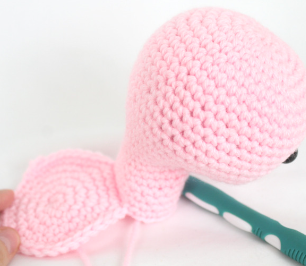
In the next round we will attach the back and neck together. This will form the body.
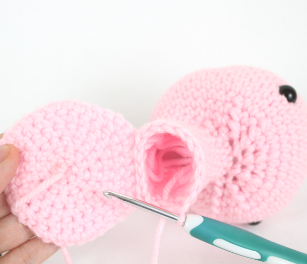
Now we will line up the neck to the back and crochet them together.
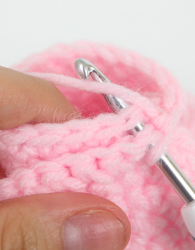
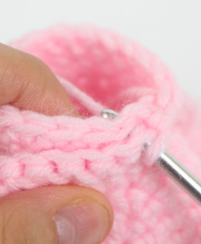
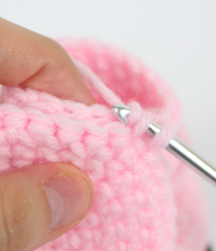
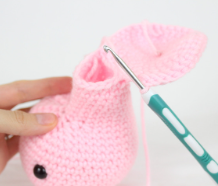
Round 26: Sc in the next 2 stitches (Pic 1). Be sure to add your stitch marker to that first stitch made in this round. Now line up the back to the dinosaur’s next neck stitches. (The back part’s wrong side should be facing you, as shown in Pic 3. The right side will face right next to the neck.)
1. 2.
2. 3.
3. 4.
4.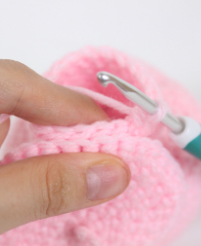
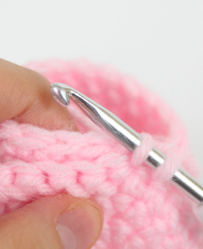
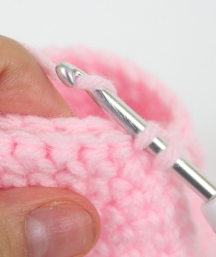
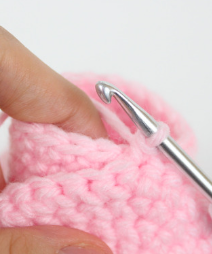
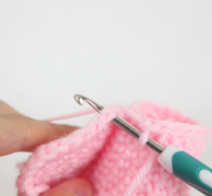
Insert your crochet hook under BOTH the neck and body stitches (Pic 5). Sc in the next st (Pic 6-11)
5. 6.
6. 7.
7. 8.
8. 9.
9. 10.
10. 11.
11.
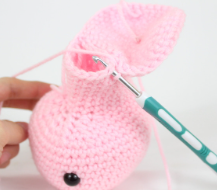
Round 27: Going through BOTH stitches, Sc in the next 5 st (Pic 12) Now we have finished attaching the back to the neck. Continuing on only the neck, Sc in the next 16 st of the neck (Pic 13) At this point we will meet the stitch marker, meaning we completed Round 26. Your animal should look like Pic 15.
12. 13.
13. 14.
14. 15.
15.
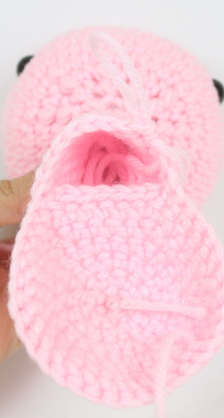
Stitch count: We will have 30 stitches on the back, 6 stitches connecting the neck and body, and 18 neck stitches
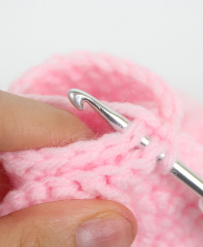
Round 28: Sc in the next 2 st (Pic 1-2). Now we meet the back. Sc in the next 30 st of the back (Pic 3-4). Now we’re working on the neck, Sc in the next 16 st (Pic 5-6) (48)
1. 2.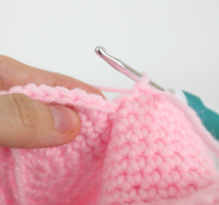 3.
3. 4.
4. 5.
5. 6.
6. 7.
7.
Round 29-30: *Sc* all around (48)
Stuff the neck now.
Round 31: Sc in the next 14 st, *Inc* in the next 6 st, Sc in the next 28 st (54)
Round 32-39: *Sc* in each stitch all around (54)
Round 40: Sc in the next 16 st. Repeat *Inc, Sc in the next st* 6 times. Sc in the next 26 st (60)
Round 41-44: *Sc* all around (60)
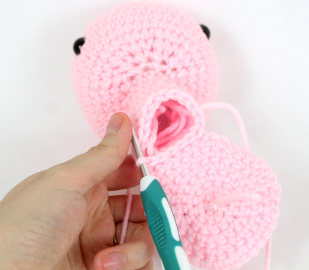
Round 45: Now we will form the tail, we will create a hole and later crochet around this hole to make the tail. Sc in the next 21 st. Ch 10, skip the next 10 st and Sc in the next 11th stitch you count. Sc in the next 28 st (60)
Round 46: *Dec, Sc in the next 8 st* all around (54)
Round 47: *Dec, Sc in the next 7 st* all around (48)
Round 48: *Dec, Sc in the next 6 st* all around (42)
Round 49: *Dec, Sc in the next 5 st* all around (36)
Round 50: *Dec, Sc in the next 4 st* all around (30)
Round 51: *Dec, Sc in the next 3 st* all around (24)
Stuff the body here. Continue stuffing after each round.
Round 52: *Dec, Sc in the next 2 st* all around (18)
Round 53: *Dec, Sc in the next st* all around (12)
Round 54: *Dec* all around (6)
Finish off and sew the remaining stitches closed. Weave in ends.
Tail:
In Green
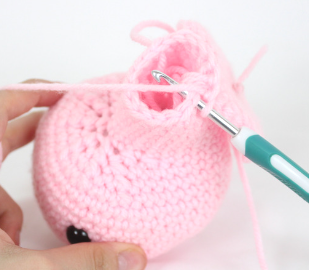
Round 1: Insert your hook into one of the stitches where the opening is (Pic 1). Yarn over with green and pull it through (Pic 2-3). Ch 1 and add a stitch marker into the chain 1 you just made. This will mark the rounds. Sc in the next 19 st, this will crochet around the entire hole (20)
1. 2.
2. 3.
3. 4.
4. 5.
5. 6.
6.
Round 2-5: *Sc* all around (20)
Round 6: *Dec, Sc in the next st* 6 times, Sc in the last 2 st (14)
Round 7-9: *Sc* all around (14)
Stuff the tail here. Continue stuffing after each round.
Round 10: *Dec* all around (7)
Round 11-12: *Sc* all around (7)
Finish off, leaving a long tail for sewing. Sew the remaining stitches closed and weave in ends, cutting any excess yarn.
Arms: (Make 4)
In Green
Round 1: 6 Sc into a Magic Ring (6)
Round 2: *Sc* all around (6)
Round 3: *Inc* all around (12)
Round 4: *Sc* all around (12)
Round 5: *Inc, Sc in the next st* all around (18)
Round 6-7: *Sc* all around (18)
Round 8: *Inc, Sc in the next 2 st* all around (24)
Round 9-10: *Sc* all around (24)
Finish off, leaving a long tail for sewing. Pin the arms on as shown and sew on. Make sure to add stuffing before fully sewing on.
Big dots: (Make 2)
In Dark Green
Round 1: 6 Sc into a Magic Ring (6)
Round 2: *Inc* all around (12)
Finish off, leaving a long tail for sewing. Pin the big dot on as shown, put one big dot on each side of the animal. Sew or hot glue on. Weave in ends and cut any excess yarn.
Small Dots: (Make 4)
In Dark Green
Round 1: 6 Sc into a Magic Ring (6)
Finish off, leaving a long tail for sewing. Pin the big dot on as shown, put two small dots on each side of the animal. Sew or hot glue on. Weave in ends and cut any excess yarn.


1 Comment
Hello Olive, How are you doing?!!! Its been quite a while I didnt had the chance to talk to you.!!!……Life I suppose!……
I just wanted to take 2 minutes to write you a comment, and I want to tell you that its all in a positive and a constructive manner….so I hope you’ll see it that way, cuz really, yours pattterns are ALWAYS EXCELLENTS, cute , and /or fun, well written for everyone, etc.
This Lock Ness Monster really caught my eyes! And even if my list of things I wanna crochet is never ending, I did want to put it on my list of things to crochet as soon as I can!
My suggestions to you would be, if it was possible , to give more photos of DIFFERENTS ANGLES. I know its a free pattern, etc ( and I shoulnt complain…which is NOT what I’m doing LOL!!!!) But, sometimes, it can be the first entry point for someone who just discovered your channel, so….
It would be very helpfull and usefull, to have photos from others point of views of your subject.
Like a photo from :
-OVER him, so we could see his back , his 4 legs, tail ,neck and head AT THE SAME TIME;
-one right in front of him,
-one right behind
– and a silhouette one from the side.
– etc…
I thank you in advance, and still repeat to you that this comment is NOT a complaint, but just a suggestion cuz I love yours patterns so much, and refer crocheters to you very ofter!
I hope youre doing well and can enjoy the summr time!
A FAN of your work, and a yarny friend
Chantale from Montreal, Quebec Canada.
xxxxxxxxxxxxx