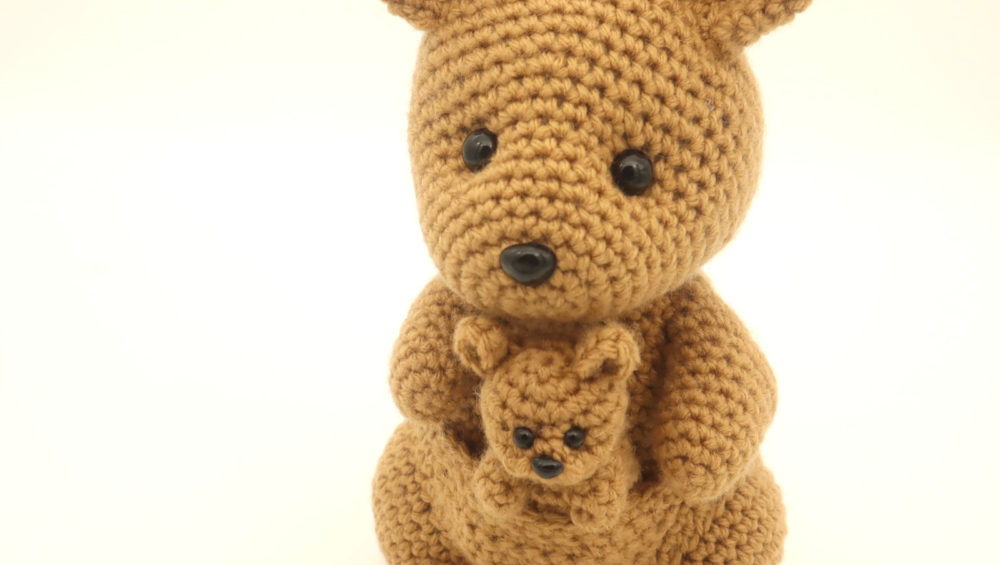
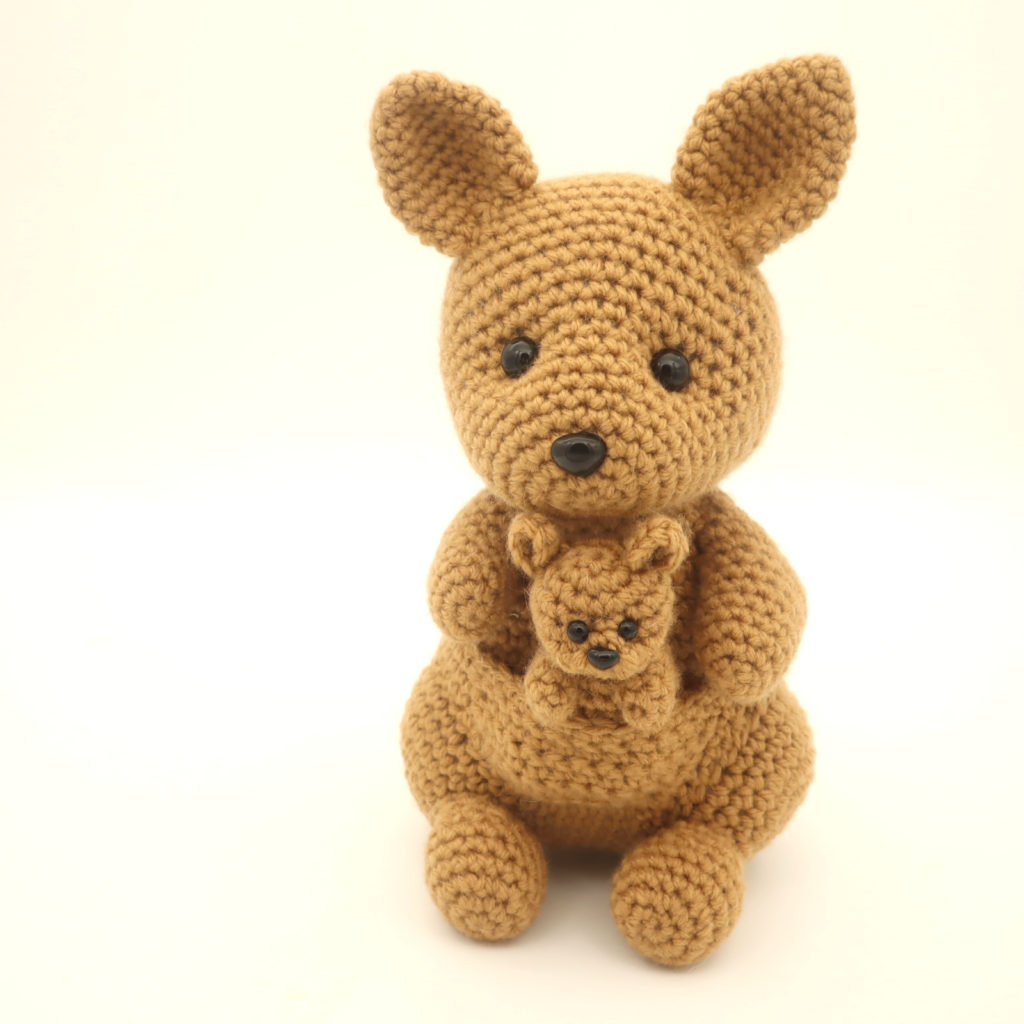
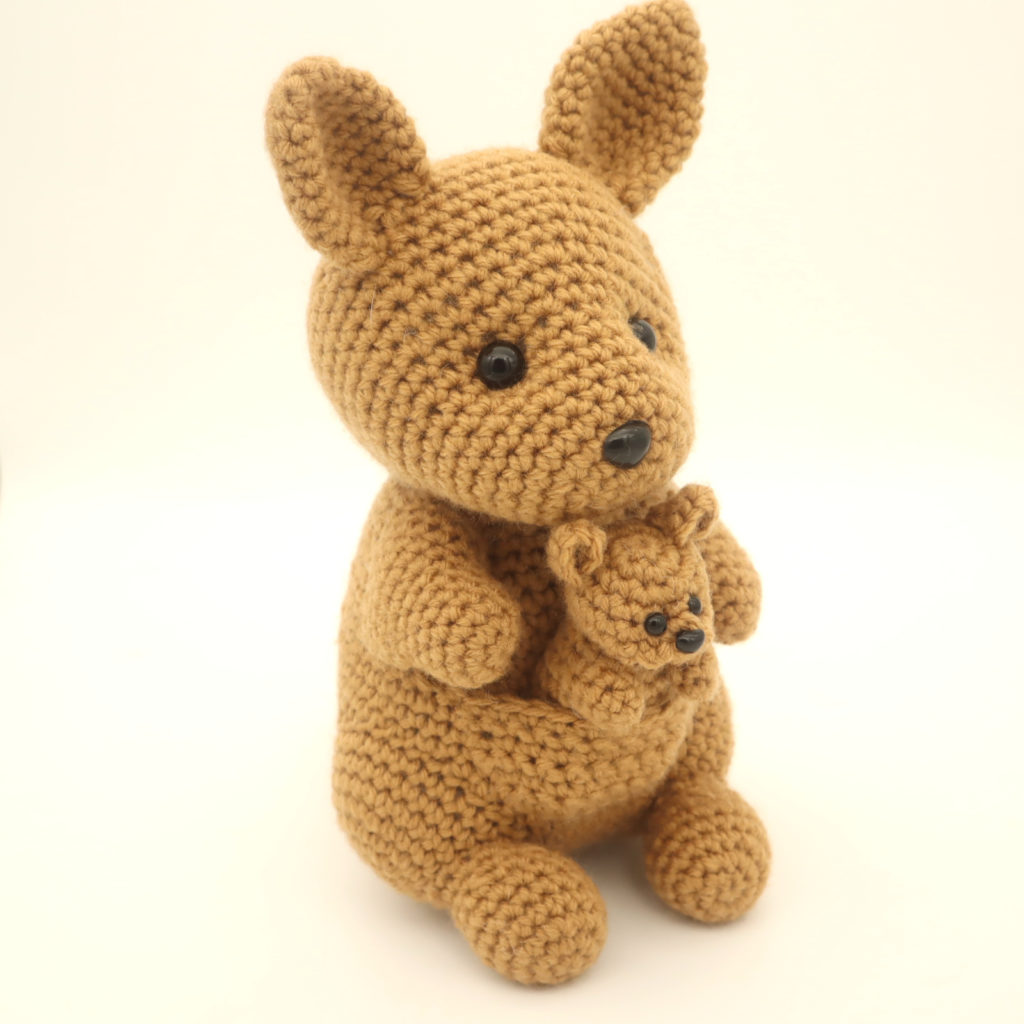
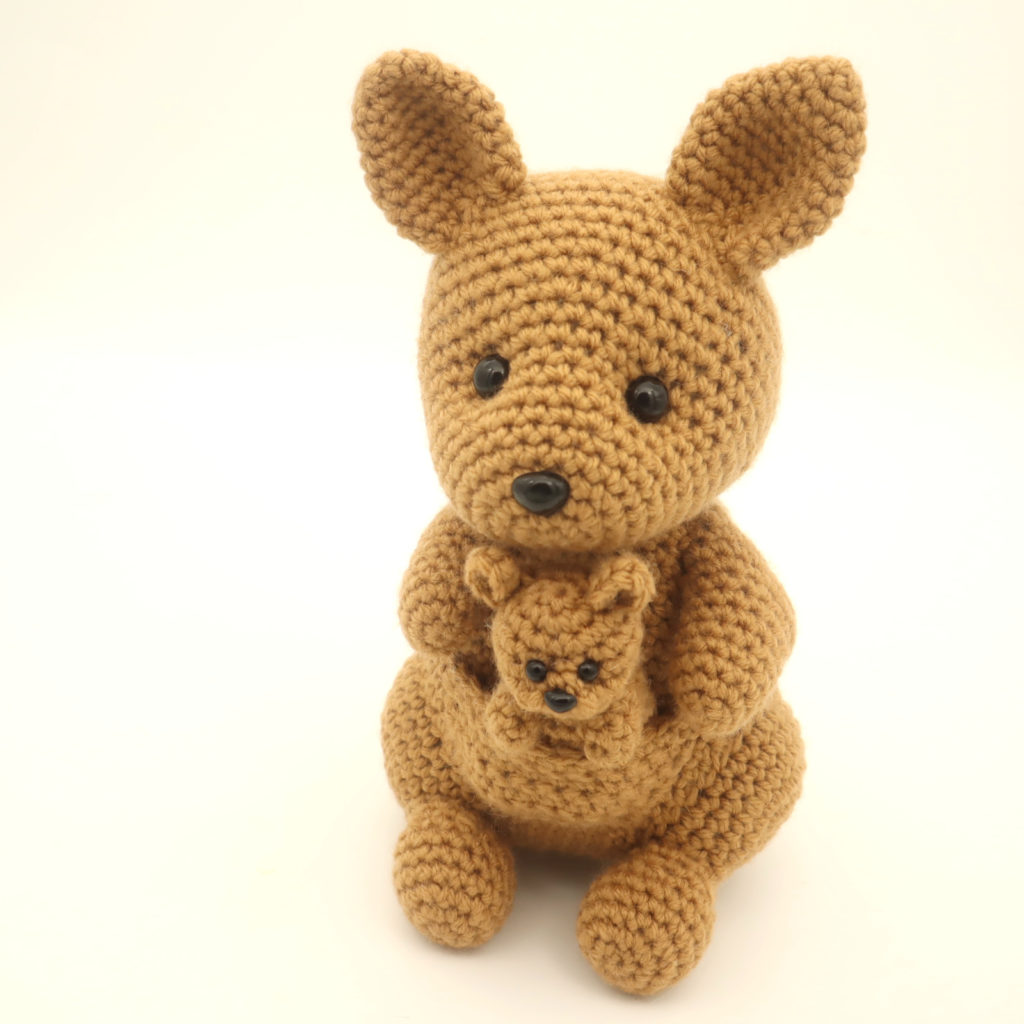
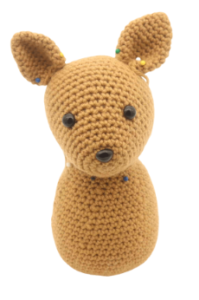
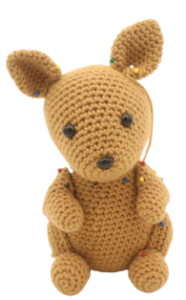
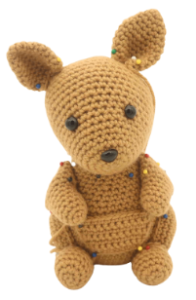
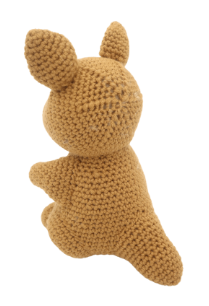
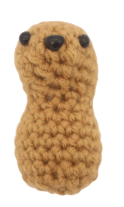
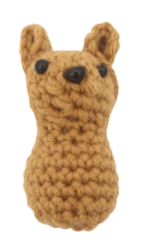
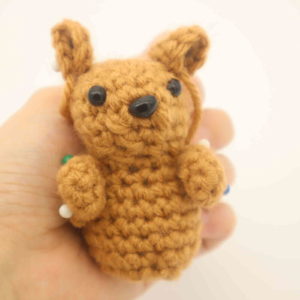
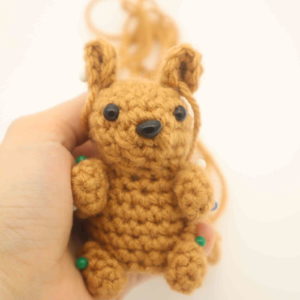
Kangaroo Amigurumi – Free Crochet Pattern
Print this pattern out – purchase the PDF version here!

 Supplies:
• Yarn 4/Medium Weight in:
Brown (I use Big Twist from JoAnn Fabrics)
•4mm Crochet Hook
•Tapestry needle
•Scissors
•Stuffing
•12mm safety eyes/nose for big kangaroo. 6mm safety eyes/nose for baby kangaroo
Additional Information:
•Difficulty: Easy, but lots of sewing.
•Size: 9 inches tall
This kangaroo pair is so adorable, I just can’t stop staring at this adorable mommy and baby kangaroo! This would make a fantastic toy for kids to play with. I also think you could get creative and use this kangaroo to store certain things in it’s pouch, such as stitch markers, and it could hold your most used crochet hook. Just an idea!
This pattern is super easy to make, as uses only very basic stitches. However, there is a lot of sewing. I enjoy sewing though – it’s fun to see the project all come together! Let’s get started!
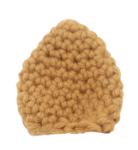
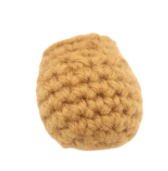
Head:
In brown yarn
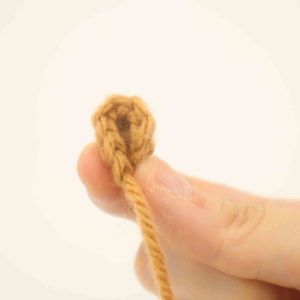
Round 1: 6 Sc into a Magic Ring (6)
Round 2: *Sc* all around (6)
Round 3: *Inc* all around (12)
Round 4: *Inc, Sc in the next st* all around (18)
Round 5: *Inc, Sc in the next 2 st* all around (24)
Round 6-7: *Sc* all around (24)
Round 8: *Inc, Sc in the next 3 st* all around (30)
Round 9-11: *Sc* all around (30)
Round 12: *Inc, Sc in the next 4 st* all around (36)
Round 13: *Sc* all around (36)
Round 14: *Inc, Sc in the next 5 st* all around (42)
Round 15: *Sc* all around (42)
Round 16: *Inc, Sc in the next 6 st* all around (48)
Round 17-22: *Sc* all around (48)
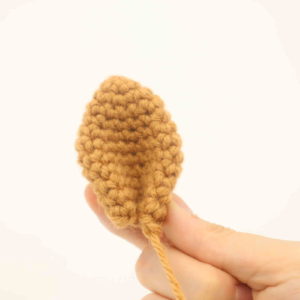
Round 23: *Dec, Sc in the next 6 st* all around (42)
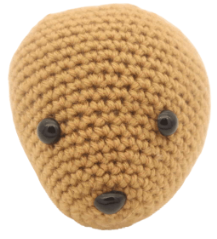
Now we will place the safety eyes in. Add the safety eyes between Round 10 and 11, 7 stitches apart. Now add a safety nose in between Round 3 and 4. The safety nose should line up in the middle of the eyes.
Round 24: *Dec, Sc in the next 5 st* all around (36)
Round 25: *Dec, Sc in the next 4 st* all around (30)
Round 26: *Dec, Sc in the next 3 st* all around (24)
Round 27: *Dec, Sc in the next 2 st* all around (18)
Round 28: *Dec, Sc in the next st* all around (12)
Round 29: *Dec* all around (6)
Finish off, leaving a long tail for sewing. Sew the remaining stitches closed and weave in ends.
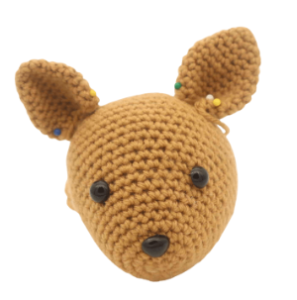
Ears: (Make 2)
In brown yarn
Round 1: 6 Sc into a Magic Ring (6)
Round 2: *Sc* all around (6)
Round 3: *Inc* all around (12)
Round 4-5: *Sc* all around (12)
Round 6: *Inc, Sc in the next st* all around (18)
Round 7-11: *Sc* all around (18)
Round 12: *Dec, Sc in the next st* all around (12)
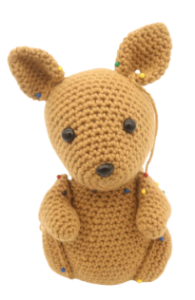
Finish off, leaving a long tail for sewing. Fold the bottom of the ear slightly together as shown. Pin the ears onto the head as shown and sew on. Once done, weave in ends and cut excess yarn.
Body:
In brown yarn
Round 1: 6 Sc into a Magic Ring (6)
Round 2: *Inc* all around (12)
Round 3: *Inc, Sc in the next st* all around (18)
Round 4: *Inc, Sc in the next 2 st* all around (24)
Round 5: *Inc, Sc in the next 3 st* all around (30)
Round 6: *Inc, Sc in the next 4 st* all around (36)
Round 7: *Inc, Sc in the next 5 st* all around (42)
Round 8: *Inc, Sc in the next 6 st* all around (48)
Round 9: *Inc, Sc in the next 7 st* all around (54)
Round 10-15: *Sc* all around (54)
Round 16: *Dec, Sc in the next 7 st* all around (48)
Round 17-19: *Sc* all around (48)
Round 20: *Dec, Sc in the next 6 st* all around (42)
Round 21-22: *Sc* all around (42)
Round 23: *Dec, Sc in the next 5 st* all around (36)
Round 24-25: *Sc* all around (36)
Round 26: *Dec, Sc in the next 4 st* all around (30)
Round 27-29: *Sc* all around (30)
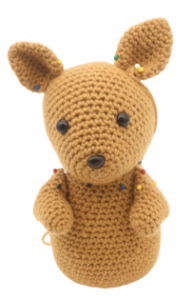
Finish off, leaving a long tail for sewing. Pin the head onto the body as shown and sew on. Once done, weave in ends.
Arms: (Make 2)
In brown
Round 1: 6 Sc into a Magic Ring (6)
Round 2: *Sc* all around (6)
Round 3: *Inc* all around (12)
Round 4-8: *Sc* all around (12)
Round 9: *Inc, Sc in the next st* all around (18)
Round 10-13: *Sc* all around (18)
Finish off, leaving a long tail for sewing. Stuff the arm firmly now. Pin the arms onto the body as shown and sew on. Once done, weave in ends and cut excess yarn.
Legs: (Make 2)
In brown

Round 1: 6 Sc into a Magic Ring (6)
Round 2: *Inc* all around (12)
Round 3: *Inc, Sc* all around (18)
Round 4: *Inc, Sc in the next 2 st* all around (24)
Round 5: *Inc, Sc in the next 3 st* (24)
Round 6-8: *Sc* all around (24)
Finish off, leaving a long tail for sewing. Stuff the arm firmly now. Pin the arms onto the body as shown and sew on. Once done, weave in ends and cut excess yarn.
Feet: (Make 2)
In brown
Round 1: 6 Sc into a Magic Ring (6)
Round 2: *Inc* all around (12)
Round 3: *Inc, Sc in the next st* all around (18)
Round 4-6: *Sc* all around (18)
Round 7: *Dec, Sc in the next st* all around (12)
Round 8-9: *Sc* all around (12)
Finish off, leaving a long tail for sewing. Stuff the foot firmly now. Pin the foot onto the leg as shown and sew on. Once done, weave in ends and cut excess yarn.
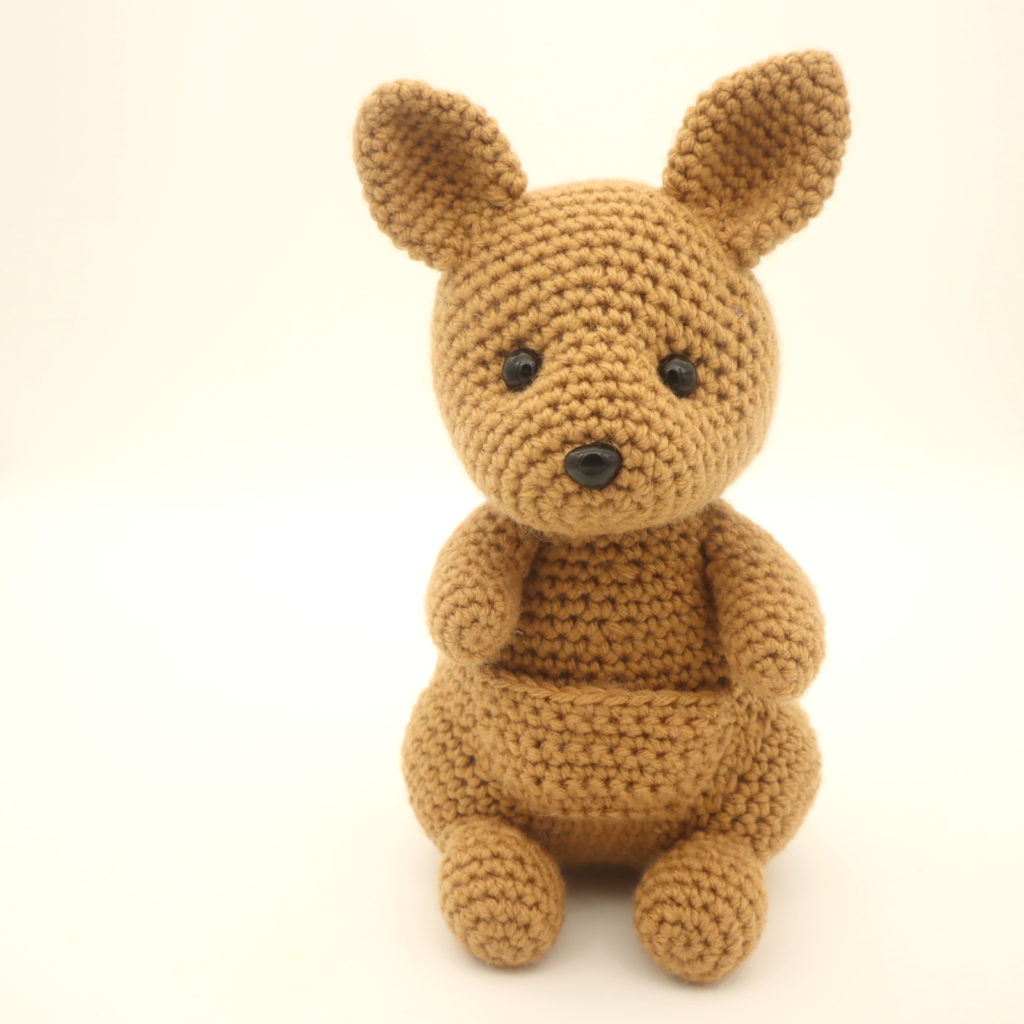
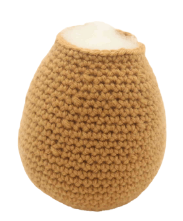
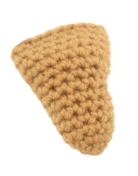
Pouch:
In brown
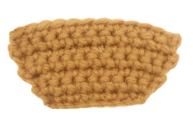
Row 1: Ch 9. Sc in the 2nd Ch from the hook. Sc into that same st, Sc in the next 6 st, Inc in the last st (10)
Row 2: Ch 1 and turn. Inc in the next st, Sc in the next 8 st, Inc in the last st (12)
Row 3-6: Ch 1 and turn. Sc in the next 12 st (12)
Finish off, leaving a long tail for sewing. Pin the pouch onto the belly of the toy as shown and sew on. Once done sewing on, tie a firm knot with this yarn, making sure the knot is close to the body. Bring this knot into the toy’s body to hide, then cut any excess yarn. The knot will help the pouch stay on better than simply weaving in the ends.
Tail:
In brown yarn
Round 1: 6 Sc into a Magic Ring (6)
Round 2: *Inc* all around (12)
Round 3: *Sc* all around (12)
Round 4: *Inc, Sc in the next st* all around (18)
Round 5-9: *Sc* all around (18)
Round 10: *Inc, Sc in the next 2 st* all around (24)
Round 11: *Sc* all around (24)
Round 12: *Inc, Sc in the next 3 st* all around (30)
Round 13: *Sc* all around (30)
Finish off, leaving a long tail for sewing. Pin the tail on as shown and sew on. Be sure to add stuffing before fully sewing on. Once done, weave in ends and cut any excess yarn.
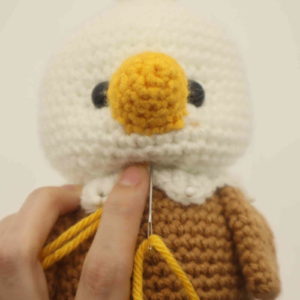
Face Definition:
In brown yarn
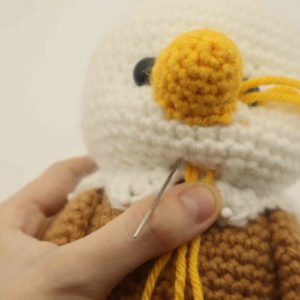
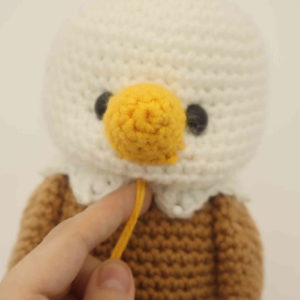
Face definition can make the toy look cuter! The pictures show an eagle, but the steps are the exact same no matter which animal you try this technique out with.
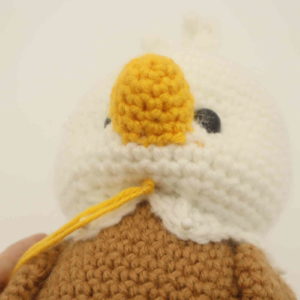
Take a 12″ piece of white yarn and place it on a needle. Insert the needle where shown (Pic 1). Pull needle out next to the right of the toy’s eye (Pic 2).
1. 2.
2.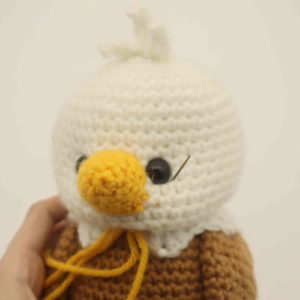
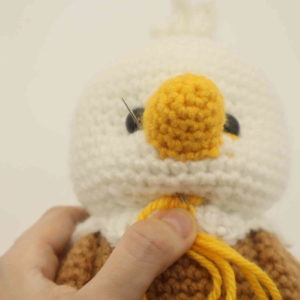
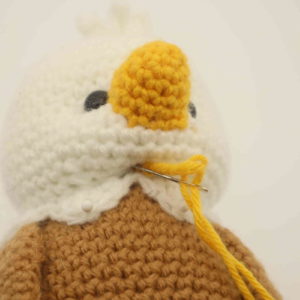
Reinsert needle to the left of the toy’s eye (Pic 3). Pull needle out where shown, about 1 stitch over from where we originally inserted the needle (Pic 4).
3. 4.
4.
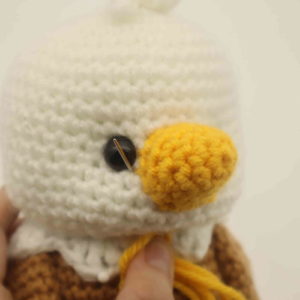
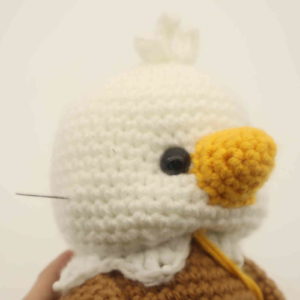
Reinsert needle 1 stitch over (Pic 5). Pull needle out at the right side of the left eye (Pic 6).
5. 6.
6.
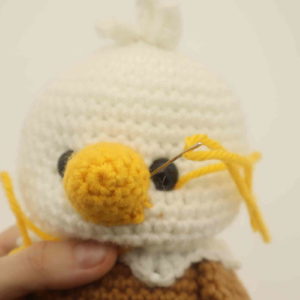
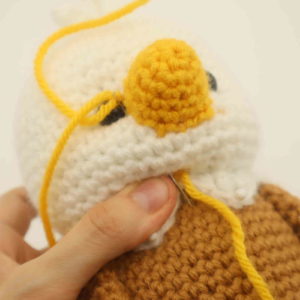
Reinsert needle at the left side of the left eye (Pic 7). Pull needle out at the same stitch where we originally inserted out needle (Pic 8).
7. 8.
8.
Pull both ends of yarn firmly to tighten the toy’s face (Pic 9). Tie both ends of yarn together a few times to form a knot (Pic 10).
9. 10.
10.
Bring the tail ends of yarn into the toy’s head to hide the knot (Pic 11-12). Cut excess yarn. Done!
11. 12.
12.
Baby Kangaroo Body:
In brown
To make the baby, we will start at the top of the head and work our way down to the body in one continuous piece.
Round 1: 6 Sc into a Magic Ring (6)
Round 2: *Inc* all around (12)
Round 3: *Inc, Sc in the next st* all around (18)
Round 4: *Sc* all around (18)
Now we will mark where to place the eyes in Round 4. Add a different colored stitch marker into the 9th and 11th stitch in Round 4. We will place the safety eyes into those areas later.
Round 5: Sc in the next 8 st, Inc in the next 3 st, Sc in the next 7 st (21)
Now we will mark where to place the nose in Round 5. Add a different colored stitch marker into the 12th stitch made in Round 5. We will place the nose in that stitch later.
Round 6: Sc in the next 8 st, *Dec* 3 times, Sc in the next 7 st (18)
Round 7: Sc in the next 6 st, *Dec* 3 times, Sc in the next 6 st (15)
Add the safety eyes and safety nose in the the marked areas now.
Round 8: Sc in the next 6 st, *Dec* 3 times, Sc in the next 3 st (12)
Round 9-10: *Sc* all around (12)
Round 11: *Inc, Sc in the next st* all around (18)
Round 12-15: *Sc* all around (18)
Stuff the head and body here. Continue stuffing after each round.
Round 16: *Dec, Sc in the next st* all around (12)
Round 17: *Dec* all around (6)
Finish off, leaving a long tail for sewing. Sew the remaining stitches closed and weave in ends. Cut any excess yarn.
Baby Ears: (Make 2)
In brown
Round 1: 6 Sc into a Magic Ring (6)
Round 2: *Inc* in each of the next 4 st.
Finish off and leave a long tail for sewing. Fold the bottom of the ear in half as shown, then pin onto the head as shown. Sew the ears on. Once done, weave in ends and cut any excess yarn.
Baby Arms: (Make 2)
In brown

Round 1: 6 Sc into a Magic Ring (6)
Round 2-4: *Sc* all around (6)
Finish off, leaving a long tail for sewing. Stuff the arms, then pin onto the body as shown. Sew on and weave in ends, cutting any excess yarn.
Baby Legs: (Make 2)
In brown
Round 1: 6 Sc into a Magic Ring (6)
Round 2-4: *Sc* all around (6)
Finish off, leaving a long tail for sewing. Stuff the legs, then pin onto the body as shown. Sew on and weave in ends, cutting any excess yarn.
All done! Now just put the baby into the mom’s pouch and you’re all done 🙂
If you made this kangaroo, I would LOVE to see! You can show me by posting a picture in the comments section underneath this post!


30 Comments
That’s not very nice…email me a free pattern and I cannot print it. Shame on you! Take me off your mailing list
Thank you for the pattern I’m new at amigurumi and your patterns are easy to follow
Please help! The pattern for the legs is missing. You have put the directions for arms in a second time. I really need the legs right away.
Still not fixed as of Sept ’23, but my best guess, form the photos and their crochet style is:
sc 6 into magic ring
Inc in each (12)
Inc, sc x6 (18)
sc round (18)
Inc, 2sc x6 (24)
sc round (24)
sc round (24)
Tie off.
Very cute little kangaroo and joey. Thank you.
Thank you for the pattern I’m new at amigurumi and your patterns are easy to follow
Thank you so much for this free design! Just a little too for later, maybe for other designs you can add more pictures, though I know that it is a lot more work. It just makes it a little simpler for us! You don’t have to, but I think that it work help out a lot!
The pattern was easy to follow. The baby didn’t quite fit in the pouch so I enlarged the pouch. Thanks for making the pattern available for free.
Merci beaucoup pour ce joli kangourou!
Bonne soirée.
Pattern really cute and fun to make. I made my pouch bigger. The pattern given was just to small for my baby.
Omgosh I can’t believe I made this. The cutest thing I’ve made so far. Thank you so much for the free pattern, adding the face definition made all the difference.
This is so cute! The pattern is easy to follow and well written, although I agree with a post above that a few more pictures (maybe side and back?) would make it easier to figure out the placements. This may sound weird, but I didn’t make the joey because I made a pair of these for my niece and nephew to use as tooth fairy pillows. They love them!
Thank you. This was so much fun to make.
Lovely pattern thank you. Making for a Wallaby rescue.
Thank you for sharing this pattern! I love all the patterns from your site; they are so cute! This will be given to one of our neighbor children; one of the sweetest girls I know. She will love it! Thanks again!
Can you explain the legs? Round 4 is (inc, 2 sc) all around for 24 stitches total. Then Round 5 is (inc, 3 sc) and has a 24 stitch total too, with rows 6-8 sc all around for 24 stitches. If Round 5 is (inc, 3 sc) all around, that would be 30 stitches each for rounds 5-8. Am I missing something?
I agree with you. We aren’t missing anything and read what was there. Personally I just did the sc 3 and inc, I just still counted up to 24. It doesn’t look bad and no one will notice.
I have finished my Kangaroo and baby. What do you think
Love this kangaroo and baby! It’s only my 5th Amigurumi I’ve made and I know the baby looks like a mouse but I love it!
My favorite creation to date! Love this pattern and plan to make more. Three months into crocheting and loving these amigurumi.
here is my kangaroo what ya’ll think? It was a great pattern and very easy to follow. The pics for reference were perfectly added too.
Hi thank you so much for this pattern will make some more going out in Christmas Stockings to an orphanage in Bulgaria
Cute kangaroo and joey for my granddaughter’s birthday
Lovely pattern, just had to extend the pouch to fit in the joey
Thank you for the pattern, very easy to follow for beginners!
This pattern turned out so cute! One of my first amigurumi projects.
I made a purple Kangaroo for my bf, favorite animal and color. Didnt do the joey, but I added a scarf ( the line of the neck was a lil wonky since im new to attaching things) and im very happy with how it came out. Thank you for the free pattern!!
Love this pattern!
At what point do you stuff the head?
Such a cute pattern! I was worried the baby wouldn’t fit in the pouch so i skipped the legs (they’ll be hidden anyways) but it turned out great!
This is so cute. I’m going to try to make it next.