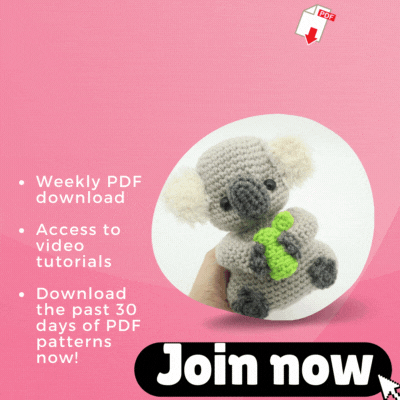
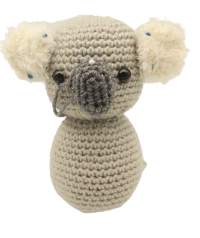
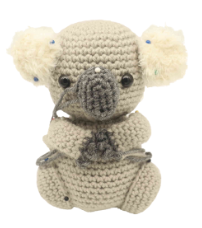
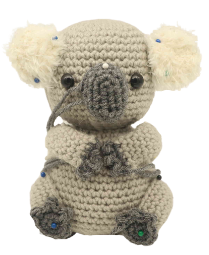
Koala Amigurumi – Free Crochet Pattern

Print this pattern out – purchase the PDF version here!

 Supplies:
• Yarn 4/Medium Weight in:
Light grey, dark grey, green, and furry white yarn
•4mm Crochet Hook
•Tapestry needle
•Scissors
•Stuffing
•12mm safety eyes
Additional Information:
•Difficulty: Intermediate
•Size: 7″ inches tall
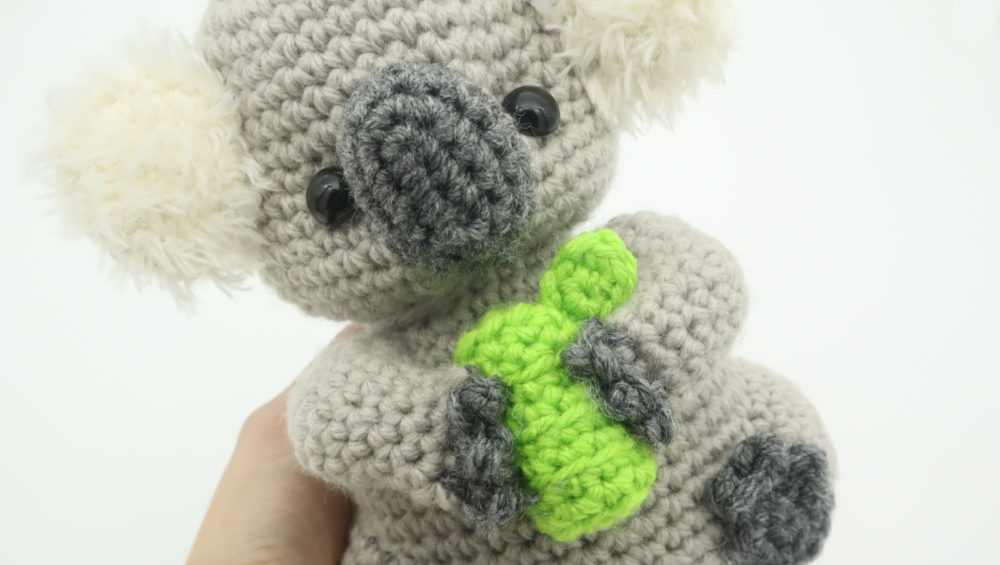
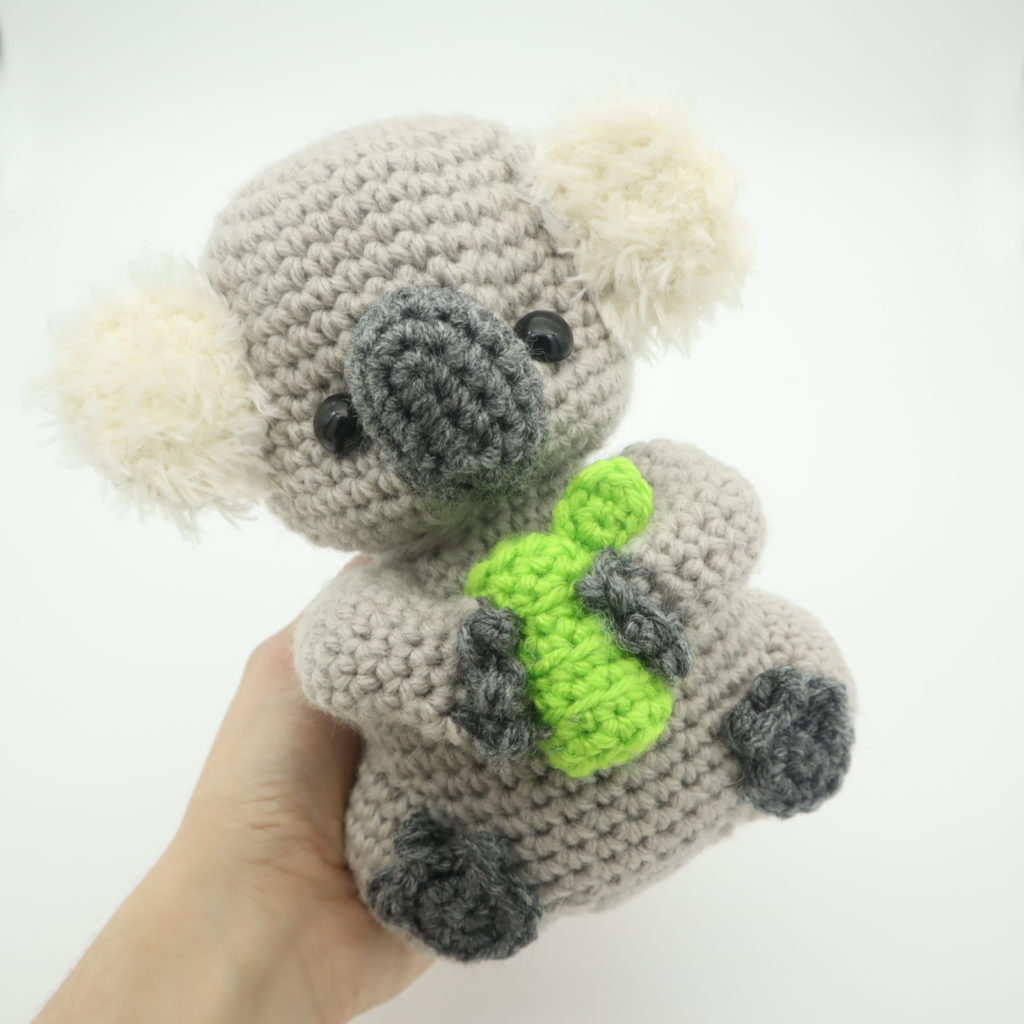
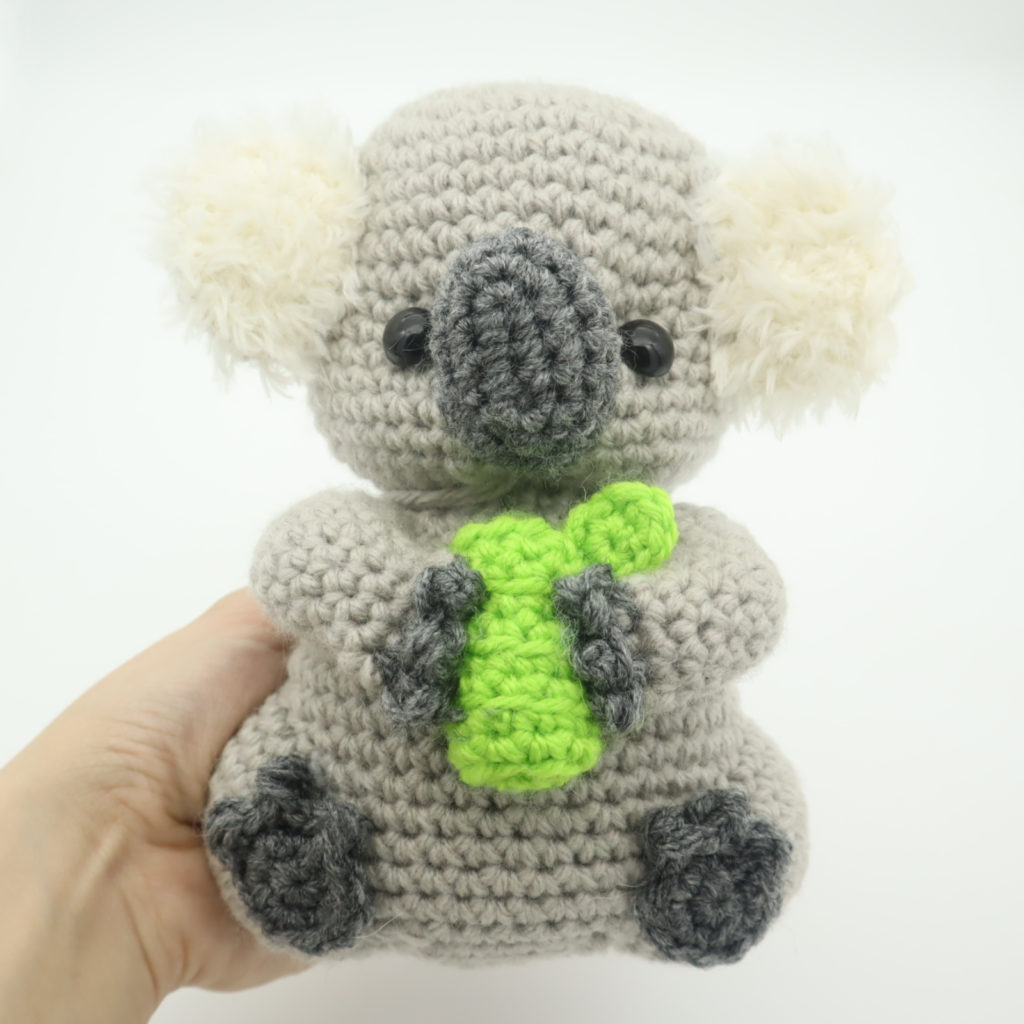
I have a soft spot in my heart for koalas! They are so cute and anytime I see one online I just want to give it a hug! I think a good compromise is hugging this crochet koala 🙂
This pattern is pretty easy, and you may learn a cool new technique to making bending arms. I suggest using fluffy yarn for the ears, but if you don’t have fluffy yarn or it’s too difficult to use, then you can simply brush out your regular white yarn with a metal brush once you’ve completed the ears.
Let’s get started!
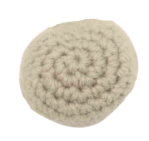
Head/body:
In grey
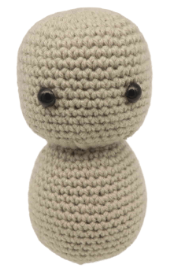
Round 1: 6 Sc into a Magic Ring (6)
Round 2: *Inc* all around (12)
Round 3: *Inc, Sc in the next st* all around (18)
Round 4: *Inc, Sc in the next 2 st* all around (24)
Round 5: *Inc, Sc in the next 3 st* all around (30)
Round 6: *Inc, Sc in the next 4 st* all around (36)
Round 7: *Inc, Sc in the next 5 st* all around (42)
Round 8-13: *Sc* all around (42)
Now we will mark where to place the safety eyes. Add a different colored stitch marker into the 20th and 28th stitch in Round 13.
Round 14-18: *Sc* all around (42)
Round 19: *Dec, Sc in the next 5 st* all around (36)
Round 20: *Dec, Sc in the next 4 st* all around (30)
Round 21: *Dec, Sc in the next 3 st* all around (24)
Add the safety eyes into the marked areas now
Round 22: *Dec, Sc in the next 2 st* all around (18)
Round 23: In the FLO (Front Loop Only), repeat *Inc, Sc in the next 2 st* all around (24)
Round 24: In BOTH loops, repeat *Inc, Sc in the next 3 st* all around (30)
Round 25: *Inc, Sc in the next 4 st* all around (36)
Round 26-28: *Sc* all around (36)
Round 29: *Inc, Sc in the next 5 st* all around (42)
Stuff the head now
Round 30-37: *Sc* all around (42)
Round 38: *Dec, Sc in the next 5 st* all around (36)
Round 39: *Dec, Sc in the next 4 st* all around (30)
Round 40: *Dec, Sc in the next 3 st* all around (24)
Stuff the body now. Continue stuffing the body after each round
Round 41: *Dec, Sc in the next 2 st* all around (18)
Round 42: *Dec, Sc in the next st* all around (12)
Round 43: *Dec* all around (6)
Finish off, leaving a long tail for sewing. Sew the remaining stitches closed and weave in ends.
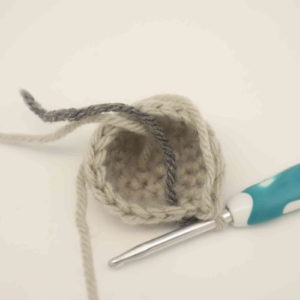
Nose:
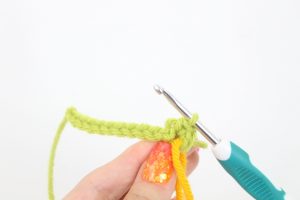
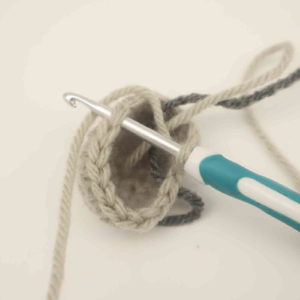
We will create the nose by creating a chain and working completely around the chain to form a round.
If you don’t know how to work around a chain, these photos will show you how and where to turn your work. The amount of chains shown in the photo are not the same amount called for in the pattern, so your chain will look a little smaller 🙂
Round 1: Ch 6 (Pic 1). Sc in the 2nd ch from the hook. Sc 2 more times into the same st (Pic 2).
1.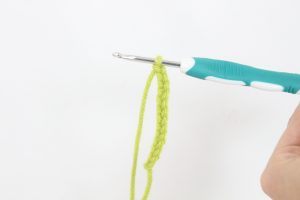 2.
2.
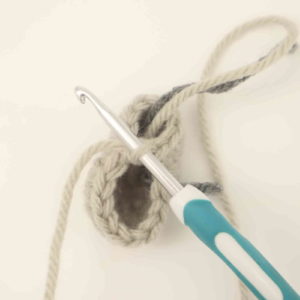
Sc in the next 3 st (Pic 3). Now we meet the last chain. Sc 3 times into this ch (Pic 3).
3.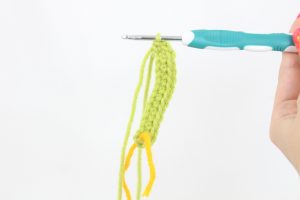
Now turn to the OTHER side of the chain, where we haven’t made any stitches yet. Continuing on this side, Sc in the next 3 st (Pic 4-5). (12)
4. 5.
5.
Round 2: *Inc* in the next 3 st, Sc in the next 3 st, *Inc* in the next 3 st, Sc in the next 3 st (18)
Round 3-4: *Sc* all around (18)
Finish off, leaving a long tail for sewing. Pin the nose on as shown. Sew the nose on, making sure to stuff the nose before fully sewn on. Once done, weave in ends.
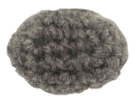
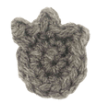
Ears: (Make 2)
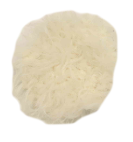
In furry white yarn
Round 1: 6 Sc into a Magic Ring (6)
Round 2: *Inc* all around (12)
Round 3: *Inc, Sc in the next st* all around (18)
Round 4: *Inc, Sc in the next 2 st* all around (24)
Round 5: Change to grey yarn. Repeat *Dec, Sc in the next 2 st* all around (18)
Round 6: *Dec, Sc in the next st* all around (12)
Round 7: *Dec* all around (6)
Finish off, leaving a long tail for sewing. Sew the remaining stitches closed, then pin the ear onto the toy as shown. Sew on. Once sewn on, weave in the ends.
Arms: (Make 2)
In light grey
Round 1: 6 Sc into a Magic Ring (6)
Round 2: *Inc* all around (12)
Round 3: *Inc, Sc in the next st* all around (18)
Round 4-5: *Sc* all around (18)
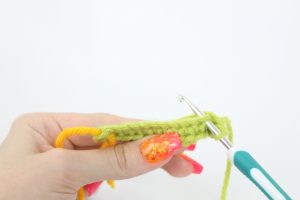
In the next round we will create the arm, which will lead into the hand.
Round 6: Skip the next 9 stitches. Sc into the 10th stitch (Pic 1-3). Now move your stitch marker to the Sc you just made. This will mark the rounds of the arm we’re forming. Sc in the next 8 st (Pic 4). (9)
1. 2.
2. 3.
3. 4.
4.
Round 7-9: *Sc* all around (9)
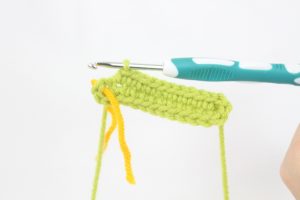
In the next row we will create the fingers
Row 10: Change to dark grey. Now lining the stitches together and going through BOTH stitches, Sc in the next 4 st as shown (Pic 6-7).
5.
 6.
6. 7.
7.
Turn. Trc in the next st, SlSt in the next st. Trc in that same st, SlSt in the next st. Trc into the same st, SlSt into the next st.
8.
Finish off, leaving a long tail for sewing. We will use this end of yarn to sew the bamboo stick to it’s hands later.
Legs: (Make 2)
In light grey
Round 1: 6 Sc into a Magic Ring (6)
Round 2: *Inc* all around (12)
Round 3: *Inc, Sc in the next st* all around (18)
Round 4: *Inc, Sc in the next 2 st* all around (24)
Round 5-7: *Sc* all around (24)
Finish off, leaving a long tail for sewing. Pin the legs onto the toy as shown and sew on.
Feet: (Make 2)
In dark grey
Round 1: 6 Sc into a Magic Ring (6)
Round 2: *Inc* all around (12)
Round 3: Repeat *SlSt in the next st, Trc into that same st, SlSt into the same st* 3 times. Finish off, leaving a long tail for sewing. Pin the foot onto the leg as shown and sew on. Once done, weave in ends.
Finish off, leaving a long tail for sewing. Pin the legs onto the toy as shown and sew on.
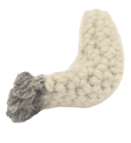
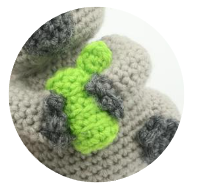
Bamboo shoot:
In green
Round 1: 6 Sc into a Magic Ring (6)
Round 2: *Inc, Sc in the next st* all around (9)
Round 3: In the BLO, *Sc* all around (9)
Round 4: In BOTH Loops, *Sc* all around (9)
Round 5: In the BLO, *Sc* all around (9)
Round 6: In BOTH Loops, *Sc* all around (9)
Round 7: In the BLO, *Sc* all around (9)
Round 8: In BOTH Loops, *Sc* all around (9)
Round 9: In the BLO, *Sc* all around (9)
Round 10: In BOTH Loops, *Sc* all around (9)
Round 11: In the BLO, *Dec* 4 times. Finish off, leaving a long tail for sewing. Pin the bamboo shoot between the hands and sew on.
Bamboo leaf:
In green
Round 1: 6 Sc into a Magic Ring (6)
Round 2: Sc 3 times into the first st. Finish off and leave a long tail for sewing. Sew the leaf to the shoot.
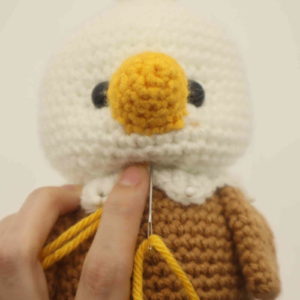
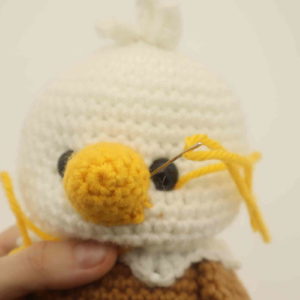
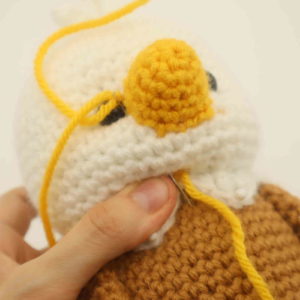
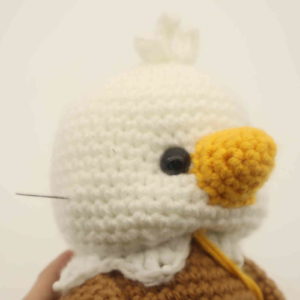
Face Definition:
In light grey yarn
Face definition can make the toy look cuter! The pictures show an eagle, but the steps are the exact same no matter which animal you try this technique out with.
Take a 12″ piece of white yarn and place it on a needle. Insert the needle where shown (Pic 1). Pull needle out next to the right of the toy’s eye (Pic 2).
1. 2.
2.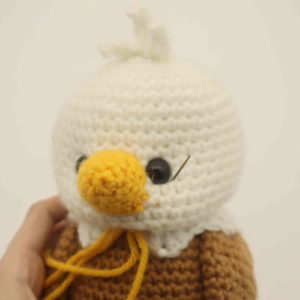
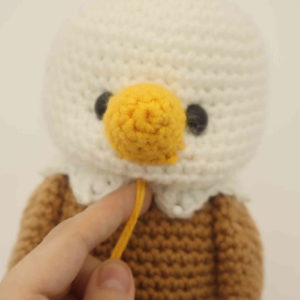
Reinsert needle to the left of the toy’s eye (Pic 3). Pull needle out where shown, about 1 stitch over from where we originally inserted the needle (Pic 4).
3. 4.
4.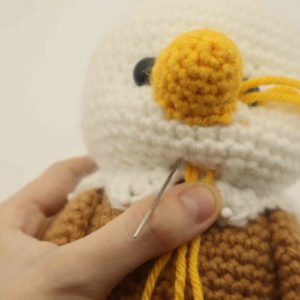
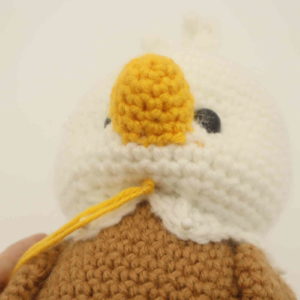
Reinsert needle 1 stitch over (Pic 5). Pull needle out at the right side of the left eye (Pic 6).
5. 6.
6.
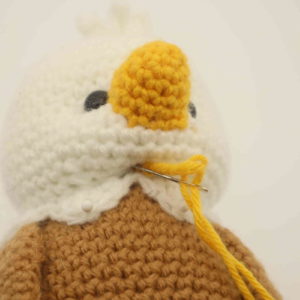
Reinsert needle at the left side of the left eye (Pic 7). Pull needle out at the same stitch where we originally inserted out needle (Pic 8).
7. 8.
8.
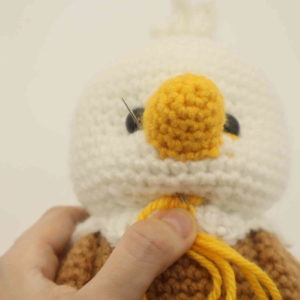
Pull both ends of yarn firmly to tighten the toy’s face (Pic 9). Tie both ends of yarn together a few times to form a knot (Pic 10).
9. 10.
10.
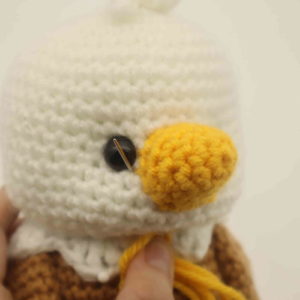
Bring the tail ends of yarn into the toy’s head to hide the knot (Pic 11-12). Cut excess yarn. Done!
11. 12.
12.
Done! If you made this koala, I would LOVE to see a picture! You can show me by posting a picture in the comments section underneath this post 🙂


2 Comments
I was soo exited to see that you had posted a new pattern then I looked at the date and I was even more exited. the pattern was posted a day after my birthday. Also this pattern is also so cute
Super cute pattern!