
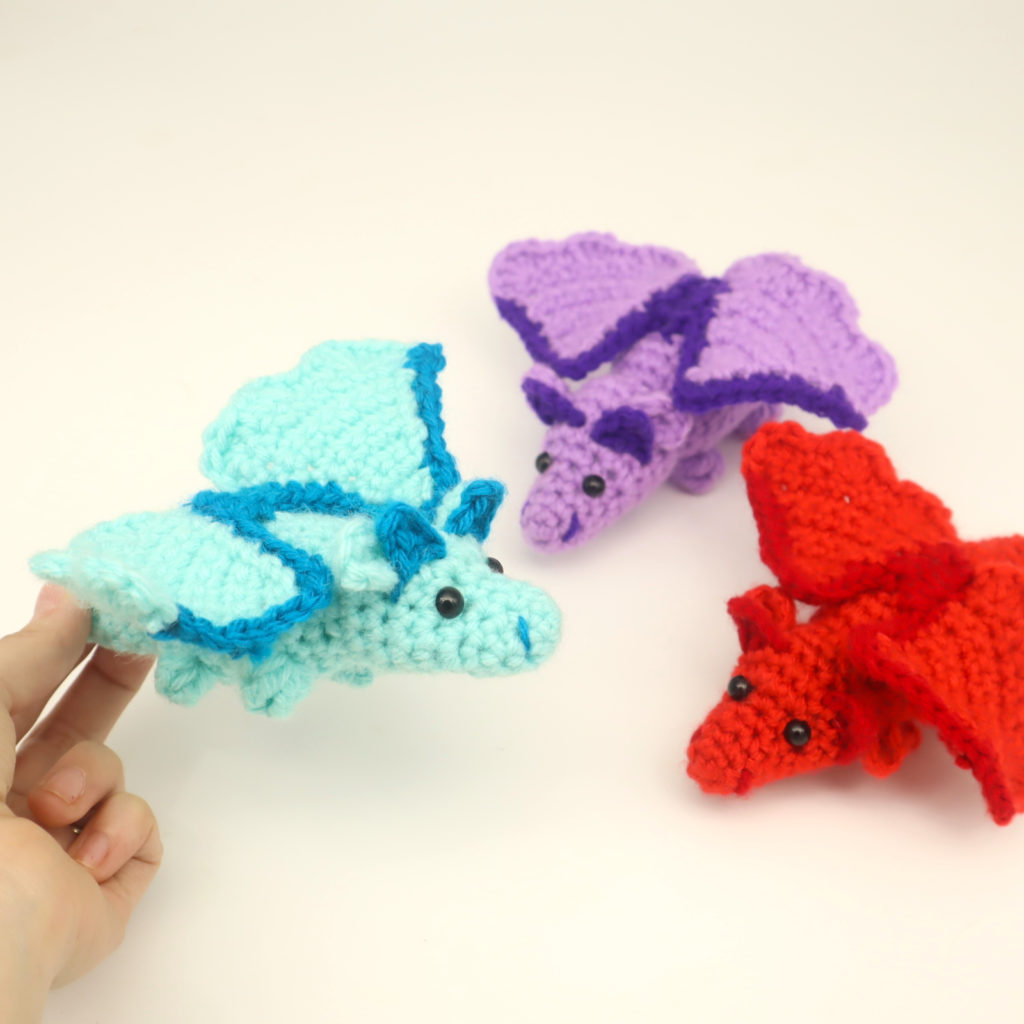
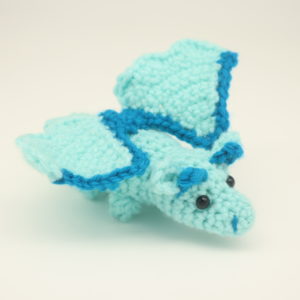
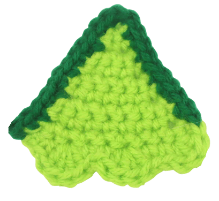
Scraptacular Dragons Amigurumi – Free Crochet Pattern


Print this pattern out – purchase the PDF here!

 Supplies:
• Yarn 4/Medium Weight in:
Main color and darker main color
•4mm Crochet Hook
•Tapestry needle
•Scissors
•Stuffing
•7mm safety eyes
Additional Information:
•Difficulty: Intermediate
•Size: 5.5″ inches from the tail to the nose
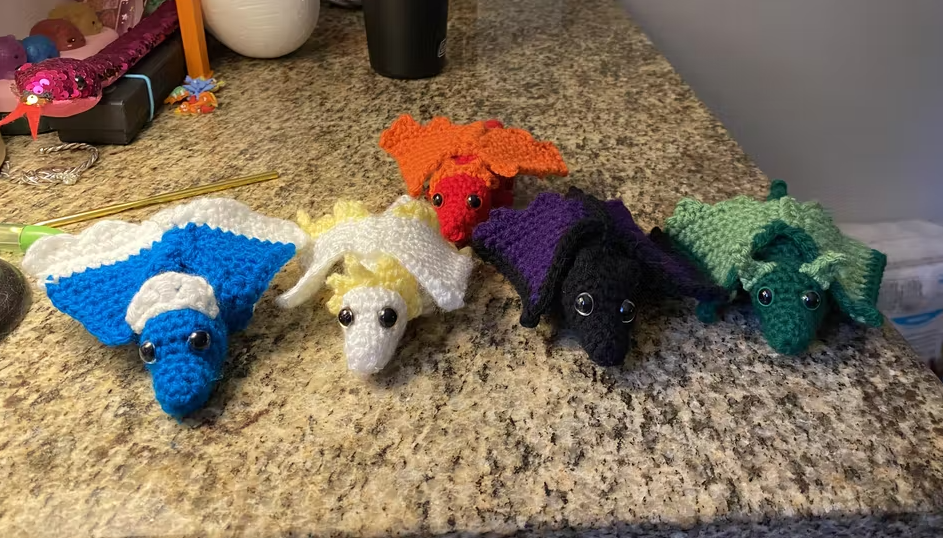
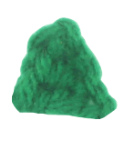
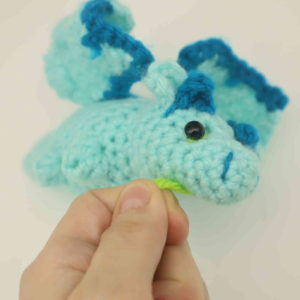
This pattern was inspired from a fellow crocheter, Kathleen, who left a review on my scraptacular reptile pattern. She did her own twist on the pattern and made the reptiles into dragons! I loved the idea SO much that I asked them if I could turn their idea into an official pattern. She said yes! So I want to thank her again for her creativity 🙂 I used her photos as inspiration to make this dragon pattern! Here’s the photo of her awesome dragons:
These dragons are super duper cute and really fun to make! The head, horns, body, and arms are all made in one continuous piece. The only sewing on in this pattern is sewing the ears and wings to the dragon.
This pattern is perfect for your scrap yarns. You can manipulate the size of the dragons by using a different weight yarn! You can use a blanket yarn to make a large dragon, or a sport weight yarn to make a smaller, keychain sized dragon. Just be sure to use the appropriate hook for the yarn you use!
Let’s get started!
How to make a triple crochet bobble stitch:
The feet are crocheted into the dragon as we’re making it.
To do this, we will create a bobble stitch. The bobble stitch is pretty easy! Here’s a quick overview: We will create 4 triple crochets into the same stitch. Then, we will take our hook out of our current working stitch, insert our hook into the first triple crochet we made, then also insert our hook into the current working loop. We will yarn over and pull through both loops at the same time. Done!
Here’s the tutorial in a bit more detail:
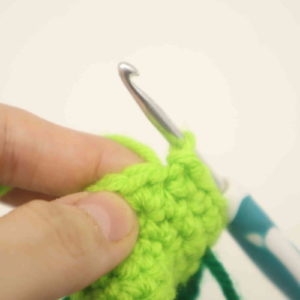
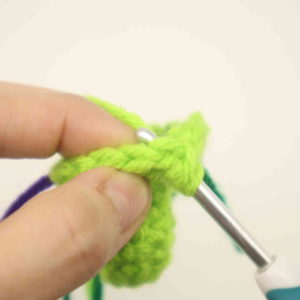
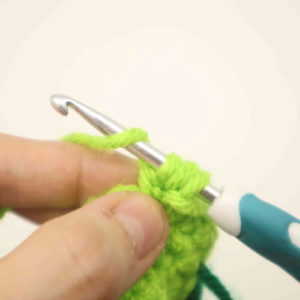
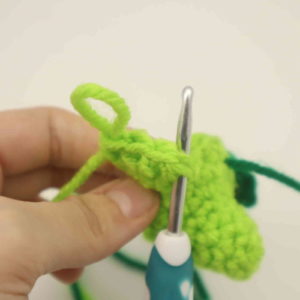
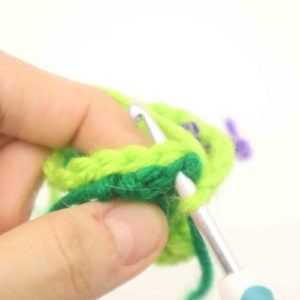
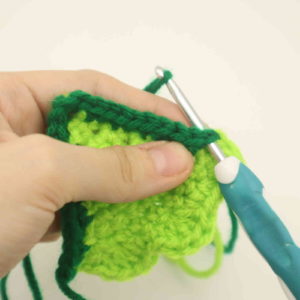
First, yarn over and insert your hook into the stitch.
*Yarn over twice (Pic 2) and insert it your hook into the stitch (Pic 3).
1. 2.
2. 3.
3.
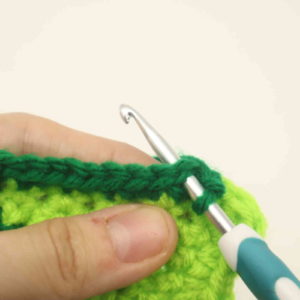
Yarn over (Pic 4) and pull the yarn through the stitch (Pic 5-6).
4. 5.
5. 6.
6.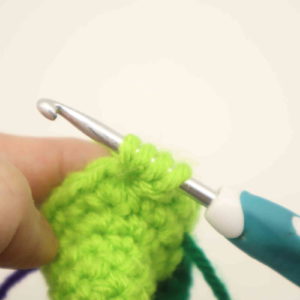
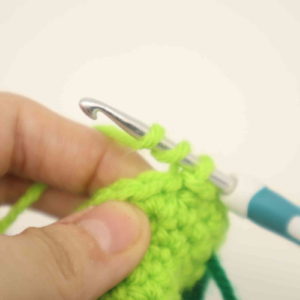
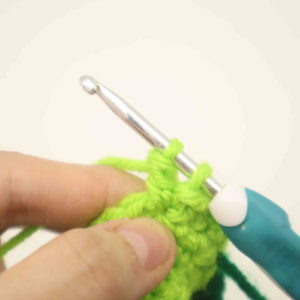
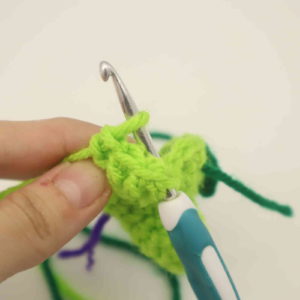
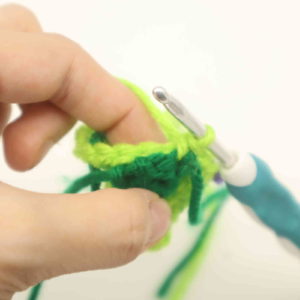
You will have four loops on your hook (Pic 6). Yarn over (Pic 7) and pull through two loops.
6. 7.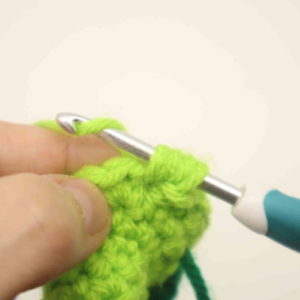
Once again, yarn over and pull through two loops (Pic 8-10).
8. 9.
9. 10.
10.
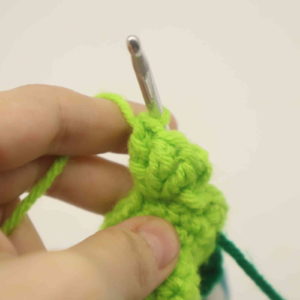
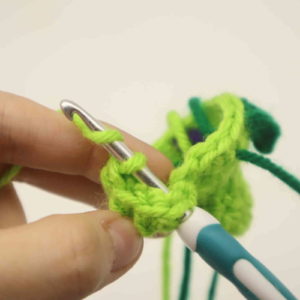
Again, yarn over and pull through two loops (Pic 11-12). You have just created a triple crochet!*
11. 12.
12.
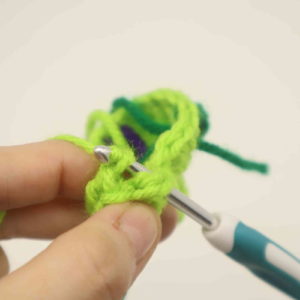
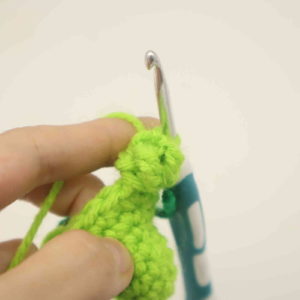
Repeat the steps in the *stars* until you have created 4 triple crochets (Pic 13)
13.
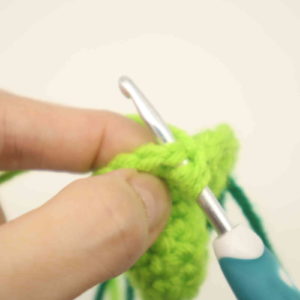
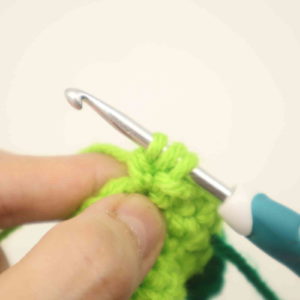
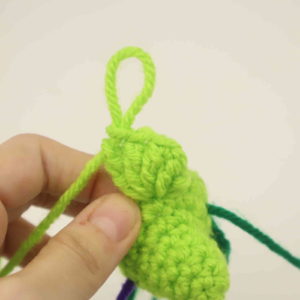
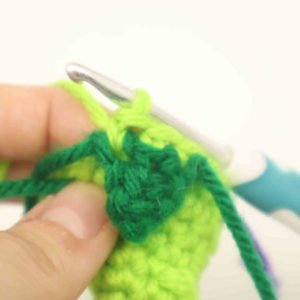
Now, remove your hook from the current working loop (Pic 14). Reinsert your hook into the first triple crochet we made (Pic 15).
14. 15.
15.
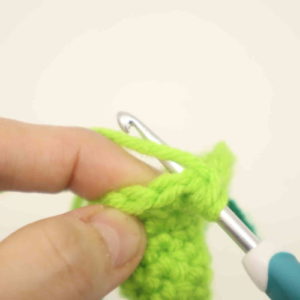
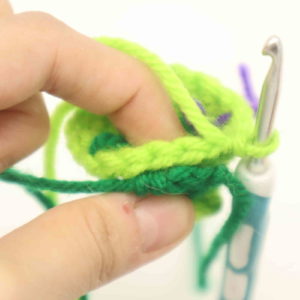
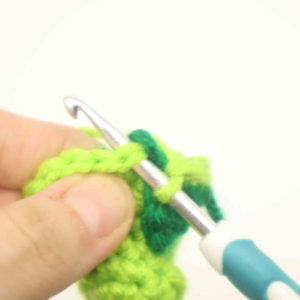
Now, also insert your hook into the current working loop (Pic 16). Yarn over (Pic 17) and pull through both loops on your hook at the same time (Pic 18-19). You’ve completed a bobble stitch!
16. 17.
17. 18.
18. 19.
19.
Remember, even though we put 4 triple crochets into one stitch, we only created one complete stitch. This is because we crocheted all 4 triple crochets together, making 1 stitch. When you meet the triple crochet, only make 1 single crochet where it is.
Horns: (Make 2)
In darker main color
Make the horns first before the body.
Row 1: Ch 4. Sc in the 2nd Ch from the hook. Hdc in the next st, Dc in the last ch. Finish off.
Head/body:
In Main Color
Round 1: 6 Sc in Magic Ring (6)
Round 2: *Sc* all around (6)
Round 3: *Inc, Sc* all around (9)
Round 4-5: *Sc* all around (9)
Round 6: Sc in next 2 St, *Inc* in the next 4 st, Sc in next 3 st (13)
Now we will mark where to place the safety eyes into Round 6. Add a different colored stitch marker into the 4th and 8th stitch in Round 6.
Round 7: Sc in next 2 st, *Inc, Sc in the next st* 4 times, Sc in last 3 st (17)
In the next round we will attach the horns to the body. We will do this by crocheting them on as we crochet the head.
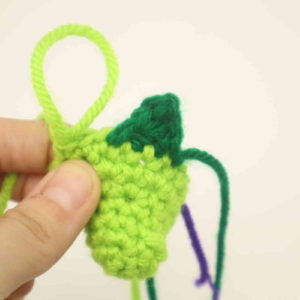
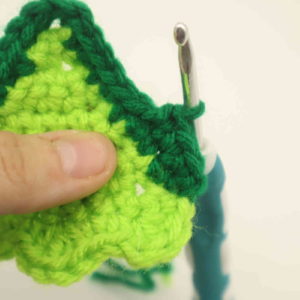
Round 8: Sc in the next 3 st. Line up the horn to the head (Pic 1). The wrong/ugly side will be facing us. Going through BOTH the horn and the head, Sc in the next 3 st (Pic 2-5).
1. 2.
2. 3.
3. 4.
4. 5.
5. On just the head, Sc in the next 3 st (Pic 6). Line up second horn to head, then going through BOTH the horn and the head, Sc in the next 3 st. Continuing on just the head, Sc in the next 5 st (Stitch Count: 17)
6.
Round 9-10: *Sc* all around (17)
Add the safety eyes to the marked areas of Round 6 now.
Round 11: *Dec* 8 times, Sc in last st (9)
Round 12: In the FLO (Front Loop Only), *Inc* all around (18)
Round 13: In BOTH Loops, *Sc* all around (18)
In the next round we will form the feet. To do this we will create bobble stitches – if you don’t know how to create a bobble stitch, please view the tutorial shown earlier.
Round 14: Sc in the next 2 st. SlSt next st. Make a bobble stitch in this same stitch using 4 triple crochets. Now Sc in the next 13 st. SlSt in the next st. Make a bobble stitch in this same stitch using 4 triple crochets. Sc in the next st (18)
Round 15-19: *Sc* all around (18)
Stuff the head firmly now.
Round 20: SlSt in the next st, Make a bobble stitch in this same stitch using 4 triple crochets. Sc next 3. SlSt in the next st, Make a bobble stitch in this same stitch using 4 triple crochets. Sc in the next 13 st (18)
Round 21: Repeat *Dec, Sc in the next st* all around (12)
Round 22-24: *Sc* all around (12)
Round 25: *Dec, Sc in the next 2 st* all around (8)
Stuff the body firmly now. Continue stuffing after each round.
Round 26: *Sc* all around (8)
Round 27: *Dec* 4 times (4)
Round 28: *Sc* all around (4)
Finish off now, leaving a tail for sewing. Sew the remaining stitches closed and weave in ends. Cut any excess yarn.
Ears: (Make 2)
In Main Color
Round 1: 6 Sc into a Magic Ring (6)
Round 2: *Inc* in the next 2 st. Finish off, leaving a long tail for sewing. Fold the ear in half and pin the ears onto the toy’s head as shown. Having the ears folded give the dragon a cuter look. Sew on. Once sewn on, weave in ends.
Wings: (Make 2)
In Main Color
Row 1: Ch 2. Sc 2 times into the 2nd Ch from the hook.
Row 2: Ch 1 and turn. Sc in the next 2 st (2)
Row 3: Ch 1 and turn. *Inc* in the next 2 st (4)
Row 4: Ch 1 and turn. Sc in the next 4 st (4)
Row 5: Ch 1 and turn. *Inc* in the next st, Sc in the next 2 st, *Inc* in the next 2 st (6)
Row 6: Ch 1 and turn. Sc in the next 6 st (6)
Row 7: Ch 1 and turn. *Inc* in the next st, Sc in the next 4 st, *Inc* in the next st (8)
Row 8: Ch 1 and turn. Sc in the next 8 st (8)
Row 9: Ch 1 and turn. *Inc* in the next st, Sc in the next 6 st, *Inc* in the next st (10)
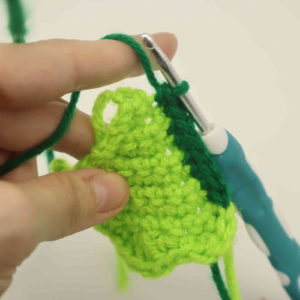
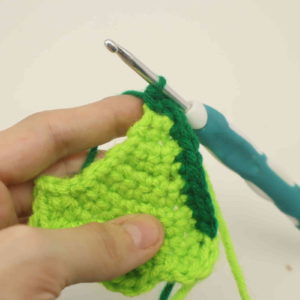
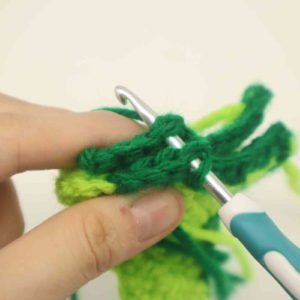
Row 10: Ch 1 and turn. Repeat *Sc in the next 2 st, create 4 Dc into the next st* 2 times. Create 3 Dc into the next st, Sc in the next 3 st.
Now change to the darker main color yarn. We will now work along the sides of the wings. Sc along the side of the wing as shown (Pic 1-2). Once you meet the tip of the wing, create 3 Sc into the tip (Pic 3). Now work single crochets along the other side of the wing (Pic 4).
1. 2.
2. 3.
3. 4.
4.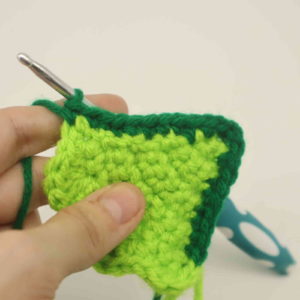
If you’re making the first wing: Ch 1 and turn. Sc in the next 4 st. Finish off and leave a tail for weaving in ends (Pic 5).
5.
If you’re making the second wing: Finish off now (Pic 6). Now attach your hook to the other side of the wing (Pic 7), Ch 1 and Sc in the next 4 st (Pic 8-9).
6. 7.
7. 8.
8. 9.
9. Now align both wings together so the edges are aligned as shown (Pic 10). Going through BOTH the wings, SlSt in the next 4 st (Pic 10-11). Finish off, leaving a long tail for sewing. Pin the wings onto the toy as shown and sew on (Pic 12). Once done, weave in ends.
10. 11.
11.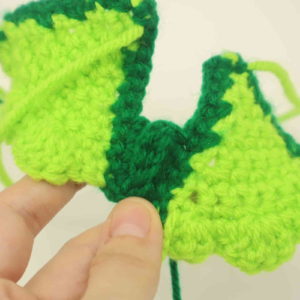 12.
12.
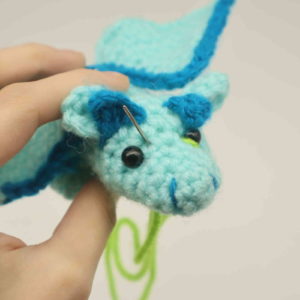
Face Shaping: (Optional)
In Main Color
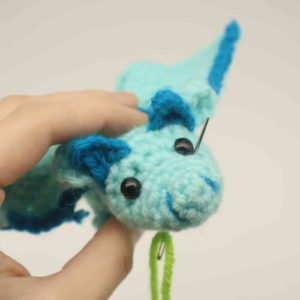
Take a 12″ piece of white yarn and place it on a needle. Insert the needle where shown (Pic 1). Pull needle out next to the right of the toy’s eye (Pic 2).
1. 2.
2.
Reinsert needle to the left of the toy’s eye (Pic 3). Pull needle out where shown, about 1 stitch over from where we originally inserted the needle (Pic 4).
3.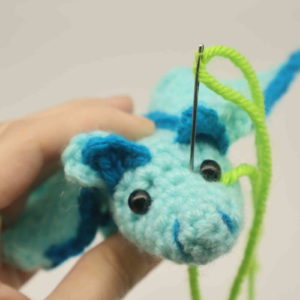 4.
4.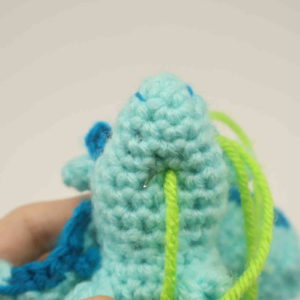
Reinsert needle 1 stitch over (Pic 5). Pull needle out at the right side of the left eye (Pic 6).
5. 6.
6.
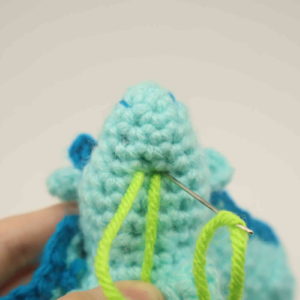
Reinsert needle at the left side of the left eye (Pic 7). Pull needle out at the same stitch where we originally inserted out needle (Pic 8).
7. 8.
8.
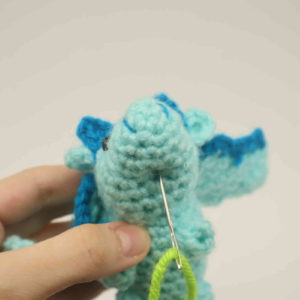
Pull both ends of yarn firmly to tighten the toy’s face (Pic 9). Tie both ends of yarn together a few times to form a knot. Bring the tail ends of yarn into the toy’s head to hide the knot. Cut excess yarn. Done!
9. 10.
10.
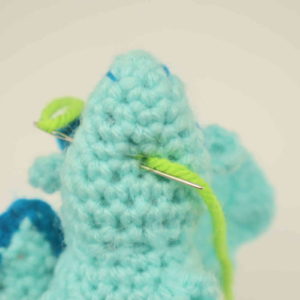
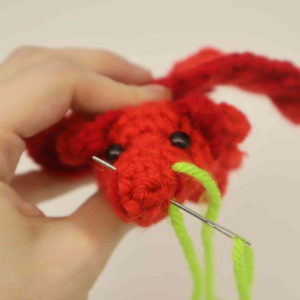
Nostrils:
In Darker Main Color
Insert needle with thread into the front of the toy’s face as shown (Pic 1). Insert needle a few stitches down, then pull the needle out at the top left side of the toy as shown (Pic 2). Insert needle a few stitches down, then pull needle out at the original insertion spot (Pic 3). Tie both ends of yarn into a firm knot. Bring the knot inside the toy to hide, cut any excess yarn.
1. 2.
2. 3.
3. 4.
4.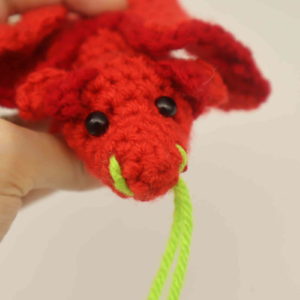
Done! If you made a dragon I would LOVE to see it! You can show me by posting a picture in the comments underneath this post 🙂


1 Comment
Hello,
I think this pattern is really cute, but I think I ran into a problem at round 25 of the body. So, last round gave me 12 stitches to work, and after 3 (dec, 2 sc), I’ve used up all 12 stitches but actually have 9 stitches, not 8. I’m assuming it’s a small typo because at first it made sense to me too, but I realized pretty quickly it wasn’t right. Hope this helps.