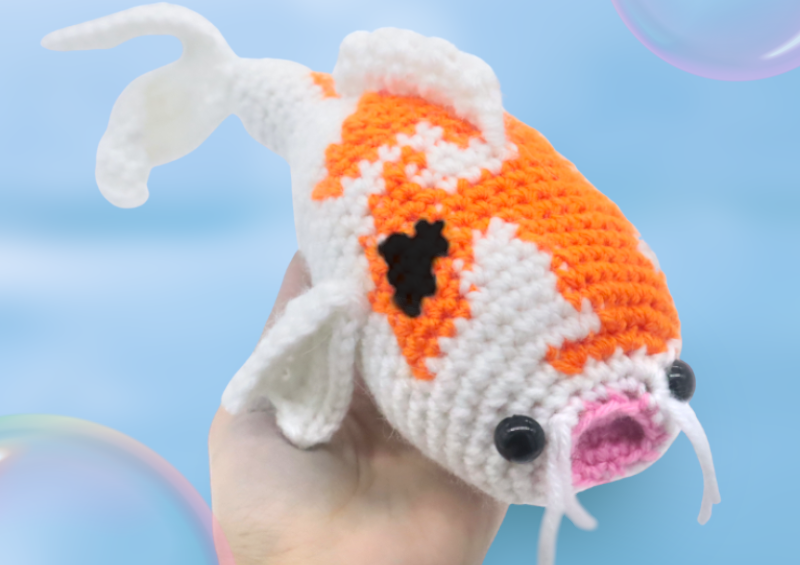
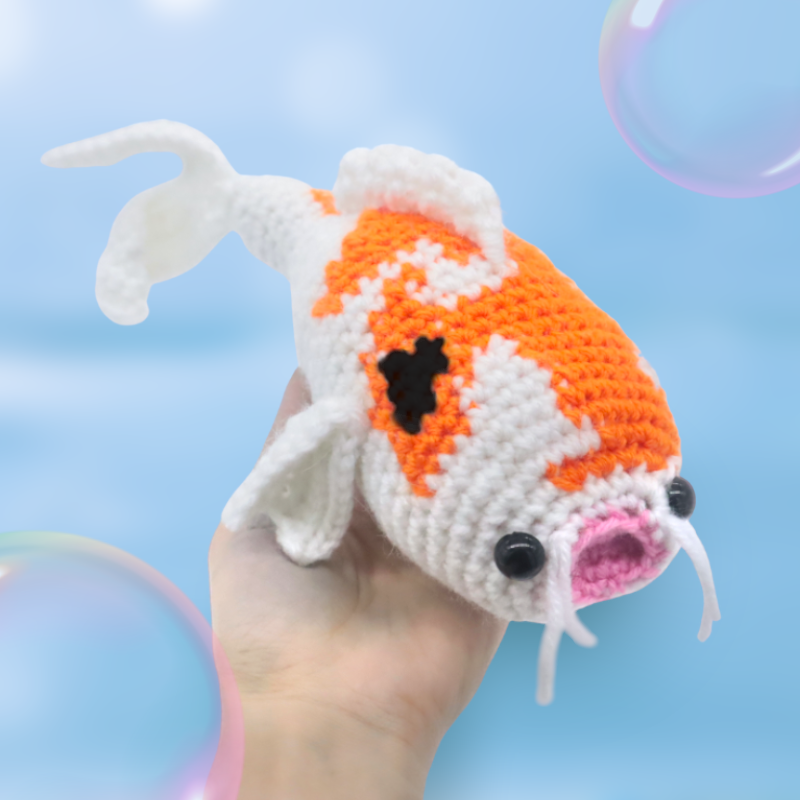
Koi Fish Amigurumi – Free Crochet Pattern
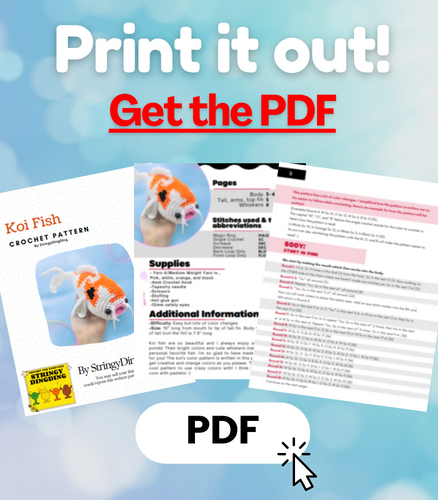
Print this pattern out – purchase the PDF version here!

 Supplies:
• Yarn 4/Medium Weight Yarn in…
Pink, white, orange, and black
•4mm Crochet Hook
•Tapestry needle
•Scissors
•Stuffing
•Hot glue gun
•12mm safety eyes
Additional Information:
•Difficulty: Easy but lots of color changes
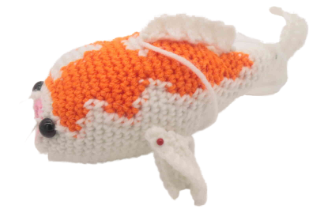
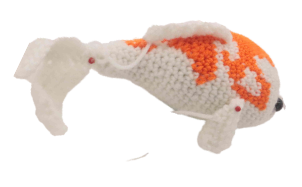
•Size: 10″ long from mouth to tip of tail fin. Body from mouth to tip of tail (not the fin) is 7.5″ long.
Koi fish are so beautiful and I always enjoy seeing them in koi ponds! Their bright colors and cute whiskers make them one of my personal favorite fish. I’m so glad to have made a koi fish pattern for you! The koi’s color pattern is written in this pattern, but you can get creative and change colors as you please. This would be such a cool pattern to use crazy colors with! I think it would look really cool with pastels! 🙂
Getting Started…
This pattern has a lot of color changes. I simplified how the pattern is written out so it’s easier to follow while crocheting. Here’s an example for how the pattern will be written!
(Example) Round 4: W Sc 14, O Sc 12, W Sc 3, B Sc 5 (35)
The capital “W”, “O”, and “B” before the single crochet stands for the color to crochet in. Here’s how the pattern is read:
In White Sc 14, In Orange Sc 12, In White Sc 3, In Black Sc 5 (35)
As you can see, shortening the pattern with the W, O, and B will make the pattern easier to read! 🙂
Body:
Start in pink
We start by making the mouth which then works into the body.
Round 1: Ch 6. Sc 3 times in the 2nd Ch from the hook. Sc in the next 3 Ch. Sc 3 times in the next Ch. Now working on the OTHER side of the chain where we haven’t made any stitches yet, Sc in the next 3 st (12)
Round 2-3: *Sc* all around (12)
Round 4: Change to white. In the Back Loop Only (BLO), Repeat *Inc, Sc in the next st* all around (18)
Round 5: Working in BOTH loops, repeat *Inc, Sc in the next 2 st* all around (24)
Now we will mark where to place the safety eyes. Add an eye stitch marker into the 8th and 16th stitch in Round 5.
Round 6: Sc in the next 9 st. In O *Inc* in the next 4 st. In W Inc in the next 2 st, then Sc in the next 9 st (30)
Round 7: Sc in the next 9 st. In O repeat *Inc, Sc in the next st* 2 times, then Inc in the next st. In W Sc in the next st. Repeat *Inc, Sc in the next st* 3 times. Sc in the next 9 st. (36)
Round 8: W Sc in the next 9 st. O Sc in the next 10 st. W Sc in the next 17 st (36)
Round 9: W Sc 11. O Sc 8. W Sc 17 (36)
Round 10: W Sc 13. O Sc 6. W Sc 4. O Sc 4. W Sc 9 (36)
Round 11: W Sc 13. O Sc 7. W Sc 3. O Sc 4. W Sc 9 (36)
Round 12: W Sc 12. O Sc 8. W Sc 2. B Sc 2. W Sc 2. O Sc 1. W Sc 9 (36)
Round 13: W Sc 12. O Sc 11. B Sc 3. O Sc 1. W Sc 9 (36)
Round 14: W Sc 12. O Sc 11. B Sc 3. O Sc 2. W Sc 8 (36)
Round 15: W Sc 14. O Sc 11. B Sc 1. O Sc 1. W Sc 9 (36)
Round 16: W Sc 16. O Sc 4. W Sc 3. O Sc 4. W Sc 9 (36)
Round 17: W Sc 16. O Sc 3. W Sc 5. O Sc 2. W Sc 10 (36)
Round 18: W Sc 16. O Sc 6. W Sc 1. O Sc 2. W Sc 11 (36)
Round 19: W Sc 15. O Sc 7. W Sc 14 (36)
Round 20: W Sc 15. O Sc 13. W Sc 8 (36)
Round 21: In W repeat *Dec, Sc in the next 4 st* 2 times. Dec, Sc in the next st. In O Sc in the next 3 st, Dec, Sc in the next 4 st, Dec, Sc in the next 3 st. In W Sc in the next st, Dec, Sc in the next 4 st (30)
Round 22: In W Sc 13 st. In O Sc 10. In W Sc 7 (30)
Round 23: In W repeat *Dec, Sc in the next 3 st* 2 times. Dec, Sc in the next st. In O Sc in the next 2 st, Dec, Sc in the next 3 st, Dec. In W Sc in the next 3 st, Dec, Sc in the next 3 st (24)
Round 24-25: In W Sc 11. O Sc 6. W Sc 7 (24)
Stuff the body firmly here.
Round 26: In W repeat *Dec, Sc in the next 2 st* 3 times. In O Dec, Sc in the next 2 st. In W repeat *Dec, Sc in the next st* 2 times (18)
Round 27: In W Sc 9. O Sc 3. W Sc 6 (18)
Round 28: In W repeat *Dec, Sc in the next st* 3 times. In O Dec, Sc in the next st, Dec. In W Sc in the next st, Dec, Sc in the next st (12)
Round 29-30: In W Sc 7. O Sc 2. W Sc 3 (12)
Stuff the body here. Continue stuffing after each round.
Round 31-33: In W *Sc* all around (12)
Round 34: In W *Dec* all around (6)
Round 35: In W *Sc* all around (6)
Finish off, leaving a long tail for sewing. Sew the remaining stitches closed and weave in ends, cutting any excess yarn.
Tail:
In White
Row 1: Ch 16. Sc in the 2nd Ch from the hook, Sc in the next 6 st, Sc 3 times in the next st, Sc in the next 7 st (17)
Row 2: Ch 1 and turn. Working in the Front Loop Only (FLO), Inc in the next st, Sc in the next 7 st, Sc 3 times in the next st, Sc in the next 7 st, Inc in the last st (21)
Row 3: Ch 1 and turn. Working in the Back Loop Only (BLO), Inc in the next st, Sc in the next 9 st, Sc 3 times in the next st, Sc in the next 9 st, Inc in the last st (26)
Finish off, leaving a long tail for sewing. Pin the tail on as shown and sew or hot glue on. Once done, weave in ends and cut any excess yarn.
Arms: (Make 2)
In White
Row 1: Ch 6. Sc 3 times in the 2nd Ch from the hook. Sc in the next 3 st. Sc 3 times in the last Ch. Working on the OTHER side of the chains, where we haven’t made any stitches yet, Sc in the next 3 st (12)
Row 2: Sc in the next st. Ch 1 and turn. Working in the BLO, Inc in the next st, Sc in the next 4 st, Sc 3 times in the next st, Sc in the next 4 st, Inc in the last st
Row 3: Ch 1 and turn. Working in the FLO, Inc in the next st, Sc in the next 6 st, Sc 3 times in the next st, Sc in the next 6 st, Inc in the last st
Finish off, leaving a long tail for sewing. Fold the fin in half and pin on as shown. Sew or hot glue on. Once done, weave in ends and cut any excess yarn.
Top Fin:
In White
Row 1: Ch 4. Sc in the 2nd Ch from the hook, Sc in the next 2 st (3)
Row 2: Working in the FLO, Sc in the next 3 st (3)
Row 3: Working in the BLO, Sc in the next 3 st (3)
Row 4: Working in the FLO, Sc in the next 3 st (3)
Row 5: Working in the BLO, Sc in the next 3 st (3)
Row 6: Working in the FLO, Sc in the next 3 st (3)
Row 7: Working in the BLO, Sc in the next 3 st (3)
Row 8: Working in the FLO, Sc in the next 3 st (3)
Row 9: Working in the BLO, Sc in the next 3 st (3)
Row 10: Working in the FLO, make a decrease stitch except skip the MIDDLE stitch when you do this. (1) Finish off, leaving a long tail for sewing. Pin the top fin on as shown and sew or hot glue on. Once done, weave in ends and cut any excess yarn.
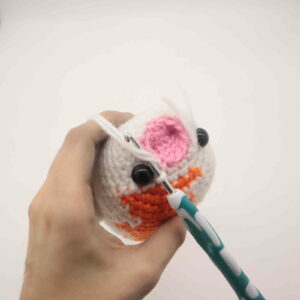
Whiskers
Cut a long piece of white yarn. Insert the hook above the mouth area as shown (Pic 1). Yarn over with the white yarn (Pic 2) and pull it a little through as shown (Pic 3). Yarn over with BOTH ends of yarn as shown (Pic 4-5) and pull through the loop. Tug to tighten. Place a small dot of hot glue under the whiskers, then put the whisker over the glue. Be careful to not put your fingers on the glue. Gluing the whiskers down will help them stay in place.
1.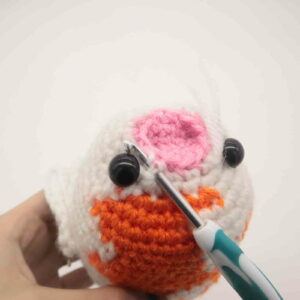 2.
2.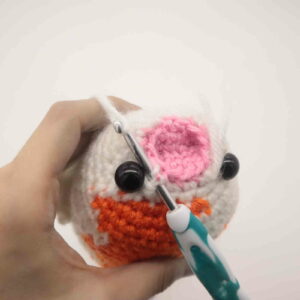 3.
3.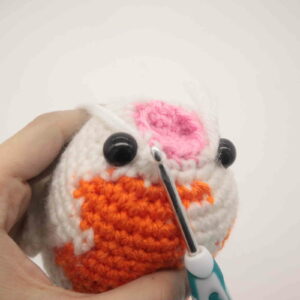 4.
4. 5.
5.
Done! If you made this koi fish, I would LOVE to see! You can show me by posting a picture in the comments section underneath this post 🙂


23 Comments
I have read over the instructions several times but I am unable to figure out just how the mouth is formed. I understand starting with pink, but when is the change to white? And just how is the mouth formed?
I think you’re looking for round 4, you switch to white and crochet BLO(back loops only) to fold the piece over so the mouth is inward
I’m not the designer, but it looks like you change from pink to white on the last stitch of round 3.
I’m also having a problem with the mouth. 2 stitches missing in row 1 and also it does not say when change to white.
Such an awesome pattern! I noticed in the pattern, you don’t say when to change from pink to white, and rounds 24 and 25 are repeats, probably just accidentally didn’t get deleted. Thank you so much for all your amazing patterns you give to this community!! You are the best!!
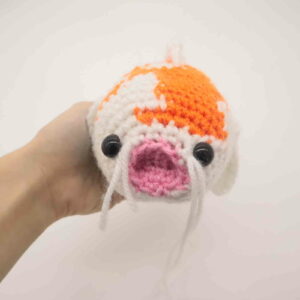
Here’s a front view. THANKS!
So much fun!
So I’m pretty sure in round 1 should be:
Ch6.
Sc3 in second Ch from hook (the fifth chain)
Sc in next 3 Ch (chains 4, 3 and 2)
Sc3 in next chain (the first chain)
Sc in the other side of chains 2, 3, and 4.
This gives you 3 sc in chain 1, 2 sc in chains 2, 3 and 4 (one on each side of the chain) and 3 sc in chain 5, (And none in chain 6) for a total of 12 stitches.
Additionally you need to switch to white at the start of round 4 which is missing from the instructions.
Even tho it was a little confusing, here’s how mine turned out.
Sharing a video of your big monkey that I made.
trim.F46298E9-57E7-4198-B0CD-86CC8DA23C8C
As stated above, I also emailed you re: round 1 missing 3 stitches & then not mentioning when to change to white.
In round 24, stitch count is off from that point all the way to the end.
Just winged it from there. Turned out ok I guess but would definitely fix that as it was very confusing for my brain. This is 1st time I’ve done multiple color changes throughout so made it difficult to know what to do when but I appreciate the free patterns & the work that goes Into making an Intermediate one.
Thanks for all the great patterns.
Front pic
Hi guys! I’m so sorry about the mistake at the start of the fish. Yes, it looks like I forgot to mention to change from white to pink starting in Round 4 as well a mistake in Round 1. I fixed both 🙂
I also accidentally did repaste Round 24 and 25 twice, I also fixed that. So sorry about the mishap, I really appreciate everyone being patient with me and letting me know!
If you purchased the pattern or downloaded the PDF using the Members website, you can redownload the corrected pattern by visiting the pattern download page found via email if purchased, or by visiting the Members download page if you are a member.
Thanks for the pattern! So fun!
Cute and fun to make
I made the fish with a few alterations, including adding an extra black spot and slightly changing the tail and side fins, as well as adding two smaller fins near the back. I also used buttons for eyes. Super cute pattern, and an utterly adorable end result. 😀
One more picture from above 🙂
Sorry for the question but what does the “W” and “O” mean?
Thank you!
“White” and “Orange”
For the top fin, at the end of each row, do you chain 1 and turn, or just turn ?
I loved crocheting your fish.
I find projects that look life like more interesting to do.
Just did few alterations to suit myself.
Thanks for this lovely pattern
Thanks for the pattern, I was able to use it to make a catfish, as my hubby is a Louisiana fisherman… love how it turned out
Hi Tessa, Ooooh my gosh your catfish is absolutely wonderful! I love it and am sure your hubby loved it too! I am originally from the North (Vermont) but now live in Scotland. In VT the closest we had to a catfish was hornpout, a mini version of your enormous catfish. Here in Scotland we have nothing even remotely similar. My hubby is excited as he lives to fish and we are going to finally go visit a friend of mine in Arkansas and she and her man love to fish and have promised to take him catfish fishing…he is already counting down the days like a kid counting down the number of sleeps until Christmas lol. Your catfish has inspired me to try making my own version as a reminder of his trip to catch a catfish and another for my friend to remind her of our visit. Your finished piece is just brilliant and so inspiring.