
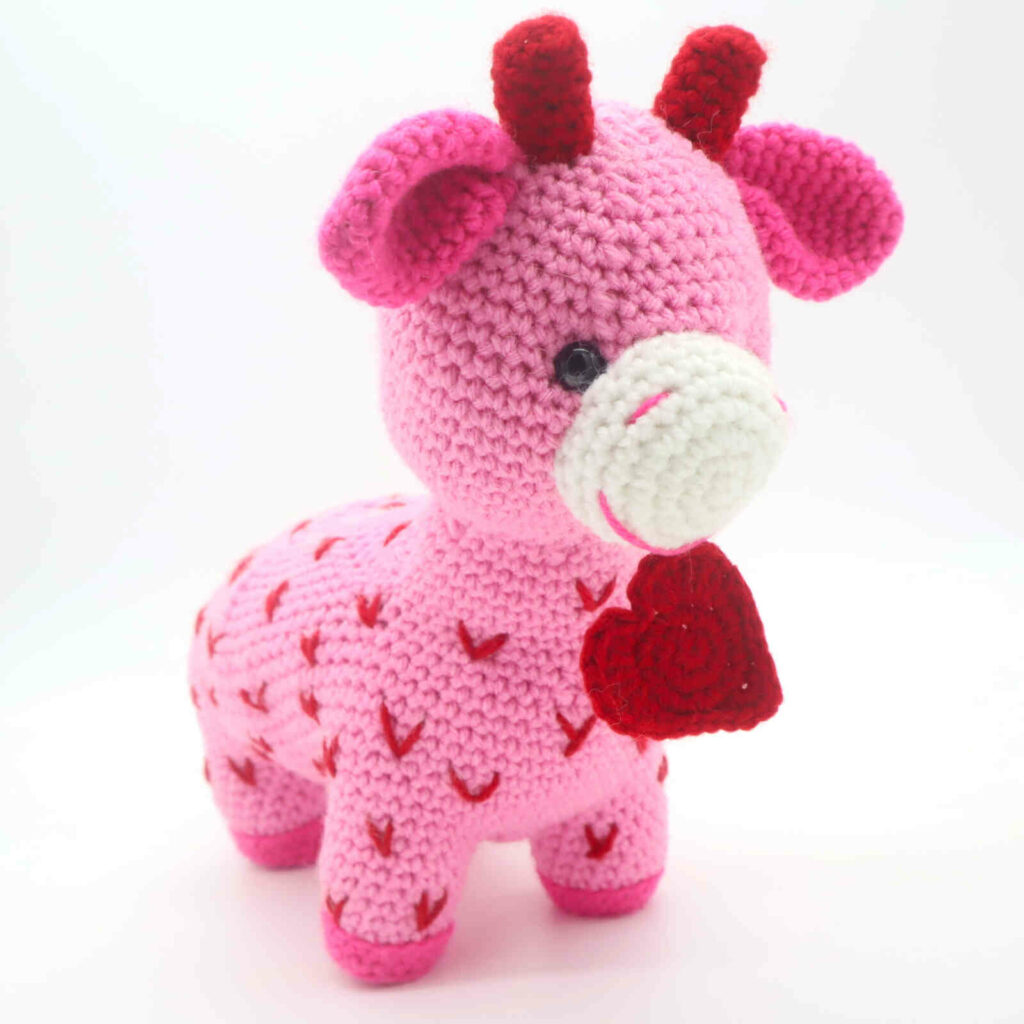
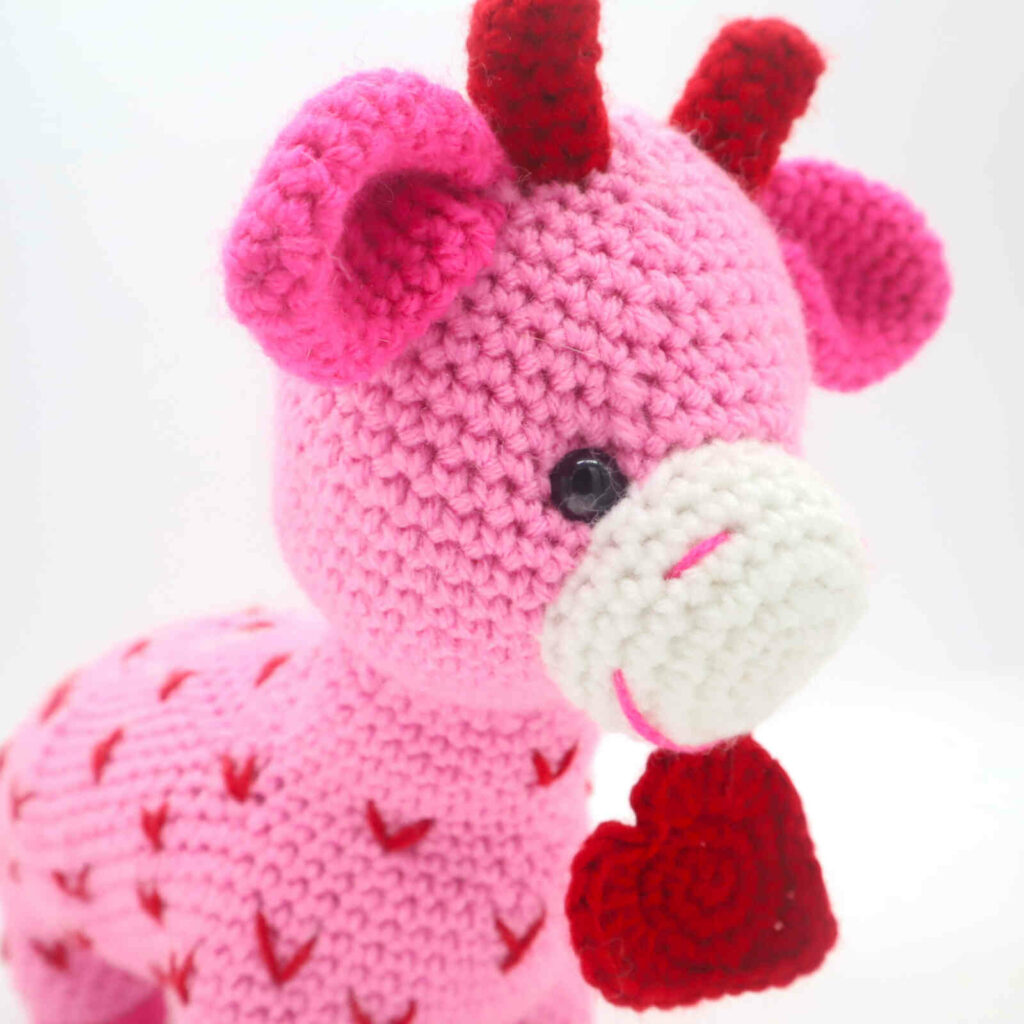
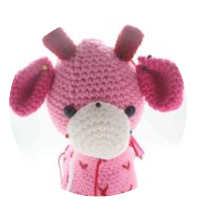
Love Giraffe Amigurumi – Free Crochet Pattern
Print this pattern out – purchase the PDF here!

 Supplies:
• Yarn 4/Medium Weight Yarn in…
Light pink, dark pink, red, and white
•4mm Crochet Hook
•10mm Safety Eyes
•Tapestry needle
•Scissors
•Stuffing
Additional Information:
•Difficulty: Intermediate
•Size: From foot to horns 10″ tall. From butt to muzzle 11″ long.
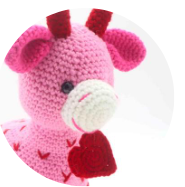
Whether it’s Valentine’s Day or any day, it’s always a perfect time to show someone you love them. Why not make them this adorable love giraffe? Her entire body is made in one piece, so it’s designed to be a well-loved toy. We do sew on the face pieces, but it’s easy to do!
Let’s get started!
Legs: (Make 4)
Start in Dark Pink
Round 1: 6 Sc into a Magic Ring (6)
Round 2: *Inc* all around (12)
Round 3: *Inc, Sc in the next st* all around (18)
Round 4: In the Back Loop Only (BLO), *Sc* all around (18)
Round 5: In BOTH loops *Sc* all around (18)
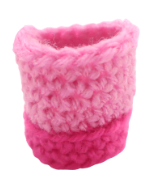
Round 6: Change to light pink. In the BLO *Sc* all around (18)
Round 7-10: In BOTH loops *Sc* all around (18)
Finish off here.
Body:
In Light Pink
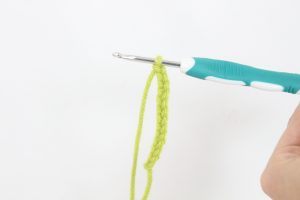
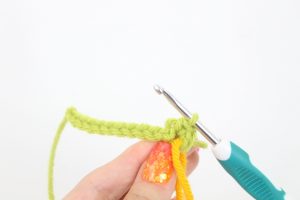
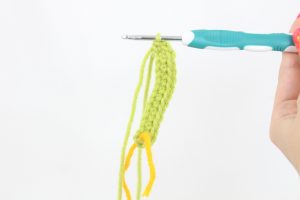
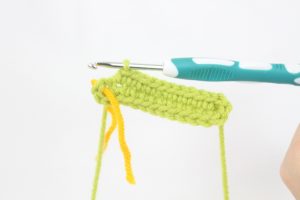
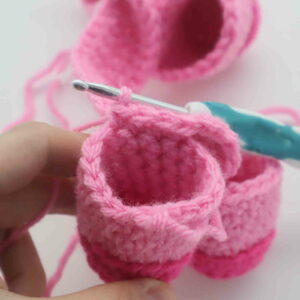
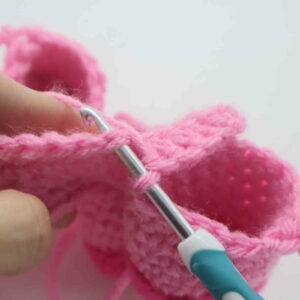
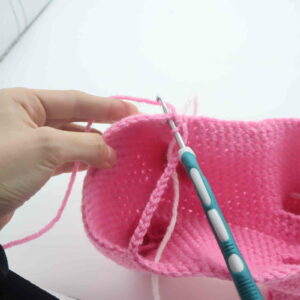
Round 1: Ch 21 (Pic 1). Sc 3 times into the 2nd Ch from the hook (Pic 2). Sc in the next 18 st. Now we meet the last Ch (Pic 3). Sc 3 times into the last Ch. Turn to the OTHER side, where we haven’t made any stitches yet (Pic 4). Sc in the next 18 st (42)
1. 2.
2. 3.
3. 4.
4.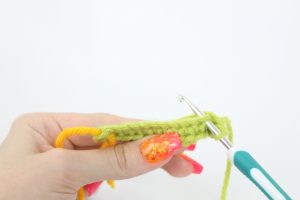 5.
5.
Round 2: *Inc* in each of the next 3 st, Sc in the next 18 st, *Inc* in each of the next 3 st, Sc in the next 18 st (48)
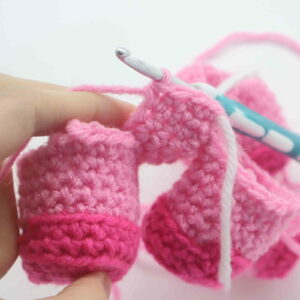
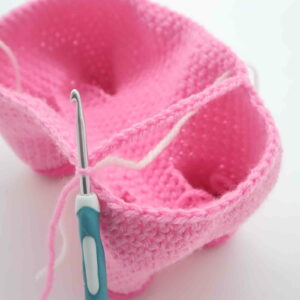
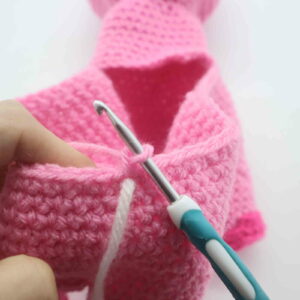
Round 3: Line up the foot and body together (Pic 1). Going through BOTH the foot and body, Sc in the next st (Pic 2). These stitches connect the foot and body together as shown in Pic 3. Going through just the body, Sc in the next 4 st (Pic 4-5). Line up the next foot to the body. Going through BOTH, Sc in the next 4 st. Working on just the body, Sc in the next 12 st. Line up both the foot and body. Going through BOTH, Sc in the next 4 st. Working on just the body, Sc in the next 5 st. Line up the next foot to the body. Working through BOTH, Sc in the next 4 st. Working on just the body, Sc in the next 10 st. Line up the first foot to the body, Sc in the next 3 st. We will meet the first stitch we made in this round; Sc in that first st. All the legs are connected as shown in Pic 6.
1.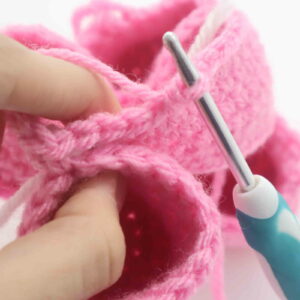 2.
2.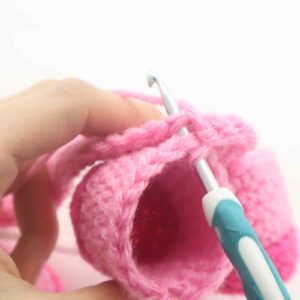 3.
3. 4.
4. 5.
5. 6.
6.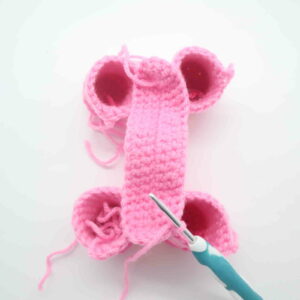
Round 4: Sc in the next 4 st. Working on the foot (Pic 1), Sc in the next 14 st (Pic 2). Working on the body, Sc in the next 12 st (Pic 3). Working on the foot, Sc in the next 14 st. Working on the body, Sc in the next 5 st. Working on the foot, Sc in the next 14 st. Working on the body, Sc in the next 10 st. Working on the foot, Sc in the next 14 st (87)
1. 2.
2. 3.
3.
Round 5-14: *Sc* all around (87)
Round 15: Repeat *Dec, Sc in the next 8 st* 8 times. Dec in the next st, Sc in the next 5 st (78)
In the next round we will create the neck area. After you make the first stitch in Round 16, DO NOT move the stitch marker. Keep it in the first stitch made in Round 16, we will use this marked area later. You will need to use a new stitch marker to mark the next rounds.
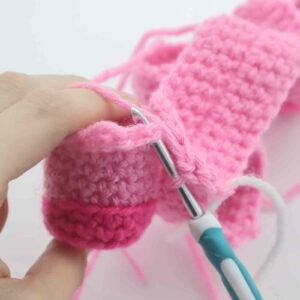
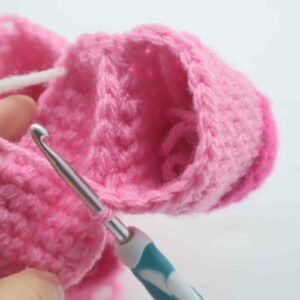
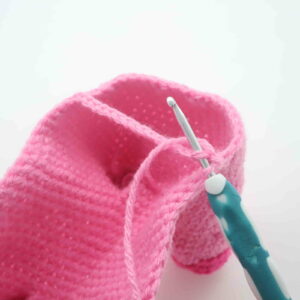
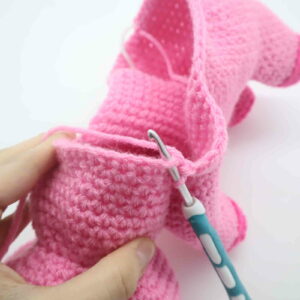
Round 16: Sc in the next 35 st. Ch 17 (Pic 1). Skip the next 21 st, Sc in the 22nd st you count (Pic 2-3). Turn your work back to work on the Ch (Pic 4). Working along the Ch, Sc in the next 17 st. Working on the body area, Sc in the next 20 st (37)
1. 2.
2. 3.
3. 4.
4.
Now we are forming the neck and head.

Round 17: Dec 1 time, Sc in the next 2 st, *Dec* 1 time, Sc in the next st. Repeat *Dec, Sc in the next 4 st* 5 times (30)
Round 18-23: *Sc* all around (30)
Round 24: Repeat *Dec, Sc in the next 3 st* all around (24)
Round 25: *Sc* all around (24)
Round 26: In the FLO (Front Loop Only), repeat *Inc, Sc in the next 3 st* all around (30)
Round 27: In BOTH loops repeat *Inc, Sc in the next 4 st* all around (36)
Round 28: *Inc, Sc in the next 5 st* all around (42)
Round 29: *Inc, Sc in the next 6 st* all around (48)
Round 30-39: *Sc* all around (48)
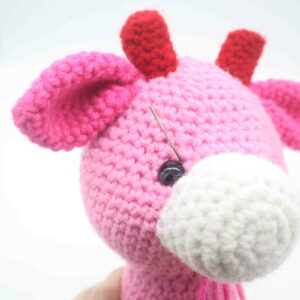
Add safety eyes into Round 38, about 9 stitches apart. Make sure the eyes line up evenly with the head’s placement.
Round 40: *Dec, Sc in the next 6 st* all around (42)
Round 41: *Dec, Sc in the next 5 st* all around (36)
Round 42: *Sc* all around (36)
Round 43: *Dec, Sc in the next 4 st* all around (30)
Round 44: *Dec, Sc in the next 3 st* all around (24)
Stuff the head and neck now. Continue stuffing after each round.
Round 45: *Dec, Sc in the next 2 st* all around (18)
Round 46: *Sc* all around (18)
Round 47: *Dec, Sc in the next st* all around (12)
Round 48: *Dec* all around (6)
Finish off now, leaving a long tail for sewing. Sew the remaining stitches closed and weave in ends.
Back:
In Light Pink
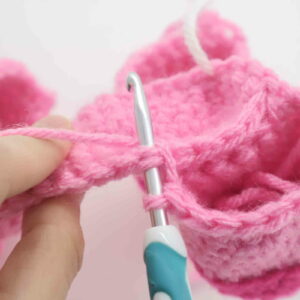
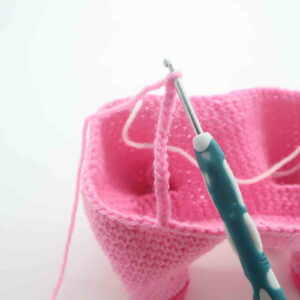
Round 1: Attach your hook where we left the stitch marker in the body (Pic 1). Ch 1 (Pic 2). Sc in the next st (Pic 3), move the stitch marker into this stitch you just made. Sc in the next 33 st (Pic 4). Working into the chains we made for the neck, Sc in the next 17 st (Pic 5). Working back on the body, Sc in the next 22 st (73)
1.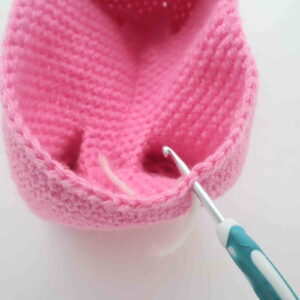 2.
2. 3.
3.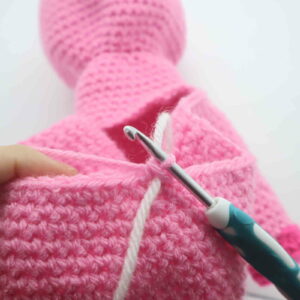 4.
4. 5.
5.
Round 2: Skip the next st, then repeat *Dec, Sc in the next 10 st* all around (66)
Round 3: *Dec, Sc in the next 9 st* all around (60)
Round 4: *Dec, Sc in the next 8 st* all around (54)
Round 5: *Dec, Sc in the next 7 st* all around (48)
Round 6: *Dec, Sc in the next 6 st* all around (42)
Round 7: *Dec, Sc in the next 5 st* all around (36)
Round 8: *Dec, Sc in the next 4 st* all around (30)
Stuff the legs and body now. Continue stuffing after each round.
Round 9: *Dec, Sc in the next 3 st* all around (24)
Round 10: *Dec, Sc in the next 2 st* all around (18)
Round 11: *Dec, Sc in the next st* all around (12)
Round 12: *Dec* all around (6)
Finish off, leaving a long tail for sewing. Sew the remaining stitches closed and weave in ends.
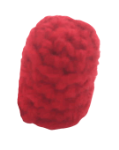
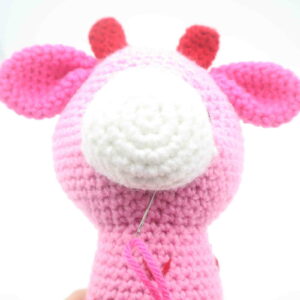
Nose:
In White Yarn

Round 1: 6 Sc into a Magic Ring (6)
Round 2: *Inc* all around (12)
Round 3: *Inc, Sc in the next st* all around (18)
Round 4: *Inc, Sc in the next 2 st* all around (24)
Round 5: *Inc, Sc in the next 3 st* all around (30)
Round 6-8: *Sc* all around (30)
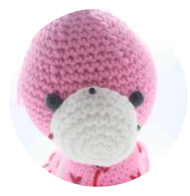
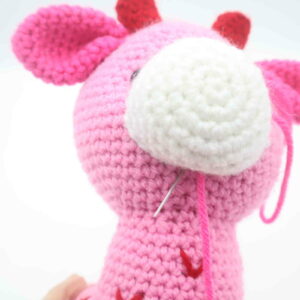
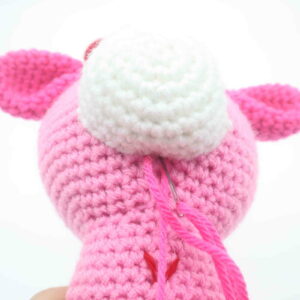
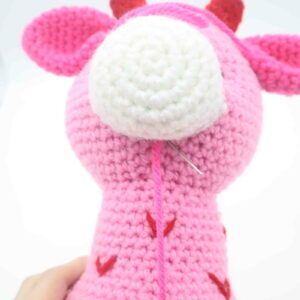
Finish off, leaving a long tail for sewing. Pin the nose on as shown and sew on. Before fully sewing on, add stuffing. Once done, weave in ends and cut any excess yarn.
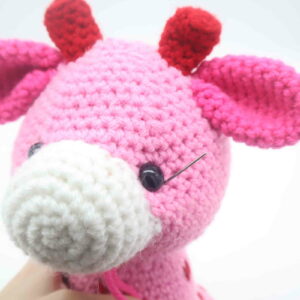
Ears: (Make 2)
In Dark Pink
Round 1: 6 Sc into a Magic Ring (6)
Round 2: *Sc* all around (6)
Round 3: *Inc* all around (12)
Round 4: *Sc* all around (12)
Round 5: *Inc, Sc in the next st* all around (18)
Round 4-9: *Sc* all around (18)
Round 10: *Dec, Sc in the next st* all around (12)
Finish off, leaving a long tail for sewing. Bend the ears in the middle and pin the ears on as shown. Sew on. Once sewn on, weave in ends and cut any excess yarn.

Horns: (Make 2)
In Red
Round 1: 6 Sc into a Magic Ring (6)
Round 2: *Inc, Sc in the next st* all around (9)
Round 3: In the BLO, *Sc* all around (9)
Round 4-7: In BOTH loops, *Sc* all around (9)
Finish off now, leaving a long tail for sewing. Stuff the horns, then pin them onto the head as shown. Sew on and weave in ends, cutting any excess yarn.
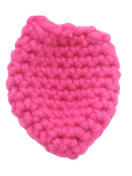
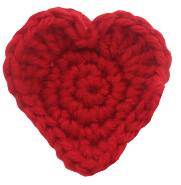
Heart:
In Red
Round 1: 6 Sc into a Magic Ring (6)
Round 2: *Inc* all around (12)
Round 3: *Inc, Sc in the next st* all around (18)
Round 4: Make 3 Dc in each of the next 2 st. SlSt in the next 2 st. Make 3 Dc in each of the next 2 st. Sc in the next st. SlSt in the next 3 st. Sc in the next st. Make 3 Sc into the next st. Sc in the next st. SlSt in the next 3 st. Sc in the next st. SlSt in the last st to complete.
Finish off, leaving a long tail of yarn for sewing. Pin the heart on as shown and sew on. Once sewn on, weave in ends.
Tail:
In Light Pink
Row 1: Ch 12. Sc in the 2nd Ch from the hook. Sc in the next 10 st (11)
Row 2: Ch 1 and turn. Sc in the next 11 st (11)
Finish off, leaving a long tail for sewing. Pin the tail on as shown and sew on. Once done, weave in ends. Tie dark pink strands to the end of the tail.
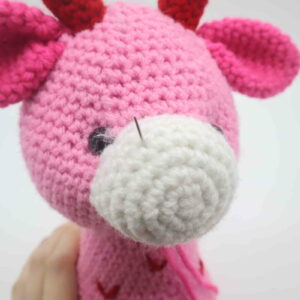
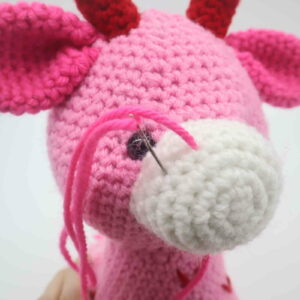
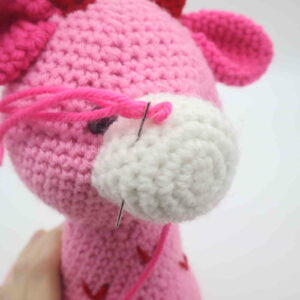
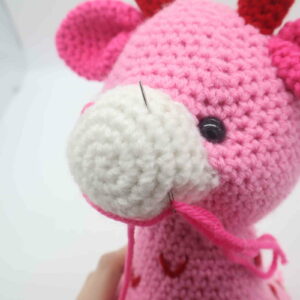
Smile/Nose:
In Dark Pink
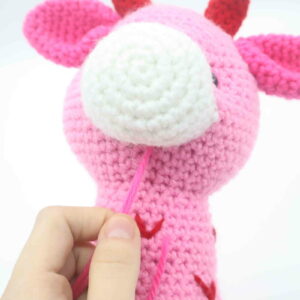
Insert needle with thread into the bottom of the muzzle. Bring needle out to the top of the muzzle as shown (Pic 1). Reinsert needle a few stitches to the left (Pic 2). Pull needle out a few stitches down as shown (Pic 2). Reinsert needle on the other side of the muzzle (Pic 3). Pull needle out at the top of the muzzle (Pic 3). Reinsert needle a few stitches down (Pic 4). Tie ends of yarn into firm knots, bring the knots inside the muzzle to hide. Cut nay excess yarn.
1. 2.
2. 3.
3. 4.
4. 5.
5. 6.
6.
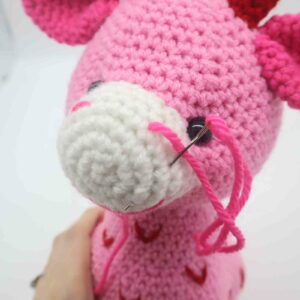
Face Shaping:
In Light Pink
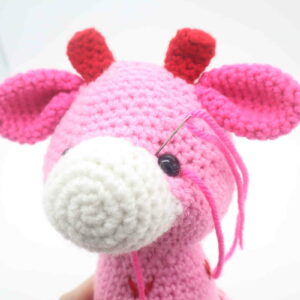
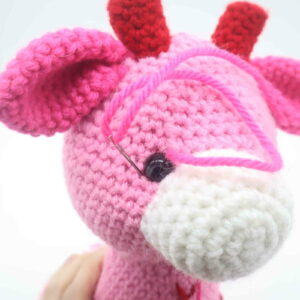
Insert needle into the bottom of the muzzle (Pic 1). Pull needle out where shown (Pic 2). Reinsert needle on the other side of the toy’s eye (Pic 3). Pull needle out at the bottom of the muzzle (Pic 4). Reinsert needle one stitch over (Pic 5). Pull needle out at the toy’s left eye where shown (Pic 6). Reinsert needle to the left of the toy’s eye (Pic 7). Pull needle out where the tail of yarn is coming out of (Pic 8). Pull both ends of yarn firmly to shape the face (Pic 9). Tie both ends together to form a knot. Bring this knot inside the toy to hide. Cut any excess yarn.
1. 2.
2. 3.
3. 4.
4. 5.
5. 6.
6. 7.
7. 8.
8. 9.
9. 10.
10.
Embroidery:
In Red Yarn
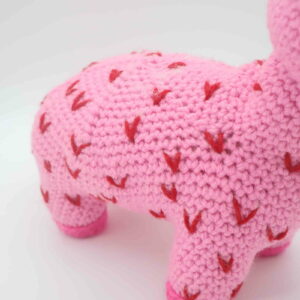
Using a needle and yarn, embroider small red hearts over the giraffe’s legs, body, and neck.
Done!


1 Comment
Esta jirafa esta hermosa, quiero hacerla por que me encantan las jirafas,
gracias por el patron, eres muy creativa, y muy amable al compartir el patron
Saludos desde Venezuela