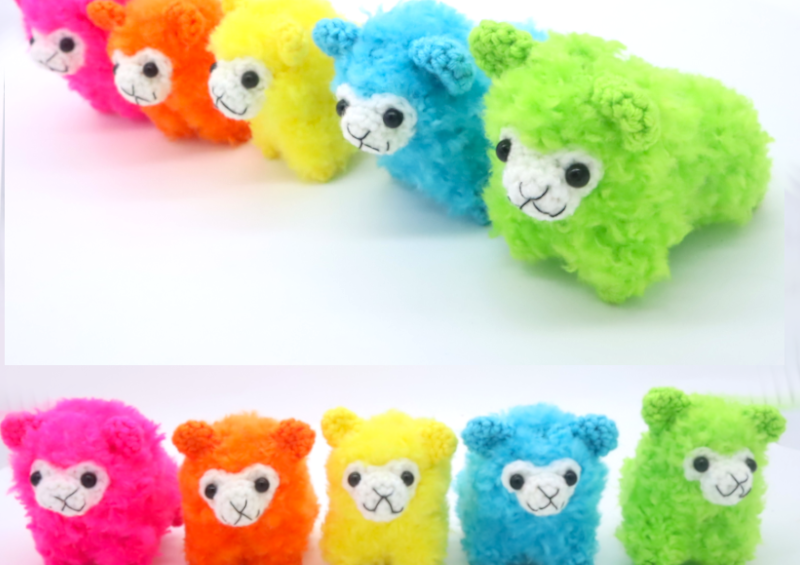
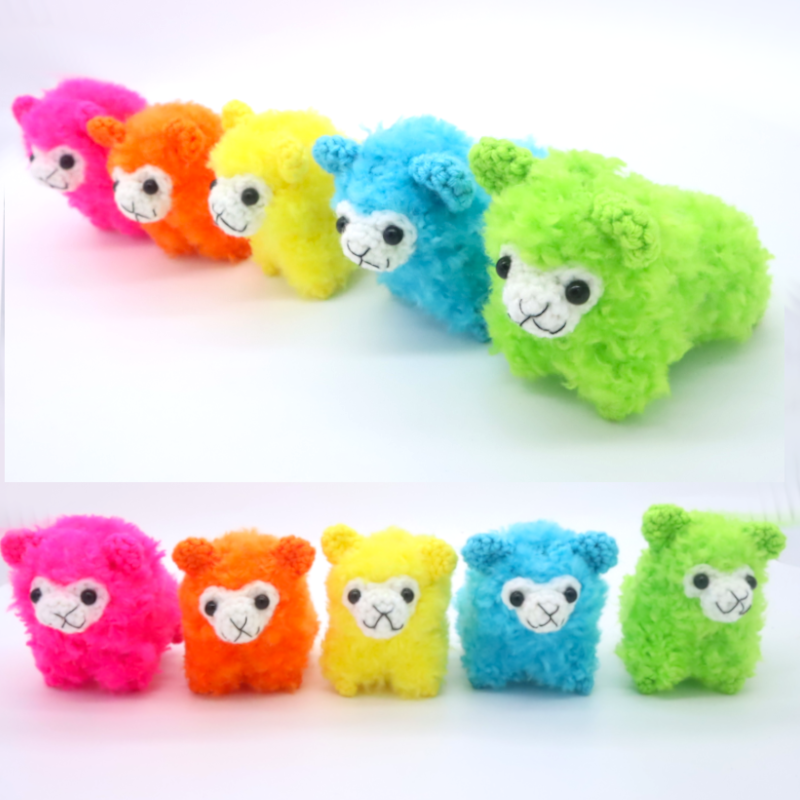
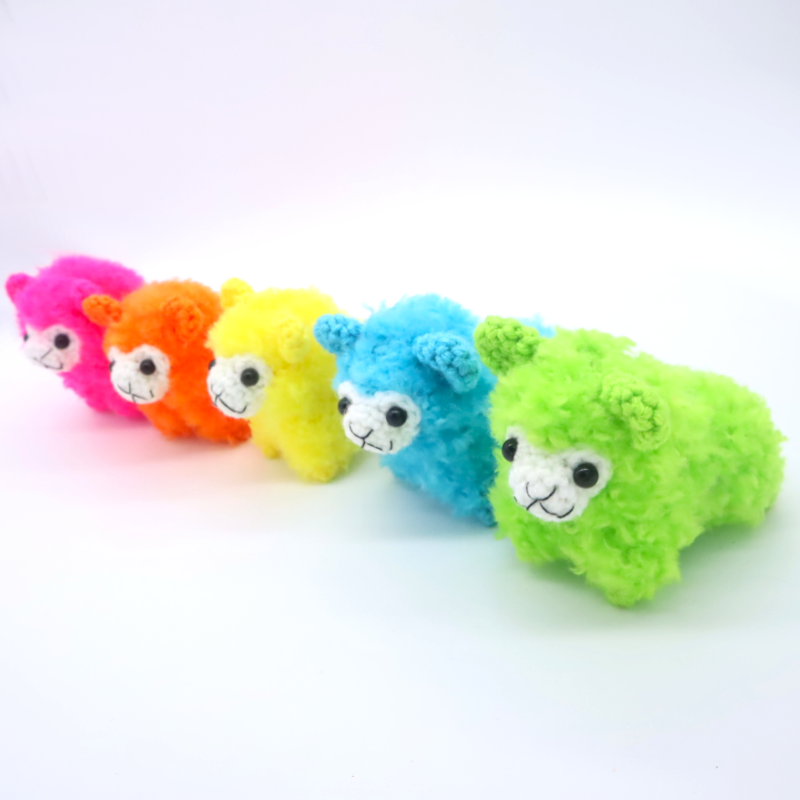
Mini Fuzzy Alpacas Amigurumi – Free Crochet Pattern
Print this pattern out – purchase the PDF version here!

 Supplies:
• Yarn 4/Medium Weight Yarn in…
Main color and white for face.
•4mm Crochet Hook
•Tapestry needle
•Scissors
•Stuffing
•8mm safety eyes
•Black embroidery thread
Additional Information:
•Difficulty: Advanced
•Size: 3.5″ tall from foot to head, 4″ long from butt to the nose
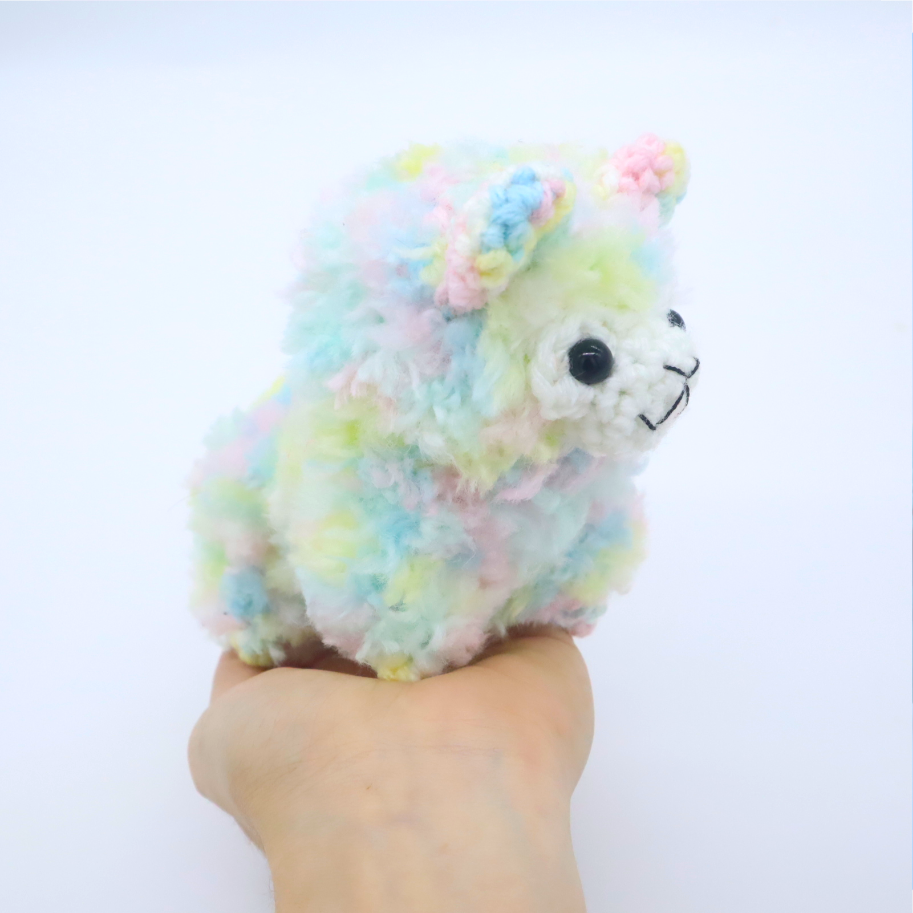
These alpacas are so cute and so fun to make! The best part? You don’t need fuzzy yarn to make them – we use regular yarn but make loop stitches, cut the loops, and brush out the loops to make the fur! Since these cute alpacas are so fun and addicting to make, I had to make them in tons of different colors. If you have multi-colored yarn, try making an alpaca with it! It will create such a cool look for your alpaca 🙂
The alpaca is also made in one piece, so there’s very little sewing involved in this pattern. The only thing we sew on are the ears and face. We first start by making the legs, then the belly, and crochet the legs to the belly. After this, it starts to form the body, which then leads into the head.
Let’s get started!
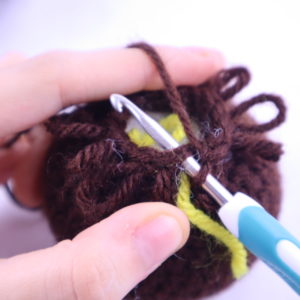
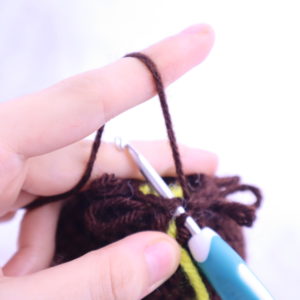
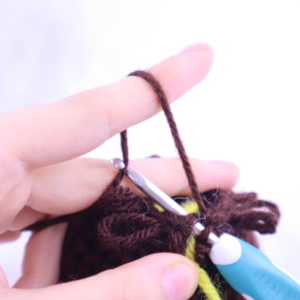
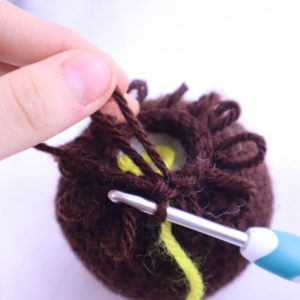
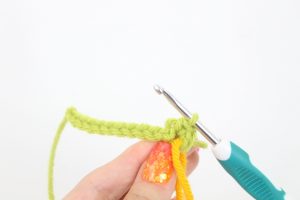
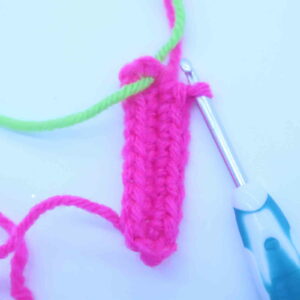
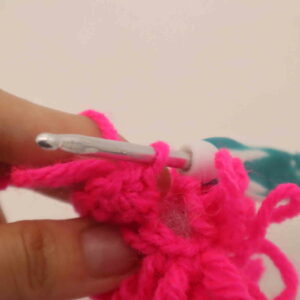
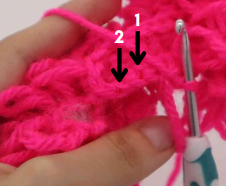
How to do a loop stitch
Insert your hook into the next stitch (Pic 1). Hold the yarn as shown (Pic 2).
1. 2.
2.
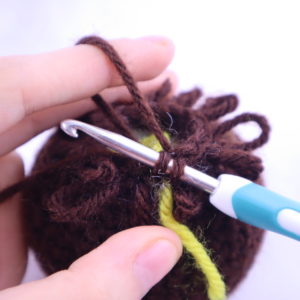
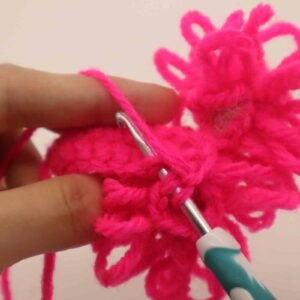
Pull the yarn on the left with your hook through the stitch (Pic 3-5).
3. 4.
4.
You will have 2 loops on your hook (Pic 5).
5.
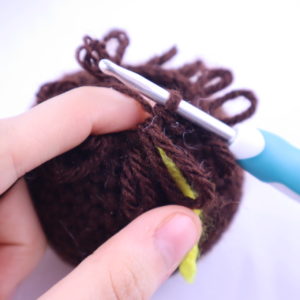
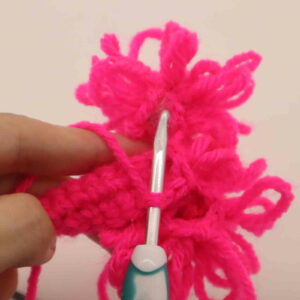
Yarn over and pull through both loops (Pic 6-8).
6.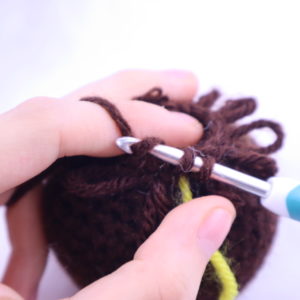 7.
7. 8.
8.
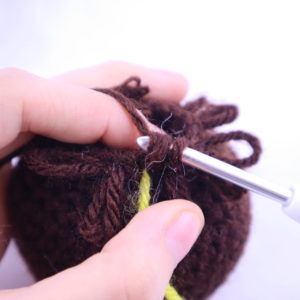
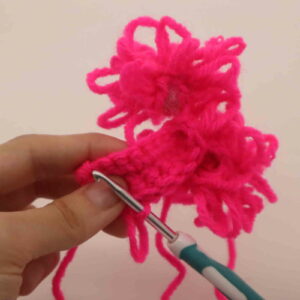
You’ve made 1 loop stitch, it will be a loop at the back. Pull that loop from the back to the front (Pic 9-10), and keep crocheting!
9. 10.
10.
Legs: (Make 4)
In Main Color
Round 1: 4 Sc into a Magic Ring (4)
Round 2: *Sc* all around (4)
Round 3: Working in the Front Loop Only (FLO), repeat *2 loop stitch into the next st* all around (8)
Round 4-5: LpSt in each stitch all around (8)
Finish off, leaving a tail of yarn. Tie the ends of yarn into firm knots close to the base of the crochet piece, then cut any excess tail yarn. This will secure the tail end of yarn from unraveling.
Bottom of belly:
In Main Color
Round 1: Ch 11 (Pic 1). Sc 3 times in the 2nd Ch from the hook (Pic 2). Sc in the next 8 Ch (Pic 3). Sc 3 times in the last Ch. Now turn the chain to the OTHER side, where we haven’t made any stitches yet (Pic 4). On that other side, Sc in the next 8 Ch (Pic 5, 22)
1.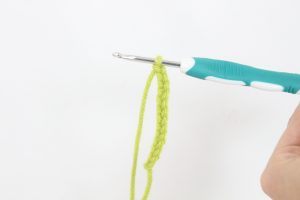 2.
2. 3.
3.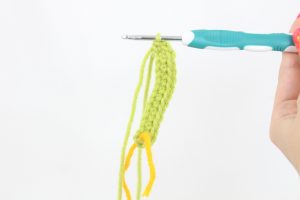 4.
4. 5.
5.
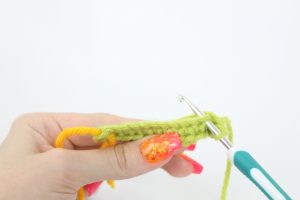
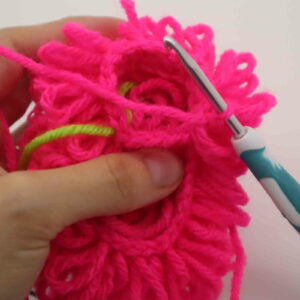
In the next round we will crochet the legs to the body. This part may be a bit hard due to the loop stitches making it hard to see. Just take it slow!
Round 2: Align a leg to the body’s first stitch in the round (Pic 2).
1. 2.
2.
Insert your hook into any stitch of the leg, then insert your hook into the first stitch of the body (Pic 3). Yarn over and complete a single crochet (Pic 4).
3. 4.
4.
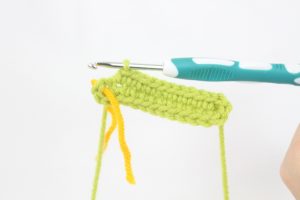
Now working on just the body, LpSt in the next st (Pic 5-6).
5. 6.
6.
Align a second leg to the body and working through BOTH the leg and body, Sc in the next 3 st (Pic 7-8).
7. 8.
8.
Round 2: (Continued) Working on just the body, LpSt in the next 4 st.
•Align a third leg to the body and working through BOTH the leg and the body, Sc in the next 3 st.
•Working on just the body, LpSt in the next st.
•Align the fourth leg to the body and working through BOTH the leg and the body, Sc in the next 3 st.
•Working on just the body, LpSt in the next 4 st.
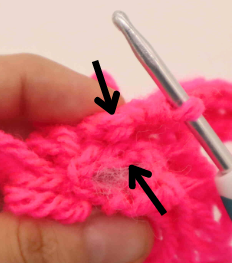
Now we will work back onto the first leg. Align the leg’s stitches to the body. Notice that there’s 1 stitch crocheted to the body? Count 2 stitches to the right of that stitch and align those two stitches to the next two stitches of the body (Pic 1). Working through BOTH the leg and the body, Sc the next 2 st (Pic 2-3). This will leave 5 stitches unworked on the first leg.
1. 2. 3.
2. 3.
Now Sc in the next st (to clarify, we are making the single crochet over the first stitch we made in this round.)
The following stitch we make in Round 3 will be the new first stitch of the round. Mark the next stitch we make with a stitch marker.
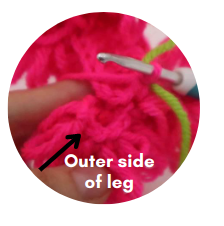
Round 3: Working on the body, LpSt in the next st. Working on the outer side of the leg, NOT the inside of the leg that connects the body, LpSt in the next 5 st.
•Working on the body, LpSt in the next 4 st. Working on the outside of the leg, LpSt in the next 5 st.
•Working on the body, LpSt in the next st.
•Working on the outside of the leg, LpSt in the next 5 st. Working on the body, LpSt in the next 4 st.
•Working on the outside of the leg, LpSt in the next 5 st (30)
Round 4-5: LpSt in each st all around (30)
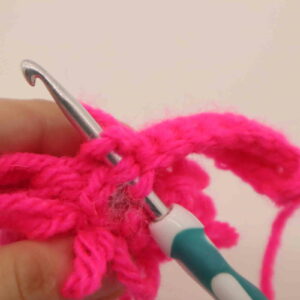
In the next round we will make a chain. This chain will separate the head and body, and we will start to form the head in Round 7.
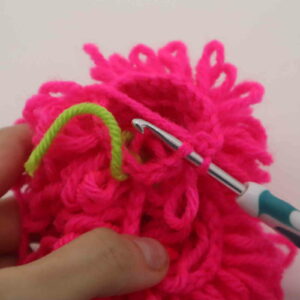
Round 6: LpSt in the next 8 st. Ch 4 (Pic 1). Skip the next 17 st and Sc in the 18th St (Pic 2).
1. 2.
2.
Note: Typically when we make an increase stitch we put two single crochets into one stitch. For this pattern you will make one single crochet, then a loop stitch into the same stitch. Decreases are made as a regular decrease.
When you see “inc” = Sc then LpSt into same st.
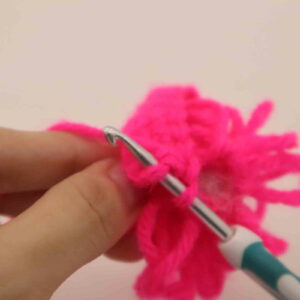
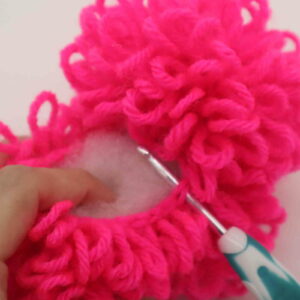
Round 7: Repeat *Inc in the next st, LpSt in the next st* 6 times. Now working on the chain (Pic 3-4), repeat *Inc in the next st, LpSt in the next st* 2 times. Skip the last st. (24 not including the skipped stitch)
3. 4.
4.
Round 8-11: LpSt in the next st all around (24)
Round 12: Repeat *Dec, LpSt in the next 2 st* all around (18)
Round 13: Repeat *Dec, LpSt in the next st* all around (12)
Stuff the head firmly here.
Round 14: *Dec* all around (6)
Finish off, leaving a tail for sewing. Sew the remaining stitches closed and weave in ends, cutting any excess yarn.
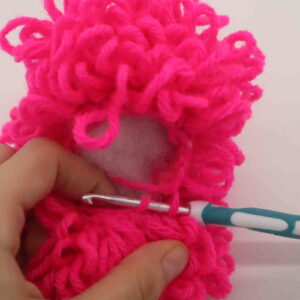
Back:
In Main Color
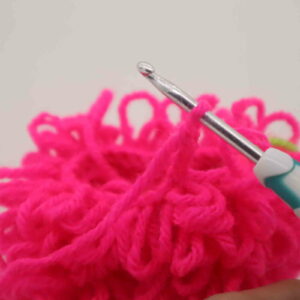
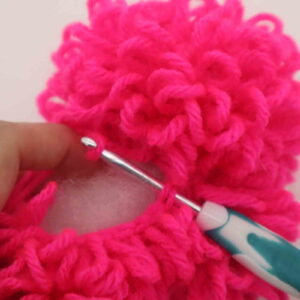
Now we will work on closing the back of the alpaca. Attach your hook to the first stitch of the back (Pic 1) and yarn over (Pic 2), pull the yarn through the loop. This doesn’t count as a stitch, the first stitch made in Round 1 will be our first stitch.
1. 2.
2.
Round 1: Repeat *Dec, LpSt in the next 2 st* 4 times. Working along the chain that we made to separate the head and back, (Pic 3-4), Dec 1 time and LpSt in the next 2 st (15)
3.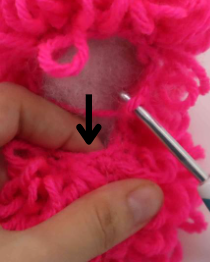 4.
4. 5.
5.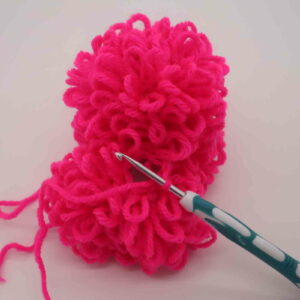
Round 2: Repeat *Dec, LpSt in the next st* all around (10)
Stuff each leg firmly now, stuff the back now and after each round.
Round 3: *Dec* all around (5)
Finish off, leaving a long tail for sewing. Sew the remaining stitches closed and weave in ends, cutting any excess yarn.
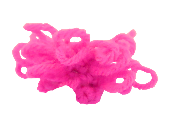
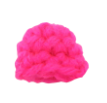
Fur
Cut each loop with scissors. It’s best to work in a small area and expand outwards. Try starting at the tip of the toy’s head, then working your way down.
After cutting the loops, brush the fur out with a metal pet brush. Brush a few times in one area until the fur is fluffy. If you notice stitches coming undone while doing this, you can easily sew these pieces back together with a needle and yarn. Secure your yarn with a knot and bring the knot inside the toy to hide, cutting any excess yarn.
Now you can trim the fur. Don’t cut too close to the alpaca, trim slowly until you’re happy with the length! When trimming around the face, trim the yarn deeper around the toy’s neckline to define in.
Ears: (Make 2)
In Main Color
Round 1: 6 Sc into a Magic Ring (6)
Round 2: *Inc, Sc in the next 2 st* all around (8)
Round 3-4: *Sc* all around (8)
Finish off, leaving a long tail for sewing. Pin the ears on as shown. Do not sew on until you have the face made. Having the face and ears pinned on at the same time will help you alter the placement. Sew on once you’re happy with the placement. Once done, weave in ends and cut any excess yarn.
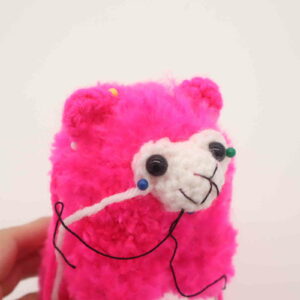
Face:
In White
Round 1: 6 Sc into a Magic Ring (6)
Round 2: *Inc* all around (12)
Round 3-4: *Sc* all around (12)
Round 5: SlSt in the next 2 st. Working in the FLO, make 4 Hdc into the next st. Working in both loops. SlSt in the next 3 st. Working in the FLO, make 4 Hdc into the next st. Working in both loops, SlSt in the next st and finish off, leaving a long tail for sewing.
Place 8mm safety eyes into the areas as shown and secure with the safety eye washer.
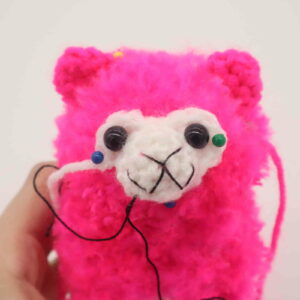
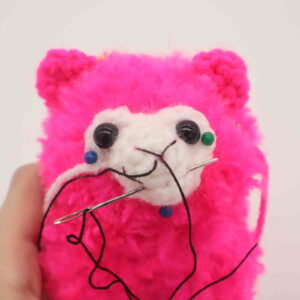
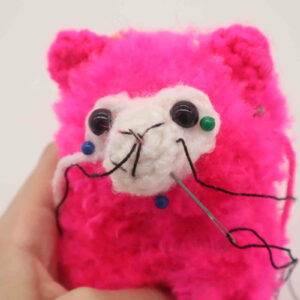
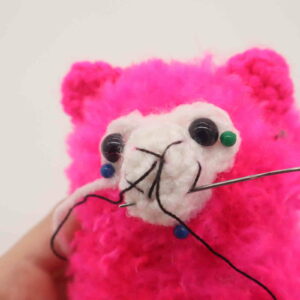
Face Embroidery:
In Black Embroidery Thread
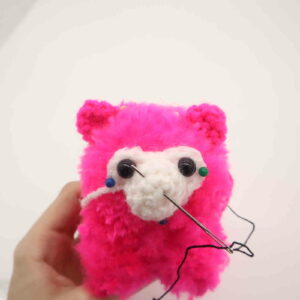
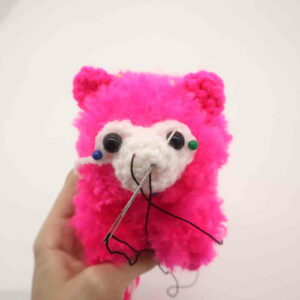
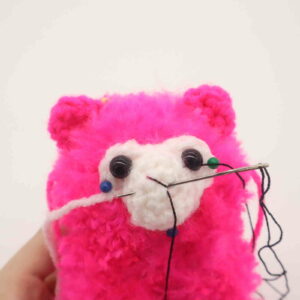
Insert needle with thread into the middle of the toy’s nose and pull needle out at the upper left side as shown (Pic 1). Reinsert needle into the middle nose area (Pic 2) and pull needle out at the upper right side as shown (Pic 2). Reinsert into the middle nose area and pull needle out at the left side as shown (Pic 3). Insert needle at the bottom left side as shown, making sure you insert the needle down a few stitches, and pull needle out at the middle nose area (Pic 4). Insert needle into the bottom right side, into the same area the corner of the left smile is (Pic 5). Pull needle out up and to the right a few stitches (Pic 5). Reinsert needle down a few stitches (Pic 6) and pull needle out at the nose area (Pic 6). Reinsert needle into the same area as the right side of the smile (Pic 7) and pull needle out anywhere. Tie ends of thread into firm knots and bring knots inside the toy to hide, cutting any excess yarn. Pin face on as shown and sew on.
1. 2.
2. 3.
3. 4.
4. 5.
5. 6.
6. 7.
7. 8.
8.
Done! If you made an alpaca, I would LOVE to see! You can show me by posting a picture in the comments section below 🙂


3 Comments
Just when I think I’ve found your cutest amigurumi, you go and make ANOTHER one that’s EVEN cuter. Well done!!! Love your work, and I really appreciate the time and effort you put into your free patterns!!
This pattern was so cute! With multi-colored/multiple colors at once it was so cute as well! I altered mine in some ways, using two different skeins at once, making the fave a bit lagers, and adding a mohawk but it is so soft and cute!
*face a bit larger