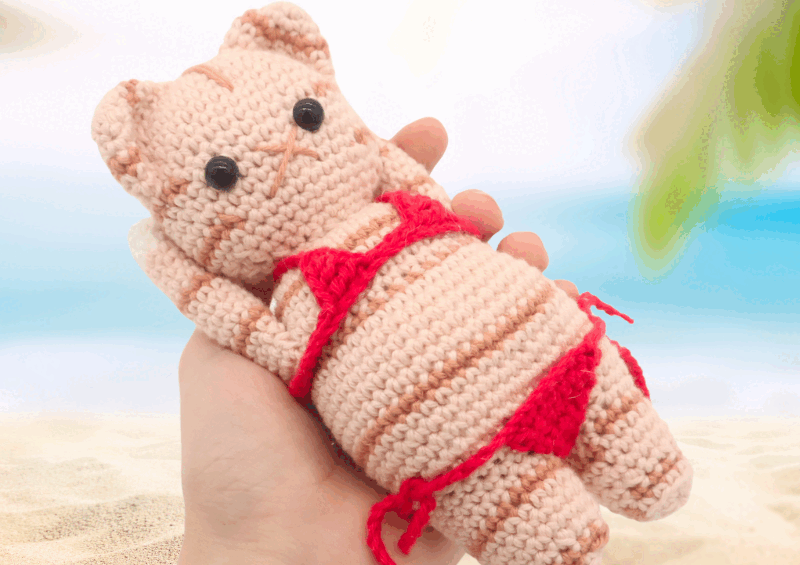
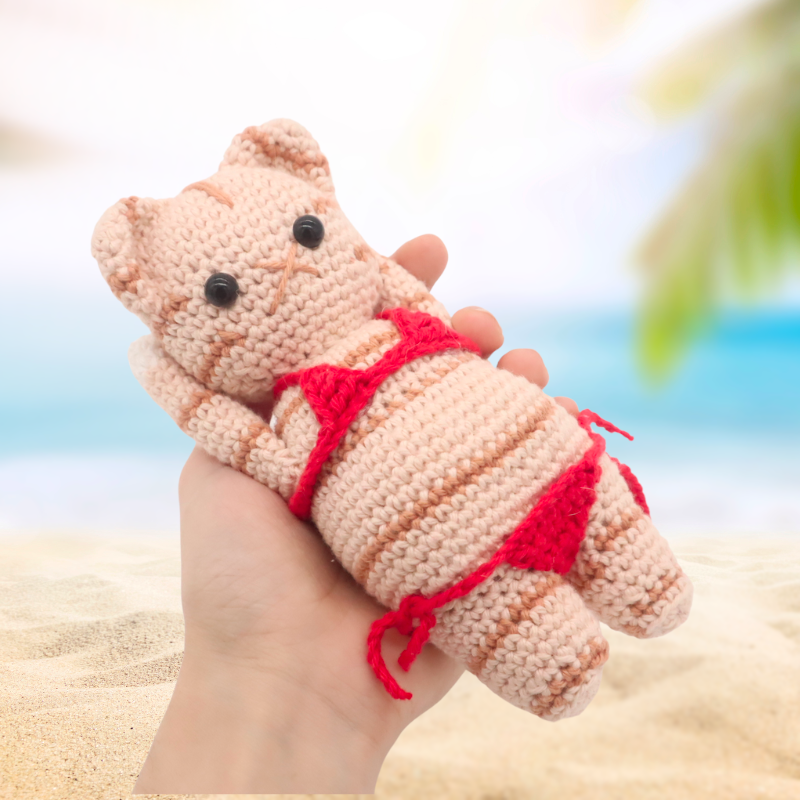
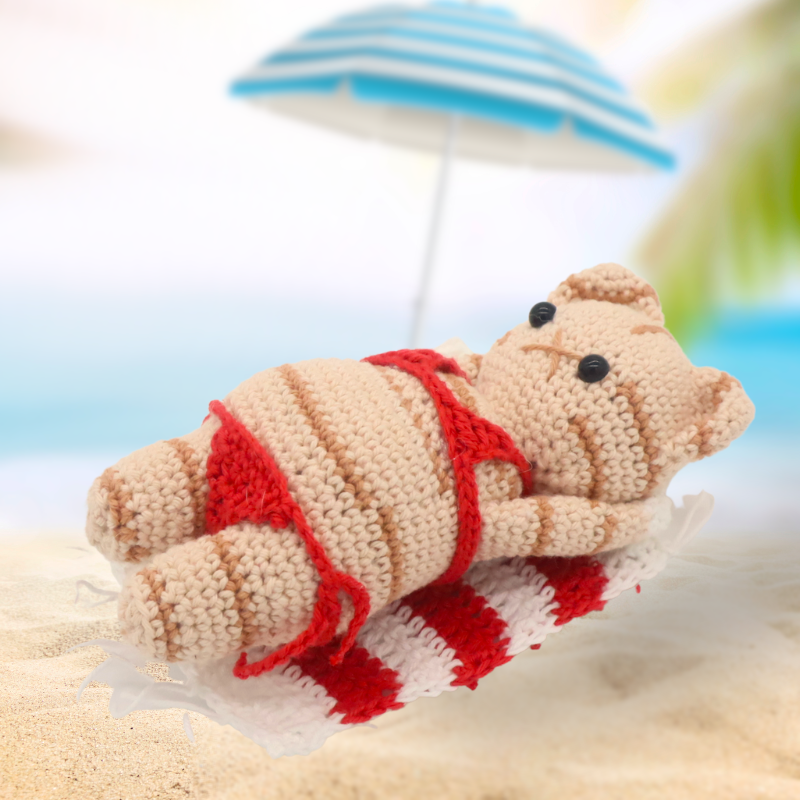
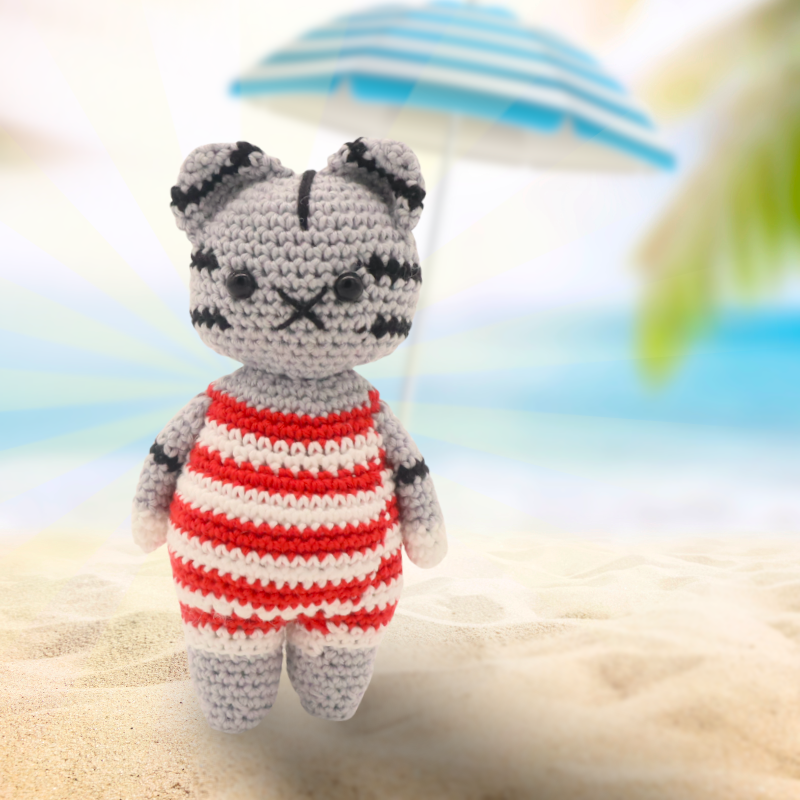
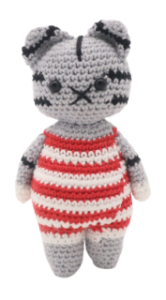
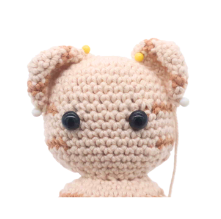
Tubby Tabby Cats Sunbathing Amigurumi – Free Crochet Pattern

Print this pattern out – purchase the PDF version here!


 Supplies:
• Yarn 2/Fine Weight Yarn in…
Main Color, Contrast Color.
Red for bikini, towel, and swimsuit
White for towel and swimsuit
•3mm Crochet Hook
•Tapestry needle
•Scissors
•Stuffing
•8mm safety eyes
Additional Information:
•Difficulty: Intermediate
•Size: 6.5″ tall
It’s a well known fact that cats LOVE to sunbathe. That’s why I thought it would be so funny and so cute to make these tabby cats literally sunbathe! You could pop your tubby tabby into a sunspot on your desk just for laughs 🙂
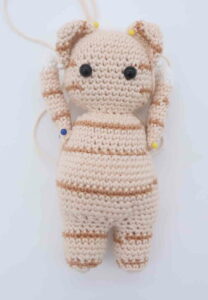
These tubby tabbys can be made to resemble your cat or a friends cat! Just change colors to match your cat 🙂 This pattern will tell you when to change colors to make the cat’s fur pattern shown in the picture, but you can choose when to change colors to best match your cat.
This pattern includes two cat patterns. One for the bikini tabby and one for the swimsuit tabby. The swimsuit is color-worked into the tabby cat.
Let’s get started!
Bikini Tabby Cat Body:
Start in Main Color
We start by making the head and working our way down to the body. The head, body, and legs are all crocheted into the same continuous piece.
Round 1: 6 Sc into a Magic Ring (6)
Round 2: *Inc* all around (12)
Round 3: *Inc, Sc in the next st* all around (18)
Round 4: *Inc, Sc in the next 2 st* all around (24)
Round 5: *Inc, Sc in the next 3 st* all around (30)
Round 6: *Inc, Sc in the next 4 st* all around (36)
Round 7-10: *Sc* all around (36)
NOTE: The following are abbreviations. MC= Main color. CC=Contrast color
Round 11: In Contrast Color, Sc in the next 14 st. In MC, Sc in the next 9 st. In CC, Sc in the next 13 st (36)
Round 12: In MC, *Sc* all around (36)
Now we will mark where to place the safety eyes. Add an eye stitch marker into the 16th and 22nd stitch in Round 12. We will later replace these markers with safety eyes.
Round 13-14: *Sc* all around (36)
Round 15: In CC, Sc in the next 16 st. In MC, Sc in the next 9 st. In CC, Sc in the next 11 st (36)
Round 16: In MC, *Sc* all around (36)
Round 17: Repeat *Dec, Sc in the next st* 3 times. Sc in the next 9 st. Repeat *Dec, Sc in the next st* 3 times. Sc in the next 9 st (30)
Round 18: *Dec* 3 times. Sc in the next 9 st. *Dec* 3 times. Sc in the next 8 st
We are going to make a decrease using the last stitch in this round and the first stitch in the next round. Essentially, just make a decrease and that decrease we make will mark the start of the next round.
Round 19: Make the decrease just mentioned. Then Sc in the next 6 st. *Dec* 3 times. Sc in the next 6 st. *Dec* 2 times (18)
Round 20: *Dec, Sc in the next 4 st* all around (15)
Round 21: Working in the Front Loop Only (FLO), *Inc, Sc in the next st* 7 times. Sc in the next st (22) Add safety eyes into the marked areas now. Stuff the head firmly now.
Round 22: *Inc, Sc in the next 2 st* 7 times. Sc in the next st (29)
Round 23: *Inc, Sc in the next 3 st* 7 times. Sc in the next st (36)
Round 24: In CC, *Sc* all around (36)
Round 25-28: In MC, *Sc* all around (36)
Round 29: In CC, *Sc* all around (36)
Round 30: In MC, Sc in the next 27 st. Inc in each of the next 8 st. Sc in the next st (44)
Round 31-34: *Sc* all around (44)
Round 35: In CC, *Sc* all around (44)
Round 36-39: In MC, *Sc* all around (44)
Round 40: Sc in the next 28 st. *Dec* 8 times (36)
Now we will make the legs.
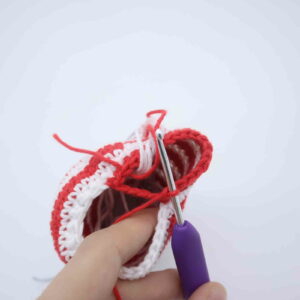
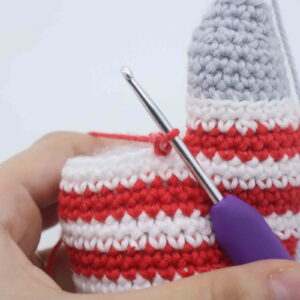
Round 41: Sc in the next 16 st (Pic 1). Ch 4 (Pic 2). Skip the next 17 stitches, Sc in the 18th stitch. Sc in the next st on the left leg (Pic 3) (Stitch count: 22)
1.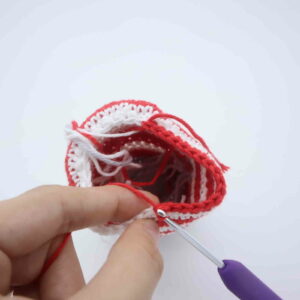 2.
2. 3.
3.
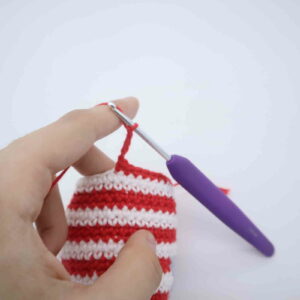
Round 42: Sc in the next 16 st. Working along the Ch, Sc in the next 4 st (Pic 1-2). Working back on the leg, Sc in the next 2 st (Pic 3-4) (Stitch count: 22)
1. 2.
2. 3.
3.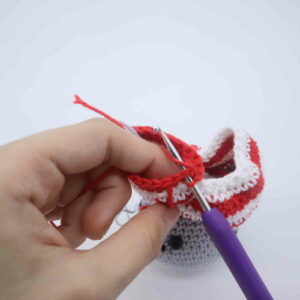 4.
4.
Round 43: *Dec, Sc in the next 2 st* 4 times. Sc in the next 6 st (18)
Round 44: *Sc* all around (18)
Round 45: In CC, *Sc* all around (18)
Round 46-48: In MC, *Sc* all around (18)
Round 49: *Dec, Sc in the next st* all around (12)
Round 50: In CC, *Sc* all around (12)
Round 51: In MC, *Sc* all around (12)
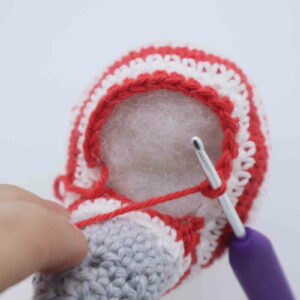
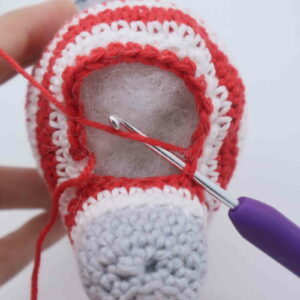
Stuff the belly firmly here, then stuff the leg firmly.
Round 52: Working in the Back Loop Only, *Dec* all around (6)
Finish off, leaving a long tail for sewing. Sew the remaining stitches closed and weave in ends. Cut any excess yarn.
Now we will work on making the other leg.
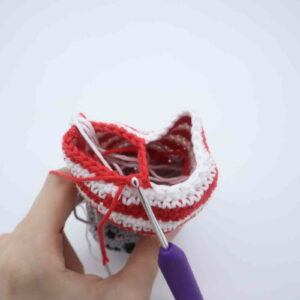
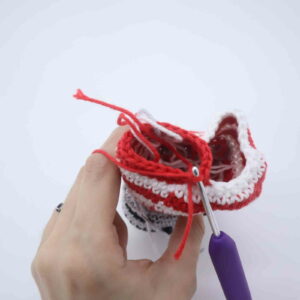
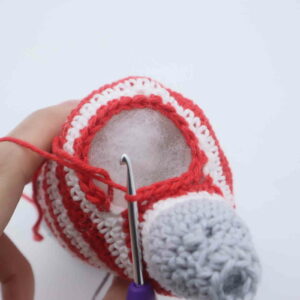
Round 53: Insert hook into the first st in the back area as shown (Pic 1). Yarn over with MC and Ch 1 (Pic 1-2). This ch 1 counts as the first st in this round, add a stitch marker into this chain. Sc in the next 17 st (Pic 3). Working along the Ch, Sc in the 4 (Pic 4-5). (Stitch Count: 22)
1. 2.
2. 3.
3. 4.
4. 5.
5.
Round 54: Repeat *Dec, Sc in the next 2 st* 4 times. Sc in the next 6 st (18)
Round 55: *Sc* all around (18)
Round 56: In CC, *Sc* all around (18)
Round 57-59: In MC, *Sc* all around (18)
Round 60: *Dec, Sc in the next st* all around (12)
Round 61: In CC, *Sc* all around (12)
Round 62: In MC, *Sc* all around (12)
Stuff the leg firmly now.
Round 63: Working in the Back Loop Only, *Dec* all around (6)
Finish off, leaving a long tail for sewing. Sew the remaining stitches closed and weave in ends. Cut any excess yarn.
Next…
Next is the pattern for the swimsuit cat’s body. After that part you’ll find instructions for the arms, ears, bikini and more.
Swimsuit Cat:
In Main Color
Round 1: 6 Sc into a Magic Ring (6)
Round 2: *Inc* all around (12)
Round 3: *Inc, Sc in the next st* all around (18)
Round 4: *Inc, Sc in the next 2 st* all around (24)
Round 5: *Inc, Sc in the next 3 st* all around (30)
Round 6: *Inc, Sc in the next 4 st* all around (36)
Round 7-10: *Sc* all around (36)
Round 11: In Contrast Color, Sc in the next 14 st. In MC, Sc in the next 9 st. In CC, Sc in the next 13 st (36)
Round 12: In MC, *Sc* all around (36)
Now we will mark where to place the safety eyes. Add an eye stitch marker into the 16th and 22nd stitch in Round 12. We will later replace these markers with safety eyes.
Round 13-14: *Sc* all around (36)
Round 15: In CC, Sc in the next 16 st. In MC, Sc in the next 9 st. In CC, Sc in the next 11 st (36)
Round 16: In MC, *Sc* all around (36)
Round 17: Repeat *Dec, Sc in the next st* 3 times. Sc in the next 9 st. Repeat *Dec, Sc in the next st* 3 times. Sc in the next 9 st (30)
Round 18: *Dec* 3 times. Sc in the next 9 st. *Dec* 3 times. Sc in the next 8 st
We are going to make a decrease using the last stitch in this round and the first stitch in the next round. Essentially, just make a decrease and that decrease we make will mark the start of the next round.
Round 19: Make the decrease just mentioned. Then Sc in the next 6 st. *Dec* 3 times. Sc in the next 6 st. *Dec* 2 times (18)
Round 20: *Dec, Sc in the next 4 st* all around (15)
Round 21: Working in the Front Loop Only (FLO), *Inc, Sc in the next st* 7 times. Sc in the next st (22) Add safety eyes into the marked areas now. Stuff the head firmly.
Round 22: *Inc, Sc in the next 2 st* 7 times. Sc in the next st (29)
Round 23: *Inc, Sc in the next 3 st* 7 times. Sc in the next st (36)
Round 24-25: In Red Sc in the next st. In Grey Sc in the next 3 st. In Red Sc in the next 15 st. In Grey Sc in the next 3 st. In Red Sc in the next 14 st (36)
Round 26: In White Sc in the next st. In Grey Sc in the next 3 st. In White Sc in the next 15 st. In Grey Sc in the next 3 st. In White Sc in the next 14 st (36)
Round 27: In White Sc in the next st. In Grey Sc in the next 3 st. In White Sc in the next 16 st. In Grey Sc in the next 3 st. In White Sc in the next 13 st (36)
Round 28: In Red Sc in the next 2 st. In Grey Sc in the next 3 st. In Red Sc in the next 15 st. In Grey Sc in the next 3 st. In Red Sc in the next 13 st (36)
Round 29: In Red Sc in the next 2 st. In Grey Sc in the next 3 st. In Red Sc in the next 16 st. In Grey Sc in the next 3 st. In Red Sc in the next 3 st. Still using red, Inc in each of the next 8 st. Sc in the last st (44)
Round 30-31: In white, *Sc* all around (44)
Round 32-33: In red, *Sc* all around (44)
Round 34-35: In white, *Sc* all around (44)
Round 36-37: In red, *Sc* all around (44)
Round 38: In white, *Sc* all around (44)
Round 39: In white, Sc in the next 28 st, *Dec* 8 times (36)
Now we will make the legs.
Round 40: In Red, Sc in the next 16 st (Pic 1). Ch 4 (Pic 2). Skip the next 17 stitches, Sc in the 18th stitch. Sc in the next st on the left leg (Pic 3) (Stitch count: 22)
1. 2. 3.
Round 41: Sc in the next 16 st. Working along the Ch (Pic 1-2), Sc in the next 4 st. Working back on the leg, Sc in the next 2 st (Pic 3-4) (Stitch Count: 22)
1. 2. 3. 4.
Round 42: In White *Dec, Sc in the next 2 st* 4 times. Sc in the next 6 st (18)
Round 43: *Sc* all around (18)
Round 44: In MC, *Sc* all around (18)
Round 45-47: *Sc* all around (18)
Round 48: *Dec, Sc in the next st* all around (12)
Stuff the belly firmly now. Stuff the leg now and after each round.
Round 49: *Sc* all around (12)
Round 50: *Sc* all around (12)
Round 51: Working in the Back Loop Only, *Dec* all around (6)
Finish off, leaving a long tail for sewing. Sew the remaining stitches closed and weave in ends. Cut any excess yarn.
Now we will work on making the other leg.
Round 52: Insert hook into the first st in the back area as shown (Pic 1). Yarn over with Red and Ch 1 (Pic 1-2). This ch 1 counts as the first st in this round. Sc in the next 17 st (Pic 3). Working along the Ch, Sc in the 4 (Pic 4-5). (Stitch count: 22)
1. 2. 3. 4. 5.
Round 53: Repeat *Dec, Sc in the next 2 st* 4 times. Sc in the next 6 st (18)
Round 54-55: In White *Sc* all around (18)
Round 56-58: In MC, *Sc* all around (18)
Round 59: *Dec, Sc in the next st* all around (12)
Round 60: *Sc* all around (12) Stuff the leg firmly here.
Round 61: *Sc* all around (12)
Round 62: Working in the Back Loop Only, *Dec* all around (6)
Finish off, leaving a long tail for sewing. Sew the remaining stitches closed and weave in ends. Cut any excess yarn.
Arms: (Make 2)
Start in White
Round 1: 6 Sc into a Magic Ring (6)
Round 2: *Inc, Sc in the next st* all around (9)
Round 3-4: *Sc* all around (9)
Round 5-8: In MC, *Sc* all around (9)
Round 9: In CC, *Sc* all around (9)
Round 10-13: In MC, *Sc* all around (9)
Finish off here if you’re making the swimsuit cat. Continue on the next rounds if you’re making the bikini cat, as the arms need to be longer for the arms to reach the cat’s head.
Round 14: In CC, *Sc* all around (9)
Round 15: In MC, *Sc* all around (9)
Finish off, leaving a long tail for sewing. Lightly stuff the arm and pin on pointing upwards for the bikini cat, and pointing down for the swimsuit cat as shown. Sew on and weave in ends, cutting any excess yarn.
Ears: (Make 2)
Start in Main Color
Round 1: 6 Sc into a Magic Ring (6)
Round 2: *Sc* all around (6)
Round 3: *Inc* all around (12)
Round 4: In CC, *Inc, Sc in the next st* all around (18)
Round 5-6: In MC *Sc* all around (18)
Finish off, leaving a long tail for sewing. Pin the ears on as shown and sew on. Once sewn on, weave in ends and cut any excess yarn.
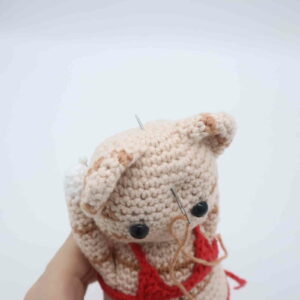
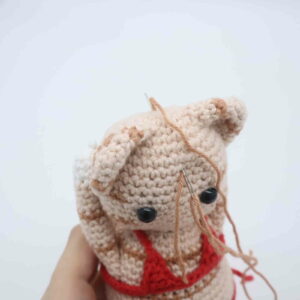
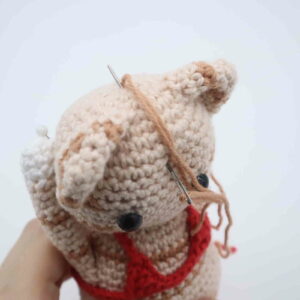
Nose/Mouth:
In Contrast Color
Insert needle into the bottom right side of the toy’s face and bring needle out at the top left as shown (Pic 1). Reinsert needle into the same bottom right area (Pic 2) and pull needle out at the bottom left as shown (Pic 2). Reinsert needle into the top right as shown (Pic 3) and pull needle out at the same bottom right area (Pic 3). The tail ends of yarn should be coming out of the same hole. Tie both ends of yarn into a firm knot, then bring the knot inside the toy to hide. Cut any excess yarn.
1. 2.
2. 3.
3. 4.
4.
Head Embroidery:
In Contrast Color
Take a long piece of contrast color yarn and place it on a needle. Insert needle into the upper middle area of the toy’s head (Pic 1) and pull needle out at the top middle area of the toy’s head (Pic 1). Reinsert needle into the original insertion spot (Pic 2). Pull needle out at the top middle area of the toy’s head (Pic 2). Reinsert needle into the original insertion spot (Pic 3) and pull needle out at the top middle area of the toy’s head (Pic 3). Tie ends of yarn into firm knots and bring the knot inside the toy’s head to hide.
1. 2.
2. 3.
3. 4.
4.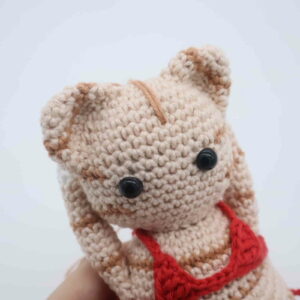
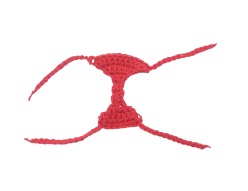
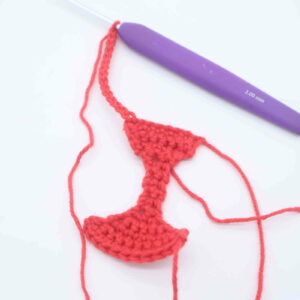
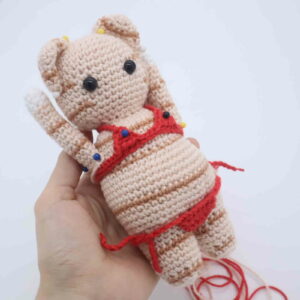
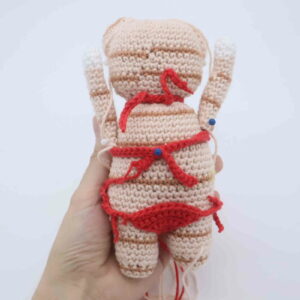
Bikini Top:
In Red
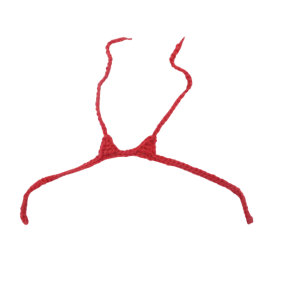
Row 1: Ch 68. SlSt in the 2nd Ch from the hook. SlSt in the next 28 st.
•Ch 5. Sc in the 2nd Ch from the hook, Hdc in the next Ch, Dc in the next Ch, Trc in the next Ch. Skip the next 2 st, SlSt in the following Ch.
•SlSt in the next 4 Ch.
•Ch 5. Sc in the 2nd Ch from the hook, Hdc in the next Ch, Dc in the nex Ch, Trc in the next Ch. Skip the next 2 Ch, SlSt in the following Ch.
•SlSt in the next 28 Ch.
Finish off here.
Bikini Top Straps:
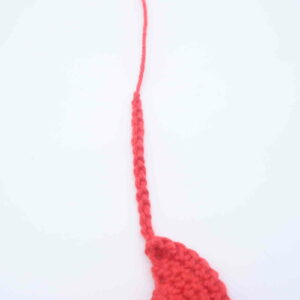
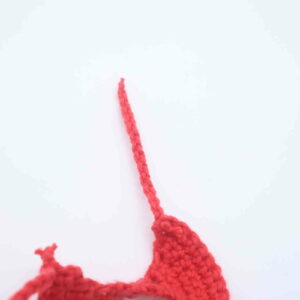
Attach your hook into the tip of the triangle as shown and ch 25. Finish off and tie a knot very close to the last chain to secure. Cut the excess yarn. Pin the bikini on as shown. You can sew the bikini to the cat to secure it. I prefer using hot glue, as it gives a cleaner finish and it easier to attach using hot glue. Use a small amount, because using too much can make the glue ooze out and become visible.
Bikini Bottom:
Row 1: Ch 9. Sc in the 2nd Ch from the hook, Sc in the next 7 Ch (8)
Row 2: Ch 1 and turn. Dec 1 time, Sc in the next 4 st, Dec 1 time (6)
Row 3: Ch 1 and turn. Dec 1 time, Sc in the next 2 st, Dec 1 time (4)
Row 4: Ch 1 and turn. Dec 2 times (2)
Row 5-10: Ch 1 and turn. Sc in the next 2 st (2)
Row 11: Ch 1 and turn. Inc in each of the next 2 st (4)
Row 12: Inc in the next st, Sc in the next 2 st, Inc in the next st (6)
Row 13: Inc in the next st, Sc in the next 4 st, Inc in the next st (8)
Row 14: Inc in the next st, Sc in the next 6 st, Inc in the next st (10)
Row 15: Inc in the next st, Sc in the next 8 st, Inc in the next st (12)
Finish off, leaving a long tail for sewing. Attach your hook to the corner of the bikini and Ch 15 (Pic 2-3). Finish off and tie a firm knot close to the last Ch (Pic 4). Cut just above the knot you made. (Pic 5) Repeat this process for the other 3 corners of the bikini. After this, place the bikini bottom onto the cat and tie the strings. Sew or hot glue on.
1. 2.
2. 3.
3. 4.
4. 5.
5.
Beach Towel:
In White

Row 1: Ch 24. Dc in the 3rd Ch from the hook. The 2 chains we skipped make the first Dc. Now Dc in the next 21 ch (23)
Row 2: Ch 2 and turn. Dc across (23)
Row 3-4: In Red, Ch 1 and turn. Dc across (23)
Row 5-6: In White, Ch 1 and turn. Dc across (23)
Row 7-8: In Red, Ch 1 and turn. Dc across (23)
Row 9-10: In White, Ch 1 and turn. Dc across (23)
Row 11-12: In Red, Ch 1 and turn. Dc across (23)
Row 13-14: In White, Ch 1 and turn. Dc across (23)
Row 15: Now we will crochet around the towel’s edges to make the towel look cleaner. Using white yarn, start making single crochets around the side of the towel. Change to red and back to white when you meet the different colored stripes. Once you’re done crocheting completely around the towel, finish off and weave in ends.
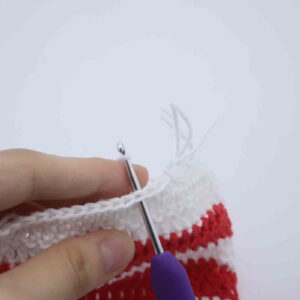
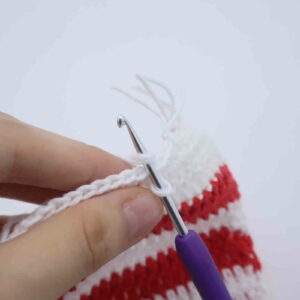
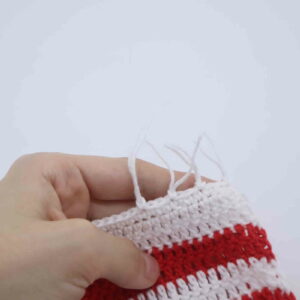
Cut about a 4″ piece of white yarn. Insert your hook into the first stitch of the towel as shown. Yarn over with the yarn you cut and pull the yarn through as shown. Yarn over with both ends of the yarn and pull this through the loop on your hook. Pull both ends of yarn at the same time to secure this edging. Repeat this process across both ends of the towel, skipping about 3 stitches between each tassel. Trim the tassels to be a little shorter and the same size.
1. 2.
2. 3.
3. 4.
4.
Done! If you made a kitty, I would LOVE to see! You can show me by posting a picture in the comments section underneath this post! 🙂


4 Comments
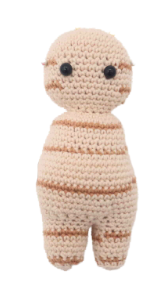
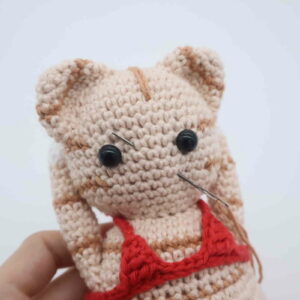
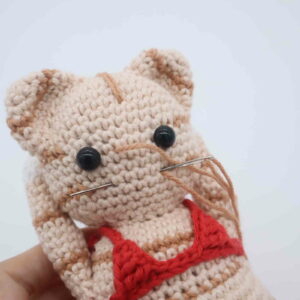
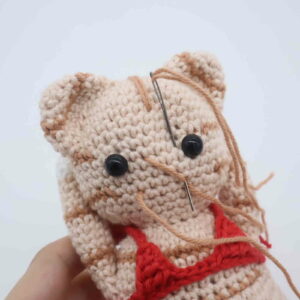
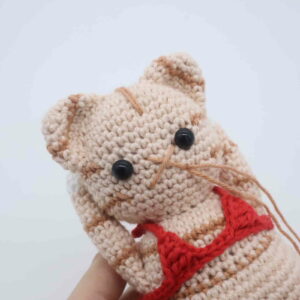
Hi, I don’t know where I’ve gone wrong on the tubby tabby cat. Please see attached pic. Followed the pattern for inserting eyes, doing stripes and the bulge out to the right to me suggests that it’s supposed to be the belly. Have I made a mistake somewhere?
mine has the same problem. Maybe an issue with the pattern?
mine has the same problem. Maybe an issue with the pattern?
Help! My entire body is sideways!! It started with the belly being bulgy on the wrong side but now the legs are sideways too!! Is there an issue with the pattern or did I mess up?