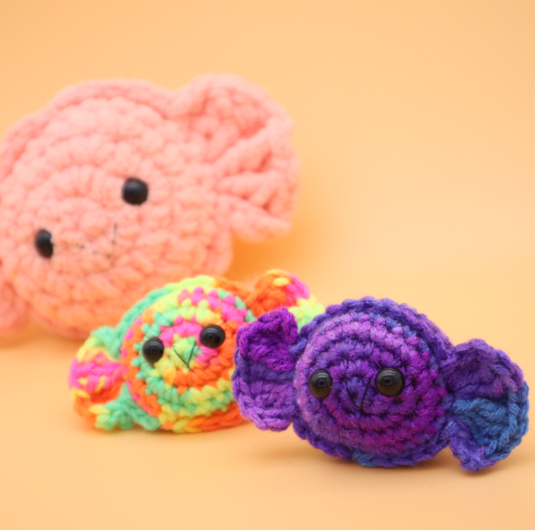
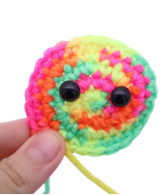
No-Sew Candy Amigurumi – Free Crochet Pattern
Hi there, Happy very early Halloween! This no-sew candy amigurumi pattern is inspired by a kind fellow crocheter who told me her young child was learning how to crochet and wanted a piece of candy to make! I loved the idea, and definitely wanted to make this pattern for Halloween. Though, candy is good anytime of year! This no-sew candy is a part of my “Scraptacular Halloween” series this year. I’ve released 4 different Halloween themed patterns that are all quick and easy to make with your scrap yarns 🙂 Besides this no-sew candy amigurumi pattern, the other patterns include a mini candy corn, eyeball, and mini pumpkin. That’s not all…
Since you’re here, you must like free Halloween patterns! You’re in luck – this year I’m releasing my biggest free Halloween bundle yet, with 10 free patterns. If you’d like to see those other upcoming patterns, here’s a picture. (You can click on the picture of the set below and you’ll be taken to a post which shows each upcoming pattern’s release date.)
View the other free Halloween patterns >>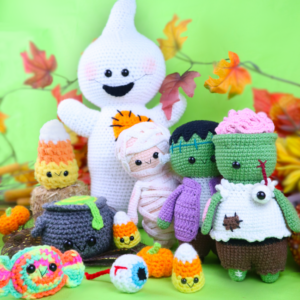
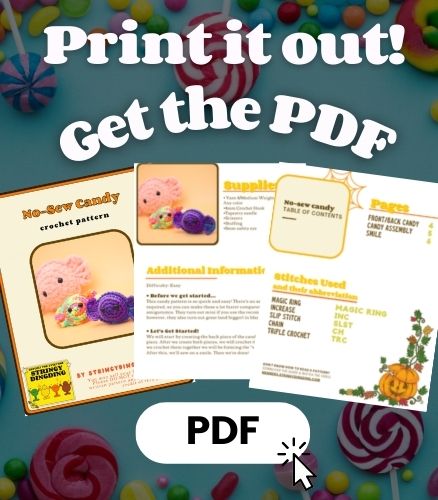
Print this pattern out – purchase the PDF here!


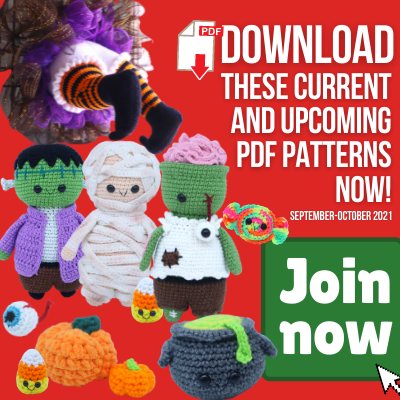
This is just 1 out of 10 patterns included in the Spooky Halloween Amigurumi Bundle! Every week 1 or more Halloween themed amigurumis will be released.
Want to see the other Halloween patterns and their release date? See them here!
Become a member to unlock each PDF pattern as they’re released!
Supplies:
• Yarn 4/Medium Weight in…
Any color
•4mm Crochet Hook
•Tapestry needle
•Scissors
•Stuffing
•8mm safety eye
Additional Information:
Difficulty: Easy
• Before we get started…
This candy pattern is so quick and easy! There’s no sewing required, so you can make these a lot faster compared to most amigurumis. They turn out mini if you use the recommended yarn, however, they also turn out great (and bigger) in blanket yarn 🙂
• Let’s Get Started!
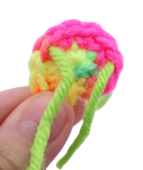
We will start by creating the back piece of the candy, then the front piece. After we create both pieces, we will crochet them together. As we crochet them together we will be forming the “wrapper” part. After this, we’ll sew on a smile. Then we’re done!
Back Piece of Candy: (Make first)
In any color

Round 1: 6 Sc into a Magic Ring (6)
Round 2: *Inc* all around (12)
Round 3: *Inc, Sc* all around (18)
Round 4: *Inc, Sc 2* all around (24)
Round 5: *Sc* all around (24)
Finish off the first piece now and weave in ends.
Front piece of candy: (Make second)
In any color
Round 1: 6 Sc into a Magic Ring (6)
Round 2: *Inc* all around (12)
We will add eye stitch markers into Round 2. These will mark where to place the safety eyes later. Add a stitch marker in the 4th and 9th stitch.
Round 3: *Inc, Sc* all around (18)
Round 4: *Inc, Sc 2* all around (24)
Round 5: *Sc* all around (24)
Add safety eyes in the marked areas now. In the next round we will assembly both pieces together to form the candy.
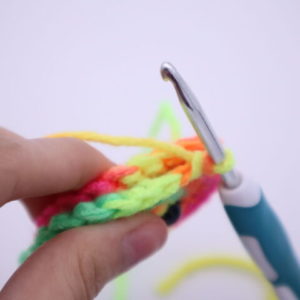
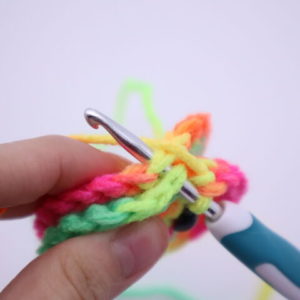
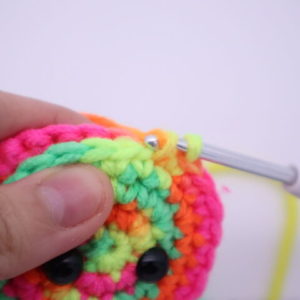
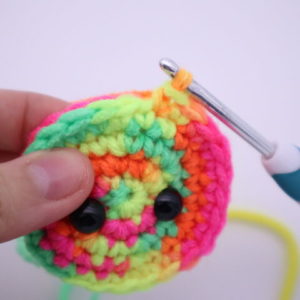
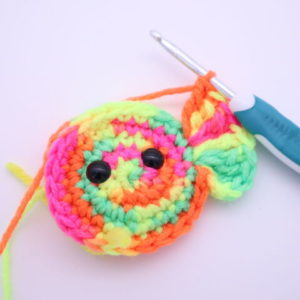
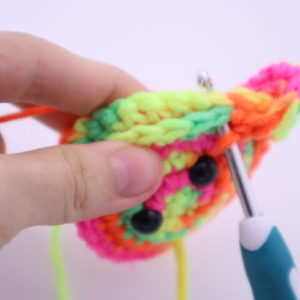
Round 6: Take the first piece we made and line it up to the second piece’s stitches as shown (Pic 1). Make sure the eyes are on the outside, not the inside. Insert your hook going through BOTH the stitches (Pic 2). Yarn over and pull up a loop (Pic 3-5).
1. 2.
2.
3.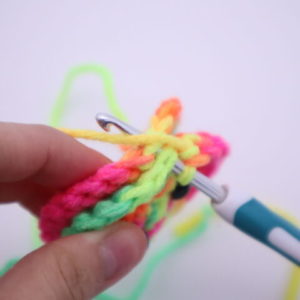 4.
4.
5.
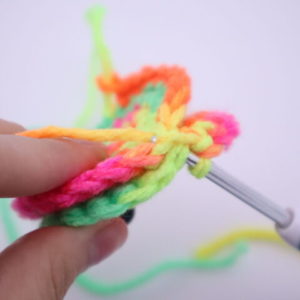
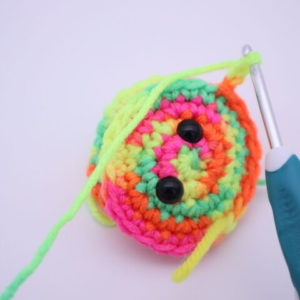
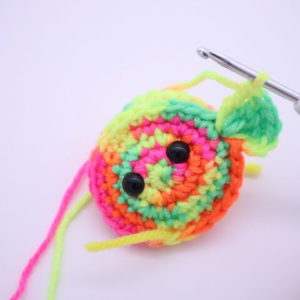
Yarn over and pull through both loops (Pic 6-8). This completes one single crochet. Continue to make 1 Sc in the next 6 st (Pic 9). SlSt in the next st, Ch 3 (Pic 10), create 5 Trc into each of the next 2 stitches (Pic 11-12). SlSt into the same st you just worked the last Trc in (Pic 13). Sc in the next 10 st.
6. 7.
7.
8. 9.
9.
10. 11.
11.
12. 13.
13.
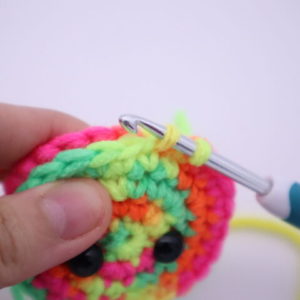
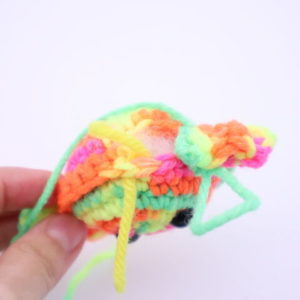
SlSt in the next st, Ch 3, create 5 Trc into each of the next 2 stitches. SlSt into the same st you just worked in. Stuff the candy firmly now (Pic 14). Sc in the next 3 st. Finish off and weave in ends (Pic 15).
14. 15.
15.
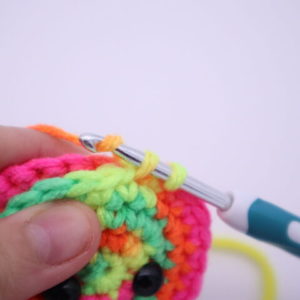
Smile:
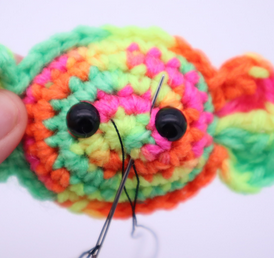
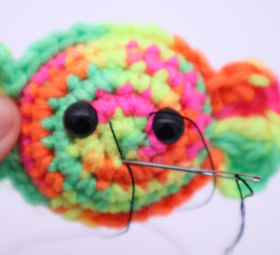
In black embroidery thread
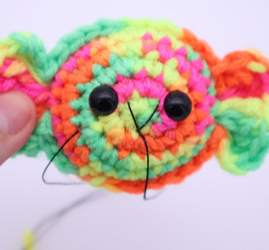
Insert needle with thread into the middle area of the candy (Pic 1) and pull the needle out next to the candy’s left eye (Pic 1). Reinsert needle into the original insertion spot (Pic 2) and pull needle out next to the candy’s right eye (Pic 2). Reinsert needle into the original insertion spot (Pic 3). Weave in ends.
1. 2.
2.
3. 4.
4.
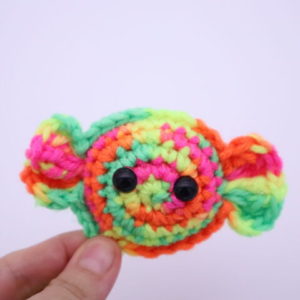
Done! If you made this candy, I would LOVE to see! You can show me by posting a picture in the comments underneath this post 🙂


2 Comments
Thanks so much for such a cute pattern! I made this little candy super quickly and love how it turned out. Your patterns are always so easy to follow, and this one was no different. 💕🍬
I know it’s technically for Halloween, but I made this for an easter candy (perhaps a chocolate?) and I’m so happy with how it turned out! Thank you for your awesome and easy-to-follow patterns!!