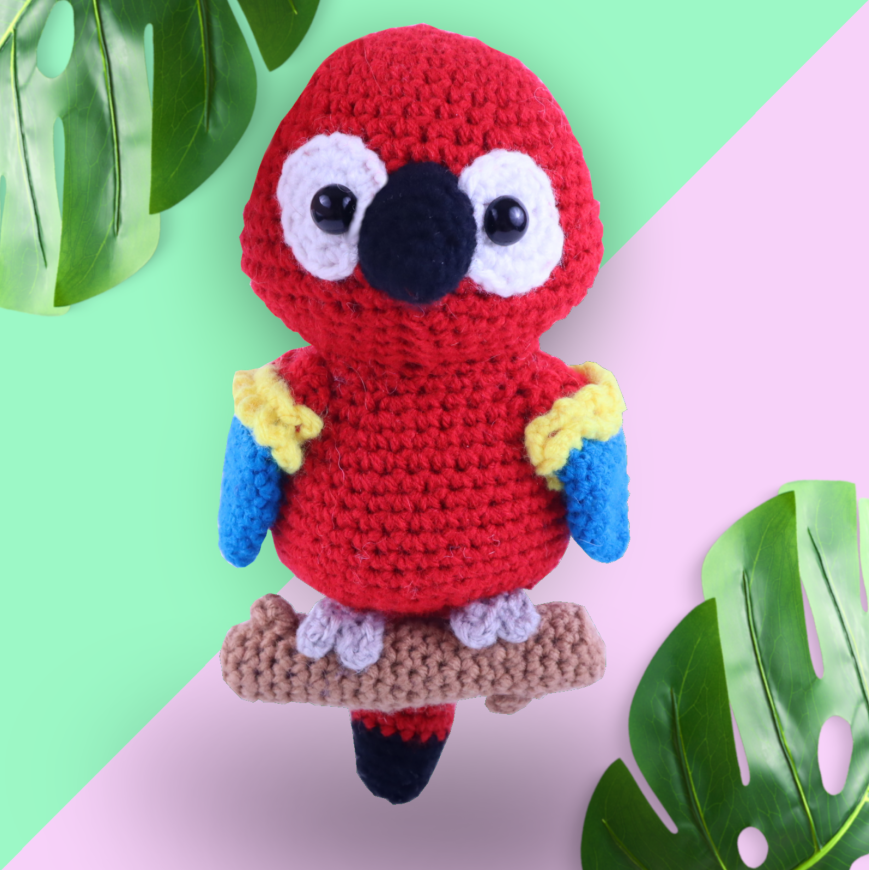
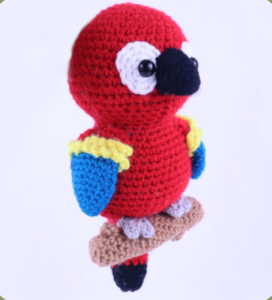
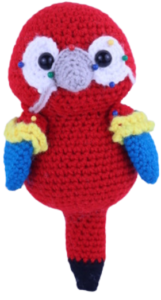
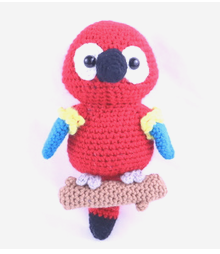
Parrot Amigurumi – Free Crochet Pattern

Print this pattern out – purchase the PDF here!
 Supplies:
4/Medium weight yarn in:
Red, white, black, blue, yellow, brown
4mm Crochet Hook
Polyfil Stuffing
10mm safety eyes
Metal wire (optional)
Additional Information:
This pattern is really fun to make. Most of it is easy, but there is a special technique when it comes to making the feathers on the two wings. I made sure to add plenty of photos for that part.
Getting started…
We first start by making the top of the bird’s head and work our way down to the body, then the tail. They are all made in one continuous piece. After this, we will make his eyes, beak, wings, feet, and the optional wood branch!
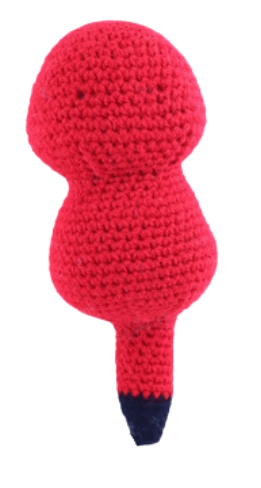
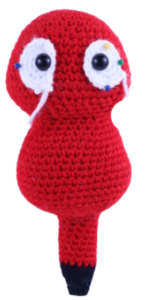
Head/Body:
Start in Red
Round 1: 5 Sc into a Magic Ring (5)
Round 2: *Inc* all around (10)
Round 3: *Inc, Sc* all around (15)
Round 4: *Inc, Sc 2* all around (20)
Round 5: *Inc, Sc 3* all around (25)
Round 6: *Inc, Sc 4* all around (30)
Round 7-8: *Sc* all around (30)
Round 9: *Inc, Sc 5* all around (35)
Round 10: *Inc, Sc 6* all around (40)
Round 11-13: *Sc* all around (40)
Round 14: *Inc, Sc 3* all around (50)
Round 15-16: *Sc* all around (50)
Round 17: *Dec, Sc 3* all around (40)
Round 18: *Dec, Sc 6* all around (35)
Round 19: *Dec, Sc 5* all around (30)
Round 20: *Dec, Sc 4* all around (25)
Round 21: In the FLO, *Sc* all around (25)
Round 22: In BOTH loops, *Sc* all around (25)
Round 23: *Inc, Sc 4* all around (30)
Round 24: *Inc, Sc 5* all around (35)
Round 25: *Inc, Sc 6* all around (40)
Stuff the head firmly here
Round 26-29: *Sc* all around (40)
Round 30: *Inc, Sc 7* all around (45)
Round 31-34: *Sc* all around (45)
Round 35: Repeat *Dec, Sc 4* 3 times, Sc in the next 9 st, Repeat *Dec, Sc 4* 3 times (39)
Round 36: Repeat *Dec, Sc 3* 3 times, Sc in the next 9 st, Repeat *Dec, Sc 3* 3 times (33)
Round 37: Repeat *Dec, Sc 2* 3 times, Sc in the next 9 st, Repeat *Dec, Sc 2* 3 times (27)
Round 38: Repeat *Dec, Sc 1* 3 times, Sc in the next 9 st, Repeat *Dec, Sc 1* 3 times (21)
Stuff the body firmly here. Continue stuffing after each round
Round 39: *Dec* 3 times, Sc in the next 9 st, *Dec* 3 times (15)
Round 40-46: *Sc* all around (15)
Round 47-48: Change to black. *Sc* all around (15)
Round 49: *Dec, Sc 3* all around (12)
Round 50: *Sc* all around (12)
Stuff the tail firmly here
Round 51: *Dec, Sc 2* all around (9)
Round 52: *Sc* all around (9)
Finish off and sew the remaining stitches closed.
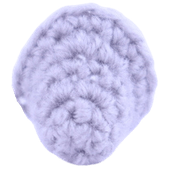
Eyes: (Make 2)
Start in White
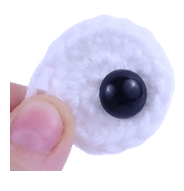
Round 1: 6 Sc into a Magic Ring (6)
Round 2: *Inc* in the next 2 st. Inc in the next st, then add a safety eye into the stitch you just crocheted into. *Inc* in the next 3 st (12)
Finish off, leaving a long tail for sewing. Place each eye onto the toy parrot’s head, making sure they line up centered to the tail. I spaced each eye white about 3 stitches apart. Once you’re happy with the placement, sew on and weave in ends.
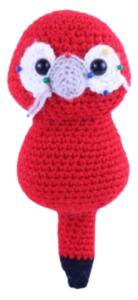
Beak:
Start in black or grey
Round 1: 6 Sc in Magic Ring (6)
Round 2: *Sc* all around (6)
Round 3: Sc in the next 2 st, Sc 3 times into each of the next 2, Sc in the next 2 st (10)
Round 4: *Sc* all around (10)
Round 5: Sc in the next 4 st, Sc 3 times into each of the next 2 st, Sc in the next 4 st (14)
Round 6: *Sc* all around (14)
Finish off leaving a long tail for sewing. Pin the beak between the eyes. The beak’s curve will be pointing down. Sew on, adding stuffing into the beak before fully sewing closed. Once done, weave in ends.
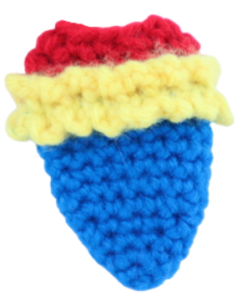
Arms: (Make 2)
Start in Blue
Round 1: 6 Sc into a Magic Ring (6)
Round 2: *Sc* all around (6)
Round 3: *Inc, Sc* all around (9)
Round 4: *Inc, Sc 2* all around (12)
Round 5: *Inc, Sc 3* all around (15)
Round 6-10: *Sc* all around (15)
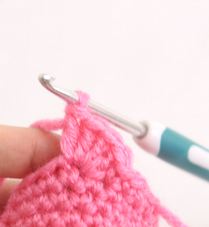
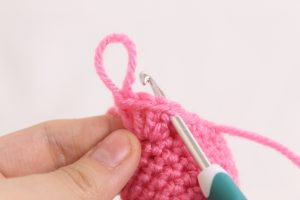
In the next round we will make feathers by creating a chain. then crocheting back onto the arm.
Round 11: Change to yellow. Repeat *Sc in the next st, Ch 3* 15 times (Stitch count: 60. 15 Sc and 45 Ch)
1.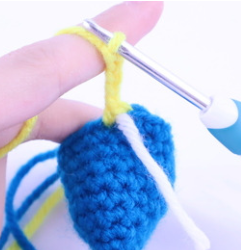 2.
2.
3. 4.
4.
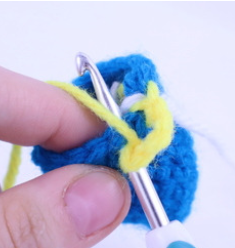
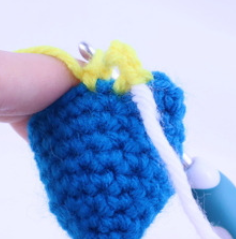
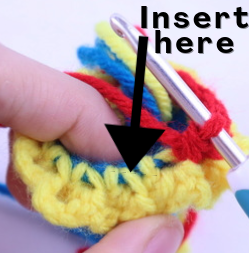
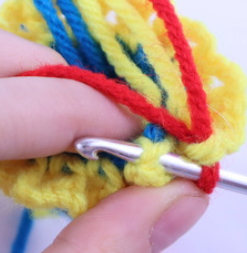
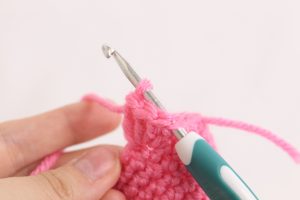
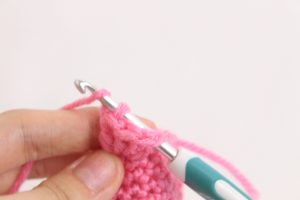
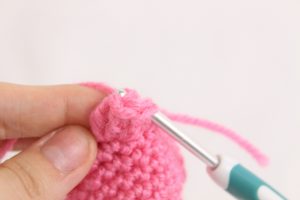
In the next round we will crochet a little differently into the previous round’s stitches. Bend the feathers TOWARDS you, you will see a “v” for each stitch (Pic 5). Insert your hook into the right post of that “v” (Pic 6). Continue to make your Sc as normal. (Pic 7) Round 12: Repeat *Sc in the next st, Ch 3* 15 times (Stitch count: 60. 15 Sc and 45 Ch)
5.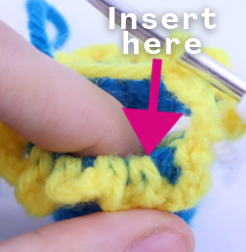 6.
6.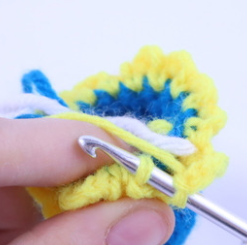
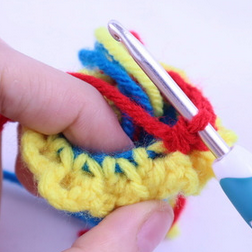
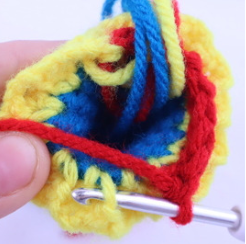
7. 8.
8.
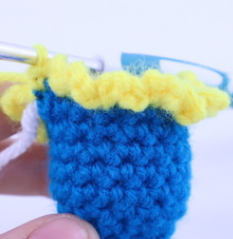
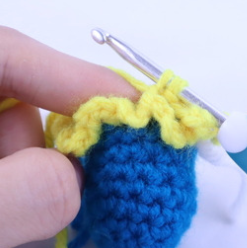
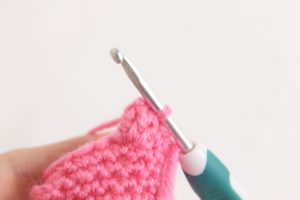
In the next round we will continue to crochet into the previous round’s stitches as we did in Round 12. Continue looking for the next “v”, then crochet into the right post of the “v”.
Round 13: Change to red. *Sc* all around (15)
1. 2.
2.
3. 4.
4.
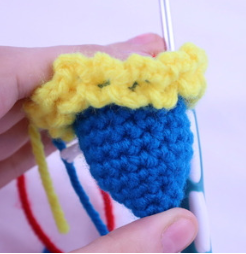
Round 14: Now we can make our single crochets as normal. *Sc* all around (15)
Round 15: *Dec, Sc 3* all around (12)
Round 16: *Dec, Sc 2* all around (9)
Finish off, leaving a long tail for sewing. Pin each arm on as shown. Don’t stuff. Sew on and weave in ends.
Feet: (Make 4)
In grey
We will make 4 feet pieces total, and sew 2 together to form 1 foot.
Round 1: 6 Sc into a Magic Ring (6)
Round 2: *Inc* in the next st. Repeat *Ch 3, Sc in the 2nd Ch from the hook, Dc in the next ch, SlSt into the next st on the circle* 2 times. SlSt in the next 2 st, Ch 3, Sc in the 2nd Ch from the hook, Dc in the next ch, SlSt in the next st on the circle (13)
Finish off, leaving a long tail for sewing.
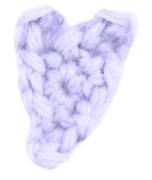
Optional if you want the feet bendy, don’t do this if you’re making the toy for a child:
Take a metal wire and bend it so it follows the foot as shown (Pic 1). Trim the wire to the crochet foot’s size. Wrap yarn firmly around the ends of the wire and secure with hot glue, this will prevent it from poking out and touching a sharp edge.
1.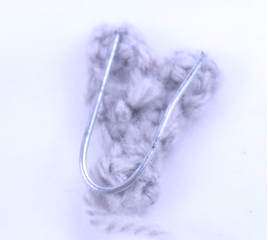 2.
2.
3.
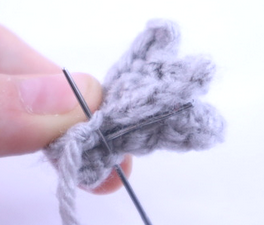
Now place the 2nd foot piece on top and sew together, going from the bottom foot piece to the top foot piece (Pic 2). Pin each foot onto the bird as shown and sew on – make sure the feet line up to the eye placement for it to be even.
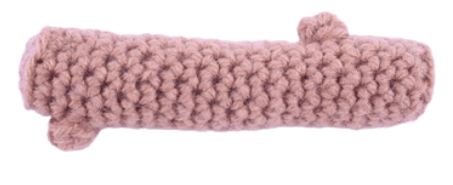
Stick:
In Brown
Round 1: 6 Sc into a Magic Ring (6)
Round 2: *Inc* all around (12)
Round 3: In the BLO, *Sc* all around (12)
Round 4-7: In BOTH loops, *Sc* all around (12)
Round 8: Sc in the next 5 st. Make 1 popcorn stitch in the next st. Sc in the next 6 st (12)
Don’t know how to make a popcorn stitch? See after the stick pattern for instructions!
Round 9-21: *Sc* all around (12)
Round 22: Sc in the next 5 st, Make 1 popcorn stitch in the next st. Sc in the next st 6 (12)
Round 23-24: *Sc* all around (12)
Stuff the stick firmly now
Round 25: In the BLO, *Dec* all around (6)
Finish off, leaving a long tail for sewing. Sew the remaining stitches closed and weave in ends.
Place the feet on top of the stick as shown. Sew on by using grey yarn – sew going from the stick, up to the toy foot. Repeat this until it’s fully sewn on. Once done, tie the end of yarn firmly into a knot and bring into the toy to hide. Cut excess yarn.
How to make a popcorn stitch:
Dc 4 times in the next st (Pic 1). Remove your hook from the current working loop and insert it into the first Dc made (Pic 2). Now also reinsert your hook into the current working loop (Pic 3). You will have two loops on your hook. Yarn over (Pic 4) and pull through both loops (Pic 5). You have just made one popcorn stitch (Pic 6). This popcorn stitch will leave a regular Sc on the top – crochet over that stitch just as normal!
1. 2.
2.
3. 4.
4.
5. 6.
6.
Done! If you made this parrot I would LOVE to see! You can post a picture in the comments under this post to show me 🙂


16 Comments
Omg I love it!!!!
Thank you so much!
Hi, I made this pattern and it was really fun!!!
He’s so cute, Melissa! Thank you for sharing a picture, you did an awesome job 😍
Thanks for the pattern! Great instructions and easy to follow!
My boy Joey is a Quacker parrot, Green with Gray frontal. Your parrot is so dang cute. I have to get the hooks out and make one . I signed up with your site for newsletters. Oh boy this is going to be a fun-to-make items diversion from clothing items.
My son is getting dressed as a pirate to pre school “party”. He’s going to love his new parrot. He calls it Melon.
Thank you for amazing and easy pattern ❤️
Thank you! It was so much fun to make this
Thank you so much ☺️ I am obsessed With you’re website! This pattern was so easy to follow I wasn’t able to do the little feet but overall I love it! Thank you for doing what you do !
Pattern was super easy to follow and it was so much fun to make!!
Thanks for the excellent pattern. Love the result and it was very well described and easy to follow. So much fun☺️👍
Thanks for the pattern! My sons wanted a parrot and was too impatient for the right colors to come in so he picked from my stash. I really enjoyed all the different stitches!
Thanks for sharing the pattern, Olive!
It was so fun and turned out so well. Well written pattern! I will be making more of your patterns!
Loving seeing all the different versions 😍 easy pattern i added a little headtopper 😁
This came out so cute!!