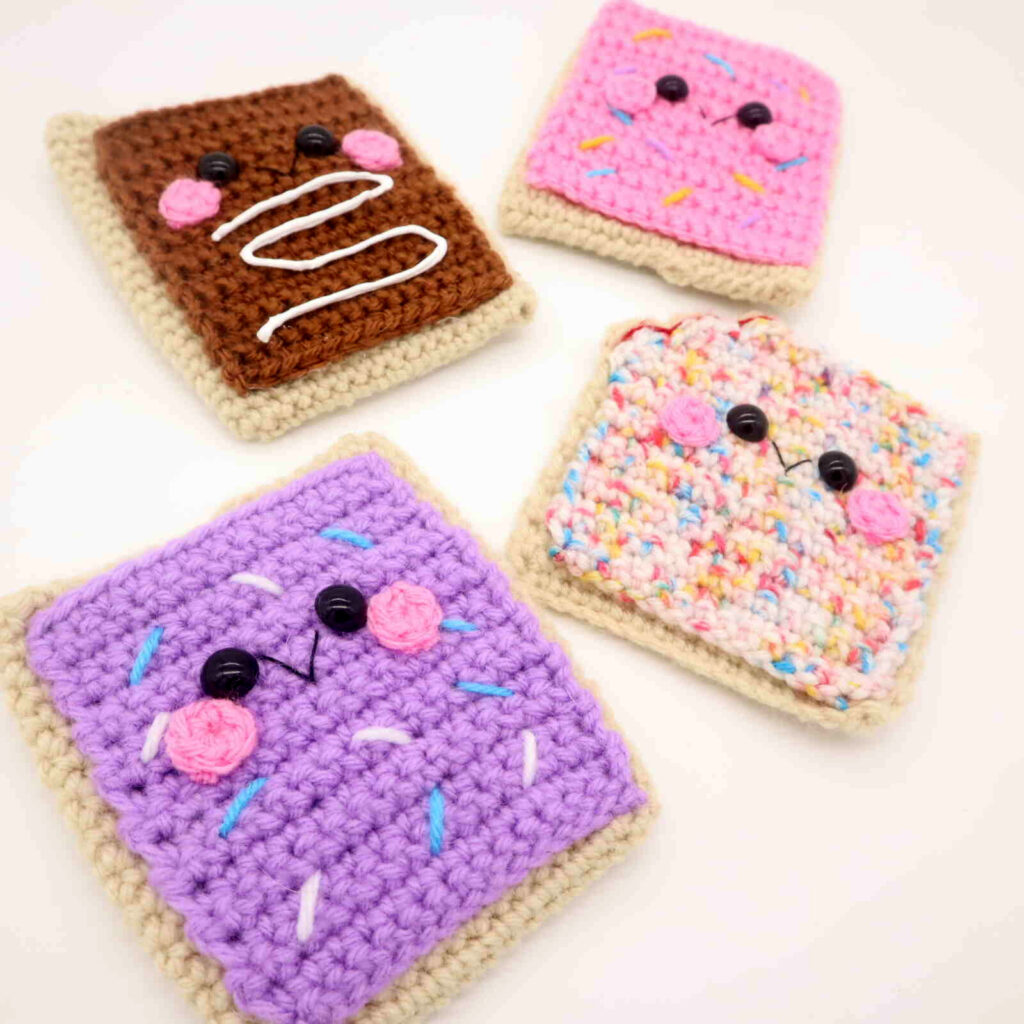
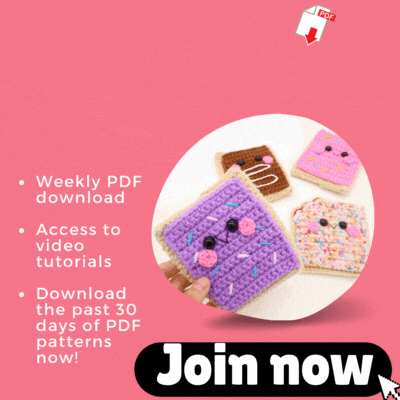
Poptart Amigurumi – Free Crochet Pattern
Print this pattern out – purchase the PDF version here!

 Supplies:
• Yarn 4/Medium Weight Yarn in…
Cream color, pink, and any color you want the icing/sprinkles
•4mm Crochet Hook
•12mm safety eyes
•Black embroidery thread for smile
•Tapestry needle
•Scissors
•Hot glue gun (optional)
•Puffy paint (optional)
Additional Information:
•Difficulty: Easy
•Size from tip of claw to end of tail: 4.5″ tall 4″ wide
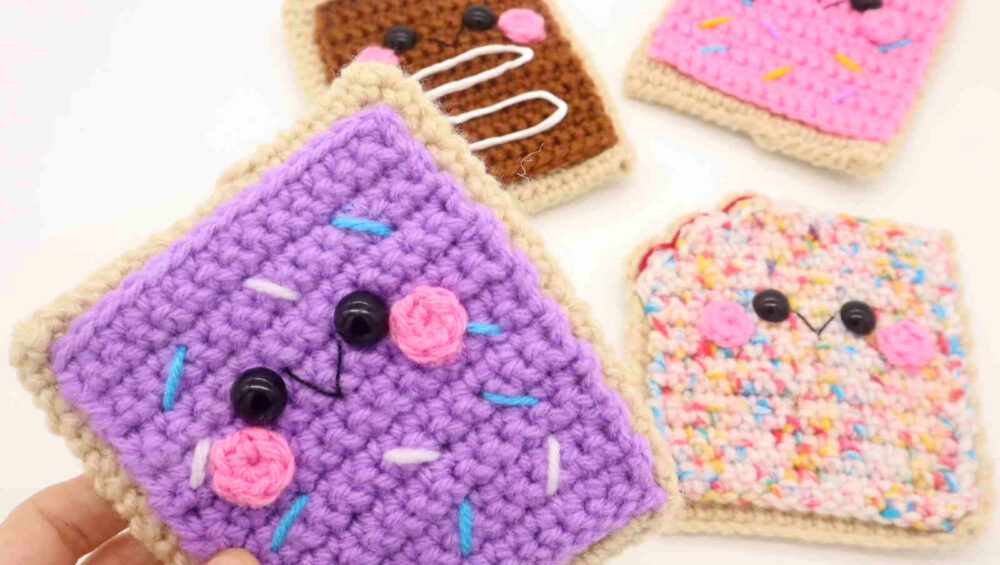
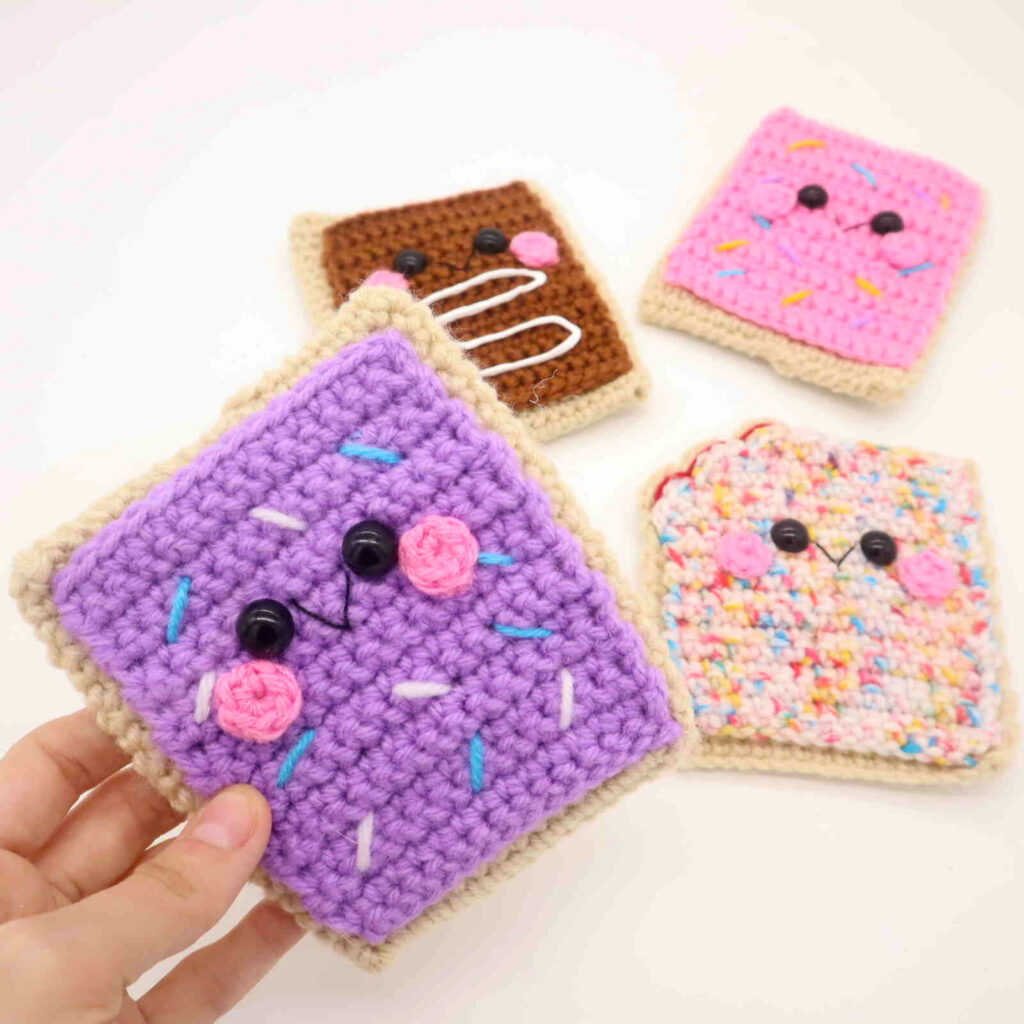
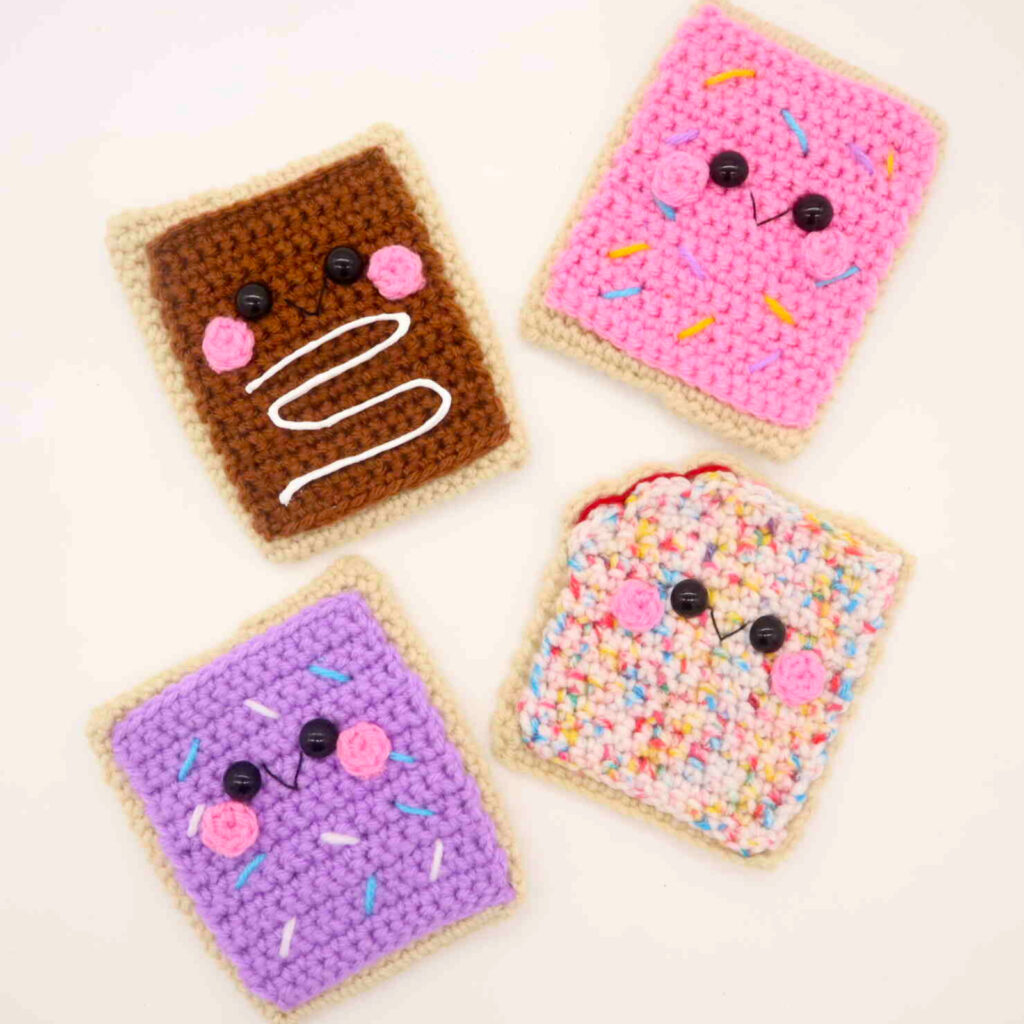
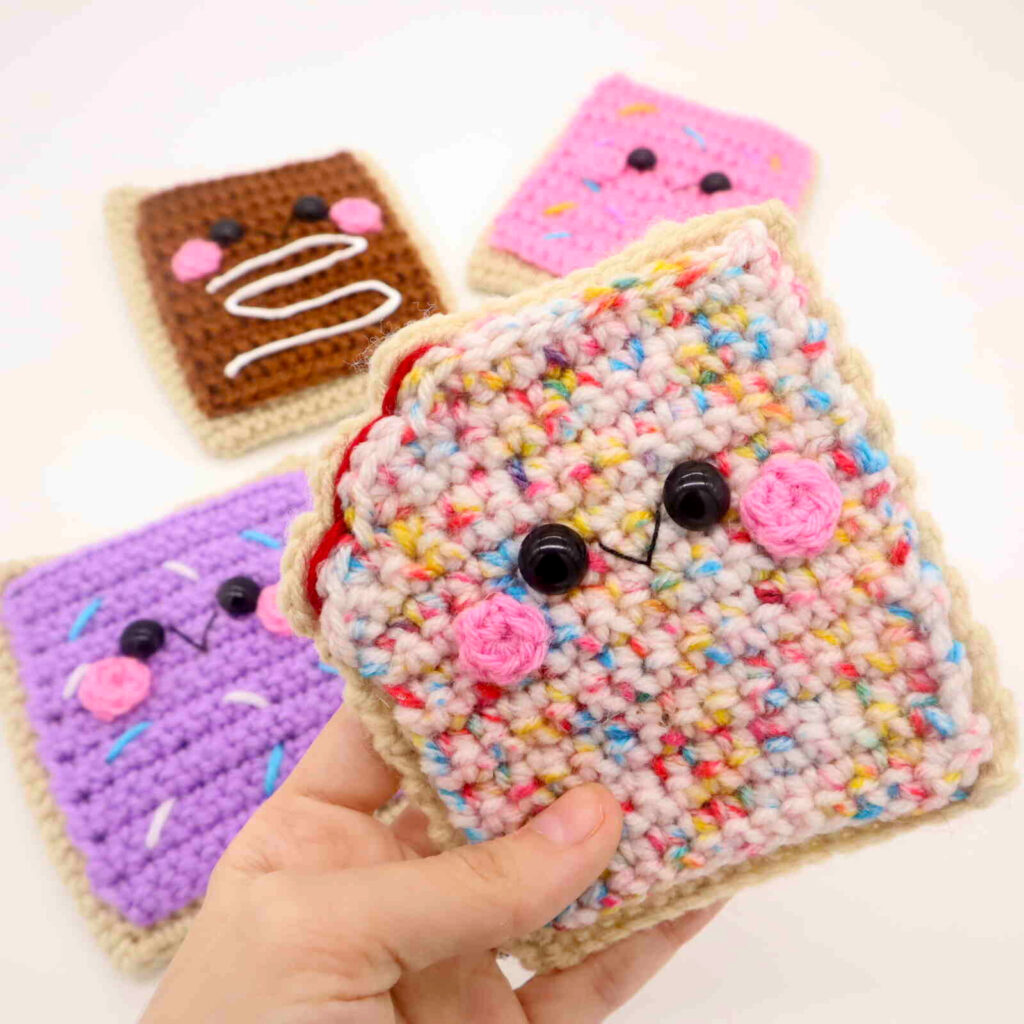
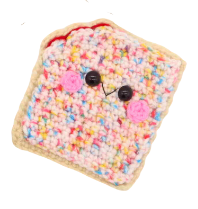
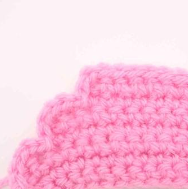
These cute poptarts are so cute and easy to make! The best part? You can make them using a multicolored yarn! I’m always looking for fun ways to use up my variegated yarn 🙂
This pattern shows you how to make a regular poptart as well as a poptart with a bite in it! Let’s get started!
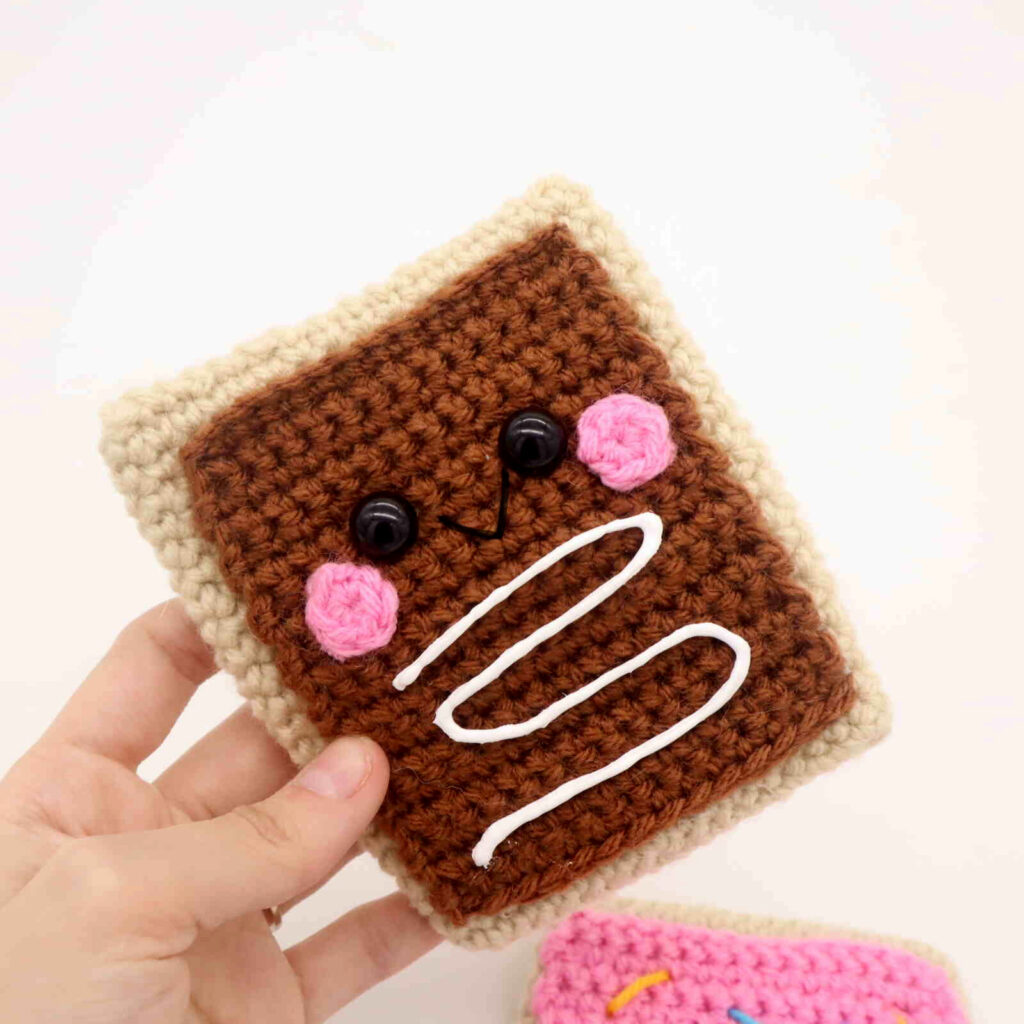
Regular Poptart Pattern

Regular Poptart Bread
In cream color
Note: This method makes the poptart sturdier. If you dislike this method (since it requires making more stitches) you can use the other poptart bread pattern.
We’re going to make a chain and work completely around the chain to form a round.
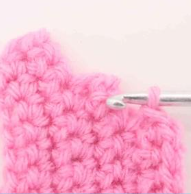
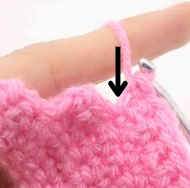
Round 1: Ch 17 (Pic 1). Sc 3 in the 2nd Ch from the hook (Pic 2). Sc in the next 14 st. Sc 3 times in the last ch. Now we meet the end of the chain (Pic 3). Turn to the OTHER side, where we haven’t made any stitches yet (Pic 4). Sc in the next 14 st (34)
Round 2-23: *Sc* all around (34)
Finish off, leaving a long tail for sewing. Sew the remaining stitches closed and weave in ends. Cut any excess yarn.
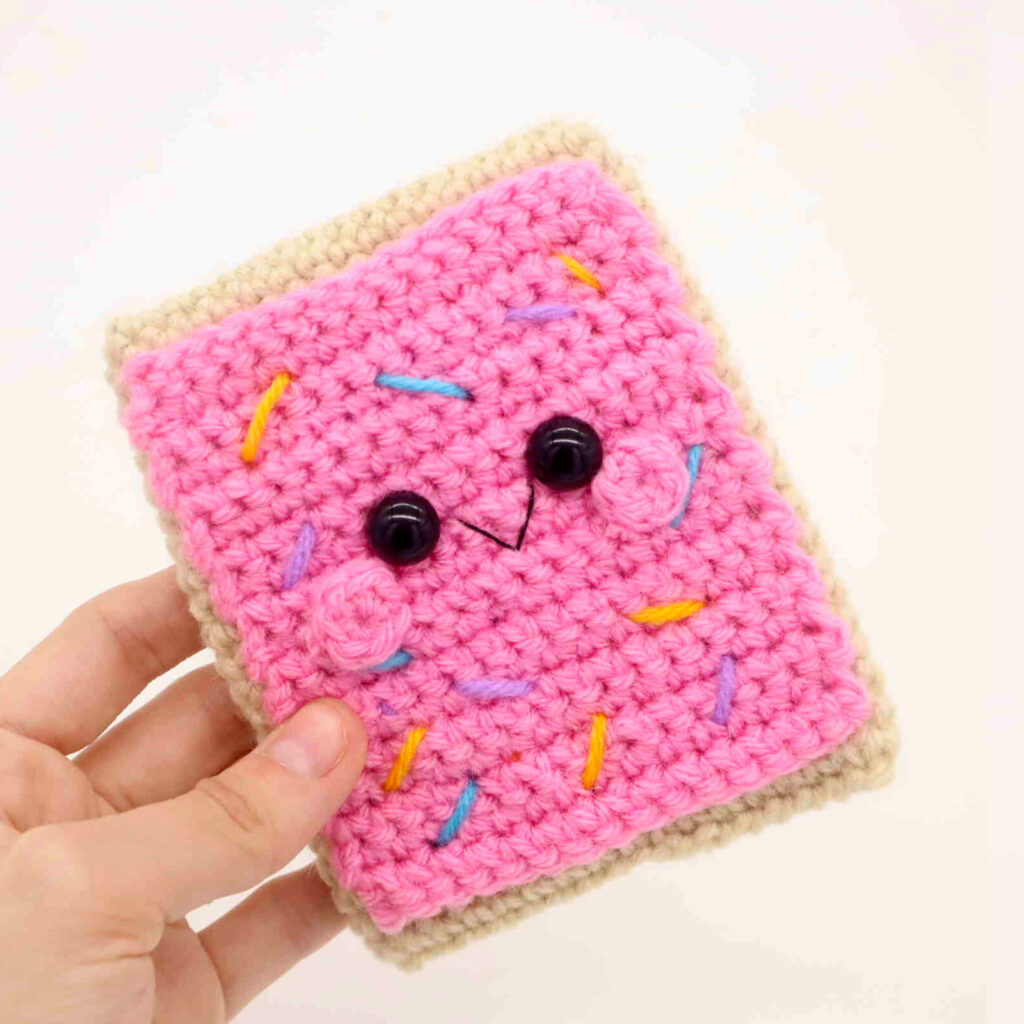
Regular Poptart Icing:
In any icing color
Row 1: Ch 16. Sc in the 2nd Ch from the hook. Sc in the next 14 st (15)
Row 2-11: Ch 1 and turn. Sc in the next 15 st (15)
Now we will mark where to place the safety eyes. Add an eye stitch marker into the 5th and 10th stitch in Row 11. Later we will add the safety eyes into these marked areas.
Row 12-19: Ch 1 and turn. Sc in the next 15 st (15)
Finish off, leaving a long tail for sewing. Embroider on sprinkles. Place the icing onto the bread. Sew or hot glue on. Once done, weave in ends. Cut any excess yarn.
Scroll down to make the smile and cheeks.
Bitten Poptart Pattern
Bitten Poptart Bread
In Cream Color
If you are using this bread pattern because it’s quicker and you do not want the bite mark, do not follow Rows 17-21. Instead, continue with: Ch 1, turn, Sc in the next 17 st (17) for Rows 17-21.
Row 1: Ch 18. Sc in the 2nd Ch from the hook. Sc in the next 16 st (17)
Row 2-16: Ch 1 and turn. Sc in the next 17 st (17)
Row 17-18: Ch 1 and turn. Sc in the next 15 st (15)
Row 19-20: Ch 1 and turn. Sc in the next 13 st (13)
Row 21: Ch 1 and turn. SlSt in the next 13 st (13)
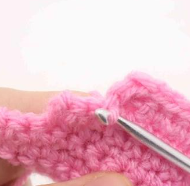
Bite row: Working along the side of the row (arrow shows where in Pic 1), Sc in the next 2 st (Pic 2).
1. 2.
2.
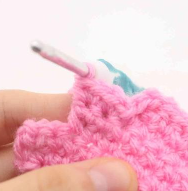
Working in between both rows, SlSt in the next st (Pic 3-4).
3. 4.
4.
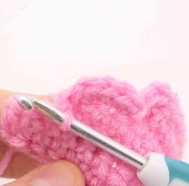
Working in the next 2 st of the row, Sc 2 times in each of the next 2 st (Pic 5).
5.
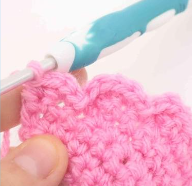
Working in between both rows as we did before, SlSt in the next st (Pic 6).
6.
Working on the next row, Sc 3 times in the next st, Sc in the next st (Pic 7).
7.
Working on the side of the row, SlSt in the next 2 st (Pic 8).
8.
Finish off, leaving a long tail for sewing. Weave in the ends and cut any excess yarn.
Bitten Poptart Icing
In any icing color
Row 1: Ch 15. Sc in the 2nd Ch from the hook. Sc in the next 13 st (14)
Row 2-10: Ch 1 and turn. Sc in the next 14 st (14)
Now we will mark where to place the safety eyes. Add an eye stitch marker into the 5th and 9th stitch in Row 10. We will add safety eyes into these marked areas later.
Row 11-13: Ch 1 and turn. Sc in the next 14 st (14)
Row 14-15: Ch 1 and turn. Sc in the next 12 st (12)
Row 16-17: Ch 1 and turn. Sc in the next 10 st (10)
Row 18: Ch 1 and turn. SlSt in the next 10 st (10)
Now follow the “bite row” on the previous page. Once done, finish off and leave a long tail for sewing. Embroider on sprinkles. Place the icing onto the bread. Sew or hot glue on. Once done, weave in ends. Cut any excess yarn.
Jam Bite:
In Dark Red
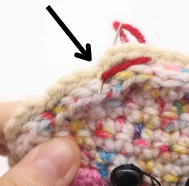
Insert needle with thread from the back side of the poptart, starting at the corner of the bite mark (Pic 1). Insert needle in between the next bite mark (Pic 2).
1.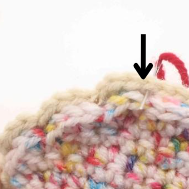 2.
2.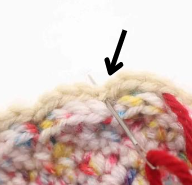
Reinsert needle into the bread, 1 stitch over (Pic 3), pulling needle out at the same front area (Pic 4).
3. 4.
4.
Insert needle in between the next bite mark (Pic 5).
5.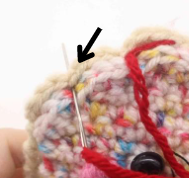
Reinsert needle into the bread, 1 stitch over (Pic 6), pulling needle out at the same front area (Pic 7).
6. 7.
7.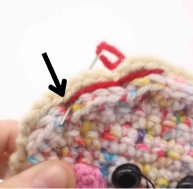
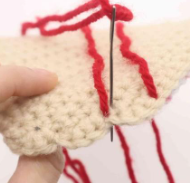
Insert needle at the corner of the last bite mark (Pic 8). Weave in ends and cut any excess yarn.
8.
Cheeks: (Make 2)
In Pink
Round 1: 6 Sc into a Magic Ring (6)
Finish off, leaving a tail for sewing. Sew or hot glue the cheeks on as shown. Once done, weave in ends and cut any excess yarn.

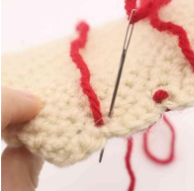
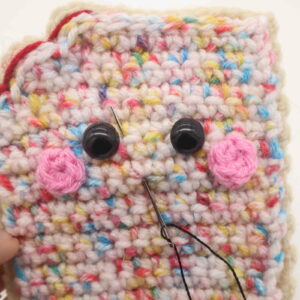
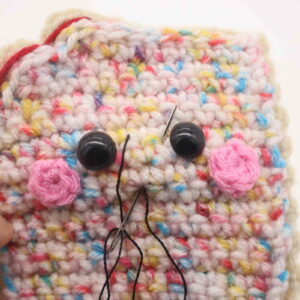
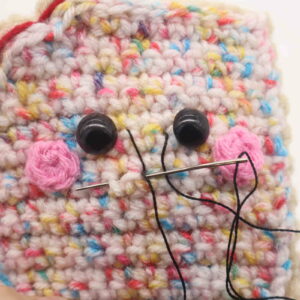
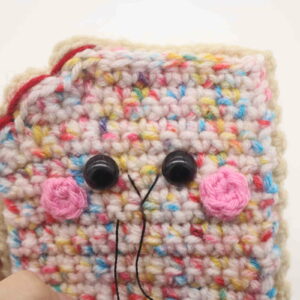
Smile:
In Black Embroidery Thread
Insert needle with thread into the middle mouth area of the toy, and pull the needle out next to the toy’s left eye as shown (Pic 1). Reinsert needle into the middle mouth area (Pic 2) and pull needle out next to the right eye (Pic 2). Reinsert needle into the middle mouth area and pull needle out a few stitches over (Pic 3). Tie the ends of thread into firm knots and bring them inside the toy to hide. This will secure the smile. Done!
1. 2.
2. 3.
3. 4.
4.
Done! If you made a poptart, I would LOVE to see! You can show me by posting a picture in the comments section underneath this post 🙂


7 Comments
Wow, this is great! wonder if the pattern can be modified to make a blanket, that’d be cool!
There seem to be pics missing: the initial instructions for reg pop tart say …. In Round 1 refers to pic 1-4 . The part that I don’t completely get is after the first sc’s end w 3 in last chain, where I’m going from there when it says “ turn”….. tia
I actually did work it out and I’m done w the toast part. Excited to finish it tomorrow!
I love ❤️ theses patterns they are so beautiful thanks for all the Patterns that you send to us 🙏❤️
I’d love to know what yarn you used for the white pop tart!
Here are the ones I made.
So cute! Yours look amazing! The white confetti yarn is from the brand Big Twist in the color Rainbow Confetti, but I recall it was discontinued years ago 😥 You might be able to find it on eBay!
Thank you for all your free pattern. I always have fun making them.