Shelf Sittin’ Elf Amigurumi – Free Crochet Pattern
Print this pattern out – purchase the PDF here!

 Supplies:
• Yarn 4/Medium Weight Yarn in…
Skin color, dark green, light green, white, red, and hair color
•4mm Crochet Hook
•Tapestry needle
•Scissors
•Stuffing
•12mm safety eyes
•Black embroidery thread
•2 small jingle bells for feet
Additional Information:
Difficulty: Intermediate
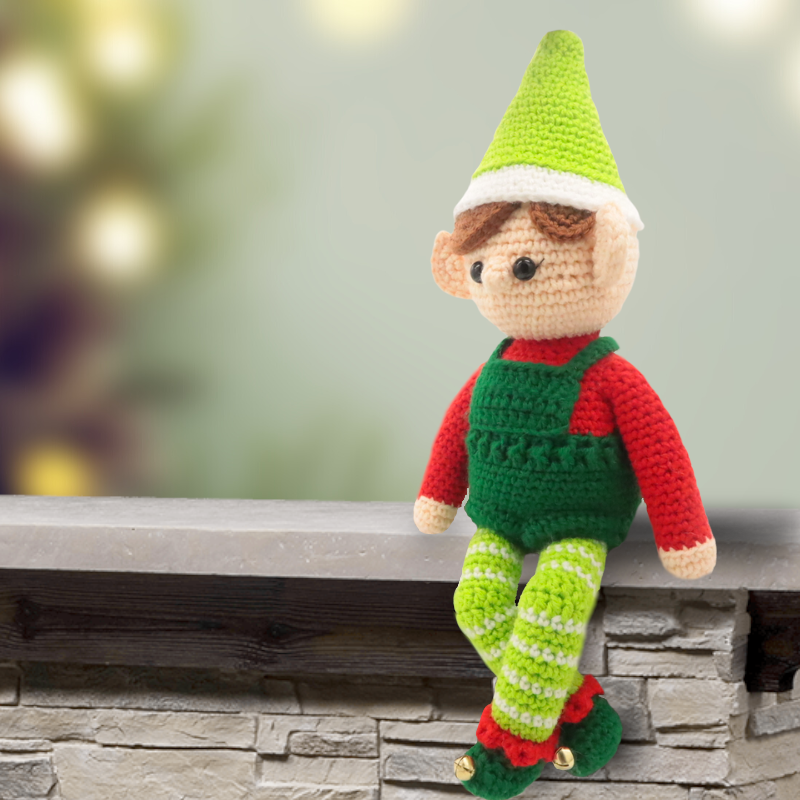
Size: 15.5″ tall from the feet to the tip of the hat
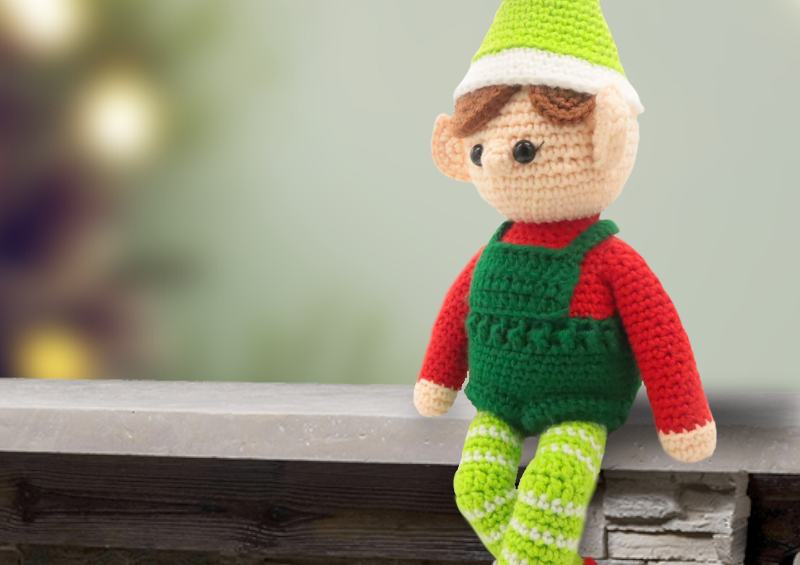
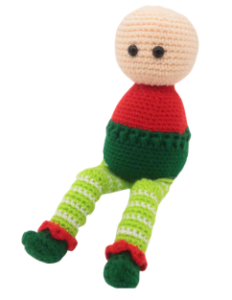
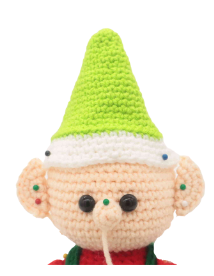
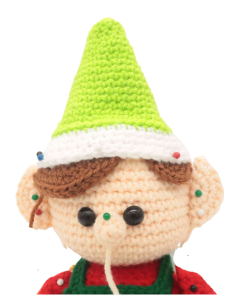
This cute elf is so cute and the perfect shelf sitter decoration for the holidays! This pattern makes a very high quality decoration, with lots of small details making an adorable elf decoration. This pattern uses simple design, such as the use of slip stitches and double crochets to form the bending legs. This pattern is fairly simple for an experienced crocheter. Let’s get started!
Head/Body:
Start in Dark Green
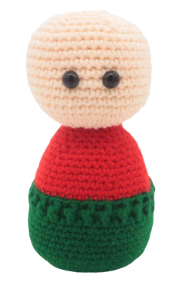
We will start by making the body. The body will then lead into the head as one continuous piece.
Round 1: 6 Sc into a Magic Ring (6)
Round 2: *Inc* all around (12)
Round 3: *Inc, Sc in the next st* all around (18)
Round 4: *Inc, Sc in the next 2 st* all around (24)
Round 5: *Inc, Sc in the next 3 st* all around (30)
Round 6: *Inc, Sc in the next 4 st* all around (36)
Round 7: *Inc, Sc in the next 5 st* all around (42)
Round 8: *Inc, Sc in the next 6 st* all around (48)
Round 9: Working in the Back Loop Only (BLO), *Sc* all around (48)
Round 10-16: Working in BOTH loops, *Sc* all around (48)
Round 17: *Dc* all around (48)
Round 18: FpDc in the next St, BpDc in the next st* all around (48)
Round 19-20: Change to Red. *Sc* all around (48)
Round 21: *Dec, Sc in the next 6 st* all around (42)
Round 22-23: *Sc* all around (42)
Round 24: *Dec, Sc in the next 5 st* all around (36)
Round 25: *Sc* all around (36)
Round 26: *Dec, Sc in the next 4 st* all around (30)
Round 27: *Sc* all around (30)
Round 28: *Dec, Sc in the next 3 st* all around (24)
Round 29: *Sc* all around (24)
Round 30: *Dec, Sc in the next 2 st* all around (18)
Round 31: Change to Skin Color. Working in the Front Loop Only, *Inc, S cin the next 2 st* all around (24)
Round 32: Working in BOTH loops, *Inc, Sc in the next 3 st* all around (30)
Round 33: *Inc, Sc in the next 4 st* all around (36)
Round 34: *Inc, Sc in the next 5 st* all around (42)
Round 35-38: *Sc* all around (42)
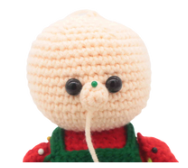
Now we will mark where to place the safety eyes. Add a different colored stitch marker into the 20th and 24th stitch in Round 38. Later we will replace these markers with safety eyes. Stuff the body now.
Round 39-43: *Sc* all around (42)
Add the safety eyes into the marked areas now.
Round 44: *Dec, Sc in the next 5 st* all around (36)
Round 45: *Dec, Sc in the next 4 st* all around (30)
Round 46: *Dec, Sc in the next 3 st* all around (24)
Stuff the head firmly now. Continue stuffing after each round.
Round 47: *Dec, Sc in the next 2 st* all around (18)
Round 48: *Dec, Sc in the next st* all around (12)
Round 49: *Dec* all around (6)
Finish off, leaving a long tail for sewing. Sew the remaining stitches closed and weave in ends, cutting any excess yarn.
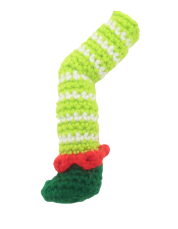
Legs: (Make 2)
Start in Dark Green
Round 1: 6 Sc into a Magic Ring (6)
Round 2: *Inc* all around (12)
Round 3: *Inc, Sc in the next st* all around (18)
Round 4: Sc in the next 5 st, 2 Hdc into the next st, 2 Dc into the next st, 2 Hdc into the next st, Sc in the next 10 (21)
Round 5: Sc in the next 5 st, *Dec* 3 times, Sc in the next 10 st (18)
Round 6: Sc in the next 4 st, *Dec* 3 times, Sc in the next 8 st (15)
Round 7: Sc in the next 4 st. Working in the Front Loop Only (FLO), Sc in the next 3 st. Working in BOTH loops, Sc in the next 8 st (15)
Round 8: *Sc* all around (15)
Round 9: Change to Red. *Sc* all around (15)
Round 10: Work in the FLO this entire round. SlSt in the next st. Repeat *Dc in the next st, Ch 2, Hdc into the same st. SlSt in the next 2 st* 4 times. Still working in the FLO, Dc in the next st, Ch 2, Hdc in the next st, SlSt in the next st (30)
Round 11: Now we will work in the back loops we left in Round 10. This means we’re starting with a stitch count of 15, since that’s the amount of stitches we had in Round 9.
Change to green. Working in the Back Loop Only, *Sc* all around (15)
Round 12: Working in BOTH loops, *Sc* all around (15)
Round 13: Change to White. *Sc* all around (15)
Round 14-15: Change to Green. *Sc* all around (15)
Round 16: Change to White. *Sc* all around (15)
Stuff the shoe/leg now.
Round 17-18: Change to Green. *Sc* all around (15)
Round 19: Change to White. *Sc* all around (15)
Round 20-21: Change to Green. *Sc* all around (15)
Round 22: Change to White. *Sc* all around (15)
In the next 2 rounds we will form the bending of the knee. Make the Slip Stitches a little loose. Doing this will make it easier to crochet into the slip stitches.
Round 23-24: Change to Green. SlSt in the next 7 st, Sc in the next st, Hdc in the next st, Dc in the next 5 st, Hdc in the next st (15)
Round 25: *Sc* all around (15)
Round 26: Change to White. *Sc* all around (15)
Round 27-28: Change to Green. *Sc* all around (15)
Round 29: Change to White. *Sc* all around (15)
Round 30-31: Change to Green. *Sc* all around (15)
Round 32: Change to White. *Sc* all around (15)
Stuff the rest of the leg firmly now.
Round 33-34: Change to Green. *Sc* all around (15)
Finish off, leaving a long tail for sewing. Pin the legs to the bottom of the body as shown and sew on. Once done, weave in ends and cut any excess yarn.
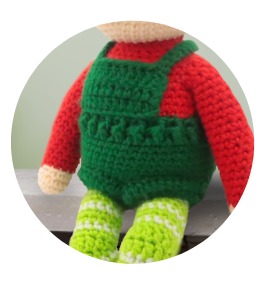
Overalls:
In Dark Green
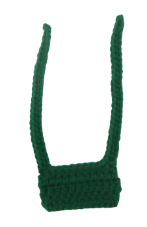
Row 1: Ch 13. Skip the next 2 Ch, Dc in the 3rd Ch from the hook. Dc in the next 10 st (12)
Row 2-3: Ch 2 and turn. Dc in the next 12 st (12)
In the next row we will form the overalls.
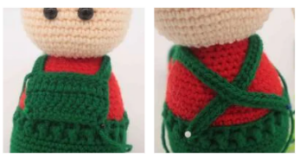
Row 4: Turn. Ch 27. Sc in the 2nd Ch from the hook. Sc in the next 25 Ch. Working back on the overalls, SlSt in the next st. SlSt in the next 8 st. Ch 27. Sc in the 2nd Ch from the hook. Sc in the next 25 Ch. Working back on the overalls, SlSt in the next st.
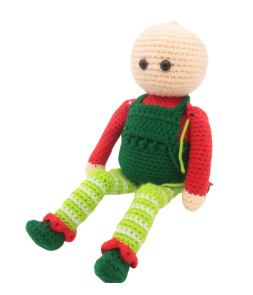
Finish off, leaving a long tail for sewing. Pin the overalls on as shown – the backs of the overall straps should cross as shown. Sew or hot glue on. Once done, weave in ends and cut any excess yarn.
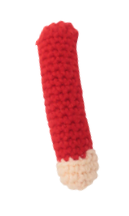
Arms: (Make 2)
Start in Skin Color
Round 1: 6 Sc into a Magic Ring (6)
Round 2: *Inc* all around (12)
Round 3-4: *Sc* all around (12)
Round 5: Change to red. Working in the Back Loop Only, *Sc* all around (12)
Round 6-20: Working in BOTH loops, *Sc* all around (12)
In the next round we will form the shoulder. When making the slip stitches, make each slip stitch loose so it’s easier to crochet into the slip stitch in the next round.
Round 21-22: SlSt in the next 5 st, Dc in the next 4 st, Hdc in the next st, SlSt in the next st.
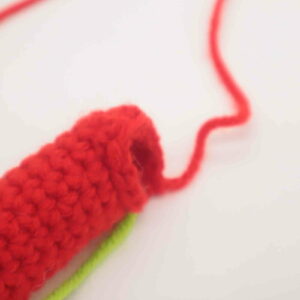
Stuff the arms firmly now. Finish off, leaving a long tail for sewing. Pin the arms on as shown and sew on. Once done, weave in ends and cut any excess yarn.
Nose:
In Skin Color
Round 1: 6 Sc into a Magic Ring (6)
Round 2: *Sc* all around (6)
Finish off, leaving a long tail for sewing. Pin the nose on as shown and sew on. Once done, weave in ends and cut any excess yarn.
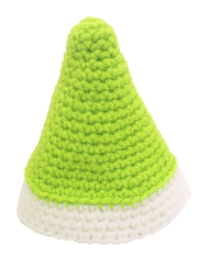
Hat:
In Light Green
Round 1: 6 Sc into a Magic Ring (6)
Round 2: *Inc* all around (12)
Round 3-5: *Sc* all around (12)
Round 6: *Inc, Sc in the next st* all around (18)
Round 7-9: *Sc* all around (18)
Round 10: *Inc, Sc in the next 2 st* all around (24)
Round 11-12: *Sc* all around (24)
Round 13: *Inc, Sc in the next 3 st* all around (30)
Round 14-15: *Sc* all around (30)
Round 16: *Inc, Sc in the next 4 st* all around (36)
Round 17: *Sc* all around (36)
Round 18: Repeat *Inc, Sc in the next 6 st* 5 times. Sc in the next st (41)
Round 19: Repeat *Inc, Sc in the next 7 st* 5 times. Sc in the next st (46)
Round 20: Change to White. Working in the BLO, *Sc* all around (46)
Round 21-23: *Sc* all around (46)
Finish off, leaving a long tail for sewing. Pin the hat on as shown but do NOT sew it on yet. We will add the hair next, then sew the hat on once we have the hair.
Ears: (Make 2)
In Skin Color
Round 1: 6 Sc into a Magic Ring (6)
Round 2: *Inc* all around (12)
Round 3: *Inc, Sc in the next st* all around (18)
Round 4: Fold the circle in half so the stitches align. Working through BOTH stitches, SlSt the stitches together.
Pin the ear on as shown and sew or hot glue on. Once done, weave in ends and cut any excess yarn.
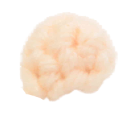
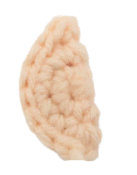
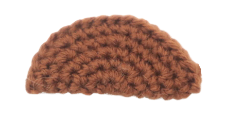
Big Hair Piece:
In Brown
Round 1: 6 Sc into a Magic Ring (6)
Round 2: *Inc* all around (12)
Round 3: *Inc, Sc in the next st* all around (18)
Round 4: *Inc, Sc in the next 2 st* all around (24)
Round 5: *Inc, Sc in the next 3 st* all around (30)
Round 6: *Inc, Sc in the next 4 st* all around (36)
Round 7: Fold the circle in half so the stitches align together. Working through BOTH stitches, SlSt the stitches together. Pin the hair on under the hat as shown. Sew or hot glue on, I find hot glue to be easier for this part. Once done, weave in ends and cut any excess yarn.
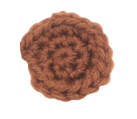
Small Hair Piece:
In Brown
Round 1: 6 Sc into a Magic Ring (6)
Round 2: *Inc* all around (12)
Round 3: *Inc, Sc in the next st* all around (18)
Pin the hair on under the hat as shown. Sew or hot glue on, I find hot glue to be easier for this part. Once done, weave in ends and cut any excess yarn.
Leg Poofs: (Make 2)
In Dark Green
Row 1: Ch 18. Sc to the first Ch. This will form a circle. Sc in the next 17 st (18)
Row 2: Working in the FLO, repeat *2 Dc into the next st, Dc in the next st* 3 times. Repeat *2 Hdc into the next st, Hdc in the next st* 3 times. Repeat *2 Dc into the next st, Dc in the next st* 3 times (27)
Finish off, leaving a long tail for sewing. Pin the leg pieces on, making sure the half double crochet parts are on the front of the leg. Sew on. Weave in ends and cut any excess yarn.
Additional Assembly:

With black embroidery thread, embroider eyelashes onto the doll.
Hot glue small jingle bells onto the shoes.
Done! If you made this elf, I would LOVE to see! You can show me by posting a picture in the comments section below this post 🙂


2 Comments
Thank you for the pattern. The elf was fu. to make.
As it is a little past Christmas, my elf turned into a bear!