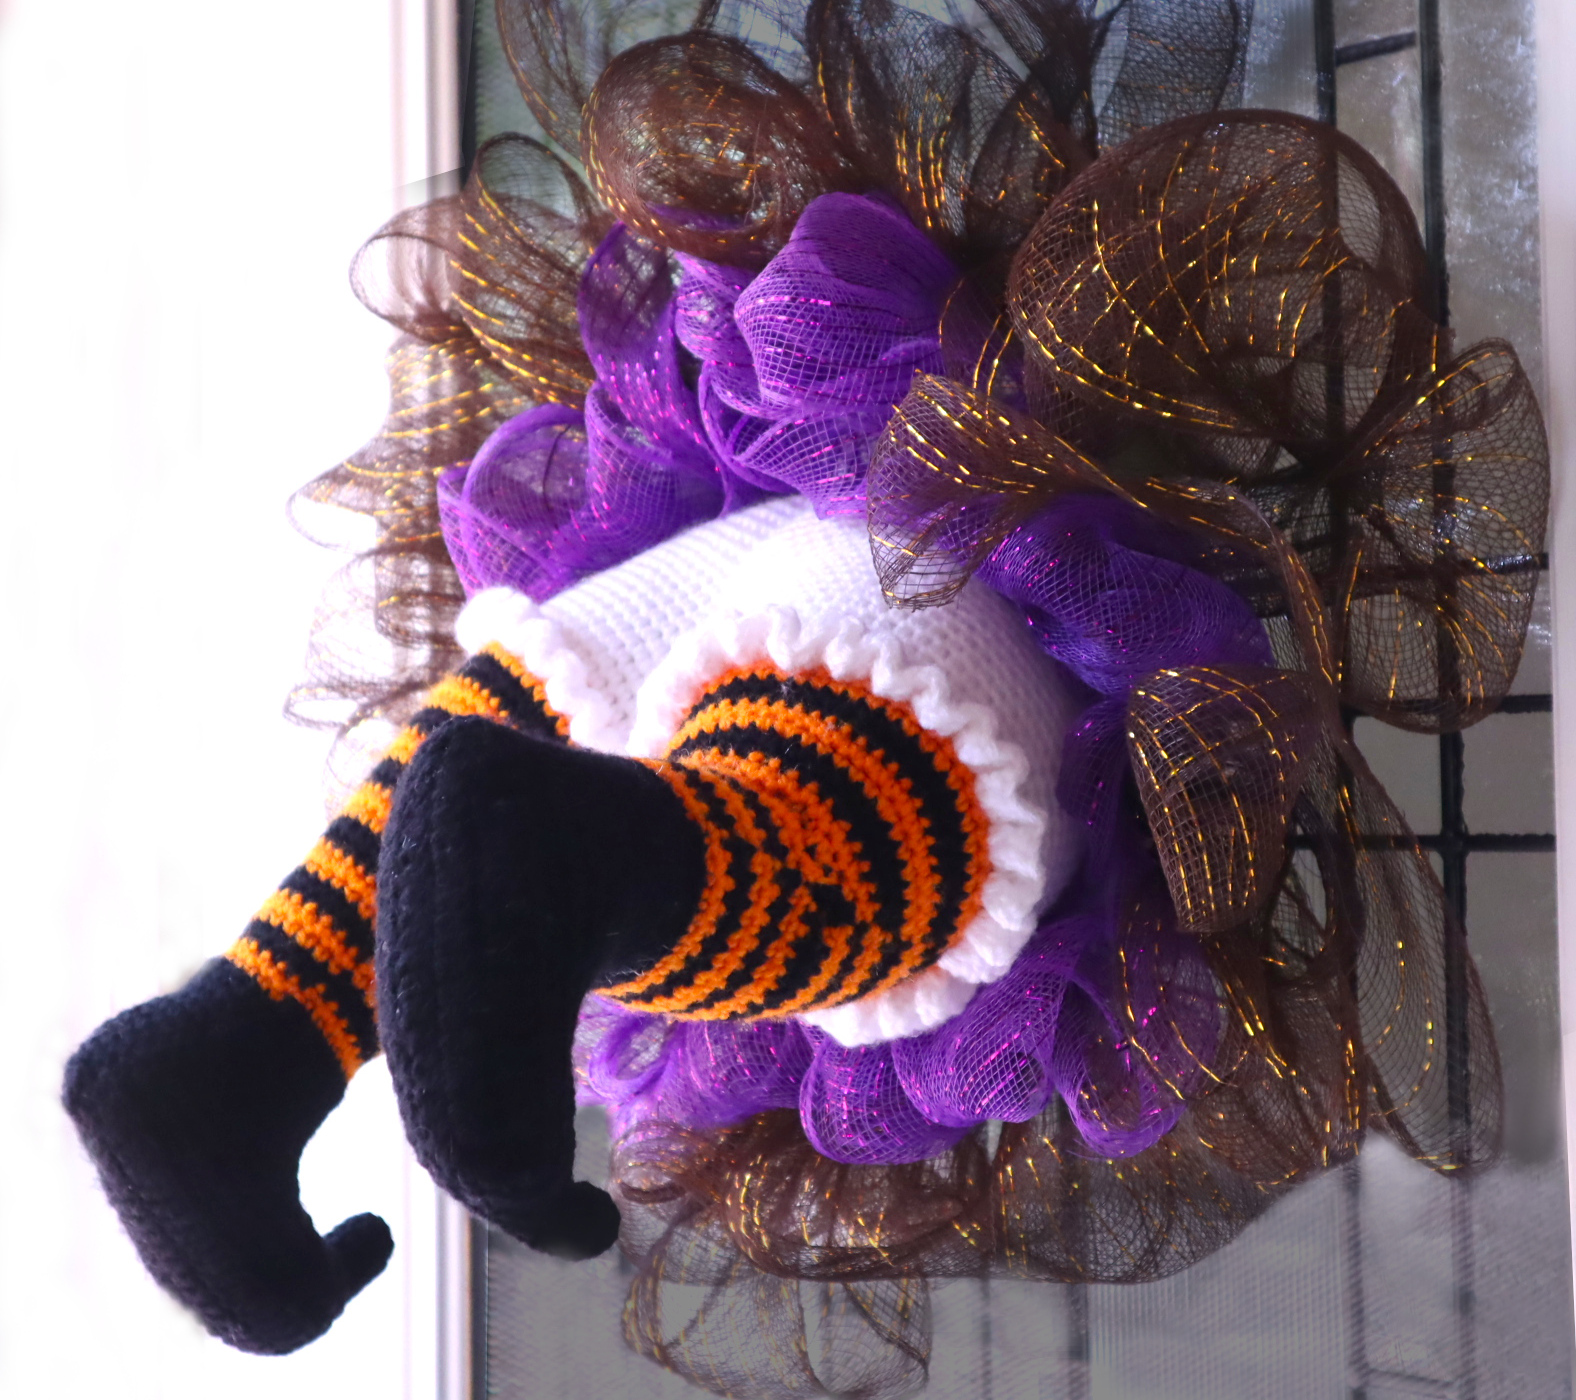
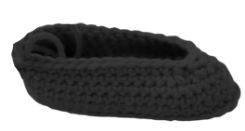
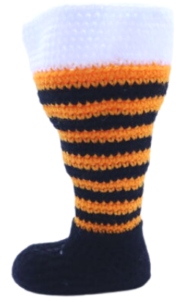
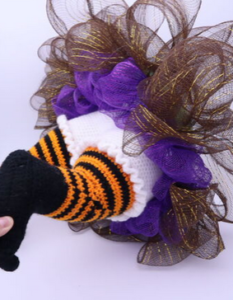
There’s a Witch Stuck in my Wreath! – Free Halloween Wreath Crochet Pattern
I know us crafty girls LOVE holidays. It seems like we all start decorating and thinking about Halloween in August. Honestly, I’m thinking of Halloween all year ’round about how exciting the 31st will be! I love seeing all the cute little kids in their costumes so much, it warms my heart. ANYWAYS! I made an amazing pattern that is sure to get you a lot of compliments. This witch wreath is super funny and will be sure to stand out when trick-or-treaters come to your house 🙂
If you didn’t see it, this pattern is actually an altered version of my elf stuck in a wreath pattern. I got tons of love on that elf pattern, so I hope you like this witch pattern! Please let me know what you think in the comments 🙂
Print this pattern out – purchase the PDF here!

Supplies:
• Yarn 4/Medium Weight Yarn in…
Black, orange, and white
•4mm Crochet Hook
•Tapestry needle
•Scissors
•Stuffing
•10 inch wreath
•Mesh for wreath in black and purple (5 yards in purple, 10 yards in black)
Additional Information:
Difficulty: Intermediate
 • Before we get started…
You will need a wreath. I bought a foam wreath (10 inches) from Dollar Tree. However, a wire wreath is better suited for the frilly wreath we’ll be doing. There are video tutorials online showing how to put mesh around a wire wreath, but I will show you how I did mine with a foam wreath.
You’ll need colorful mesh to go around the wreath. I got 2 rolls in black and 1 in purple from Dollar tree as well. Each roll has 5 yards.
• Let’s Get Started!
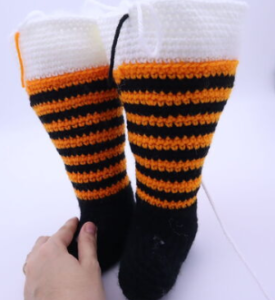
We will first start by making a shoe, this shoe will lead into the lead. We will then make a second leg and crochet both legs together to form the waist area. After this we will make the curly part of the shoe, the frilly edging around the bloomers, and put the mesh around the wreath. Last, we will attach the witch to the wreath!
- Note:
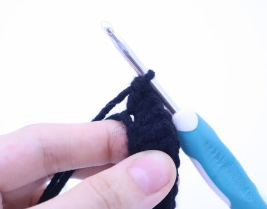
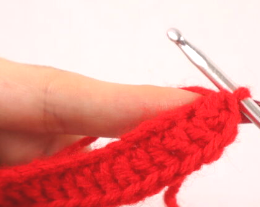
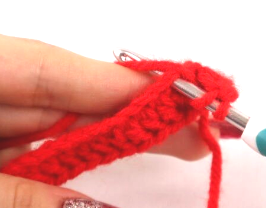
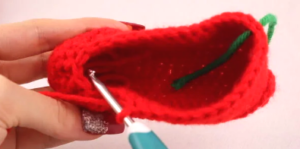
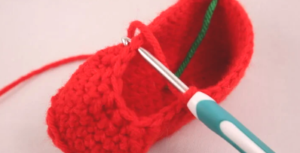
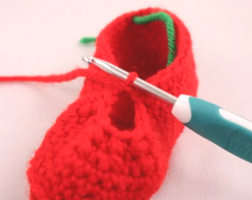
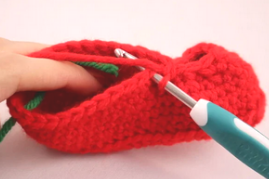
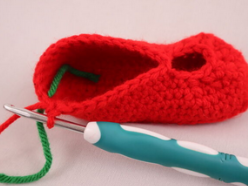
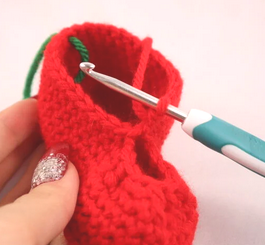
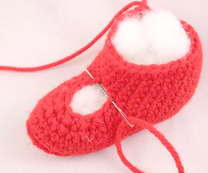
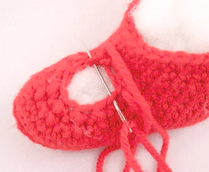
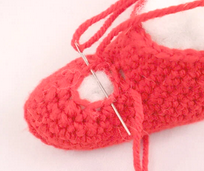
Some of the pictures show a red shoe. This is because in some of the demo photos using black yarn, it was too dark to see the stitches, so I used the red shoe photos so you can see what I’m doing easier 🙂
Let’s get started!
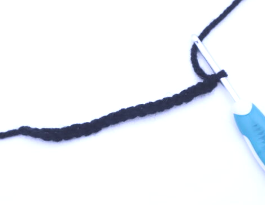
In round 1 we will make a foundation chain. This means we will make a chain, work down one side of the chain, then we turn to the other side of the chain and continue down that side. This will make a round. We are NOT turning the work and crocheting over the stitches we just made! That would be working a row.
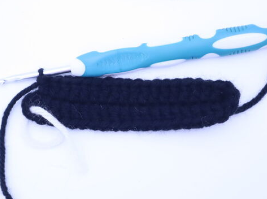
Shoe: (Make 2)
In Black
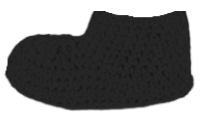
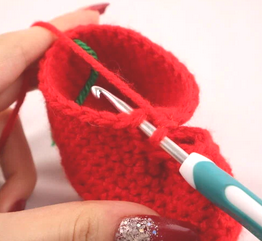
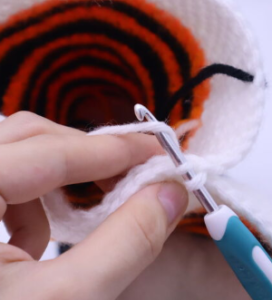
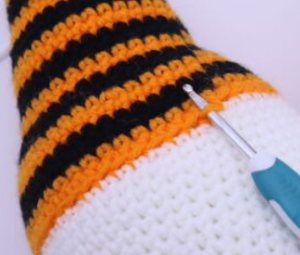
Round 1: Ch 22 (Pic 1). Dc in the 3rd Ch from the hook. Dc in the next 18 Ch (Pic 2). Dc 3 times in the last Ch (Pic 3). Now turn the chain to the opposite side, where we haven’t worked any double crochets yet (Pic 4). Dc in the next 18 st (Pic 5-6) (40)
1. 2.
2.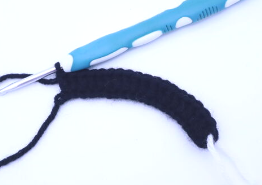
3. 4.
4.
5. 6.
6.
Round 2: * 2 Dc in the next st, 1 Dc in the next 4 st* 8 times (48)
Round 2 will look like photo below:

Round 3: In the BLO (Back Loop Only) Sc in the next 48 st (48)
Round 4-6: In BOTH Loops, *Sc* all around (48)
Round 7: Sc in the next 17 st, Repeat *Dec, Sc in the next st* 6 times. Sc in the next 13 st (42)
Round 8: Sc in the next 17 st, *Dec* 6 times, Sc in the next 13 st (36)
Round 8 will look like photo below:
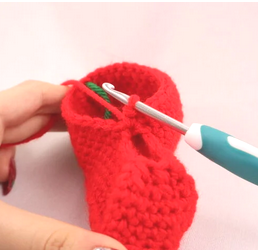
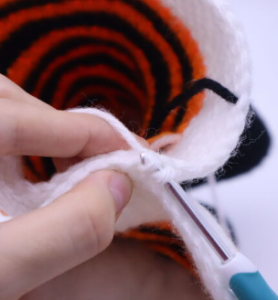
Round 9: Sc in the next 16 st (Pic 1). Count the next 9 st and Sc into that 9th st (Pic 2-3). Sc in the next 11 st (Pic 4-5) (28)
1. 2.
2.
3. 4.
4.
5.
This will create a leg on the shoe. We will also have a hole near the front. Don’t worry, we will just sew it closed later!
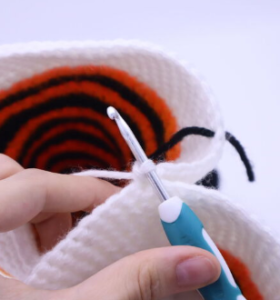
Round 10: Sc in the next 16 st (Pic 1). Sc in the next st that connects the shoe (Pic 2-3). Sc in the next 11 st (Pic 4) (28)
1. 2.
2.
3. 4.
4.
Round 11-13: *Sc* all around (28)
Stuff the shoe here (Pic 1). Now we will sew the front hole of the shoe closed. Take a needle with red yarn and sew through the stitches that align (Pic 2-5). Grab both tail ends of yarn and pull firmly at the same time to tighten the yarn. Now tie each tail end of yarn into firm knots and bring into the shoe to hide.
1. 2.
2.
3. 4.
4.
5.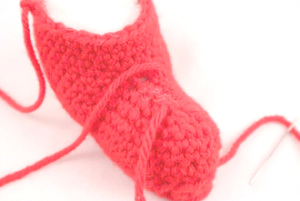
Now we make the leg. It’s easy, but we make frequent color changes
Round 14: Change to orange. In the BLO *Sc* all around (28)
Round 15: In BOTH Loops, *Sc* all around (28)
Round 16-17: Change to black. *Sc* all around (28)
Round 18-19: Change to orange. *Sc* all around (28)
Round 20-21: Change to black. *Sc* all around (28)
Round 22: Change to orange. *Sc* all around (28)
Round 23: Repeat *Inc, Sc 3* 7 times (35)
Round 24-25: Change to black. *Sc* all around (35)
Round 26-27: Change to orange. *Sc* all around (35)
Round 28-29: Change to black. *Sc* all around (35)
Round 30-31: Change to orange. *Sc* all around (35)
Round 32: Change to black. Repeat *Inc, Sc 4* 7 times (42)
Round 33: *Sc* all around (42)
Round 34: Change to orange. *Inc, Sc 5* 7 times (49)
Round 35: *Sc* all around (49)
Round 36-37: Change to black. *Sc* all around (49)
Round 38-39: Change to orange. *Sc* all around (49)
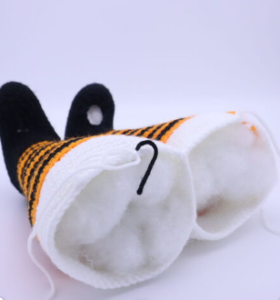
Round 40: Change to white. In the BLO. *Inc, Sc 4* 9 times. Inc in the next st, Sc in the next 3 (59)
Round 41-48: In BOTH Loops, *Sc* all around (59)
Here is where we will do a different pattern depending on which leg you’re making:
First leg, Round 49: In BOTH Loops, *Sc* all around (59)
Finish off the first leg here, keep the stitch marker in this leg, we will need it later. Stuff now.
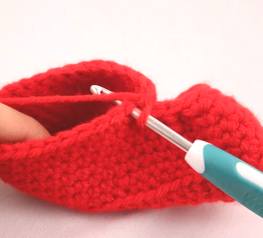
Second leg, Round 49: Sc in the next 7 st (Pic 1). Take the first leg made and count to the 47th stitch made in the last round (Pic 2).
1. 2.
2.
Next we will Sc going through BOTH the first and second leg.
While your hook is still in the working loop of the second leg (Pic 3), also insert your hook into that 47th stitch on the first leg (Pic 4). Now insert hook into the next stitch of the first leg (Pic 5). Yarn over and pull up a loop (Pic 6-8).
3. 4.
4.
5. 6.
6.
7. 8.
8.
Yarn over and pull through both loops at the same time (Pic 9-11). This makes 1 single crochet.
9. 10.
10.
11.
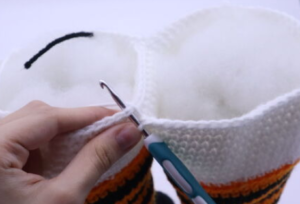
Continue working through BOTH the first and second leg. Sc in the next 10 st (Pic 12-13). Continuing on the second leg (the left leg), Sc in the next 41 st (Pic 14-15).
12. 13.
13.
14. 15.
15.
Round 50: Sc in the next 7 st (Pic 1). Now we will work on the other leg. Sc in the next 48 st (Pic 2-3). Now we meet the other leg. Sc in the next 41 st (Pic 4-5) (96)
1. 2.
2.
3. 4.
4.
5.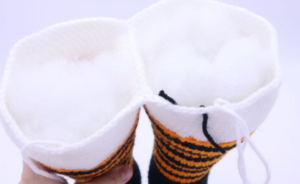
Round 51-60: *Sc* all around (96)
Stuff here. Continue stuffing after each round.
Round 61: In the BLO, *Dec, Sc 6* 12 times (84)
Round 62: In BOTH loops, *Dec, Sc 5* 12 times (72)
Round 63: *Dec, Sc 4* 12 times (60)
Round 64: *Dec, Sc 3* 12 times (48)
Round 65: *Dec, Sc 2* 12 times (36)
Round 66: *Dec, Sc 1* 12 times (24)
Round 68: *Dec* all around (12)
Round 69: *Dec* all around (6)
Finish off and sew closed.
Shoe Tip:
In Black
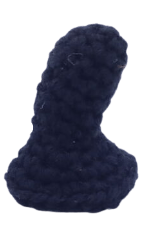
Round 1: 6 Sc into a Magic Ring (6)
Round 2: *Inc, Sc in the next st* all around (9)
Round 3-4: *Sc* all around (9)
Round 5-7: Sc in the next 3 st. SlSt in the next 3 st. Sc in the next 3 st (9)
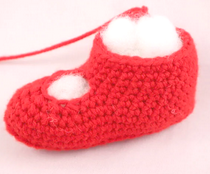
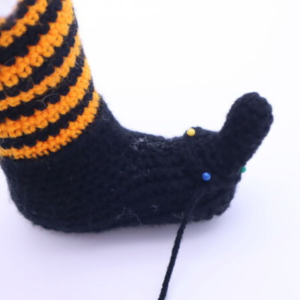
Pin this piece to the tip of the shoe as shown. Sew on, don’t stuff. Weave in ends.
Bloomers Frilly:
In White
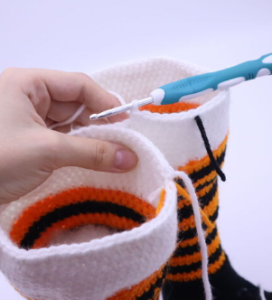
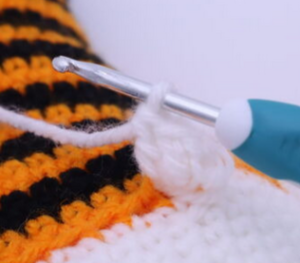
Place your hook into the loop we left from Round 40 (Pic 1). Yarn over with white and pull through the loop (Pic 2-3). Ch 3 (Pic 4). Make 2 Dc into that same st (Pic 5). Make 3 Dc into each all around. Once done, finish off and weave in ends (Pic 6).
1. 2.
2.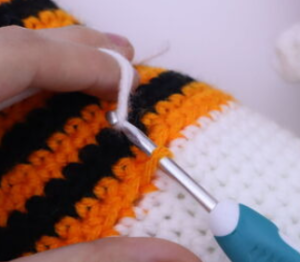
3. 4.
4.
5. 6.
6.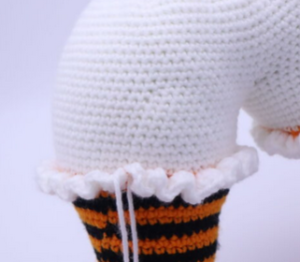
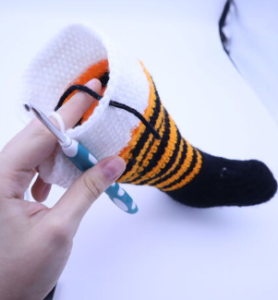
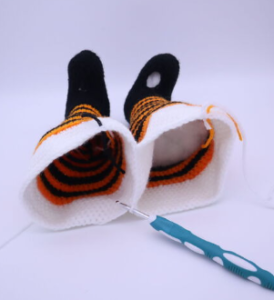
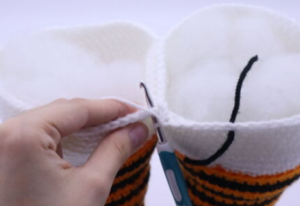
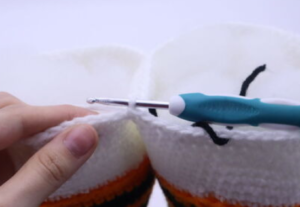
Repeat the process shown above for the other leg. At this point, we’re now done with crocheting the witch! Now what we need to do is make the witch’s leg bend, then put mesh on the wreath, and finally, attach the witch to the wreath. Let’s move on to the next part!
Leg Assembly:
In Orange
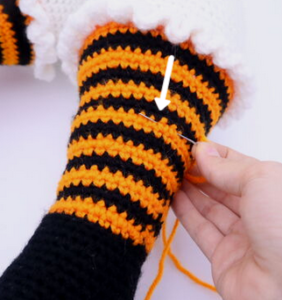
To make the witch look like she’s fallen in the wreath, we need to bend her leg slightly. Here is how we do that!
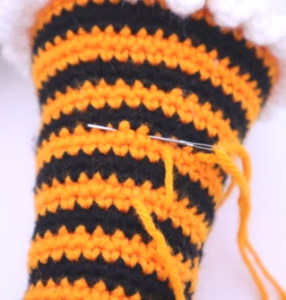
Insert needle with green yarn into the 5th white stripe on the right leg, and pull needle out a stitch to the left (Pic 1). Reinsert needle on the 3rd right stripe, lining up to where you’d previously pulled in and out the needle (Pic 2).
1. 2.
2.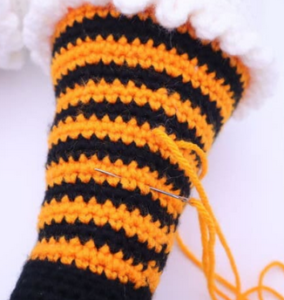
Reinsert needle on the 5th white stripe, next to where you previously had sewed. Pull the needle out about 2 stitches to the left (Pic 3). Reinsert needle into the 3rd stripe, next to where you previously had sewed. Pull the needle out about 2 stitches to the left (Pic 4).
3. 4.
4.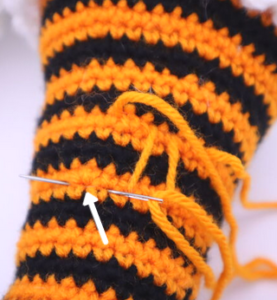
Repeat this process until you’ve sewed the back of the leg. Pull both tail ends of yarn firmly at the same time to tighten the leg (Pic 5-6). Tie the ends of yarn into firm knots and weave in to hide.
5. 6.
6.
Wreath Assembly:
If you know how to make your own wreath, feel free to do so! However, I’m not very experienced in wreath making so I just made do with the supplies I had.
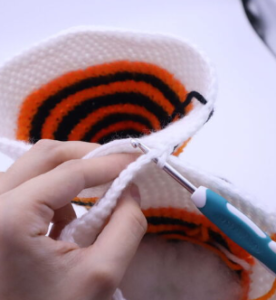
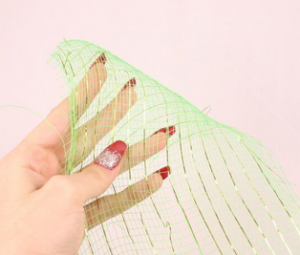
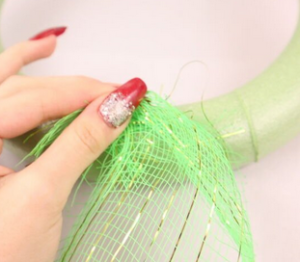
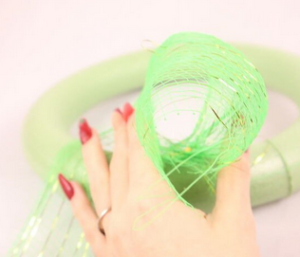
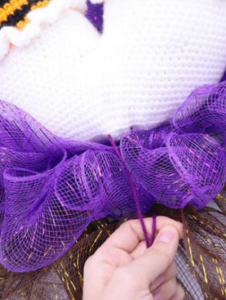
Take a wreath (I am using a foam wreath from Dollar Tree, they also have wire wreaths that are better suited for making frilly wreaths like this.) Now take mesh and bunch it up at the very tip and place it on the wreath (Pic 3). Place a pin to secure this mesh, try to make sure the pin goes through all layers of the mesh (Pic 4).
1. 2.
2.
3. 4.
4.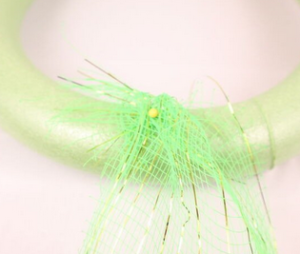
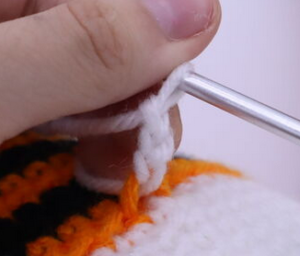
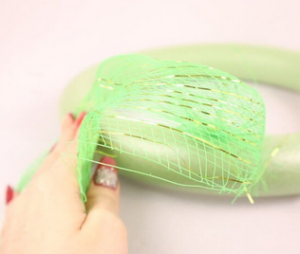
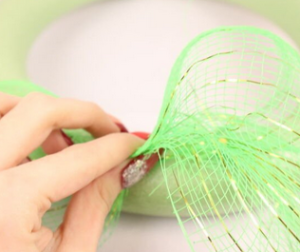
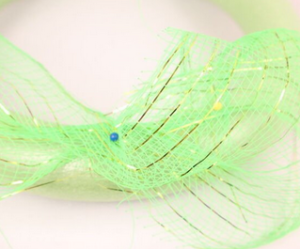
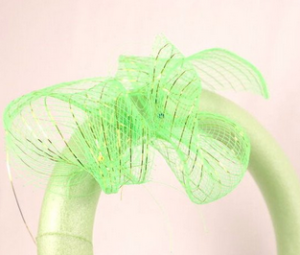
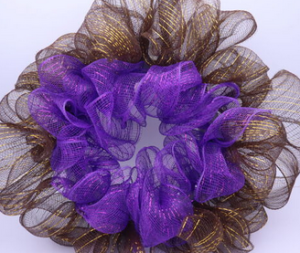
Grab a section of the mesh and bring it to close to the previous mesh you pinned, it should make what looks like a loop (Pic 5-6). Bunch this area up close to the wreath (Pic 7), and place a pin going through all layers of the mesh (Pic 8-9). Repeat this process all around. I did purple mesh first and closer to the center, then repeated the same process with black mesh at the outside of the wreath (Pic 10).
5. 5.
5.
7. 8.
8.
9. 10.
10.
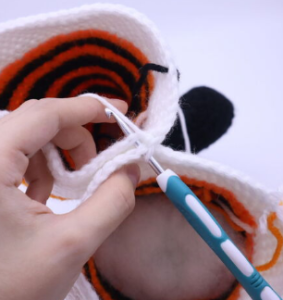
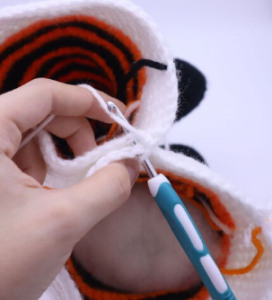
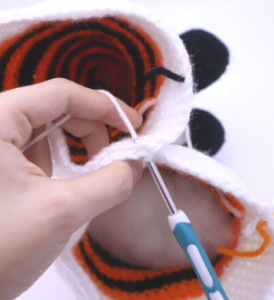
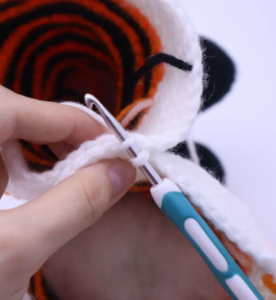
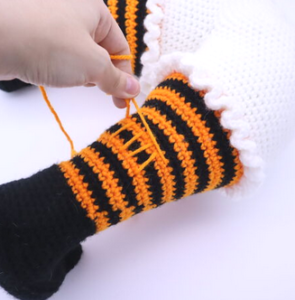
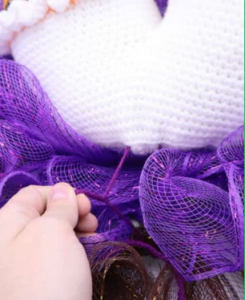
Attaching witch to wreath:
We will attach the witch to the wreath by tying her to it. This secures it really well and you won’t see the yarn as long as you use a color that matches your wreath’s mesh.
I did this step on the top part of the witch, though you could also do it to the sides of the witch if you wanted it extra secure.
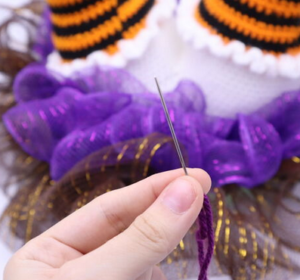
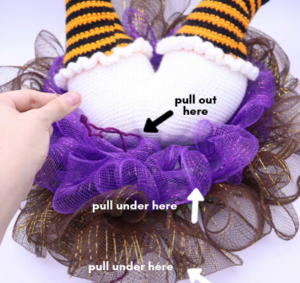
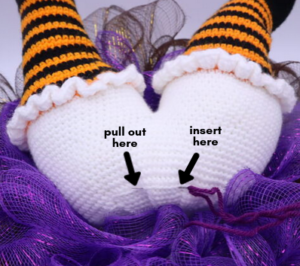
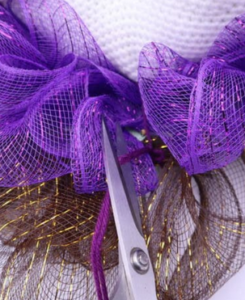
Take a 8″ piece of yarn and place it on a needle (Pic 1). Bring this yarn through the wreath as shown (Pic 2). Insert the needle through the elf and pull the needle out about 4 stitches to the left (Pic 3). This yarn through now be at the top of the wreath. Grab both tail ends of yarn and pull them very firmly so the witch is close to the wreath (Pic 4). Tie these tail ends of yarn firmly together a few times and cut the excess yarn (Pic 5-6).
1. 2.
2.
3. 4.
4.
5. 6.
6.
7.
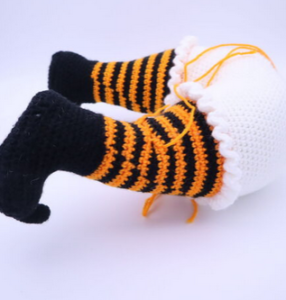
Repeat this a total of 2 times on the left and right side of the witch, as well as once at the top of the witch.
Done! If you made this wreath I would LOVE to see 🙂 You can show me by posting a photo in the comments below this post!


29 Comments
OMG this is so cute! My daughter will go crazy for this. Thanks I’m looking forward to making this cute witch stuck in my wreath.
Hi Cheryl!
Thank you SO much for your very nice comment 😍 I was beyond happy to read that not only you like this pattern, but you think your daughter will love it, too! I’m so excited to hear what you think of this pattern – if by chance you have any questions, please don’t hesitate to let me know. I’d love to help! Thanks so much again, Cheryl!
Olive
This is so cute!! And I can’t tell you how much I appreciate the tutorial…I’m so rusty that I need it badly. Thanks so much!
Thank you so much! I’m so glad you like this silly pattern 😍 Haha I totally understand needing to follow a pattern to the t. Hopefully it all works out for you, but if you happen to have any questions, please don’t hesitate to ask! I don’t mind helping 🙂 Good luck making your witch!
I cannot wait to do this. Thank you for your generosity in making this a free pattern! This is definitely one of the cutest things I’ve ever seen. My grandbabies are going to love this! Thank you again.
Hi Jeanie! Thank you SO much for your very high praise, I’m so happy to hear that you’re excited to make this pattern 😍 It was a lot of fun to put together and it seems to give people a laugh! I’m sure your grandbabies are going to get a kick out of this! Let me know if you happen to have any questions, I’m always happy to help!
This witch is so cute. Thank you so much for the pattern. I can’t wait to make this!!
Aww thank you so much, Christine! I appreciate your kind words so much 😍 I hope you have fun with this pattern! Happy (very early) Halloween! Lol 🙂
I thoroughly enjoyed making this. Thank you so much for sharing your pattern for free. I can’t wait to hang this on my front door! 🙂
Whoa that is so cool, Jen! I love how you used green mesh for the wreath, that looks so awesome like that! Your witch looks sooo cute and I’m really happy you had a nice time with the pattern 😍 I’m sure you’ll get lots of compliments when it’s on your front door! Thank you so much for sharing this with me, it made my day 🙂
Olive
I made one, I’m starting the elf one today:
Turned out amazing!
Whoa!!!!! You are a master wreath maker, that is insane! I love how well it came out, yours is so awesome 😍 I’m in awe of your work, I hope you’ve been getting plenty of compliments on it! Did you use a wire frame for the wreath? If so, I MUST try that next time 🙂 Thank you so much for sharing this with me, you’re very talented!
Thank you so much! I did use a wire frame, I also used pipe cleaners to bunch the mesh together to make it easier to attach to the frame.
Here’s my wreath. I gave it to my niece tonight at a family gathering. Everyone loves it.
I had so much fun making this witch project. I’m starting the elf project and after that I’m going to make “Santa stuck in my wreath.” I’ve had so many compliments and requests. I’m excited to see what other cute project you’ll come up with.
Hello thankx for the cute pattern – but no where on here does it tell you to slip stitch at end of the round or chain stitch at begining of rounds wish i didnt have that struggle . and yes i have made meny items and have crochet & knit for meny years
Hi Vickie!
I don’t mention to slip stitch or chain for each round because we work it’s not necessary for this pattern 🙂 In most amigurumis, we don’t need to join with a slip stitch/make a chain at each round. Don’t worry, if I ever require that to happen in a pattern, I will write it at the beginning of each round!
Thanks so much, I’m really glad you like this pattern 🙂 Happy Halloween!
Olive
tkx hun i did finally figure that out but thank-you very much for getting back to me now things are going smoothly 🙂
tkx yes i finally got it lol
tkx yes i finally got it lol
Hi. What a wonderful kind gesture to share your pattern. May I ask if you have the santa version.
I have grandchildren nagging Granny to make one. I’m desperate as always happens so many things to finish before santa comes. Thank you
Thank you so much for the kind words! Haha I think that’s so cute your grandchildren are really wanting a Santa one!
I have an elf version, but you can very easily alter it to make Santa. Here’s a link to that free pattern: https://stringydingding.com/i-got-my-elf-stuck-christmas-elf-wreath-free-crochet-pattern/
When you make the elf into santa, use black for the shoes and don’t make the shoe tip for the shoe. The shoe will look like a book if you don’t add the tip!
In Rounds 14 and 15, change to a white fuzzy yarn.
From rounds 16 to 55 use only red yarn.
From rounds 56-60, use white fuzzy yarn.
For the remaining rounds, use red yarn.
I hope this could help! 🙂
This pattern looks amazing but I can’t seem to get my shoe to turn out whenever I do (2,DC in the stitch and DC I. The next 4 stitches 8 times and when you start to dec it starts to look all wonky if you have any suggestions please help! Thank you
Thank you <3
https://www.instagram.com/reel/ChNa3dtJpcO/?utm_source=ig_web_copy_link
How do I make the shoe tip for the witch wreath when the pattern stops at Round 7? Just wondering how do I finish it to make it bigger like shown in the pattern pic.
Thanks
Cindy
All Done. Just in time.
Will post it on my insta @Tigis_Werkstatt
Loved this pattern, enjoyed making the legs. Found the wreath part a bit fiddly, as I had never made a wreath before. Absolutely delighted with the finished wreath! I am definitely making the Elf in my Wreath next! Thanks Stringy Ding Ding!
Thank you for this pattern!