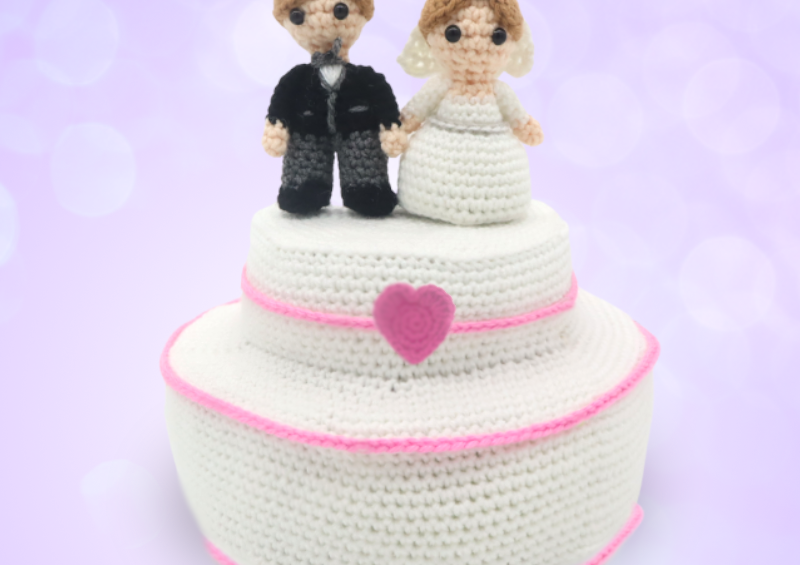
Wedding Cake Amigurumi – Free Crochet Pattern

Print this pattern out – purchase the PDF here!

 Supplies:
• Yarn 4/Medium Weight Yarn in…
White and light pink
•4mm Crochet Hook
•Tapestry needle
•Scissors
•Stuffing
•Cardboard
Additional Information:
•Difficulty: Easy but time consuming
•Size: 6″ tall, 11″ across
Who doesn’t love cake? It’s a delicious way to celebrate special events – especially as something special as a wedding! This cake is simple, made in all white with minimal icing. You can change the color of the cake to make it more suitable for a birthday cake! In this pattern, I also include a tutorial on how to add icing, which is a great addition if you’re making this into a birthday cake.
The bride and groom are their own separate pattern, which is available for free here: https://stringydingding.com/bride-and-groom-wedding-amigurumi-free-crochet-pattern/
You can purchase the PDF of the bride and groom here: https://stringydingding.com/product/bride-and-groom-weddding-amigurumi-pdf-crochet-pattern/
Let’s get started!
Cake:
In White

Round 1: 6 Sc into a Magic Ring (6)
Round 2: *Inc* all around (12)
Round 3: *Inc, Sc in the next st* all around (18)
Round 4: *Inc, Sc in the next 2 st* all around (24)
Round 5: *Inc, Sc in the next 3 st* all around (30)
Round 6: *Inc, Sc in the next 4 st* all around (36)
Round 7: *Inc, Sc in the next 5 st* all around (42)
Round 8: *Inc, Sc in the next 6 st* all around (48)
Round 9: *Inc, Sc in the next 7 st* all around (54)
Round 10: *Inc, Sc in the next 8 st* all around (60)
Round 11: *Inc, Sc in the next 9 st* all around (66)
Round 12: *Inc, Sc in the next 10 st* all around (72)
Round 13: *Inc, Sc in the next 11 st* all around (78)
Round 14: *Inc, Sc in the next 12 st* all around (84)
Round 15: *Inc, Sc in the next 13 st* all around (90)
Note: If you want to add icing, do it in this round. Change to your icing color, then refer to the bottom of the page for the icing tutorial.
Place the crochet piece onto a piece of cardboard. Trace around the piece onto the cardboard. You will have a circle on the cardboard. Cut around this piece. Do this once again, you will have a total of 2 cardboard pieces. We will place these into the cake later, as it helps the cake stay flat, rather than lumpy.

Round 16: In the BLO (Back Loop Only), *Sc* all around (90)
Round 17-25: In BOTH loops, *Sc* all around (90)
Note: If you want to add icing, do it in this round. Change to your icing color, then refer to the bottom of the page for the icing tutorial.
Round 26: In the Front Loop Only, repeat *Inc, Sc in the next 14 st* all around (96)
Round 27: In BOTH loops, repeat *Inc, Sc in the next 15 st* all around (102)
Round 28: *Inc, Sc in the next 16 st* all around (108)
Round 29: *Inc, Sc in the next 17 st* all around (114)
Round 30: *Inc, Sc in the next 18 st* all around (120)
Round 31: *Inc, Sc in the next 19 st* all around (126)
Round 32: *Inc, Sc in the next 20 st* all around (132)
Note: If you want to add icing, do it in this round. Change to your icing color, then refer to the bottom of the page for the icing tutorial.
Round 33: In the BLO, *Sc* all around (132)
Round 34-44: In BOTH loops, *Sc* all around (132)
Note: If you want to add icing, do it in this round. Change to your icing color, then refer to the bottom of the page for the icing tutorial.
Round 45: In the BLO, repeat *Dec, Sc in the next 20 st* all around (126)
Round 46: In BOTH loops, repeat *Dec, Sc in the next 19 st* all around (120)
Round 47: *Dec, Sc in the next 18 st* all around (114)
Round 48: *Dec, Sc in the next 17 st* all around (108)
Place the cake onto cardboard and trace around the base of the cake. Do this twice to have 2 circles of cardboard. Cut out the cardboard pieces.
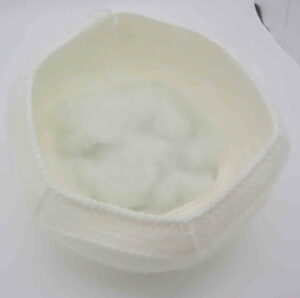
Now we will insert the cardboard and stuff the cake. First, place the smaller circle into the very base of the cake (Pic 1). Stuff firmly (Pic 2).
1. 2.
2.
Now, place the second smaller circle into the cake (Pic 3). Now place the larger circle into the cake (Pic 4).
3. 4.
4.
Stuff the cake firmly (Pic 5). Place the last large circle into the cake (Pic 6).
5. 6.
6.
Round 49: *Dec, Sc in the next 16 st* all around (102)
Round 50: *Dec, Sc in the next 15 st* all around (96)
Round 51: *Dec, Sc in the next 14 st* all around (90)
Round 52: *Dec, Sc in the next 13 st* all around (84)
Round 53: *Dec, Sc in the next 12 st* all around (78)
Round 54: *Dec, Sc in the next 11 st* all around (72)
Round 55: *Dec, Sc in the next 10 st* all around (66)
Round 56: *Dec, Sc in the next 9 st* all around (60)
Round 57: *Dec, Sc in the next 8 st* all around (54)
Round 58: *Dec, Sc in the next 7 st* all around (48)
Round 59: *Dec, Sc in the next 6 st* all around (42)
Round 60: *Dec, Sc in the next 5 st* all around (36)
Round 61: *Dec, Sc in the next 4 st* all around (30)
Round 62: *Dec, Sc in the next 3 st* all around (24)
Round 63: *Dec, Sc in the next 2 st* all around (18)
Round 64: *Dec, Sc in the next st* all around (12)
Round 65: *Dec* all around (6)
Finish off, leaving a long tail for sewing. Weave in ends. Cut any excess yarn.
Decorations:
In Pink

Make a long chain until it reaches fully around the cake as shown. Once it reaches fully around, finish off and leave a long tail of yarn. Pin the chain on as shown. Sew on the chain, or hot glue it on. If hot gluing on, unpin the chain in small sections, then add the glue in that section. I recommend hot gluing because it gives a cleaner finish. Just be careful to not add too much glue in a section, do small dots of glue!

Repeat this process for the bottom layer of cake.
Heart:
In red, pink, or purple

Round 1: 6 Sc into a Magic Ring (6)
Round 2: *Inc* all around (12)
Round 3: *Inc, Sc in the next st* all around (18)
Round 4: Make 3 Dc in each of the next 2 st. SlSt in the next 2 st. Make 3 Dc in each of the next 2 st. Sc in the next st. SlSt in the next 3 st. Sc in the next st. Make 3 Sc into the next st. Sc in the next st. SlSt in the next 3 st. Sc in the next st. SlSt in the last st to complete.
Finish off, leaving a long tail of yarn for sewing. Pin the heart on as shown and sew or hot glue on. Once on, weave in ends.

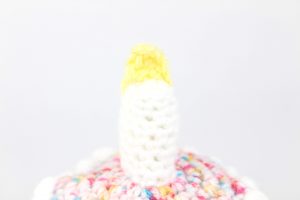
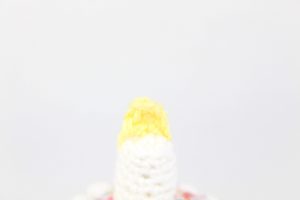
Candle Stick:
In White
Round 1: 6 Sc in Magic Ring (6)
Round 2: *Inc, Sc 2* all around (8)
Round 3: In BLO (Back Loop Only), *Sc* all around (8)
Round 4: In BOTH Loops, *Sc* all around (8)
Round 5-10: *Sc* all around (8)
Finish off. Stuff and pin to the middle of the cake. Sew on.
Candle Light:
In Yellow
Round 1: Ch 4. Sc in the 2nd Ch from hook. Dc in the next ch, Trc in the last ch.
Finish off and pin to the top of the candle. Sew on.
Icing:
In Any Color
Make the icing round after you’ve completed making the increases in the cake. Once we make the icing, the pattern will naturally start working down, so you do not need to work in the back loop only after making the icing stitch round.
*Yarn over (Pic 1) and insert hook into the next stitch (Pic 2). Yarn over again (Pic 3), and pull through the stitch (Pic 4-5). Yarn over (Pic 6) and pull through 2 of the loops on your hook (Pic 7). Repeat steps 1-7 a total of 6 times. (Pic 9). You will have a total of 7 stitches on your hook. Yarn over (Pic 10) and pull through all loops on your hook (Pic 11). This completes 1 icing stitch. Sc in the next stitch* Repeat this all around until you’ve completed the round. Switch back to regular cake color yarn to continue the cake.
1. 2.
2. 3.
3. 4.
4. 5.
5. 6.
6. 7.
7. 8.
8. 9.
9. 10.
10. 11.
11. 12.
12.
Done! If you made this cake, I would LOVE to see! You can show me by posting a picture in the comments section underneath this post.


3 Comments
Thank you so much for the pattern. I hope you like what I created from your cake pattern and the bride & groom patterns.
Here is the front
I want to try these patterns