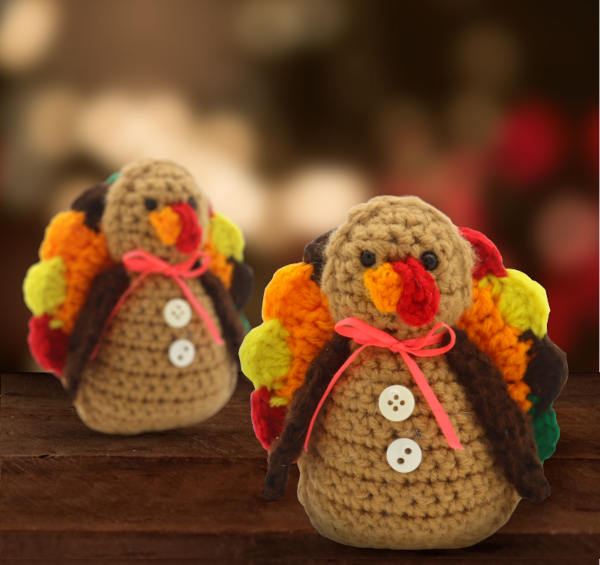
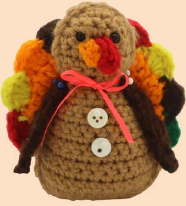
Country Turkey Amigurumi – Free Crochet Pattern
Happy November! November means I’m obligated to bring you a free turkey amigurumi crochet pattern 😁 This pattern has to be my favorite turkey I’ve made so far. In case you missed them, I have 2 other turkey patterns from the previous years, you can check them out here and here.
This turkey pattern is going after that country decor look that was so popular in the 80’s and 90’s. Everything has ribbons and buttons, and geese were all the rage! Maybe I should do a big goose sometime soon, but for now, here’s this turkey. I’m going to be hanging him on my wall for all of November. A quick idea – you can stuff him with scented things like a sachet. Maybe ginger or clove with cinnamon? Anyways, let’s get started on making him!
Print this pattern out – purchase the PDF here!
 Supplies:
• Yarn 4/Medium Weight in…
Light brown, dark brown, orange, red, yellow, and green,
•4mm Crochet Hook
•Tapestry needle
•Scissors
•Stuffing
•Sewing Pins
•6mm safety eye
•Ribbon for bow (optional)
•2 small white buttons (optional)
Additional Information:
Difficulty: Intermediate
• Before we get started…
This turkey is such a cute decoration, I decided to hang it up on my wall for all of November! He requires a lot of little pieces, but is very much worth all the effort 🙂
• Let’s Get Started!
His body is made in rows, so we will make 2 separate pieces and crochet them together to form the body. Next, we will make the feathers. We make 2 flat feather pieces and crochet them together to form 1 whole feather piece. We then make the face pieces arms, and optional ribbon and buttons.
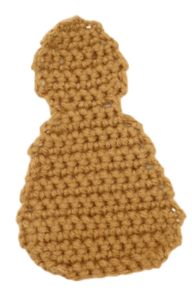
Body:
In Light Brown
We will make two flat pieces of the turkey’s body, then place them together. We will crochet them together to form 1 body!
Row 1: Ch 3. Inc in the 2nd Ch from the hook, Inc in the last st (4)
Row 2: Ch 1 & turn. *Inc* in the next st, Sc in the next 2 st, *Inc* in the last st (6)
Row 3: Ch 1 & turn. Sc in the next 6 st (6)
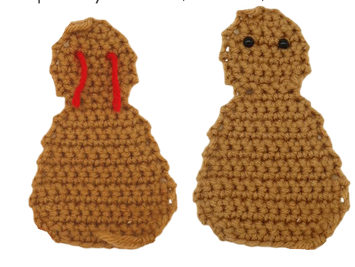
In Row 4, we will add safety eyes stitch markers into ONLY the first piece we make.
If you’re making the second piece, do Row 4, except don’t add the stitch markers 🙂
Row 4: Ch 1 & turn. Inc in the next st, Sc in the next st. Add a stitch marker in the stitch you just made. This will mark where to place the eye later. Sc in the next 2 st. Sc in the next st and add a stitch marker in the st you just made. Inc in the last st (8)
Row 5-7: Ch 1 & turn. Sc in the next 8 st (8)
Row 8: *Dec* 1 time, Sc in the next 4 st, *Dec* 1 time (6)
Row 9: *Dec* 1 time, Sc in the next 2 st, *Dec* 1 time (4)
Row 10: Ch 1 & turn. *Inc* in the next st, Sc in the next 2 st, *Inc* in the next st (6)
Row 11: Ch 1 & turn. *Inc* in the next st, Sc in the next 4 st, *Inc* in the next st (8)
Row 12: Ch 1 & turn. *Inc* in the next st, Sc in the next 6 st, *Inc* in the next st (10)
Row 13-15: Ch 1 & turn. Sc in the next 10 st (10)
Row 16: *Inc* in the next st, Sc in the next 8 st, *Inc* in the next st (12)
Row 17-18: Ch 1 & turn. Sc in the next 12 st (12)
Row 19: *Inc* in the next st, Sc in the next 10 st, *Inc* in the next st (14)
Row 20-21: Ch 1 & turn. Sc in the next 14 st (14)
Row 22: *Dec* 1 time, Sc in the next 10 st, *Dec* 1 time (12)
Row 23: *Dec* 1 time, Sc in the next 8 st, *Dec* 1 time (10)
Row 24: *Dec* 1 time, Sc in the next 6 st, *Dec* 1 time (8)
Finish off the first piece you made now. Add safety eyes into the first piece now.
DON’T finish off the second piece you make, instead, continue on with the following step.
Body:
In Light Brown
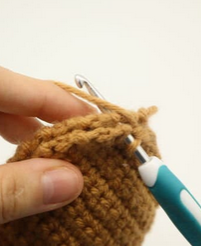
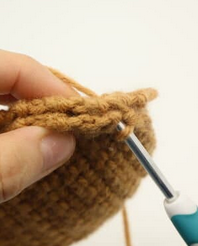
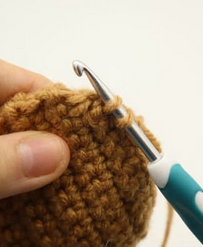
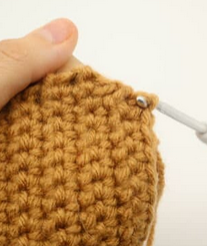
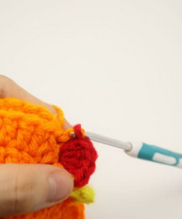
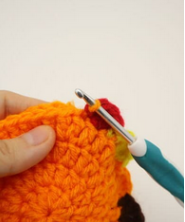
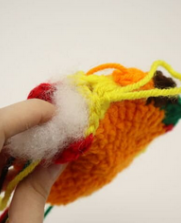
Line up both pieces together, making sure the right sides are facing out and the eyes are facing out. The stitches should align. Insert your hook into the next stitch, making sure to go through BOTH loops (Pic 1). Yarn over (Pic 2) and pull the yarn through (Pic 3). You will have 2 loops on your hook (Pic 4). Make a slip stitch by pulling the left loop under the right loop (Pic 5-6). Continue making 1 SlSt all around the turkey until it’s almost crocheted closed. Stuff the turkey firmly before it’s fully closed (Pic 7), then continue crocheting it closed. Once done, finish off and weave in ends (Pic 8).
1.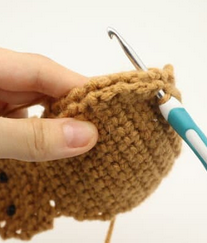
2.
3.
4.
5.
6.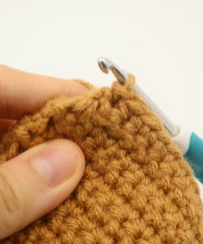
7.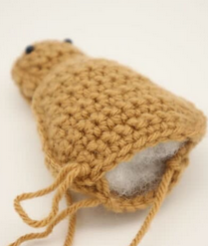
8.
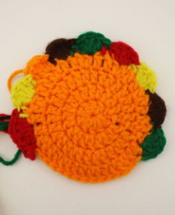
Feathers: (Make 2 pieces, front and back)
Start in orange
Round 1: Ch 4. Dc 9 times into the 1st ch. This will create a bunch of double crochets into a circle, much like when we make a magic ring. Join to the top of the Ch 3 we first made by making a slip stitch. From now on, this step will be referred to as “join”. (10)
Round 2: Ch 3, Dc in the same st. Dc in the next st. Repeat *2 Dc in each st* 9 times (20)
Round 3: Join to the top of the Ch 3 with a SlSt. Ch 3, Dc in the same st, Dc in the next st. Repeat *2 dc in the next st, Dc next st* 9 times (30)
Round 4: Join to the top of the Ch 3 with a SlSt. Ch 3, Dc in the same st, Dc in the next 2 st. Repeat *2 Dc in the next st, Dc in the next 2 st* 9 times (40)
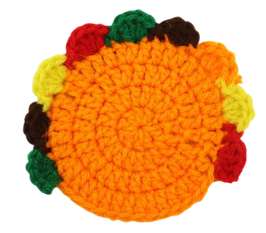
In the next round we will make the feathers for the turkey by making 4 double crochets into the same 1 stitch, these are known as “double crochet clusters”. I alternated colors for each cluster, but you can keep them the same color for less weaving in ends.
For my first feather piece, I started in Red, yellow, orange, brown, green, red, yellow, brown, then green.
First Feather Piece, Round 5: Join to the top of the Ch 3 with a SlSt. Change to red. Ch 3, Dc 3 times into that same st, Sc in the next 2 st.
Change to yellow, Dc 3 times into the next st, Sc in the next 2 st.
Change to orange, Dc 3 times into the next st, Sc in the next 2 st.
Change to brown, Dc 3 times into the next st, Sc in the next 2 st.
Change to green, Dc 3 times into the next st, Sc in the next 2 st.
Change to red, Dc 3 times into the next st, Sc in the next 2 st.
Change to yellow, Dc 3 times into the next st, Sc in the next 2 st.
Change to brown, Dc 3 times into the next st, Sc in the next 2 st.
Change to green, Dc 3 times into the next st, Sc in the next 2 st.
Finish off the first feather piece now.
When you make your second feather piece, you will reverse this order. Start with green, brown, yellow, red, green, brown, orange, yellow, and red. We reverse it so when we crochet the feathers together, the colors will match up when facing different ways.
Second feather piece:
In orange
Second Feather Piece, Round 5: Join to the top of the Ch 3 with a SlSt. Change to green. Ch 3, Dc 3 times into that same st, Sc in the next 2 st.
Change to brown, Dc 3 times into the next st, Sc in the next 2 st.
Change to yellow, Dc 3 times into the next st, Sc in the next 2 st.
Change to red, Dc 3 times into the next st, Sc in the next 2 st.
Change to green, Dc 3 times into the next st, Sc in the next 2 st.
Change to brown, Dc 3 times into the next st, Sc in the next 2 st.
Change to orange, Dc 3 times into the next st, Sc in the next 2 st.
Change to yellow, Dc 3 times into the next st, Sc in the next 2 st.
Change to red, Dc 3 times into the next st, Sc in the next 2 st.
DON’T finish off the second feather piece you make. Instead, change to orange.
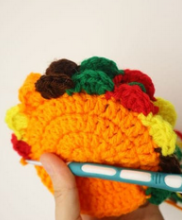
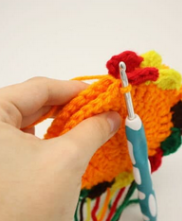
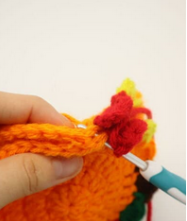
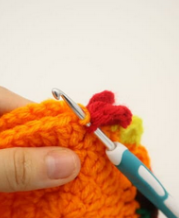
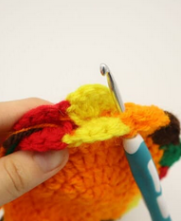
Align both feather pieces together so the colors match up (Pic 1). Inserting your hook through BOTH stitches (Pic 3), SlSt the next 13 st together. You will have to change to your next feather color when you meet it (Pic 8), so if you followed my colors, change to green now. SlSt the next 6 st.
Change to brown, SlSt in the next 6 st.
Change to yellow, SlSt in the next 6 st.
Change to red, SlSt in the next 6 st.
Change to green, SlSt in the next 6 st.
Change to brown, SlSt in the next 6 st.
Change to orange, SlSt in the next 6 st.
Stuff the feathers lightly now (Pic 9).
Change to yellow, SlSt in the next 6 st.
Change to red, SlSt in the next 6 st.
Finish off now and leave a long tail for sewing.
1.
2.
3.
4.
5.
6.
7.
8.
9.
10.
Pin the feathers onto the back of the turkey, making sure the feathers are facing up. Using the tail end of yarn, sew the feathers to the back of the turkey.
Arms: (Make 2)
In Dark Brown
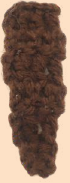
Row 1: Ch 6. Dc in the 3rd Ch from the hook. Dc in the next 2 st (3)
Row 2-4: Ch 2 & turn. Dc in the next 3 st (3)
Row 5: Ch 2 & turn. Dc in the next st, skip the next st, Dc in the next st (2)
Row 6: Ch 2 & turn. Skip the next st and Dc in the next st (1)
Finish off, leaving a long tail for sewing. Pin the arm onto the side of the turkey and sew on. Weave in ends.
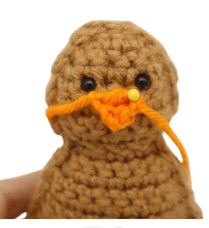
Beak:
In orange
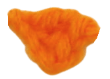
Row 1: Ch 4. Sc in the 2nd Ch from the hook, Dc in the next 2 Ch (3)
Finish off, leaving a long tail for sewing. Pin the beak on as shown and sew on.
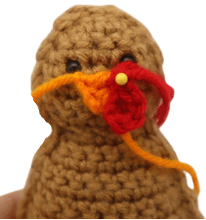
Gobble:
In Red
Row 1: Ch 4. SlSt 3 times in the 2nd Ch from the hook, SlSt in the next 2 ch (5)
Finish off, leaving a long tail for sewing. Pin the beak on as shown and sew on.
Optional: You can tie a small bow around the toy turkey’s neck and sew on 2 small white buttons.


2 Comments
I love your site and last year I made some of your ghosts and gave them to family and friends and they loved them. I’m going to make one of your turkeys. Thank you so much for all the cute and easy patterns. Have a wonderful fall and Holiday season!
this is so cool i love all your turkey patterns